Thingiverse
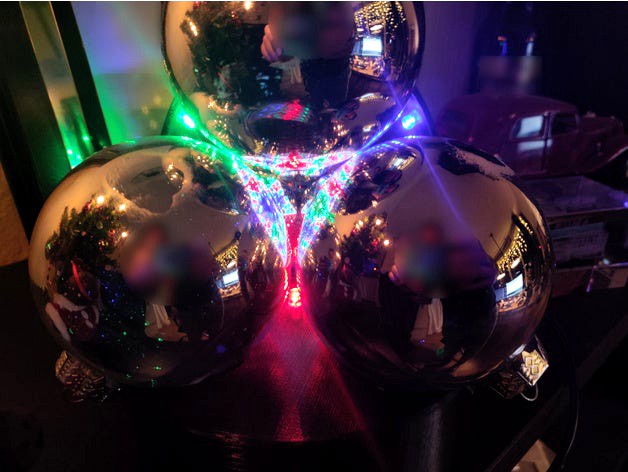
Christmas Fractal Lamp by raimund89
by Thingiverse
Last crawled date: 3 years, 3 months ago
Introduction
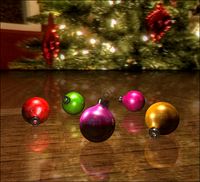
A Christmas lamp with a mathematical twist. Using the same basic principle as a kaleidoscope, the four reflecting surfaces of the Christmas balls together with the three colored LEDs create a fractal pattern of reflections on the Christmas balls. So in the end it looks like a geometric pattern with infinite resolution, or it just looks like a nice sparkling Christmas lamp with multiple colors :)
For this project you need at least some basic soldering skills, or be willing to learn them.
If you just want all LEDs to turn on, you can mount a DC jack socket (for example this one) in the circular hole in the base, and directly wire the LEDs to this socket (don't forget to add >150ohm resistors!).
But if you want more advanced features such as animated lights and wifi-control, you can use the PCB design and an ESP-01 chip to make the lamp 'smart'. I'm still working on the software, take a look at the github page for the latest version.
Part list
Non-electronics
1x the base (3d printed)
2x the arm (3d printed)
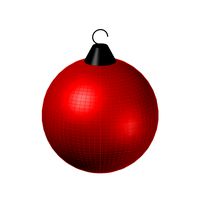
4x shiny silver Christmas ball, 8cm diameter (or 3")
Superglue to glue the LEDs in place
4x screw 2.5mm to mount the PCB
Electronics
1x printed circuit board (order online)
1x ESP-01 chip
1x pin socket, 2x4 pins, 2.54mm pin distance
1x DC connector, pcb mount, 2.1/5.5mm
3x JST connector horizontal (e.g. JST S2B-XH-A)
If you want to be able to disassemble the arms for storage, you could use a horizontal pin socket instead and directly insert the wires into these sockets.
1x LM1117-3.3v, size SOT-223
3x BSS138, size SOT-23
2x smd tantalum capacitor, size 3528, 10-30uF, 16V
1x smd ceramic capacitor, size 0805, 100nF, 5V
3x smd resistor, size 0805, >150ohm, 125mW
Wiring
3x JST plugs (e.g. XHP-2)
If you want to be able to disassemble the arms for storage, you don't need those
3x LED, 5mm diameter, red/green/blue
Insulated electronic wire. I prefer solid core, because it stays in place after it's folded.
Some shrink socket to cover exposed wire.
Notes
If you have never soldered SMD before:
Start with the components with the smallest pads. So first the BSS138, then the resistors, capacitors and LM1117. At last all through-hole components.
First connect one pin with solder and align it correct for the other pads. Then soldering the other pads should be easy.
It is nice to have some solder resin laying around, because you can use it to clean up ugly solder. Just apply some resin to the solder and reheat it, it will end up smooth and shiny.
A Christmas lamp with a mathematical twist. Using the same basic principle as a kaleidoscope, the four reflecting surfaces of the Christmas balls together with the three colored LEDs create a fractal pattern of reflections on the Christmas balls. So in the end it looks like a geometric pattern with infinite resolution, or it just looks like a nice sparkling Christmas lamp with multiple colors :)
For this project you need at least some basic soldering skills, or be willing to learn them.
If you just want all LEDs to turn on, you can mount a DC jack socket (for example this one) in the circular hole in the base, and directly wire the LEDs to this socket (don't forget to add >150ohm resistors!).
But if you want more advanced features such as animated lights and wifi-control, you can use the PCB design and an ESP-01 chip to make the lamp 'smart'. I'm still working on the software, take a look at the github page for the latest version.
Part list
Non-electronics
1x the base (3d printed)
2x the arm (3d printed)
4x shiny silver Christmas ball, 8cm diameter (or 3")
Superglue to glue the LEDs in place
4x screw 2.5mm to mount the PCB
Electronics
1x printed circuit board (order online)
1x ESP-01 chip
1x pin socket, 2x4 pins, 2.54mm pin distance
1x DC connector, pcb mount, 2.1/5.5mm
3x JST connector horizontal (e.g. JST S2B-XH-A)
If you want to be able to disassemble the arms for storage, you could use a horizontal pin socket instead and directly insert the wires into these sockets.
1x LM1117-3.3v, size SOT-223
3x BSS138, size SOT-23
2x smd tantalum capacitor, size 3528, 10-30uF, 16V
1x smd ceramic capacitor, size 0805, 100nF, 5V
3x smd resistor, size 0805, >150ohm, 125mW
Wiring
3x JST plugs (e.g. XHP-2)
If you want to be able to disassemble the arms for storage, you don't need those
3x LED, 5mm diameter, red/green/blue
Insulated electronic wire. I prefer solid core, because it stays in place after it's folded.
Some shrink socket to cover exposed wire.
Notes
If you have never soldered SMD before:
Start with the components with the smallest pads. So first the BSS138, then the resistors, capacitors and LM1117. At last all through-hole components.
First connect one pin with solder and align it correct for the other pads. Then soldering the other pads should be easy.
It is nice to have some solder resin laying around, because you can use it to clean up ugly solder. Just apply some resin to the solder and reheat it, it will end up smooth and shiny.
Similar models
thingiverse
free

FabDuino v1.1 by dimrobotics
...al
:::upd::: i reccomend to buy sparkfun arduino ready version of atmega328 so you do not need to flash bootloader by your own.
grabcad
free

0805 SMD Resistor
...0805 smd resistor
grabcad
generic smd resistor
0805 package
grabcad
free

Resistor-0805
...resistor-0805
grabcad
smd resistor 0805.
grabcad
free

SMD LED 0805
...smd led 0805
grabcad
smd led size 0805 - various colors
3dwarehouse
free

JST 2 pin right angle header smd
...jst 2 pin right angle header smd
3dwarehouse
jst 2 pin right angle header smd #2_pin #header #jst #pcb #right_angle #smd
grabcad
free

Resistor SMD 0603
...resistor smd 0603
grabcad
resistor smd 0603 w/ pcb joints and pads
thingiverse
free

Little Lantern by blecheimer
... now you can charge your lamp with power from your usb port. a 10 seconds charge will make the led shine for at least 10 minutes.
grabcad
free

Printed Circuit Board
...rs - fariborz jadidi
- smd resistors - singlefonts
- soic 8 - shaun houlihan
- sot 23 - pietro battistoni
- switch - voinguyen
thingiverse
free

EQ Direct for EQ6 Pro by RomanHujer
...socket
4x 1.4x4.5 mm screw
2x 4/40 unc screw for db lock
note
solder the d-sub socket last, after placing the board in the box !
cults
free
Shining Lantern
...amp with power from your usb port. a 10 seconds charge will make the led shine for at least 10 minutes.
(build at your own risk)
Fractal
turbosquid
$5

Fractal chandelier
...
royalty free 3d model fractal chandelier for download as max on turbosquid: 3d models for games, architecture, videos. (1426939)
turbosquid
free

Fractal cube
... available on turbo squid, the world's leading provider of digital 3d models for visualization, films, television, and games.
turbosquid
$1

Fractal sports car
...del fractal sports car for download as jpg, 3ds, obj, and md3 on turbosquid: 3d models for games, architecture, videos. (1500593)
turbosquid
free

Fractal Vase
...squid
royalty free 3d model vase for download as c4d and fbx on turbosquid: 3d models for games, architecture, videos. (1317806)
turbosquid
$2

Fractal Dome Glass Light
... available on turbo squid, the world's leading provider of digital 3d models for visualization, films, television, and games.
turbosquid
$2

Fractal Light - Tri Side Glass
... available on turbo squid, the world's leading provider of digital 3d models for visualization, films, television, and games.
turbosquid
$5

Fractal shape - kaleidoscopic IFS model
... ifs model for download as blend, dae, fbx, stl, dxf, and obj on turbosquid: 3d models for games, architecture, videos. (1561552)
3d_ocean
$7

«Craftal Box»
...3docean abstract accent art craftals decor decoration detailed elements fractal interior metal mysterious openwork statuette fractal craftals decor detailed...
3d_ocean
$12

Iphone 4 + Creative scene
...iphone 4 + creative scene 3docean fractal fractal generated graphics iphone 4 iphone 5 scene studio...
3d_ocean
$7
Craftal Disk Statuette
...craftal disk statuette 3docean abstract craftals decor decoration details fractal metal modern sculpture statuette unique statuette on stand for...
Christmas
3d_ocean
$3

Christmas bauble
...christmas bauble
3docean
christmas bauble christmas tree merry christmas
christmas bauble
turbosquid
$2

Christmas Ornament Christmas Ornament
... available on turbo squid, the world's leading provider of digital 3d models for visualization, films, television, and games.
3d_ocean
$5
Christmas
...de in 3ds max 2013 3dsmax with vray render included material and light obj file fbx file hope you like it please don’...
3d_export
free
christmas sphere
...christmas sphere
3dexport
christmas sphere to decorate your christmas pine in 3d
3d_export
free
christmas sphere
...christmas sphere
3dexport
christmas sphere to decorate your christmas pine in 3d
3d_export
$5
christmas balls
...christmas balls
3dexport
christmas balls, great decorations for your 3d christmas tree.
3d_ocean
$5
Christmas Ornaments
... ornaments in cinema 4d. it’s very basic, but extremely nice, especially for christmas. this is perfect for your holiday scene...
3d_ocean
$19

Christmas wreath
...christmas wreath
3docean
christmas decoration wreath
high quality christmas wreath with animated lights
turbosquid
$1

christmas
...rbosquid
royalty free 3d model christmas for download as max on turbosquid: 3d models for games, architecture, videos. (1357407)
3d_export
$5

christmas lollipop
...christmas lollipop
3dexport
christmas lollipop.
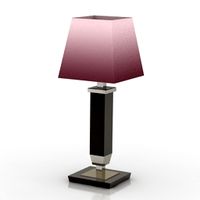
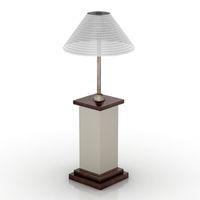
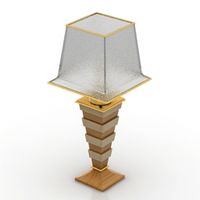
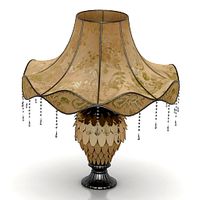
Lamp
archibase_planet
free
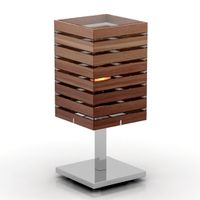
Lamp
...lamp
archibase planet
lamp reading lamp table lamp
lamp - 3d model (*.gsm+*.3ds) for interior 3d visualization.
archibase_planet
free
Lamp
...lamp
archibase planet
lamp reading lamp table lamp
lamp - 3d model (*.gsm+*.3ds) for interior 3d visualization.
archibase_planet
free

Lamp
...lamp
archibase planet
lamp table lamp reading lamp
lamp - 3d model (*.gsm+*.3ds) for interior 3d visualization.
archibase_planet
free

Lamp
...lamp
archibase planet
lamp table lamp reading lamp
lamp - 3d model (*.gsm+*.3ds) for interior 3d visualization.
archibase_planet
free

Lamp
...lamp
archibase planet
lamp reading lamp table lamp
lamp - 3d model (*.gsm+*.3ds) for interior 3d visualization.
archibase_planet
free
Lamp
...lamp
archibase planet
lamp reading lamp table lamp
lamp - 3d model (*.gsm+*.3ds) for interior 3d visualization.
archibase_planet
free
Lamp
...lamp
archibase planet
lamp table lamp reading lamp
lamp - 3d model (*.gsm+*.3ds) for interior 3d visualization.
archibase_planet
free

Lamp
...lamp
archibase planet
lamp table lamp reading lamp
lamp - 3d model (*.gsm+*.3ds) for interior 3d visualization.
archibase_planet
free
Lamp
...lamp
archibase planet
lamp reading lamp table lamp lantern
lamp - 3d model (*.3ds) for interior 3d visualization.
3d_ocean
$6
Lamp
...lamp
3docean
lamp
a high quality lamp.