Thingiverse
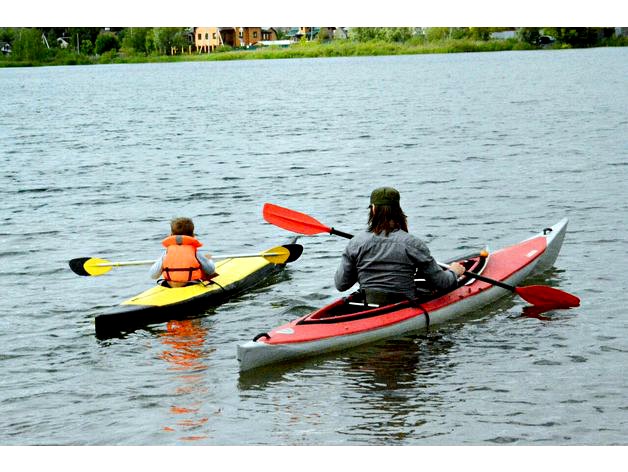
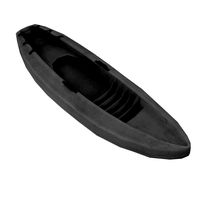
Children folding kayak "Yukaghir" by DarthCorvus
by Thingiverse
Last crawled date: 3 years ago
It's my first printable venicle project and there are two things because I did it:
1) There are almost no any folding kayaks for children.
2) I need a simpe project to start mayking kayaks with.
This kayak was designed for paddling learning on still water. It's enough fast for a little journey.
The type of construction is the same as Triton Ladoga 1, 70% scaled. All parts was re-designet to be 3d printable. The original Ladoga1 uses 20mm and 25mm aluminium alloy tubes and fiberglass-filled plastic connectors. Because non-composit ABS is not so strong so fiberglass-filled ABS, i use PVC tubes in my design, without scaling their diametres. So, because i did not scale tubes diameter, i can use 2 times less strong materials to make the same rigid and durability boat. The second thing I change is the lenght of stern. It is 140 mm longer to make kayak faster and more stable.
The main parameters:
Length - 3500 mm
Width - 450 mm
Sitting place width - 260 mm
Nominal load - 20-30 kg
Maximum load - 50 kg
Frames places (from nose, 1,2,3,5,6, in mm) - 620, 1180, 1740, 2310, 2900
(The 4-th frame is an additional one, needed for sitting place mounting and it's place can be some different)
Weight of assembled framework - 4.5 kg
Total weight - 7 kg
3d printer platform for making - 200x200 mm or more.
That's all screw:
M4 bolts:
45mm - 5pcs
35mm - 3pcs
30mm - 4pcs
25mm - 2 pcs
M4 nuts, self-fixing - 6pcs
M4 nuts - 7pcs
4mm washers - 12psc.
Also you need in PVC tubes. I use 25mm OD 22mm ID - 5x2m and 20mm OD 17.5mm ID - 12x2m. If you can find 3m length tubes it will make less garbage. And, what is more, you need about 200 ml of good plastic glue. I used "Moment crystal".
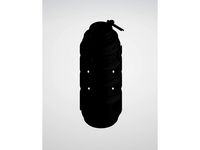
For "skin" I used PVC coated synthetic fabric 0.65 kg per m2, black for hool and yellow for deck and sponsors. Them are different only for colour.
Hool material spreads along the body and cutts to form sterns. The material must be tightened along the frame, so it's good idea to assemble the frame on any tape to be 2-3 cm shorter, then it will be, when doing this operation.
It's easier to glue the fabric first, and then sew them by strong thread.
For sterns watertight and more durable i glued 10 cm wide band of that black fabric along the keel and sterns.
I cut off the hool fabric on it's place, about 3 cm from the upper stringers. Do not tight the hool and deck fabric across the frame, the air sponsors will do it.
The deck material must be tightened along the frame, too. First of all i glued it, and then i did cockpit hole and sew perimeter to hool. Zippos are needed for assembling and simplifing packing goods.
Air sponsors are 280 cm long, and about 10 cm in diameter. Do not necessarily make them accurate, but airtight.
In assembling kayak, air sponsor goes from upper stringer, first frame to lower stringer 3-5 frames and then to upper stringer, 6 frame.
The seat made from 5mm plywood, 24x28 cm, but you can use any.
Backrest is standart one from kayak (see photo).
This kayak is really fast one, goes up to 5 kmh with my son, so I am planning some little weekend journeys now.
Warnings:
do not heat PVC tubes over 100°C. It will produce VERY TOXIC gases. 80-90°C is enough for forming.
do not use if there are more then 150 mm high water waves or more then 5 meters per second wind.
always use live vest.
there must be a second boat close to young paddler while learning.
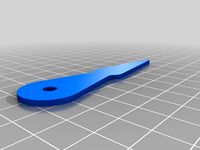
UPD 7/3/2017 - paddle added http://www.thingiverse.com/thing:2160535
UPD 26/6/2017 - skin photos and text
1) There are almost no any folding kayaks for children.
2) I need a simpe project to start mayking kayaks with.
This kayak was designed for paddling learning on still water. It's enough fast for a little journey.
The type of construction is the same as Triton Ladoga 1, 70% scaled. All parts was re-designet to be 3d printable. The original Ladoga1 uses 20mm and 25mm aluminium alloy tubes and fiberglass-filled plastic connectors. Because non-composit ABS is not so strong so fiberglass-filled ABS, i use PVC tubes in my design, without scaling their diametres. So, because i did not scale tubes diameter, i can use 2 times less strong materials to make the same rigid and durability boat. The second thing I change is the lenght of stern. It is 140 mm longer to make kayak faster and more stable.
The main parameters:
Length - 3500 mm
Width - 450 mm
Sitting place width - 260 mm
Nominal load - 20-30 kg
Maximum load - 50 kg
Frames places (from nose, 1,2,3,5,6, in mm) - 620, 1180, 1740, 2310, 2900
(The 4-th frame is an additional one, needed for sitting place mounting and it's place can be some different)
Weight of assembled framework - 4.5 kg
Total weight - 7 kg
3d printer platform for making - 200x200 mm or more.
That's all screw:
M4 bolts:
45mm - 5pcs
35mm - 3pcs
30mm - 4pcs
25mm - 2 pcs
M4 nuts, self-fixing - 6pcs
M4 nuts - 7pcs
4mm washers - 12psc.
Also you need in PVC tubes. I use 25mm OD 22mm ID - 5x2m and 20mm OD 17.5mm ID - 12x2m. If you can find 3m length tubes it will make less garbage. And, what is more, you need about 200 ml of good plastic glue. I used "Moment crystal".
For "skin" I used PVC coated synthetic fabric 0.65 kg per m2, black for hool and yellow for deck and sponsors. Them are different only for colour.
Hool material spreads along the body and cutts to form sterns. The material must be tightened along the frame, so it's good idea to assemble the frame on any tape to be 2-3 cm shorter, then it will be, when doing this operation.
It's easier to glue the fabric first, and then sew them by strong thread.
For sterns watertight and more durable i glued 10 cm wide band of that black fabric along the keel and sterns.
I cut off the hool fabric on it's place, about 3 cm from the upper stringers. Do not tight the hool and deck fabric across the frame, the air sponsors will do it.
The deck material must be tightened along the frame, too. First of all i glued it, and then i did cockpit hole and sew perimeter to hool. Zippos are needed for assembling and simplifing packing goods.
Air sponsors are 280 cm long, and about 10 cm in diameter. Do not necessarily make them accurate, but airtight.
In assembling kayak, air sponsor goes from upper stringer, first frame to lower stringer 3-5 frames and then to upper stringer, 6 frame.
The seat made from 5mm plywood, 24x28 cm, but you can use any.
Backrest is standart one from kayak (see photo).
This kayak is really fast one, goes up to 5 kmh with my son, so I am planning some little weekend journeys now.
Warnings:
do not heat PVC tubes over 100°C. It will produce VERY TOXIC gases. 80-90°C is enough for forming.
do not use if there are more then 150 mm high water waves or more then 5 meters per second wind.
always use live vest.
there must be a second boat close to young paddler while learning.
UPD 7/3/2017 - paddle added http://www.thingiverse.com/thing:2160535
UPD 26/6/2017 - skin photos and text
Similar models
thingiverse
free

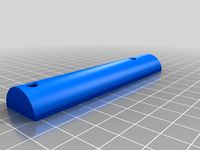
PVC Tube Stopper for filament holder by piffio
...or my wanaho d4s and a simple 20 mm pvc tube.
it fits nicely in the tube with enough grip to stay in place and be easily removed.
thingiverse
free
F-Nut Trap for MPCNC (25 mm OD, M4) by matonym
....tubing 25mm x 1.5) and it uses m4 nuts instead of the #6-32, since inch is such a funny standard... :-)
rhino sources included
thingiverse
free

Third Hand by crysis_ps
.../nuts.
upd:
just splited the files
there are two options of stand detal:
v1 and variant2 for using alum tubes as "legs"
thingiverse
free

1" PVC Clincher by MT2
... many different things you can do. mount this on a wall and snap 1" pvc into it. relish your pvc tubing hack to do whatever.
thingiverse
free
Airsoft .►. Impact Sound Grenade 40mm PVC By Goticwar by Goticwar
...crew the "against weight" with 2 m5 nuts at both ends
-you can donate to support me if you wish. it will help me a lot.
thingiverse
free

PVC Lid and Cover for Storage Rack by fernandogarzaw
...this is what i came with. didn't find anything similar on thingiverse so i decided to post it. i...
thingiverse
free

Airsoft .►. Impact Sound Grenade By Goticwar by Goticwar
...crew the "against weight" with 2 m5 nuts at both ends
-you can donate to support me if you wish. it will help me a lot.
thingiverse
free

TUSH - US 1/2" PVC Framed Filament Spool Holder by RonnieG303
... pvc connector sizes, have been well proven in several of my other pvc based projects. only a few details are added for this one.
cg_trader
$10

Fruit Picker | 3D
...with 20mm outside diameter and other with 25mm outside diameter, the inner tube is used to pull the trigger, closing the fingers.
thingiverse
free

railblaza kayak light pole adapter for 3/4" ID PVC EMT pipe by styk
...on light with strobe, model # sl92001on a length of 3/4" pipe (aluminum, pvc or abs).
for the top adapter see thing: 3048389

Darthcorvus
thingiverse
free

Merkaba by DarthCorvus
...merkaba by darthcorvus
thingiverse
mercaba figure (sacred geometry)
thingiverse
free
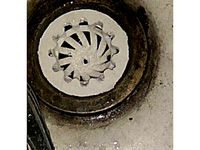
Bath filter by DarthCorvus
...bath filter by darthcorvus
thingiverse
a bath filter, no support or raft needed.
thingiverse
free
Toy clock arrows by DarthCorvus
...toy clock arrows by darthcorvus
thingiverse
arrows for diy toy clock
thingiverse
free

hooks set for bathroom by DarthCorvus
...hooks set for bathroom by darthcorvus
thingiverse
glueble hooks set for bathroom.
thingiverse
free

A screw for Planes toy by DarthCorvus
...a screw for planes toy by darthcorvus
thingiverse
a screw for planes toy. reverse engineering.
thingiverse
free

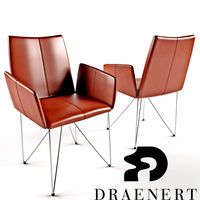
Table handle by DarthCorvus
...table handle by darthcorvus
thingiverse
а standart (95 mm between holes) handle. need some glue or acetone, but no support.
thingiverse
free

Moai lego duplo brick by DarthCorvus
...moai lego duplo brick by darthcorvus
thingiverse
a moai for your duplo
thingiverse
free

whiteboard marker wall mounting by DarthCorvus
...whiteboard marker wall mounting by darthcorvus
thingiverse
d = 18.2 mm
thingiverse
free

A nagel for Ikea hummer-toy. by DarthCorvus
...a nagel for ikea hummer-toy. by darthcorvus
thingiverse
a nagel for ikea toy. reverse engineering.
thingiverse
free

Whiteboard holder by DarthCorvus
...on them when installing and need to replace it. as you can see, a printed one has not a technologic hole, so it must be stronger.
Kayak
turbosquid
$8

kayak
...k
turbosquid
royalty free 3d model kayak for download as obj on turbosquid: 3d models for games, architecture, videos. (1381194)
3d_export
$10
Kayak
...kayak
3dexport
modelled in solidworks 2019.
turbosquid
$6
Kayak 10
...alty free 3d model kayak 10 for download as max, fbx, and obj on turbosquid: 3d models for games, architecture, videos. (1712455)
turbosquid
$6

Kayak 09
...alty free 3d model kayak 09 for download as max, fbx, and obj on turbosquid: 3d models for games, architecture, videos. (1712454)
turbosquid
$6
Kayak 08
...alty free 3d model kayak 08 for download as max, fbx, and obj on turbosquid: 3d models for games, architecture, videos. (1712453)
turbosquid
$6

Kayak 06
...alty free 3d model kayak 06 for download as max, obj, and fbx on turbosquid: 3d models for games, architecture, videos. (1712451)
turbosquid
$6

Kayak 05
...alty free 3d model kayak 05 for download as max, fbx, and obj on turbosquid: 3d models for games, architecture, videos. (1712450)
turbosquid
$6

Kayak 04
...alty free 3d model kayak 04 for download as max, fbx, and obj on turbosquid: 3d models for games, architecture, videos. (1712449)
turbosquid
$6

Kayak 02
...alty free 3d model kayak 02 for download as max, fbx, and obj on turbosquid: 3d models for games, architecture, videos. (1712447)
turbosquid
$6
Kayak 01
...alty free 3d model kayak 01 for download as max, fbx, and obj on turbosquid: 3d models for games, architecture, videos. (1712446)
Children
3d_export
$15
children room
...children room
3dexport
children room
3d_export
free

childrens
...childrens
3dexport
3d_export
$10

childrens bedroom
...childrens bedroom
3dexport
childrens bedroom 3dmax vray
3d_export
$10

childrens bedroom
...childrens bedroom
3dexport
childrens bedroom 3dmax vray
3d_export
$10

childrens bedroom
...childrens bedroom
3dexport
childrens bedroom 3dmax vray
3d_export
$10

childrens bedroom
...childrens bedroom
3dexport
childrens bedroom 3dmax vray
3d_export
$10
childrens bedroom
...childrens bedroom
3dexport
childrens bedroom 3dmax vray
3d_export
$10

childrens bedroom
...childrens bedroom
3dexport
childrens bedroom 3dmax vray
3d_export
$10
childrens bedroom
...childrens bedroom
3dexport
childrens bedroom 3dmax vray
3d_export
$10

childrens bedroom
...childrens bedroom
3dexport
childrens bedroom 3dmax vray
Folding
design_connected
$16
Fold
...fold
designconnected
poliform fold computer generated 3d model. designed by torres, rodrigo.
design_connected
$7
Folded
...folded
designconnected
baleri italia folded computer generated 3d model. designed by levy, arik.
3ddd
$1

folding sofa
...3ddd
sofa , folding , sofa bed
folding sofa bed
3d_ocean
$4
Chair folding
...chair folding
3docean
camp chair folding hammock light stool wood
folding chair light wood
3ddd
free
Nando FOLD
... fold , стеллаж
http://www.nendo.jp/en/works/fold-2/?egenre
turbosquid
$9
FOLD
... available on turbo squid, the world's leading provider of digital 3d models for visualization, films, television, and games.
3ddd
free

Folding Chair
...folding chair
3ddd
раскладной
folding chairhttp://www.journal-du-design.fr/design/folding-chair-par-leo-salom-23471/
3ddd
free
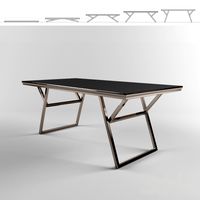
FOLDING TABLE
...folding table
3ddd
обеденный
folding table designed by endrit hajno
3d_export
$10
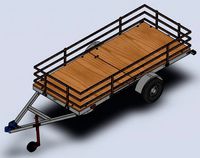
Folding trailer
...folding trailer
3dexport
this is a 3d model of folding trailer for shipping and handling objects
3ddd
$1
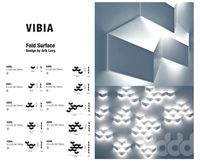
vibia fold surface
...vibia fold surface
3ddd
vibia fold surface , vibia
vibia fold surface