Thingiverse
Cherry Pi Delta 3D Printer by AndyCart
by Thingiverse
Last crawled date: 2 years, 12 months ago
UPDATE 13 April 2014
I have released details of Cherry Pi II with many improvements incorporated:-http://www.thingiverse.com/thing:298168
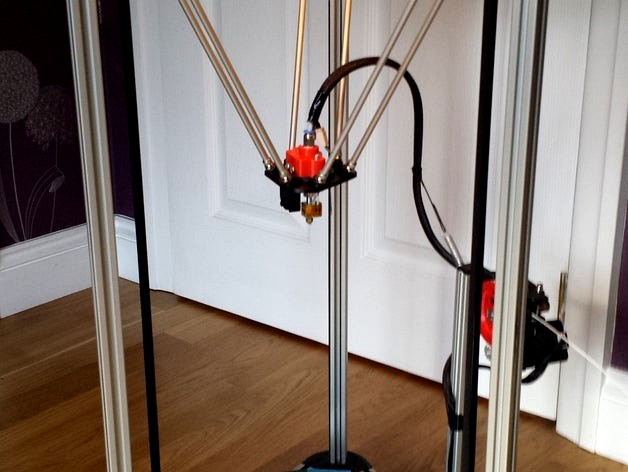
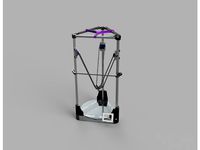
This is my own variant of a variety of 3D printer designs available. I have used ideas from Kossel, Delta Pi, 3DR and, of course, Rostock. Many thanks to the designers of those machines for their brilliant ideas that I have shamelessly 'Cherry Picked' hence the name of my design!
The rods on my printer are 277mm from steel ball centre to centre. The towers are 800mm Bosch/Rexroth aluminium extrusion and the base frame extrusions are 250mm long as are, obviously, the top frame extrusions. You need nine in all.
The bearing carriers use 6 623 10mm x 4mm x 3mm bearings and slide directly on the extrusion. Nut traps for M3 nuts are included in the carrier. The rods connect to the carrier with a plate that fastens with 3 M3 bolts, again nut traps are included. The rod carriers and the effector plate hold 10mm x 5mm countersunk, cylindrical rare earth magnets and my rod end balls are 8mm diameter. My rods are 5mm carbon tube but you could use 6mm aluminium. My rod end balls have a 10mm M5 threaded rod and are the type used for the ends of gas struts, etc. the idea of the seperate rod carriers was to enable different rod attachment methods but the magnets and balls have worked out fine for me.
Update: (2014-01-03)
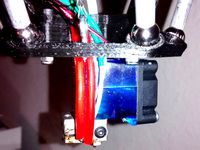
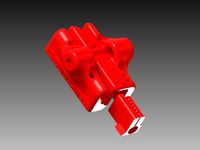
I have altered the delta rods and attachment mechanism and also designed a new effector plate. This time around I used 10mm spherical neodymium magnets and modified some M5 socket head capscrews with a 10mm ball end mill in my pillar drill. The magnetic attraction between the new spheres and the M5 SHCS 'cups' is about four times stronger than the previous version using 8mm steel balls and countersunk magnets. I've posted some images of the new design and also the .stl for the new effector plate. They should be self explanatory but drop me a line if you need further info.
Update: 21/02/2014
I have had some issues with the idler bearing belt guides - they disintegrated on me! I've posted a modified design on the 'files' section
Andy
I have released details of Cherry Pi II with many improvements incorporated:-http://www.thingiverse.com/thing:298168
This is my own variant of a variety of 3D printer designs available. I have used ideas from Kossel, Delta Pi, 3DR and, of course, Rostock. Many thanks to the designers of those machines for their brilliant ideas that I have shamelessly 'Cherry Picked' hence the name of my design!
The rods on my printer are 277mm from steel ball centre to centre. The towers are 800mm Bosch/Rexroth aluminium extrusion and the base frame extrusions are 250mm long as are, obviously, the top frame extrusions. You need nine in all.
The bearing carriers use 6 623 10mm x 4mm x 3mm bearings and slide directly on the extrusion. Nut traps for M3 nuts are included in the carrier. The rods connect to the carrier with a plate that fastens with 3 M3 bolts, again nut traps are included. The rod carriers and the effector plate hold 10mm x 5mm countersunk, cylindrical rare earth magnets and my rod end balls are 8mm diameter. My rods are 5mm carbon tube but you could use 6mm aluminium. My rod end balls have a 10mm M5 threaded rod and are the type used for the ends of gas struts, etc. the idea of the seperate rod carriers was to enable different rod attachment methods but the magnets and balls have worked out fine for me.
Update: (2014-01-03)
I have altered the delta rods and attachment mechanism and also designed a new effector plate. This time around I used 10mm spherical neodymium magnets and modified some M5 socket head capscrews with a 10mm ball end mill in my pillar drill. The magnetic attraction between the new spheres and the M5 SHCS 'cups' is about four times stronger than the previous version using 8mm steel balls and countersunk magnets. I've posted some images of the new design and also the .stl for the new effector plate. They should be self explanatory but drop me a line if you need further info.
Update: 21/02/2014
I have had some issues with the idler bearing belt guides - they disintegrated on me! I've posted a modified design on the 'files' section
Andy
Similar models
thingiverse
free

Magnetic Effector Plate for a Delta printer by daveb500
...to be bonded into the hollows. i have used this style effector plate on my delta machine for about a year now with great success.
thingiverse
free

Ball Bearing Delta Effector (Cherry Pi inspired) by Chr37
... adapter for a dial indicator. i use this to find my delta radius.
i will add more info later (parts list, fusion360 files etc.)
thingiverse
free

Hot End Effector Setup for Cherry Pi III with 10 mm ball bearings (Or 8 mm balls) by maso27
...asurements, can be edited within the openscad files to adjust them as necessary. so a version with 8mm balls can be used as well.
thingiverse
free
Andycart / Maso effector for Cherry Pi III 10mm ball bearing for E3D V6 Hotend by Zzyzxx71
...9;s fan.
i do not know if this will work with the e3d v5, i believe andy's oriignal effector was designed for it's use.
thingiverse
free
Infill 3D Delta Bot Carrier by Infill3D
...39;ll start working on the non-magnetic version of the effector soon.
updates can be found here https://infill3d.com/20-downloads
thingiverse
free

Inky Pi 3d delta printer by daveb500
...e with the rod ends bonded on and are 270mm long.
my machine has been running now for over 12 months and gives excellent results.
thingiverse
free
SteinMore DeltaMax by Rotorbugjl
...pdate2:
added crossbrace. print three. one for each upright. i used 10mm aluminium tubing to connect the three to create a brace.
thingiverse
free

Cherry Pi III Printer: Mini V Wheel Carriage for OpenBuild Extrusions (magnetic design) by maso27
...c design, find an adjusted stl in the cherry pi forum thread here: http://forums.reprap.org/read.php?178,361141,409638#msg-409638
thingiverse
free

Lightweight end effector plate for Delta by alhirzel
... printer. if anyone has any ideas for how i can recess the end effector (maybe somehow by raising the groove mount?) let me know.
thingiverse
free

3D delta printer dual magnetc effector for rostock / kossel style printer. E3D hot end adaptors included by d3delta3d
...ake 6 x 10mm diameter magnetic balls that are jb welded intothe pockets. i recommend scratching the magnets first to aid adhesion
Andycart
thingiverse
free

Cherry Pi IIIS by AndyCart
... springs.
check out the forum post for full instructions and help with the build
http://forums.reprap.org/read.php?178,361141
thingiverse
free

Low Friction Spool Holder by AndyCart
...pool sizes. it allows very easy feeding of filament to the extruder with virtually no friction and swapping spools takes seconds.
thingiverse
free

Bug Bot by AndyCart
...t. total build cost is around £25.00
there's a video of him doing his thing here http://youtu.be/ogso3zanqsa
enjoy
andy
thingiverse
free
Andycart / Maso effector for Cherry Pi III 10mm ball bearing for E3D V6 Hotend by Zzyzxx71
...9;s fan.
i do not know if this will work with the e3d v5, i believe andy's oriignal effector was designed for it's use.
thingiverse
free

PrntQB V2 by AndyCart
... the completed machine here http://youtu.be/_oyftjf3l34.
i've added a better quality video here :-http://youtu.be/qpjg7uqw8mi
thingiverse
free

Cherry Pi IIIS Heated Bed Mount by AndyCart
...between the mount and the bed to help insulate the mount. the mount is printed in abs and i use 0.3mm layer height and 33% infill
thingiverse
free
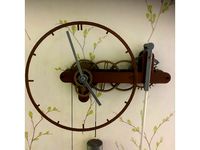
Big Bullseye Clock by AndyCart
...asy winding. thanks to goofy for the idea for that. there's a video of the clock running here :-
https://youtu.be/l88bo01-u7i
thingiverse
free

Cherry Pi II by AndyCart
... nuts used throughout (http://www.thingiverse.com/thing:28788)
low friction spool mount
(http://www.thingiverse.com/thing:235925)
thingiverse
free

Core XY PrntQB by AndyCart
...ng for delta like speeds with cartesian precision. we'll see :-)
i am now waiting for the rest of the parts to ship.
andy
thingiverse
free

3dr spring socket arms by ekaggrat
...by ekaggrat thingiverse this is a modification to use andycart#39;s cherry pi spring socket joint idea in the...
Cherry
3ddd
$1
Cherry
...cherry
3ddd
cherry
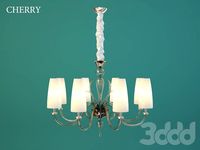
люстра cherry
archibase_planet
free

Cherry
...cherry
archibase planet
cherry cherries berry
cherry n010808 - 3d model (*.gsm+*.3ds) for interior 3d visualization.
archibase_planet
free

Cherries
...cherries archibase planet cherries cherry berry food cherries n010812 - 3d model (*.gsm+*.3ds) for...
3d_ocean
$5

cherry
...ation food fruit fruits kitchen realistic red table
cherry cherries fruit fruits table decoration bowl kitchen food realistic red
3ddd
$1
Cherry
...cherry
3ddd
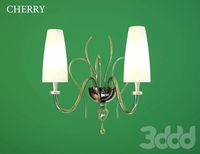
бра cherry
3ddd
$1

cherry
...cherry
3ddd
вишня
plate with cherries for tableware use
3d_export
free

cherry
...cherry
3dexport
cherry lowpoly<br>for fruits and vegetables collecion
3d_ocean
$20

Cherries
...cherries 3docean 3ds max architecture cherries cherry choice fruit deco decoration fruit fruits mental ray realistic...
3d_export
$25

Cherry
...ss what version your 3d program is. preview images are rendered blender cycles formats are: blander 3ds max maya cinema4d obj fbx
3d_export
$8

cherry
...cherry
3dexport
Delta
design_connected
$16
Delta
...delta
designconnected
arflex international spa delta computer generated 3d model. designed by koivisto, eero.
design_connected
$16

Delta
...delta
designconnected
lj lamps delta computer generated 3d model. designed by janowski-lenhart, sasha.
design_connected
$13
Delta
...delta
designconnected
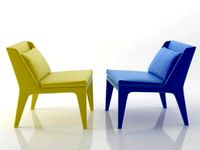
emu group delta armchairs computer generated 3d model. designed by marin chiaramonte .
3ddd
$1

Delta Light
...delta light
3ddd
delta light , you-turn reo 3033
точечний светильник delta light
3ddd
$1
Blanco / delta
...blanco / delta
3ddd
blanco , мойка
мойка blanco delta со смесителем
3ddd
$1
Delta Light Spot
...delta light spot
3ddd
delta light
светильник фирмы delta light
3ddd
free
Bianchi Delta LVMDLT200100
...i delta lvmdlt200100
3ddd
bianchi delta , смеситель
смеситель bianchi delta lvmdlt200100
design_connected
free
Delta 190
...delta 190
designconnected
free 3d model of delta 190 by zanotta designed by progetti, emaf.
design_connected
$27

Delta 211
...delta 211
designconnected
zanotta delta 211 computer generated 3d model. designed by progetti, emaf.
design_connected
$27

Delta 234
...delta 234
designconnected
zanotta delta 234 computer generated 3d model. designed by progetti, emaf.
Pi
design_connected
$11

Pi
...pi
designconnected
ligne roset pi chairs computer generated 3d model. designed by thibault desombre.
3d_export
$5

raspberry pi
...raspberry pi
3dexport
carcasa para la raspberry pi
turbosquid
$18

pied
... available on turbo squid, the world's leading provider of digital 3d models for visualization, films, television, and games.
3ddd
$1

Emme pi light
...emme pi light
3ddd
emme pi light
люста emme pi light
3ddd
$1

Emme pi light
...emme pi light
3ddd
emme pi light
бра классическое emme pi light
3ddd
$1

Emme Pi Light
...emme pi light
3ddd
emme pi light
3ddd
$1

Emme Pi Light
...emme pi light
3ddd
emme pi light
design_connected
$16

Pi-Air
...pi-air
designconnected
living divani pi-air lounge chairs computer generated 3d model. designed by harry & camila.
3d_ocean
$15

Manneken Pis
...picting a naked little boy urinating into a fountain’s basin. (wikipedia) the model was sculpted in blender 2.70a rendered wit...
3ddd
$1

Emme pi light
...emme pi light
3ddd
emme pi light
люстра классическая фирма: emme pi light
артикул: 3595/5/cot/12/wh
Printer
archibase_planet
free

Printer
...inter
archibase planet
printer laser printer pc equipment
printer n120614 - 3d model (*.gsm+*.3ds) for interior 3d visualization.
archibase_planet
free

Printer
...rchibase planet
laser printer office equipment computer equipment
printer - 3d model (*.gsm+*.3ds) for interior 3d visualization.
turbosquid
$100

Printer
...er
turbosquid
royalty free 3d model printer for download as on turbosquid: 3d models for games, architecture, videos. (1487819)
turbosquid
$3

Printer
...turbosquid
royalty free 3d model printer for download as max on turbosquid: 3d models for games, architecture, videos. (1670230)
turbosquid
$1

printer
...turbosquid
royalty free 3d model printer for download as max on turbosquid: 3d models for games, architecture, videos. (1595546)
turbosquid
$1

printer
...turbosquid
royalty free 3d model printer for download as max on turbosquid: 3d models for games, architecture, videos. (1595105)
turbosquid
$10

Printer
...id
royalty free 3d model printer for download as max and 3dm on turbosquid: 3d models for games, architecture, videos. (1607146)
turbosquid
$7

Printer
...royalty free 3d model printer for download as ma, ma, and obj on turbosquid: 3d models for games, architecture, videos. (1644580)
turbosquid
$30

Printer
... available on turbo squid, the world's leading provider of digital 3d models for visualization, films, television, and games.
turbosquid
$20

Printer
... available on turbo squid, the world's leading provider of digital 3d models for visualization, films, television, and games.