Thingiverse
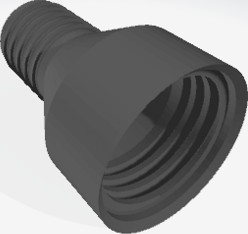
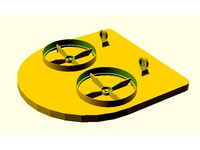
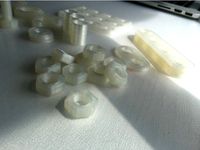
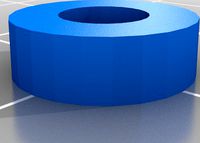
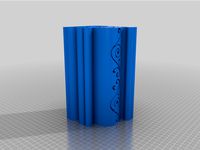
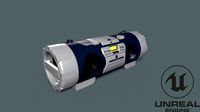
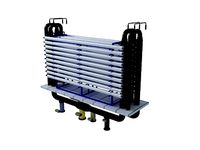
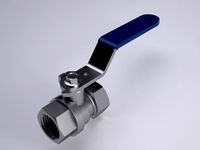
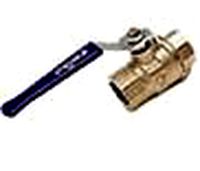
check valve 2 - JVC - Sand Dollar Membrane Valve by MohamedMostafa
by Thingiverse
Last crawled date: 4 years ago
the original designer
CAMERADACTYL Cameras
In this video I go through a few different things
https://www.youtube.com/watch?v=ToI8-92lDpA&t=300s
FIRST: TO BE CLEAR: These designs ARE NOT replacement parts for the ventilators in hospitals right now. DO NOT print them out and bring them to a hospital. These are component precursors to open source, and crowdsourced DIY ventilators that people are working on all over the world. DO grab the CAD files and use them in your designs. I hope to 1: speed up people designing larger systems, by designing components that they can just grab and use, rather than redesign them from scratch, or wait for off the shelf parts. Amazon just shut down incoming warehouse deliveries of many items, I would assume plumbing valves are on that list. And 2, which is related to some limited e-commerce right now: I hope to make some alternative designs for already used components, so that they can be used in place of off the shelf components if and when they run out, or if shipping and lead times get very long.
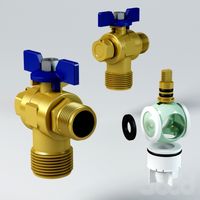
You can download, or copy and modify the parts to the pump head valve body in this video here: https://cad.onshape.com/documents/5c9...
make a free onshape account and you should be able to easily modify some of the dimensions of this set of parts for use in your own project.
Printing instructions:
All prints at 0.4mm nozzle, 0.3mm layer height, in PLA, but PETG is better. No support material is needed for any of the parts.
print the lock nut nut at 30% infill, 4 shell layers all around, top and bottom
Print the other parts at 10-15% infill, 4 shell layers all around. If you can, turn on the option in your slicer for "Avoid Crossing Periiters"
Print the check valves with the orifice plates flat against a CLEAN GLASS print bed. these need to be smooth. print the exhaust (labeled 'out fitting') with the hose barb nozzle against the print bed, and the large threaded part of the funnel facing up. This is counterintuitive, but it works better this way.
Thanks for reading and watching. I hope that someone figures out a good solution for the rest of an Ambu Bag replacement. If you have some thoughts on it, please drop them in the comments, I'll try and test some out and get a working prototype and share it back with the group.
Stay safe, and have fun building!
CAMERADACTYL Cameras
In this video I go through a few different things
https://www.youtube.com/watch?v=ToI8-92lDpA&t=300s
FIRST: TO BE CLEAR: These designs ARE NOT replacement parts for the ventilators in hospitals right now. DO NOT print them out and bring them to a hospital. These are component precursors to open source, and crowdsourced DIY ventilators that people are working on all over the world. DO grab the CAD files and use them in your designs. I hope to 1: speed up people designing larger systems, by designing components that they can just grab and use, rather than redesign them from scratch, or wait for off the shelf parts. Amazon just shut down incoming warehouse deliveries of many items, I would assume plumbing valves are on that list. And 2, which is related to some limited e-commerce right now: I hope to make some alternative designs for already used components, so that they can be used in place of off the shelf components if and when they run out, or if shipping and lead times get very long.
You can download, or copy and modify the parts to the pump head valve body in this video here: https://cad.onshape.com/documents/5c9...
make a free onshape account and you should be able to easily modify some of the dimensions of this set of parts for use in your own project.
Printing instructions:
All prints at 0.4mm nozzle, 0.3mm layer height, in PLA, but PETG is better. No support material is needed for any of the parts.
print the lock nut nut at 30% infill, 4 shell layers all around, top and bottom
Print the other parts at 10-15% infill, 4 shell layers all around. If you can, turn on the option in your slicer for "Avoid Crossing Periiters"
Print the check valves with the orifice plates flat against a CLEAN GLASS print bed. these need to be smooth. print the exhaust (labeled 'out fitting') with the hose barb nozzle against the print bed, and the large threaded part of the funnel facing up. This is counterintuitive, but it works better this way.
Thanks for reading and watching. I hope that someone figures out a good solution for the rest of an Ambu Bag replacement. If you have some thoughts on it, please drop them in the comments, I'll try and test some out and get a working prototype and share it back with the group.
Stay safe, and have fun building!
Similar models
thingiverse
free
Mini Hover Craft by bigfoot13
...was inspired by the minihoov
i'm still working out some design issues. then i'll upload the individual parts for printing
thingiverse
free

Cherry Tomato Plant Shelf by OldManJohnson
...lls), and no top or bottom layers. the infill pattern i used is full honeycomb at 15%, but nearly any pattern will probably work.
thingiverse
free
Mecano parts by ociotec
....
i've printed all of them with 0.6mm nozzle, 0.2mm layer height, 100% infill (no need, but i used translucent pla filament).
thingiverse
free
MINI ITX COMPUTER CASE by themakerunit
...fill for the outer shell with a layer height of 0.4mm.
if using a 0.4mm nozzle you should probably go for 3 external perimeters.
3dwarehouse
free

LAB COMPONENT TRAY
...house
lab component tray useful to use in the hospital/clinic/laboratory project. i hope u can give some like to my work. thanks
thingiverse
free
miniture shelf by DocBoyales
...hoice, but i have done some shelf brackets in the same fasion as this shelf and printed them on the side and they came out great.
thingiverse
free

complete right hand by drn10n
...parts using aceton it makes them stronger because it fused all the outer shell layers togather, and it will make them move bater.
thingiverse
free

Working NutCracker V2 by RenatoT
...eat to see your prints :)
both parts was printed at 25% infill and 2 shells.
the supports are needed just by the part2_ok.stl
thingiverse
free

3D Printed Powered Exoskeleton Hands (Upgrade v1) by 3DPrintIt
...t have a % figure)
the manual will be coming out soon but i thought i would get the models out there so you can start printing.
thingiverse
free
Vinyl/Bondo Squeegee by Jett0312
...e. you can change the infill for the desired flexibility per job, the higher the infill the stiffer it will be. hope you like it.
Jvc
3ddd
free

JVC
...jvc
3ddd
jvc , видеокамера
видеокамера jvc
3ddd
$1
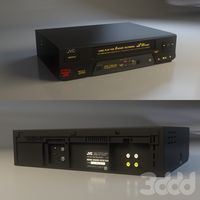
Видеомагнитафон JVC
... jvc
как и обещал к видеокассетам сделал видик)
так же проработан со всех сторон.
в архиве: 3d max 2014, 2011, fbx.
cg_studio
$79
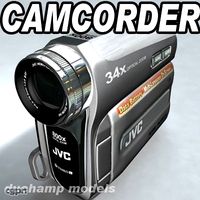
JVC camcorder3d model
...cgstudio
.3ds .fbx .lwo .max .mb .obj - jvc camcorder 3d model, royalty free license available, instant download after purchase.
3d_export
$80
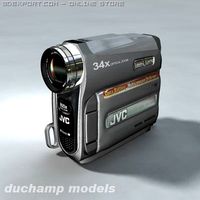
JVC camcorder 3D Model
...era camera minidv dv hd tape cam video sony canon mini handycam handy handheld
jvc camcorder 3d model duchampmodels 7595 3dexport
3ddd
$1

JVC 3020 GM Teeny Vision
...jvc 3020 gm teeny vision
3ddd
телевизор
телевизор jvc 3020 gm teeny vision
3d_export
$15
JVC Boombox
...s.<br>pbr textures: 4k res base color, roughness, metalness, normal and ao.<br>there is a video display with a timer.
turbosquid
$34
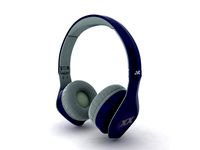
JVC Elation XX Headphones
... available on turbo squid, the world's leading provider of digital 3d models for visualization, films, television, and games.
turbosquid
$48

JVC Everio GZ-R70B camcorder
... available on turbo squid, the world's leading provider of digital 3d models for visualization, films, television, and games.
turbosquid
$48

JVC Everio GZ-R30B camcorder
... available on turbo squid, the world's leading provider of digital 3d models for visualization, films, television, and games.
3d_export
$19

Jvc dv cam GR D850 3D Model
...andycam mini dv digital video lcd camera jvc handcam electronic zoom lens battery
jvc dv cam gr d850 3d model ae3d 11323 3dexport
Membrane
turbosquid
$70

Cell Membrane
...quid
royalty free 3d model cell membrane for download as lxo on turbosquid: 3d models for games, architecture, videos. (1219693)
turbosquid
$49
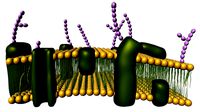
Cell Membrane
... available on turbo squid, the world's leading provider of digital 3d models for visualization, films, television, and games.
turbosquid
$15

Layerdesign membrane chair
... layerdesign membrane chair for download as max, obj, and fbx on turbosquid: 3d models for games, architecture, videos. (1707837)
turbosquid
$45

Membrane Canopy 1
...odel membrane canopy 1 for download as max, 3ds, fbx, and obj on turbosquid: 3d models for games, architecture, videos. (1634705)
turbosquid
$15

membrane structure model
... available on turbo squid, the world's leading provider of digital 3d models for visualization, films, television, and games.
turbosquid
$140

LNG carrier membrane type
...lng carrier membrane type for download as lwo, obj, and blend on turbosquid: 3d models for games, architecture, videos. (1249001)
turbosquid
$30
Reverse osmosis membrane
...
royalty free 3d model uf skids membrance for download as max on turbosquid: 3d models for games, architecture, videos. (1152947)
turbosquid
$12

Open up Swivel chair with membrane-covered backrest
... available on turbo squid, the world's leading provider of digital 3d models for visualization, films, television, and games.
turbosquid
$12

Open mind Cantilever chair with armerests membrane-covered backrest
... available on turbo squid, the world's leading provider of digital 3d models for visualization, films, television, and games.
turbosquid
$12

Open up Conference swivel chair with membrane-covered backrest, glides or castors
... available on turbo squid, the world's leading provider of digital 3d models for visualization, films, television, and games.
Dollar
3d_export
$5

dollar
...dollar
3dexport
dollar
3d_ocean
$4

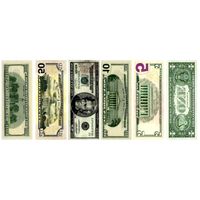
Dollars
...dollars
3docean
banknote bill crumpled dollar money
dollar banknotes belt, crumpled $100 bill, plane bill.
3d_ocean
$5
Dollar Bills
...dollar bills
3docean
bill bills cash dollar money pay
low-poly dollar bill
3d_ocean
$5

Stack of Dollars
... realistic stack
ready to render! textured photorealistic dollars are animated. stack of dollars are falling down over and over…
turbosquid
$2

Dollars
... available on turbo squid, the world's leading provider of digital 3d models for visualization, films, television, and games.
turbosquid
free

dollar
... available on turbo squid, the world's leading provider of digital 3d models for visualization, films, television, and games.
3ddd
$1

100 Dollars
...100 dollars
3ddd
100 dollars текстуры в комплекте :-)
3d_ocean
$3

1 dollar bill
...1 dollar bill
3docean
american american dollar bill dollar euro money one
1 u.s. dollar in 3ds and obj format.
3d_export
$5

dollar role
...dollar role
3dexport
3d_export
$5

dollar stack
...dollar stack
3dexport
Valve
3d_export
$5
Valve
...valve
3dexport
diverter valve
3d_export
$5
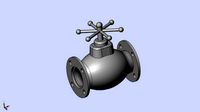
valve
...valve
3dexport
this is a 3d model of a valve available in all formats.
3d_export
free
valve
...valve
3dexport
simple valve 3d model, more free models here:
3d_export
$20

gate valve
...gate valve
3dexport
gate valve
3d_export
$10

stop valve
...stop valve
3dexport
stop valve
3d_export
$5
ball valve
...ball valve
3dexport
ball valve
turbosquid
$14

Valve
...e
turbosquid
royalty free 3d model valve for download as c4d on turbosquid: 3d models for games, architecture, videos. (1217741)
3ddd
$1
valve 02
...valve 02
3ddd
клапан
water valve
3ddd
$1

Valve 01
...valve 01
3ddd
клапан
water valve
turbosquid
$19

Valve
...royalty free 3d model valve for download as ige, obj, and stl on turbosquid: 3d models for games, architecture, videos. (1425806)
Sand
3ddd
$1
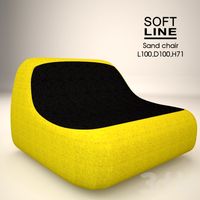
Softline / Sand
...softline / sand
3ddd
softline , sand
softline / sand
archibase_planet
free
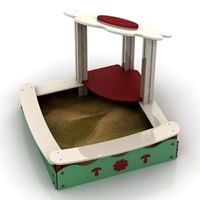
Sand box
...sand box
archibase planet
sand-box sand box sandbox
sand box - 3d model (*.gsm+*.3ds) for exterior 3d visualization.
3d_ocean
$4
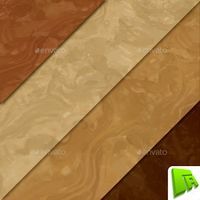
Sand
...oly mud sand stylized texture tiling
this is a set of 4 hand painted sand textures, all tiling. each one is a flat png at 512×512
archibase_planet
free
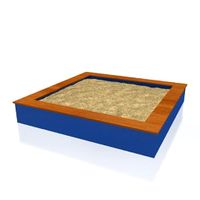
Sand-box
...sand-box
archibase planet
sand-box playground
sand-box - 3d model for interior 3d visualization.
3d_ocean
$3
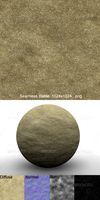
Sand 1
...sand 1
3docean
a seamless tileable sand texture with diffuse, bump, normal and ao maps.
3d_ocean
$4
Desert Sand
...to was taken with the new canon rebel t2i 18 megapixel camera. included are tileable textures ranging from 2048×2048 down to 2...
turbosquid
$58
Sand carrier Sand carrier cargo ship engineering ship cargo ship transport sand farm sand carrier Hu
... ship transport sand farm sand carrier hu for download as max on turbosquid: 3d models for games, architecture, videos. (1651996)
3d_ocean
$6
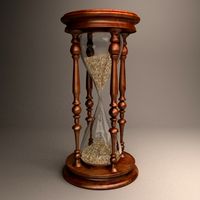
Sand clock
...de in 3ds max 2013 3dsmax with vray render included material and light obj file fbx file hope you like it please don’...
3d_export
free
sand timer
...sand timer
3dexport
3d_ocean
$5
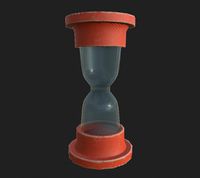
Sand Clock
...d clock for product visualization and interior decoration. poly count: 5706 file formats: 3ds max 2013 default, 3ds, fbx and obj
Check
design_connected
$18

Cross Check
...cross check
designconnected
knoll cross check computer generated 3d model. designed by gehry, frank.
turbosquid
$39

Check in Desk
... available on turbo squid, the world's leading provider of digital 3d models for visualization, films, television, and games.
turbosquid
$9
check valve
... available on turbo squid, the world's leading provider of digital 3d models for visualization, films, television, and games.
3ddd
$1
Coloro Check Room
...coloro check room
3ddd
check board design at , 3ds max + vray
3ddd
$1
Spor check shoes
...s , sporcheck
simple spor check shoes using unwarp uvw for texturing .. hope you like it
turbosquid
$59

Woman in checked shirt
...alty free 3d model woman in checked shirt for download as obj on turbosquid: 3d models for games, architecture, videos. (1507064)
turbosquid
$50

check valve parametric
...alty free 3d model check valve parametric for download as rfa on turbosquid: 3d models for games, architecture, videos. (1522639)
turbosquid
$65

check in counter
...ree 3d model check_in_counter for download as ma, ma, and fbx on turbosquid: 3d models for games, architecture, videos. (1519701)
archive3d
free
Check-point 3D Model
...d
check-point
check point - kpp n200208 - 3d model (*.gsm+*.3ds) for interior 3d visualization.
turbosquid
$15

COAT-CHECK-CHAIR
... available on turbo squid, the world's leading provider of digital 3d models for visualization, films, television, and games.
2
design_connected
$11

No 2
...no 2
designconnected
sibast no 2 computer generated 3d model. designed by sibast, helge.
turbosquid
$6

Cliff Rock 2-2
...uid
royalty free 3d model cliff rock 2-2 for download as obj on turbosquid: 3d models for games, architecture, videos. (1619161)
turbosquid
$29

Book variation 2 2
...3d model book variation 2 2 for download as max, obj, and fbx on turbosquid: 3d models for games, architecture, videos. (1366868)
turbosquid
$22

Classic baluster (2) (2)
...assic baluster (2) (2) for download as max, obj, fbx, and stl on turbosquid: 3d models for games, architecture, videos. (1483789)
turbosquid
$99

Smilodon 2 Pose 2
... available on turbo squid, the world's leading provider of digital 3d models for visualization, films, television, and games.
turbosquid
$20

Barrel Barricade 2-2
... available on turbo squid, the world's leading provider of digital 3d models for visualization, films, television, and games.
turbosquid
$6

Wall Trophy (2) (2)
... available on turbo squid, the world's leading provider of digital 3d models for visualization, films, television, and games.
turbosquid
free

Tire label 2 of 2
... available on turbo squid, the world's leading provider of digital 3d models for visualization, films, television, and games.
3ddd
$1

Кровать, 2 тумбочки, 2 светильника
...кровать, 2 тумбочки, 2 светильника
3ddd
кровать, 2 тумбочки, 2 светильника
нормальное качество
формат 3ds max
без текстур
3ddd
free

Кровать, 2 тумбочки, 2 светильника
...кровать, 2 тумбочки, 2 светильника
3ddd
кровать, 2 тумбочки, 2 светильника
нормальное качество
формат 3ds max
без текстур