Thingiverse
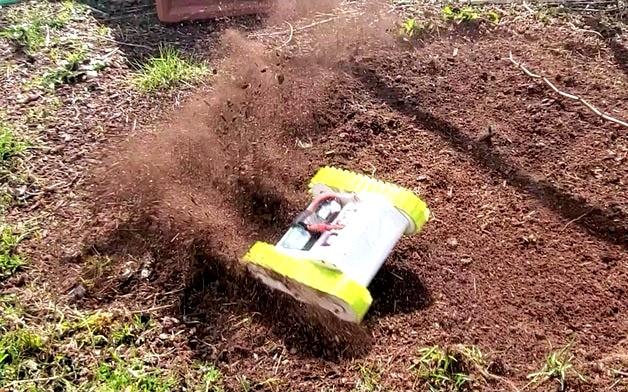
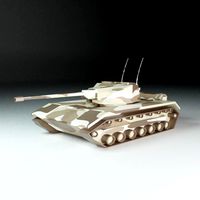
Cheaper and easier, but still awesome speed tank by conquestdz
by Thingiverse
Last crawled date: 3 years ago
Here are a few clips showing how it performs. https://youtu.be/dae_LeZtj3M
I was thinking about printing the really awesome RC tank by Staind: https://www.thingiverse.com/thing:2414983,
but when I went online shopping and looked at the complexity of the project I hit the brakes and decided to come up with something a bit easier and less expensive to print. I also wanted to use TPU for the tracks, and that required scaling things down to get a track circle that would fit on my print bed. A 200mm square print bed will have room to spare.
I redesigned the axles to be separate parts with steps to locate the bearings. With this setup you can thoroughly tighten the axle bolts without side loading the bearings. The axles should slip fit into the holes on the side plates.
I had 2 of the super cheap 2212 1400 kv motors and esc's laying around from another project and decided to build around those. This motor and ESC combo is about $16 on Amazon. That goes a long way towards keeping the project cost down. So does using TPU tracks. you don't need about 100 m3 bolts to make a linked track that breaks every time you put the hammer down. These tracks have been super durable under heavy thrashing and get awesome traction.
Print instructions:
The orientations are not necessarily correct. You will have to lay the flat side down in your slicer.
I printed everything with white Overture PETG with the following settings:
Cura "low quality" setting of .28 layer height
cooling off
30% gyroid infill with a .6 infill line width
Printing with cooling off makes the PETG very tough and flexible which is a good thing to avoid breakage.
Supports everywhere at 50 degrees for the chassis only. All other parts print without support.
Print the drive wheels with the gear side up.
The tracks should be printed hollow for good shock absorption.
Overture high speed TPU
1 wall, no tops or bottoms, no infill
I ended up needing a narrow brim
Shopping list:
2 motors and esc:https://www.amazon.com/BGNing-Brushless-Outrunner-Controller-Quadcopter/dp/B00PXVG7VM/ref=sr_1_2?crid=L155TMKMFUAY&dchild=1&keywords=2212+brushless+motor+1400kv&qid=1617899985&sprefix=2212+brushless+motor+1400%2Caps%2C220&sr=8-2
Note: These ESC do not have reverse. If you really want reverse and are willing to add to the project cost consider a bidirectional esc like this:https://www.amazon.com/Baoer-Bidirectional-Brushless-Pneumatic-Underwater/dp/B08D3G45J7/ref=sr_1_12?dchild=1&keywords=bidirectional%2Besc%2B30A&qid=1617900314&s=toys-and-games&sr=1-12&th=1
Alternative bigger motor (it's awesome):https://www.amazon.com/DYS-1300KV-Brushless-Multicopters-Helicopter/dp/B077HLPP4N/ref=sr_1_3?crid=1ZYBDVRP92ORU&dchild=1&keywords=2830+brushless+motor&qid=1617900442&s=toys-and-games&sprefix=2830%2Ctoys-and-games%2C221&sr=1-3
11T MOD1 Pinion gear:https://www.hobbytown.com/traxxas-hardened-steel-mod-1.0-pinion-gear-w-5mm-bore-11t-tra6484x/p661892?v=636143
Shaft adapter for pinion gear:https://www.amazon.com/ShareGoo-Adapter-Change-Over-Hobbywing-EZRUN-3656/dp/B081CFT28V/ref=sr_1_1?dchild=1&keywords=pinion+shaft+adapter&qid=1617900514&s=toys-and-games&sr=1-1
608zz bearings 12 required:https://www.amazon.com/Sackorange-Skateboard-Bearings-Miniature-Bearings(Pack/dp/B07216D1SZ/ref=sr_1_3?dchild=1&keywords=608zz&qid=1617900948&sr=8-3
604zz bearing 4 requiredhttps://www.amazon.com/XiKe-604ZZ-Pre-Lubricated-Performance-Cost-Effective/dp/B07JGT587B/ref=sr_1_5?dchild=1&keywords=604zz&qid=1617901069&sr=8-5
M4x60mm socket head cap screw 12 required
M4x40mm Hex head bolt 2 required
M4x30mm socket head cap screw 2 required
M4 lock nuts 16 required
M3x6mm socket head screw 8 required
M3x10mm socket head screw 4 required
Battery
A 3s 3000mah battery fits nicely and gives good run time. There is room in the chassis for 2 of these if you really want long run time, but I found it unnecessary.
Radio
You will need a radio capable of channel mixing. This is a cheap and simple example:https://www.amazon.com/DUMBORC-Transmitter-Receiver-Controller-400m-500m/dp/B07RR81GSB/ref=sr_1_2?dchild=1&keywords=dumborc&qid=1617901713&sr=8-2
Assembly:
Start by putting the M4 hex head bolt through the back of the gear case. It is intentionally a tight fit. It will need a few love taps to seat all the way in.
Mount the motors to the motor mounts with M3 screws and add the pinion gears with adapters.
Put the inner bearings into the gears. They should fit easily.
Slide gear onto the shaft add the bearing spacer and then the outer bearing, secure with a lock nut. Don't over tighten. It should spin freely.
Test assemble the motor and mount to the gear case and adjust the pinion gear for full contact.
Bolt the motor gearbox combo to the side plate and snug everything down.
Press 6 lock nuts into the recesses in the chassis.
Use 2 m3 bolts to attach the front cover to each side plate by the bottom holes only for now. Leave these bolts loose enough that the cover can pivot.
Put the inner bearing in all of the wheels
Drop the axles into the wheels with the long side towards the body.
Add outer bearings.
Add the outer side plate and use a M4x60 bolt through each axle to secure the assembly to the nuts in the chassis.
Add your ESC and radio in the front.
Secure the front cover with 2 more M3 screws.
Roll the tracks onto the wheels and you are all set.
Note:
Some radios may not like having 2 BEC plugged in. You can remove the power wire from the BEC on one ESC is this happens to you. I had no problem with the receiver linked above but your experience may be different.
Similar models
3d_export
$5

bathroom towel set 01
...ns-turkish-organic-slippers/dp/b016y8jzqg/ref=sr_1_3?dchild=1&keywords=bath%2bslippers&qid=1633083417&sr=8-3&th=1
thingiverse
free

Hotend fan support - LONGER LK4 Pro & Alfawise U30 Pro by MiniMoro
...iga-blower-40x40x10mm-cooling-printer/dp/b08bz6w47m/ref=sr_1_7?dchild=1&keywords=fan+printer+3d&qid=1614643510&sr=8-7
thingiverse
free
mini keg co2 mount by -KT-
...aqax68objr3&dchild=1&keywords=ball+lock+picnic+tap&qid=1602425476&sprefix=ball+lock+picnic%2caps%2c190&sr=8-5
thingiverse
free

Rotary Tool using brushless motor by CliffCliff
...ric-0-3-4mm-mounted-connecting-3-17mm/dp/b01aw7ndoa/ref=sr_1_6?ie=utf8&qid=1486392393&sr=8-6&keywords=jt0+drill+chuck
thingiverse
free
Torvol tool organizer by Collinhasasthma
...ver-electronic-short-circuit-available/dp/b088tvvnvm/ref=sr_1_4?dchild=1&keywords=smoke+stopper&qid=1623510410&sr=8-4
thingiverse
free

spool holder and storage by cptgumby2004
...=unxyhj8cuo5g&dchild=1&keywords=skateboard+bearings&qid=1604364780&sprefix=skateboard+bear%2caps%2c263&sr=8-8
thingiverse
free

Dual belt driven Z-axis for ender 3 pro XL by Fraddle33
...for top of leadscrew.
https://www.amazon.com/gp/product/b07ggvtj6l/ref=ppx_yo_dt_b_asin_title_o03_s00?ie=utf8&psc=1
a. belt
thingiverse
free

Ardino drone prototype by evan1101
...rqizlbmnyexb0zwrbzelkpuewnzqxmzawrjbwuezgskxhmvnxjndpzgdlde5hbwu9c3bfyxrmjmfjdglvbj1jbglja1jlzglyzwn0jmrvtm90tg9nq2xpy2s9dhj1zq==
thingiverse
free

TRAXXTRUDER Compact geared extruder by liu_d
...1&keywords=48p+13t
more details are coming! the prototype is waiting on some hardware and photos/video will be uploaded asap.
grabcad
free

Hobbyhh D3530 910KV Brushless Motor
...qmgnrq6/ref=sr_1_2?crid=2cmd3qzegjh2o&keywords=hobbyhh+3530&qid=1663384886&sprefix=hobbyhh+3530%2caps%2c59&sr=8-2

Cheaper
3d_export
$15

chair
...chair 3dexport it's comfortable for siting, it's cheaper and...
3d_ocean
$12
Wind Turbine
...poly //// sketchfab 3d preview //// https://sketchfab.com/models/4bbe060159f443c6bed61c6a2ccdd715 get this cheaper here :...
3d_ocean
$5
Machete Low Poly
...weapon weapons machete – 3d low poly get this cheaper here : http://3dlowpolymodels.com/market-item/jungle-machete/ very cool and detailed low poly...
3d_ocean
$3

Screwdriver - 3D Low Poly
...poly //// sketchfab 3d preview //// https://sketchfab.com/models/95fd0d3315a044ba8d5376f980033c04 get this cheaper here :...
3d_ocean
$5
Pipe Weapon - Low Poly
...//// sketchfab 3d preview //// https://sketchfab.com/models/d0d7cbba01664ece8ec99f687f357997 get this model cheaper here :...
3d_ocean
$6
Air Condition Unit 04
...a most have especially for urban enviroments. get this cheaper here :...
3d_ocean
$6

Sledgehammers - Low Poly
...poly //// sketchfab 3d preview //// https://sketchfab.com/models/fc42ae9dcbf8417e9a061df1575123f7 get this cheaper here :...
3d_export
$5

barbecue prong
...in .fbx and .obj formats.<br>blender file coming soon so cheaper for now.<br>made in...
3d_ocean
$4

Pickaxe Low Poly
...weapons worktool pickaxe – 3d low poly get this cheaper here : http://3dlowpolymodels.com/market-item/pickaxe/ very cool and detailed low poly...
3d_ocean
$4
Hammer Low Poly
...work workbench hammer – 3d low poly get this cheaper here : http://3dlowpolymodels.com/market-item/hammer/ very cool and detailed low poly...
Awesome
turbosquid
free

Awesome
... available on turbo squid, the world's leading provider of digital 3d models for visualization, films, television, and games.
turbosquid
$20

Awesome Chair
...quid
royalty free 3d model awesome chair for download as c4d on turbosquid: 3d models for games, architecture, videos. (1212050)
3d_export
$20

awesome bike
...awesome bike
3dexport
great for exteriors
turbosquid
$15
Awesome Couch
... available on turbo squid, the world's leading provider of digital 3d models for visualization, films, television, and games.
turbosquid
$10

Awesome Crane
... available on turbo squid, the world's leading provider of digital 3d models for visualization, films, television, and games.
turbosquid
free
Awesome Chair
... available on turbo squid, the world's leading provider of digital 3d models for visualization, films, television, and games.
turbosquid
$1

Awesome clock's
... available on turbo squid, the world's leading provider of digital 3d models for visualization, films, television, and games.
turbosquid
$1

awesome coffee cup
...oyalty free 3d model awesome coffee cup for download as blend on turbosquid: 3d models for games, architecture, videos. (1277009)
turbosquid
free

Awesome rigged eyes
...d
free 3d model free awesome rigged eyes for download as max on turbosquid: 3d models for games, architecture, videos. (1596325)
turbosquid
free
5 Awesome Fanasty Interiors
... available on turbo squid, the world's leading provider of digital 3d models for visualization, films, television, and games.
Easier
3d_ocean
$5

Design Pregnancy Test
...3docean 3d health kids products woman design innovation and easier to source than the existing design is too...
3d_export
$15
quran support chair
...the recal of the koran, it will make it easier for investors to read the holy letters of the...
3d_export
$5

coaster
...it is a model that will make your job easier ...
3d_export
$5

butterfly painting
...it is a model that will make your job easier ...
3d_export
$5

garden armchair
...it is a model that will make your job easier ...
3d_export
$5

butterfly painting 02
...it is a model that will make your job easier ...
3d_ocean
$8
Satay Cart
...unique wooden satay cart with three wheels. it is easier to moved and more cheap by using simple...
3d_export
$5

owl relief table
...it is a model that will make your job easier ...
3d_export
$5

garden camellia 02
...it is a model that will make your job easier ...
3d_export
$5
garden camellia 05
...it is a model that will make your job easier ...
Tank
archibase_planet
free

Tank
...ibase planet
tank tank-wagon tank-truck tank-car
tank train small n110113 - 3d model (*.gsm+*.3ds) for exterior 3d visualization.
3d_ocean
$49
Tank
...tank
3docean
kv-1s tank
tank kv-1s
archibase_planet
free
Tank
...tank
archibase planet
tank medium tank
tank wmcvun n070712 - 3d model (*.3ds) for exterior 3d visualization.
archibase_planet
free
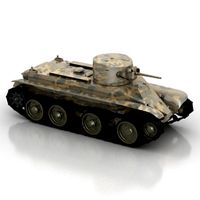
Tank
...k
archibase planet
tank light tank bt-2 high-speed tank
tank bt-2 n200814 - 3d model (*.gsm+*.3ds) for exterior 3d visualization.
3d_export
$5

tanks
...tanks
3dexport
tanks
3d_export
free
tank
...tank
3dexport
tank
archibase_planet
free
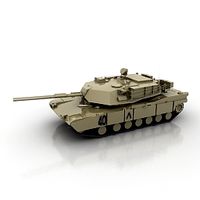
Tank
...tank
archibase planet
tank heavy tank
tank abrams l n090511 - 3d model (*.3ds) for exterior 3d visualization.
archibase_planet
free

Tank
...tank
archibase planet
tank medium tank
tank m60 n070712 - 3d model (*.gsm+*.3ds) for exterior 3d visualization.
archibase_planet
free
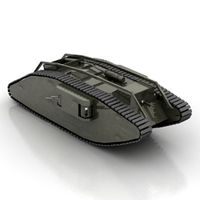
Tank
...tank
archibase planet
tank medium tank
tank female n070712 - 3d model (*.gsm+*.3ds) for exterior 3d visualization.
3d_export
$5
tank
...tank
3dexport
tank lowpoly
Speed
turbosquid
$50

speed
... available on turbo squid, the world's leading provider of digital 3d models for visualization, films, television, and games.
turbosquid
$50

speed
... available on turbo squid, the world's leading provider of digital 3d models for visualization, films, television, and games.
turbosquid
free

speed
... available on turbo squid, the world's leading provider of digital 3d models for visualization, films, television, and games.
3d_ocean
$8

Speed Camera
...model is separate and named appropriately. this is perfect for any type of scene from a road side, architectural or motorway s...
turbosquid
$25

Speed Buggy
...urbosquid
royalty free 3d model speed buggy for download as on turbosquid: 3d models for games, architecture, videos. (1209512)
turbosquid
$4

Speed Sign
...turbosquid
royalty free 3d model speed sign for download as on turbosquid: 3d models for games, architecture, videos. (1251518)
3d_export
$10
variable speed bicycle
...variable speed bicycle
3dexport
variable speed bicycle
3d_export
$5
High - speed aircraft
...high - speed aircraft
3dexport
high speed plane
turbosquid
$5

Speed bag
...y free 3d model speed bag for download as blend, obj, and stl on turbosquid: 3d models for games, architecture, videos. (1577878)
turbosquid
$9

Speed Bump
... 3d model speed bump for download as blend, dae, fbx, and obj on turbosquid: 3d models for games, architecture, videos. (1551854)
Still
design_connected
$4

Still
...still
designconnected
minotti still tables computer generated 3d model. designed by rodolfo dordoni.
turbosquid
$49

Still
... available on turbo squid, the world's leading provider of digital 3d models for visualization, films, television, and games.
3ddd
$1

Кровать STILLES
...кровать stilles
3ddd
bidermajer , stilles
прошу добавить в профи
3ddd
$1
prive still
...prive still
3ddd
cassina
prive still arm chair (840x840)pix
3ddd
$1

Molteni Still
...molteni still
3ddd
molteni&c
sofa molteni still. ширина 250см,глубина95см,высота86см.
3ddd
$1

STILLES dining table
...les dining table
3ddd
обеденный , stilles
stilles dining table, dimension: 190x105x75 cm
3ddd
$1

MOLTENI STILL
...olteni still
3ddd
molteni&c
sofa molteni still. ширина 250см,глубина95см,высота86см. обивка кожанная.цвет-белый и черный.
3d_export
free

still-life
...still-life
3dexport
turbosquid
$159

Still life
... available on turbo squid, the world's leading provider of digital 3d models for visualization, films, television, and games.
turbosquid
$100

still-life
... available on turbo squid, the world's leading provider of digital 3d models for visualization, films, television, and games.