GrabCAD

Car Door Trim assembly
by GrabCAD
Last crawled date: 1 year ago
AIM:
To design a Door Panel of an Automotive using CATIA V5.
OBJECTIVES:
To create an assembly and organize different surfaces of the given class A surface into different parts of the door trim panel. To create a tooling axis and perform a draft analysis on the class A surface of each part. To create class B, class C surface, and close surface for each part. To perform draft analysis on the close body of each part. To create engineering features (Heat stakes, Locators, Dog House) to join the parts of the door trim panel together. To assemble push pins to the door panel.
THEORY:
A door panel, also known as a door card, is an insert that covers the interior components of a vehicle's door. Modern cars often have door cards that are constructed of plastic and incorporate other decorative elements, with injetion molding being the most common method. Other features that add to the vehicle's aesthetic, functionality, and ergonomics are usually included in the door panel. Armrests, switches, or other controls for the windows and locking mechanism, convenience lights, speakers, storage compartments, and other features are examples of this..
PROCEDURE:
Class A surface of a door panel received from the styling team. In the automotive industry dedicated team is allocated to develop class A surface using sketches followed by ideation. Class A surface is the first input given to the plastic designer.
A) CLASS A SURFACE OF A DOOR PANEL
FRONT SIDE:
BACK SIDE:
B) CREATION OF AN ASSEMBLY:
Door Panel class A surface has the following parts -
Door Arm Rest
Lower Substr
Map Pocket
Bottle Holder
Door Arm Rest
Creation of tooling axis
The line has been created using the line command. The point-direction option is used to create the main tooling axis in the z-direction.
Draft analysis of Class-A surface on Tooling axis direction:
Change View Mode Customization to Material mode.
Go to INSERT--->ANALYSIS--->FEATURE DRAFT ANALYSIS and move the compass to the moving Axis.
Change the range to 3°. Apply the settings as shown in below image.
The input Class A also has walls having negative angle to the tooling axis.
This can be an issue while manufacturing the component as it would be very difficult to draw from the molds.
So, this design needs to consider Various Side Tooling Options.
Here also we can see that some faces are not clearing draft analysis and it is due to the improper class A surface and we have to imform our styling team to modify the class A surface.
Similar models
grabcad
free

Automotive interior part creation of Ribs & Screw Boss
...t » analysis » feature draft analysis.
use the compasss to define the draft direction.
in the colour scale change the draft angle
grabcad
free

SWITCH BEZEL
...s on the given class a surface and then final component.
#. creation of class b and class c surface.
#. solidifying the component
grabcad
free

BUMPER DESIGN
...le and at the end perform the draft analysis on the model.
https://skill-lync.com/student-projects/week-9-challenge-3-bumper-538
grabcad
free

Switch Bezel Design
... end perform the draft analysis on the model.
https://skill-lync.com/student-projects/week-9-challenge-2-switch-bezel-design-520
grabcad
free

Base Bracket Design
... end perform the draft analysis on the model.
https://skill-lync.com/student-projects/week-9-challenge-1-base-bracket-design-517
grabcad
free

BASE BRACKET BRACKET
...te a tooling axis using bisecting method.
#. create class b & c surface.
#. convert close surface feature.
#. draft analysis.
grabcad
free

Draft Analysis on Fan Cover
... given ideally to the features inside the plastic part). but for automotive sheet metal parts, it will be from 7 degrees or more.
grabcad
free

B- pillar ( Class A to Class B surface conversion)
...e parting line.
📌checking the draft angle by using draft analysis option.
📌finding the correct tool direction for the final part.
grabcad
free

Plastic part ( Test)
...e parting line.
📌checking the draft angle by using draft analysis option.
📌finding the correct tool direction for the final part.
grabcad
free

Plastic Rack Molding
...r plastic basket molding:
draft analysis, parting line analysis, shut-off surfaces, parting surfaces, tooling split, core, cavity
Trim
3d_ocean
$2
Metal Trims
...metal bindings. you can assign the texture to fixtures and metal trims in your scene or use it to create your own textures. ho...
turbosquid
$5
Wheel Trim
... available on turbo squid, the world's leading provider of digital 3d models for visualization, films, television, and games.
3ddd
$1

Naughtone Trim Armchair
... detailed modern armchair modeled in 3ds max with vray materials, uvw unwrapping so you can change the textures to anything else.
3ddd
$1

Naughtone Trim Sofa
...detailed modern sofa modeled in 3ds max 2014 with vray materials, uvw unwrapping so you can change the texture for anything else.
turbosquid
$15

Classic carved trim
...royalty free 3d model classic carved trim for download as 3ds on turbosquid: 3d models for games, architecture, videos. (1555950)
turbosquid
$50

Door with nob and trim
... available on turbo squid, the world's leading provider of digital 3d models for visualization, films, television, and games.
turbosquid
$3

Trim Package 9
... available on turbo squid, the world's leading provider of digital 3d models for visualization, films, television, and games.
turbosquid
$3

Trim Package 6
... available on turbo squid, the world's leading provider of digital 3d models for visualization, films, television, and games.
turbosquid
$3
Trim Package 5
... available on turbo squid, the world's leading provider of digital 3d models for visualization, films, television, and games.
turbosquid
$3

Trim Package 3
... available on turbo squid, the world's leading provider of digital 3d models for visualization, films, television, and games.
Assembly
3d_export
$7
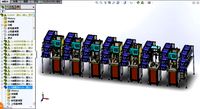
Electronic product assembly machine assembly machine
...electronic product assembly machine assembly machine
3dexport
electronic product assembly machine assembly machine
3d_export
$15
generator assembly line
...ced and assembled in the form of module block. it is a demonstration project of generator assembly. welcome to download and learn
3d_export
$10
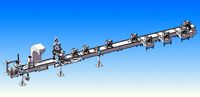
elevator traction machine assembly line motor assembly process
... traction machine assembly line motor assembly process
3dexport
elevator traction machine assembly line (motor assembly process)
3d_export
$16
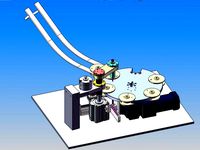
pin assembly machine
...pin assembly machine
3dexport
pin assembly machine
3d_export
$7
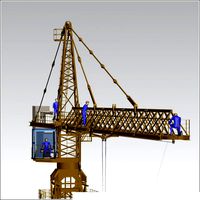
tower-crane-assembly
...tower-crane-assembly
3dexport
tower-crane-assembly
turbosquid
$100

Engine Assembly
...id
royalty free 3d model engine assembly for download as stl on turbosquid: 3d models for games, architecture, videos. (1658296)
turbosquid
$100

Engine Assembly
...id
royalty free 3d model engine assembly for download as stl on turbosquid: 3d models for games, architecture, videos. (1658291)
turbosquid
$100

Engine Assembly
...id
royalty free 3d model engine assembly for download as stl on turbosquid: 3d models for games, architecture, videos. (1658293)
turbosquid
$75
Platform Assembly
...royalty free 3d model platform assembly for download as blend on turbosquid: 3d models for games, architecture, videos. (1472939)
turbosquid
$15
generator assembly
...y free 3d model generator assembly for download as and sldas on turbosquid: 3d models for games, architecture, videos. (1469469)
Door
3d_export
$5

door handle of doors
...door handle of doors
3dexport
door handle of doors
3d_ocean
$4

Door
...3docean
architecture door gate gothic door old style door
door, 3d door, gothic door, architecture, old style door, gate, 3d gate
3d_ocean
$10

Door
...door
3docean
design door doors home house indoor interior opening doors
door design
archibase_planet
free
Door
...r
archibase planet
door sliding door interior door rail door
door n250515 - 3d model (*.gsm+*.3ds) for interior 3d visualization.
archibase_planet
free
Door
...door
archibase planet
door sash door sash-door interior door
door 900 - 3d model (*.gsm+*.3ds) for interior 3d visualization.
archibase_planet
free
Door
...door
archibase planet
door sash door sash-door interior door
door 600 - 3d model (*.gsm+*.3ds) for interior 3d visualization.
archibase_planet
free

Door
...door
archibase planet
door sash door sash-door interior door
door 800 - 3d model (*.gsm+*.3ds) for interior 3d visualization.
archibase_planet
free
Door
...door
archibase planet
door sash door sash-door interior door
door 800 - 3d model (*.gsm+*.3ds) for interior 3d visualization.
archibase_planet
free
Door
...door
archibase planet
door sash door sash-door interior door
door 700 - 3d model (*.gsm+*.3ds) for interior 3d visualization.
archibase_planet
free
Door
...door
archibase planet
door sash door sash-door interior door
door 600 - 3d model (*.gsm+*.3ds) for interior 3d visualization.
Car
3d_export
$5

car
...car
3dexport
luxury car high quality car
3d_export
$5

car
...car
3dexport
luxury car high quality car
3d_export
$5

car
...car
3dexport
luxury car high quality car
3d_export
$5

car
...car
3dexport
luxury car high quality car
3d_export
$5

car
...car
3dexport
luxury car high quality car
archibase_planet
free
Car
...
archibase planet
car sports car motor-car sportster
car nascar#1 n300114 - 3d model (*.gsm+*.3ds) for exterior 3d visualization.
archibase_planet
free

Car
...ibase planet
car motor-car sportster sports car
car gablota xform n190214 - 3d model (*.gsm+*.3ds) for exterior 3d visualization.
archibase_planet
free

Car
...car
archibase planet
car motor car transport
car vaz 2104- 3d model for interior 3d visualization.
3d_export
$15

car
...car
3dexport
car
3d_export
free

car
...car
3dexport
car