Thingiverse
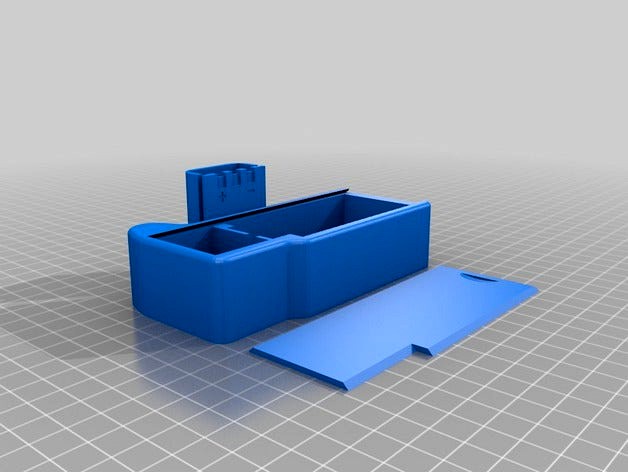
Canon Grip by Flyfisher
by Thingiverse
Last crawled date: 3 years ago
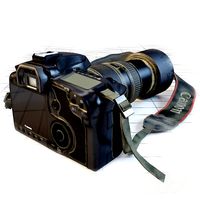
How to build grip for Canon 400D.
Required hardware (see PIC001.JPG):
Glue (CA or Epoxy);
A couple of rechargeable batteries 18650;
Container for the batteries;
Any died AA or AAA battery to make contacts;
Male and female connectors;
Nail (1/10" or 2,5 mm diameter). It should fit to small hole in the bottom of the camera body;
1/4" screw. If you cannot bye inch thread screw, you can get it from cheap selfie stick.
Steps to build:
1) Print the parts (see PIC002.JPG).
2) Use sandpaper to fit Part 1 and Part 2.
3) Saw off screw and nail (PIC003.JPG). Glue them with Part 3 and Part 4 (PIC004.JPG). Let the glue dry.
4) Remove the battery box cap from the camera body (PIC005.JPG).
5) Fasten Part 1 to body, put Part 4 with nail to the small hole. Align Part 1 along to body
and glue Part 4 by a couple of glue drops (PIC006.JPG).
6) Unfasten Part 1. Put Part 5 into battery cap place (PIC007.JPG), put a couple of glue drops on it.
Fasten Part 1 again. Let glue dry.
7) Unfasten Part 1. Glue Part 4 and Part 5 from the bottom side (PIC008.JPG). Grip is ready.
8) Make a couple of contacts from died AA or AAA battery body and solder them to female connector.
Contacts width is 4 mm (PIC009.JPG).
9) Glue contacts to Part 6. Double check a polarity. Red is plus, black is minus. Glue Part 7 to Part 6.
The battery stub is ready (PIC010.JPG).
10) Solder male connector to battery container. Load two charged batteries 18650 into container (PIC011.JPG).
Double check a polarity. Red is plus, black is minus.
11) Connect the container and the battery stub. Double check a polarity. Multimetr has to show about 8 Volts
and polarity has to be correct (PIC012.JPG). Disconnect the container and the battery stub.
12) Assembly the grip. Set the battery stub into the body (PIC013.JPG). Fasten the grip (PIC014.JPG).
Load the container with batteries and connect it with the battery stub.
13) Since we checked the polarity six times, the power can be turned on - PIC015.JPG.
The camera has to work. Ta-dam-m-m!!! Close the grip cap.
Note: If the grip cap moves too easy, put a small peace of foam under the battery container.
Similar models
3dwarehouse
free

холдер для 18650 в battery grip для Canon EOS 500d
...18650 в battery grip для canon eos 500d
3dwarehouse
холдер для аккумуляторов типаразмера 18650 в battery grip для canon eos 500d
thingiverse
free

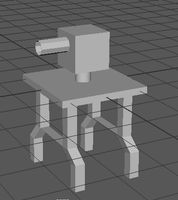
Enclosure for WeMos Clone With LCD and 18650 by Atiesh
...to body
insert joystick with litle amound of glue... and try to align before glue is dry.
insert battery and close cover.
profit!
thingiverse
free

AAA Battery Boxes by wkarraker
... there are alternated polarity indicators, the end connections provide a grip to make good contact and hold the battery in place.
thingiverse
free

Battery holder (18650 - 4, AA - 14, AAA - 10) by Mitka
...battery holder (18650 - 4, aa - 14, aaa - 10) by mitka
thingiverse
battery holder for 18650 - 4pcs, aa - 14pcs, aaa - 10pcs
thingiverse
free

Battery converter 3x AAA to 1x 18650 Li-ion by Mr_Ploppy
...8650 li-ion battery and so battery life greatly improved.
it's a two part print. stick them together and add your connectors.
thingiverse
free

Battery Box (AAA, AA, 18650) by tinexd
...battery box (aaa, aa, 18650) by tinexd
thingiverse
3 kinds of battery boxes (aaa, aa, 18650).
thingiverse
free

DC Coupler Canon SX150 IS by towerpc
... the camera (the one in the plastic border) is fed plus,
on the fact that closer to the center is a minus (without the fringing).
thingiverse
free
Double 26650 flashlight to 18650 battery bushing
...8650 batteries in a double 26650 flashlight. all it does is centering the smaller diameter batteries in a larger flashlight body.
thingiverse
free

Universal FPV goggles 18650 battery case
...ator 1$ from aliexpress (or banggood). like this: https://ru.aliexpress.com/item/32988584425.html . glue it on double sided tape.
thingiverse
free

Battery magazine 18650, AA, AAA by Lukass
...battery magazine 18650, aa, aaa by lukass
thingiverse
magazine for save some space
can hold 18650, aa, aaa batterys
Flyfisher
thingiverse
free

nut tool for flyfishing rod guide by jpo85
...nut tool for flyfishing rod guide by jpo85
thingiverse
nut tool for flyfishing rod guide
thingiverse
free

GEPRC Flyfish Pod by merzod
...ubosd
more reliable mounting on frame then stock one
protection for receiver antennas with extra cut for folding in case of crash
thingiverse
free

Flyfishing line clean and rewind tool by DIY3D
...n and rewind tool by diy3d
thingiverse
this tool is for cleaning and preparing a flyfishing line. keep in mind, work in progress
renderosity
$17

Totte's Flyfishing
...g you need to make your own flies with the fly construction kit and go out fishing with top of the line rods and reels.</p>
thingiverse
free

Flyfishing flyline holder / spool by Buschwiesel
...g flyline holder / spool by buschwiesel
thingiverse
made this to store my flyline and shooting heads which came without a spool.
thingiverse
free
Flyfishing Line Tool by DIY3D
...with 3 mm foam. but before you glue the foam, melt the claw with a nail on the spindle (which of course is screwed in the frame).
thingiverse
free

geprc flyfish pod assembly by UncleMcNuts
...sts cut them to a length of 38mm from the top, the base is only there for printing ease. posts can't be used with v2 version.
thingiverse
free

4 stream dispenser by Flyfisher
...ura tool is able to set separate printing options for each model on table
small video https://www.youtube.com/watch?v=g0qyma53wj4
thingiverse
free

geprc flyfish pod assembly version 2 by UncleMcNuts
...ings.
outer walls need to have support in order for the recording camera mount to be of decent quality.
0.4mm max extrusion head
thingiverse
free

Bobbin dispenser flyfishing by M0rbital
...o onshape design:https://cad.onshape.com/documents/58ad744500e2ed524016996f/w/e8161a9b3be0c67a9f321aa7/e/36cec9713a58d366cf495fd8
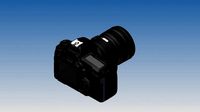
Canon
3d_export
$5

canon
...canon
3dexport
canon/obj/powpoly
3ddd
free
Canon 5D
...canon 5d
3ddd
canon , фотоаппарат
canon 5d
turbosquid
$3
Canon
...on
turbosquid
royalty free 3d model canon for download as ma on turbosquid: 3d models for games, architecture, videos. (1342900)
3d_export
$7
canon-5d
...canon-5d
3dexport
canon-5d
turbosquid
$90

CANON
... available on turbo squid, the world's leading provider of digital 3d models for visualization, films, television, and games.
turbosquid
$35

CANON
... available on turbo squid, the world's leading provider of digital 3d models for visualization, films, television, and games.
3d_export
$6

canon camera
...canon camera
3dexport
high poly model of camera canon
3ddd
$1

Ксерокс Canon
...ксерокс canon
3ddd
canon , ксерокс
буду рад, если кому-нибудь пригодится.
3d_export
$18
Canon 3D Model
...canon 3d model
3dexport
canon decoration broze gold objects
canon 3d model sarnidesign 401 3dexport
turbosquid
$8

Grandred-Canon
...osquid
royalty free 3d model grandred-canon for download as on turbosquid: 3d models for games, architecture, videos. (1271796)
Grip
3d_ocean
$5
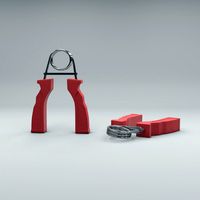
Hand Grips
...hand grips
3docean
3ds hand hand grips obj sport
3d model hand grips c4d file +obj+3ds
turbosquid
$4

Pistol Grip
...osquid
royalty free 3d model pistol grip for download as stl on turbosquid: 3d models for games, architecture, videos. (1489529)
turbosquid
$1

Grip for a gun
...ree 3d model grip for a gun for download as 3ds, max, and fbx on turbosquid: 3d models for games, architecture, videos. (1316268)
turbosquid
$35

Vice Grips
... 3d model vice grips for download as obj, fbx, blend, and dae on turbosquid: 3d models for games, architecture, videos. (1233289)
turbosquid
$1

Gun Grip
...ee 3d model gun grip for download as 3ds, obj, blend, and dae on turbosquid: 3d models for games, architecture, videos. (1357070)
turbosquid
$30

Hand Grips
... available on turbo squid, the world's leading provider of digital 3d models for visualization, films, television, and games.
turbosquid
$19

Hand Grip
... available on turbo squid, the world's leading provider of digital 3d models for visualization, films, television, and games.
turbosquid
$15

Hand Grip
... available on turbo squid, the world's leading provider of digital 3d models for visualization, films, television, and games.
turbosquid
$8

Grip Knife
... available on turbo squid, the world's leading provider of digital 3d models for visualization, films, television, and games.
turbosquid
$5

Grip Master
... available on turbo squid, the world's leading provider of digital 3d models for visualization, films, television, and games.