Thingiverse

Camera Slider by glsf91
by Thingiverse
Last crawled date: 2 years, 12 months ago
It is a motorized camera slider. See https://www.youtube.com/watch?v=Xh0SBud-Cfs. First the slider is running on slowest speed, then full speed and slowest speed again.
I used the original thing as an example but changed a lot.
You can put it on the ground, on one stand or 2 stands. I use 2 stands because there will be a little movement because of the weight when the camera is at one side. It depends on the weight of the camera. It also depends on the connection with the stand.
The 2 rods bases (where the stands are connected) can move. You don't have to use glue like the original one.
A BOM list is added. Don't pay attention to the DIN or ISO numbers of the bolts and nuts.
I used a dc motor with gearbox. But there is also a mount (slider-motor.stl) for a NEMA 17 stepper. I used a 80 RPM DC motor, but you can use of course a slower or faster motor.
There is also a open mount for the DC motor (slider-dcmotor.stl)
I will use an Arduino with motor driver (30A Mini VNH2SP30 Stepper Motor Driver Monster Moto Shield module For Arduino) to drive the motor. Intention is to add an app connected with bluetooth. It is not ready yet. I will add later some details.
You can also use a 6-30V DC Motor speed Controller Reversible PWM Control Forward / Reverse Switch to control the motor. Then you don't need the limit switches of course. But you have to stop the motor on time :-). Running on a 5V battery pack is not working right now. The motor driver needs at minimum about 5.2V. For this moment I use 10V for the motor and 5V for the Arduino. We use 2 USB battery packs for making 10V (in serie) and one of these 2 are used for Arduino 5V.
Maybe we will try later with a step-up regulator and 1 5V battery pack.
The belt is connected to the platform on the left and right. Just by inserting it double folded. See pictures. The belt can be put on tension with the 2 screws in the belt wheelholder. Don't tension it to much.
I use a rubber band (from the postman) around the platform to trigger the limit switches which gives some flexibility. You can use it without. But on full speed the DC motor will take a little more time to stop then a stepper motor. With the rubber band it will not run into the limit switch. On lower speed this is not necessary.
It is still work in progress but the 3D printed parts will be ready (I think).
Edit:
14-4-2017:
Added diagram of electronics. Also in the diagram LANC control for my Sony camera is added. You can leave this out if not needed. It is used to take pictures automatically at a defined interval.
I used a Arduino Nano, Bluetooth HC-05 module and 30A Mini VNH2SP30 Stepper Motor Driver Monster Moto Shield (like this one http://www.ebay.com/itm/152234873766).
Arduino software will be uploaded later here.
26-4-2017:
Arduino software is added. No guarantees for the software :-)
Probably not most efficient coding but it is doing what I want.
Following commands are possible:
(output will also presented when connection terminal to serial port arduino)
Action commands:
1# STOP all2# Move FORWARD (away from motor side)3# Move REVERSE (towards motor side)5# Move continues run (without pause)6# Move start/stop with pause and running delays; Continues runP# Take photoU# Switch camera offA# Switch camera onI# Switch camera on, take photo, switch camera offFxxxx# Start take photo every xxxx in seconds without moving. Will stop current move actionG# Move start/stop with pause and running delays and take photo just after moving; Continues runL# Calibrate. Measure time (ms) to move from one side to the other side at current speed
Settings commands:
D# Set direction forward (away from motor side)E# Set direction reverse (towards motor side)+# Increase speed with +5 (000-255)-# Decrease speed with -5 (000-255)Sxxxx# Set speed 0001 - 0255 (min = 0030)Bxxxx# Duration of pause in start/stop run Cxxxx# Duration of running in start/stop run Hxxxx# Stop everything after taken xxxx photos (only STOP action will reset this)J# Get current speedK# Get number of photos taken
Commands can be given through bluetooth or serial port (USB Arduino Nano).
Just try and have fun.
We are still working on the android app which will connect with arduino by BT.
Camera functions are for Sony LANC camera.
Similar models
thingiverse
free

Stepper Motor Slider by GUTO_Graber_i3
...dc 12v or 5v and a driver;
use lubricant if you want;
2 allen m4;
1 end stop switch;
arduino code to example .ino in thing files!
grabcad
free

VNH2SP30 DC Motor Driver
...vnh2sp30 dc motor driver
grabcad
vnh2sp30 dc motor driver.
grabcad
free

TB6600 Stepper motor driver by taitran
... output 4a peak current, which is enough for the most of stepper motors. the stepper driver supports speed and direction control.
grabcad
free

TB6600 stepper motor driver by prodes
... output 4a peak current, which is enough for the most of stepper motors. the stepper driver supports speed and direction control.
grabcad
free

TB6600 Stepper motor driver by Tdesign
... output 4a peak current, which is enough for the most of stepper motors. the stepper driver supports speed and direction control.
grabcad
free

TB6600 Stepper motor driver by Taitran Technic
... output 4a peak current, which is enough for the most of stepper motors. the stepper driver supports speed and direction control.
grabcad
free

TB6600 stepper motor driver by proma
... output 4a peak current, which is enough for the most of stepper motors. the stepper driver supports speed and direction control.
thingiverse
free
Model stepper 28BYJ-48 by siderits
...r with uln2003 driver board (without driver board.
used in modeling enclosures.
included an indicator for this stepper motor.
grabcad
free

Motor driver L9110
...motor driver l9110
grabcad
motor driver arduino compatible used for driving 2 dc motors or 1 stepper motor.
3dwarehouse
free

Stepper Motor BYJ48 (Arduino)
...all arduino compatible stepper motor with an off-center 5mm shaft. type 28byj-48. 5v dc. very exact dimensions. #arduino #stepper
Glsf91
thingiverse
free

TMO keychain by glsf91
...tmo keychain by glsf91
thingiverse
key chain with tmo on it.
for https://www.youtube.com/user/trumpetmusiconline
thingiverse
free

Headphone stand by glsf91
...headphone stand by glsf91
thingiverse
i only split the stand because it was to big for printing on my 20x20x20 bed.
thingiverse
free

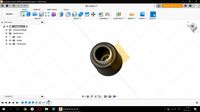
Tool MC4 Connector by glsf91
...tool mc4 connector by glsf91
thingiverse
tool used to disconnect male and female mc4 connections which are use with solarpanels
thingiverse
free

Fillet tool epoxy by glsf91
...
thingiverse
a tool to make a fillet with epoxy. the first one is 25mm. i added one with 15 mm.
the pictures are from the 25 mm.
thingiverse
free

Spoolholder lock for P3Steel by glsf91
...ade for ps3steel from hta3d. it will click in place.
mirror the part with the slicer software before printing for the second one.
thingiverse
free

Filament clip by glsf91
...ing:12516). what i have done is just make the hole 2,5 mm instead of 2 mm.
edit 24-1-2016: i also added a clip with hole 2,25 mm.
thingiverse
free

Vise pad by glsf91
...ong powerful small round rare earth neodymium disc magnets 10 x 2 mm 10x2mm" from aliexpress.
print the other one in mirror.
thingiverse
free
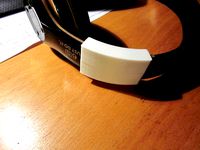
Repair Bakeey P15 headphone head band by glsf91
...at the head band. just where it can be folded.
with this part and some glue it can be repaired.
you have to use 2 of these parts.
thingiverse
free

Oil cap for Bosch chainsaw by glsf91
... m36.
depending on you printer you have to resize it (uniform scaling) a little bit in your slicer. i printed with 100% with pla.
thingiverse
free

Strimmer Black&Decker actuator 806474 by glsf91
...0pxc, gl570, gl570c, gl580, gl580c, glc13, glc14, glc120, glc2000, glc2500, glc2500nm, glc3000
print it upside down with support.
Slider
3d_export
$5
slider
...slider
3dexport
slider
3d_export
$5

Camera Slider
...camera slider
3dexport
camera slider toy
turbosquid
$10

SLIDER RAW
... available on turbo squid, the world's leading provider of digital 3d models for visualization, films, television, and games.
turbosquid
free

Slider V1
... available on turbo squid, the world's leading provider of digital 3d models for visualization, films, television, and games.
turbosquid
free

Vitrocsa3001-Slider-Fixed
... available on turbo squid, the world's leading provider of digital 3d models for visualization, films, television, and games.
3ddd
$1

ЭКМИ-МЕБЕЛЬ / Регина-slider
...er
3ddd
угловой , экми-мебель
диван "регина-slider". производитель экми-мебель
3d_ocean
$12
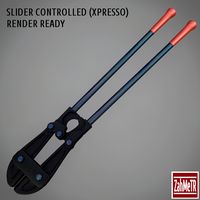
Bolt Cutter (Xpresso Slider Controlled)
...are to use slider controller. you can see how to use slider in preview video. render system and materials are ready. c4d and o...
3ddd
free

Шкатулка-держатель для фотографий Slider
...рмы umbra. вмещает три фотографии размером 8 х 8 см, 10 х 10 см и 10 х 15 см.http://www.umbra.com/usd/slider-photo-dis
3d_ocean
$9
Seats with Automatic Adding Slider (Xpresso)
... / images and read description carefully before you buy. thanks. you need cinema 4d software to use slider controller or just ...
turbosquid
$15

Computer Camera Slider, closes and opens camera view
...der, closes and opens camera view for download as skp and stl on turbosquid: 3d models for games, architecture, videos. (1331206)
Camera
archibase_planet
free
Camera
...base planet
camera surveillance camera video camera
camera surveillance n090211 - 3d model (*.3ds) for interior 3d visualization.
archibase_planet
free

Camera
...hibase planet
camera security camera video camera
camera security n210515 - 3d model (*.gsm+*.3ds) for exterior 3d visualization.
archibase_planet
free
Camera
...se planet
camera web camera webcam
camera butterfly usb pc camera n090713 - 3d model (*.gsm+*.3ds) for interior 3d visualization.
archibase_planet
free
Camera
...mera
archibase planet
surveillance camera video camera camcorder
camera n011211 - 3d model (*.3ds) for exterior 3d visualization.
archibase_planet
free
Camera
...camera
archibase planet
camera digital camera
camera canon digital n041211 - 3d model (*.3ds) for interior 3d visualization.
archibase_planet
free
Camera
...camera
archibase planet
camera film camera phototechnique
camera n100214 - 3d model (*.gsm+*.3ds) for interior 3d visualization.
archibase_planet
free

Camera
...amera
archibase planet
camera video camera camcorder
camera video n070315 - 3d model (*.gsm+*.3ds) for interior 3d visualization.
archibase_planet
free

Camera
...rchibase planet
camera video camera camcorder
camera studio n101213 - 3d model (*.gsm+*.3ds+*.max) for interior 3d visualization.
archibase_planet
free
Camera
...ibase planet
digital camera camera phototechnique
camera canon ixus 400 n310311 - 3d model (*.3ds) for interior 3d visualization.
archibase_planet
free

Camera
...ase planet
photocamera video camera camera
camera sony t300 black n291010 - 3d model (*.gsm+*.3ds) for interior 3d visualization.