Thingiverse
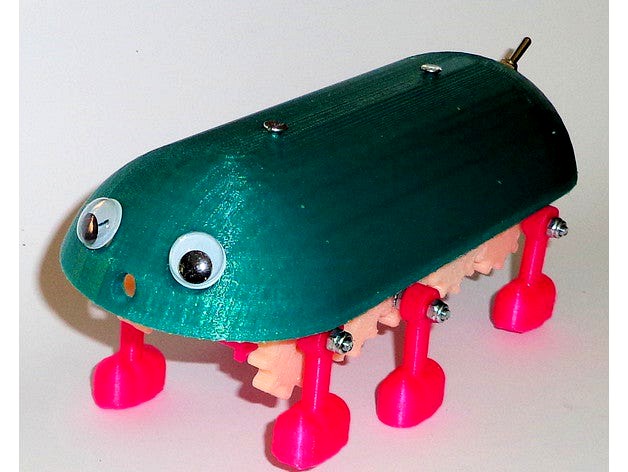
Buggy Junior by WillemvD
by Thingiverse
Last crawled date: 3 years ago
https://youtu.be/ypQx8DEk7VA
This thing is a more simple setup, compared to https://www.thingiverse.com/thing:771004
Gear wheels are included and attached to a frame.https://youtu.be/oOeriEbkMsY
For the miniature geared dc motor, a 9 volt battery is fixed with a tie wrap or a piece of double sided adhesive foam tape..https://youtu.be/-gS8GaNyc9I
You might need to rotate the body to the normal position before printing. It is a good idea to trim the shaft openings in the frame after printing with a 4 mm drill.
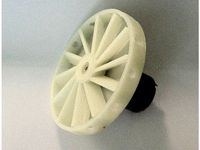
The square shafts are driven gently into one of the leg wheels with a light hammer. Only gentle force should be applied. If a shaft breaks, remove it with an M3 bolt in the other side of the shaft opening and use a hammer to remove the broken part. When installing the wheels at the other side, the leg bolts should be opposite. Depending on the tolerances of your printer, it might be necessary to remove some material from the shaft ends using sandpaper, until they slip into position with reasonable friction. Eventually use a rotary tool to rotate the shaft and clamp sandpaper to the rotating end, applying pressure with your fingers. The legs are secured by a lock nut. The on/off switch goes into the tail. If your buggy walks backward, simply reverse the motor wires. A drop of oil on the moving parts reduces friction. The shell is fixed with two M3x50 bolts and separated from the frame with two printed spacers. If the legs are not exactly synchronized, buggy gets a funny wobly walk as demonstrated in the movie of the test walk.
This thing is a more simple setup, compared to https://www.thingiverse.com/thing:771004
Gear wheels are included and attached to a frame.https://youtu.be/oOeriEbkMsY
For the miniature geared dc motor, a 9 volt battery is fixed with a tie wrap or a piece of double sided adhesive foam tape..https://youtu.be/-gS8GaNyc9I
You might need to rotate the body to the normal position before printing. It is a good idea to trim the shaft openings in the frame after printing with a 4 mm drill.
The square shafts are driven gently into one of the leg wheels with a light hammer. Only gentle force should be applied. If a shaft breaks, remove it with an M3 bolt in the other side of the shaft opening and use a hammer to remove the broken part. When installing the wheels at the other side, the leg bolts should be opposite. Depending on the tolerances of your printer, it might be necessary to remove some material from the shaft ends using sandpaper, until they slip into position with reasonable friction. Eventually use a rotary tool to rotate the shaft and clamp sandpaper to the rotating end, applying pressure with your fingers. The legs are secured by a lock nut. The on/off switch goes into the tail. If your buggy walks backward, simply reverse the motor wires. A drop of oil on the moving parts reduces friction. The shell is fixed with two M3x50 bolts and separated from the frame with two printed spacers. If the legs are not exactly synchronized, buggy gets a funny wobly walk as demonstrated in the movie of the test walk.
Similar models
grabcad
free

LifeTrac Wheel Bracket
...ly connected to the wheel shaft. probably the motor can be perpendicular to the wheel shaft using bevel gears to transfer torque.
thingiverse
free

Begleri stand by Sorri
... fit to the corners of the frame (on the short sides), and the leg braces should friction fit onto the legs (on the short sides).
grabcad
free

Axle
...cles, the axle may be fixed to the wheels, rotating with them, or fixed to the vehicle, with the wheels rotating around the axle.
grabcad
free

Side Shaft DC Gear Motor
...side shaft dc gear motor
grabcad
dc gear motor side shaft
grabcad
free

DC Geared Motor - Side shaft
...dc geared motor - side shaft
grabcad
dc geared motor - side shaft
thingiverse
free

Steel Axles for OM3's 1/10 Scale RC Buggy by xamith
...to keep it a very snug fit, i had to tap mine in with a hammer. use a dab of super glue to keep the end fixed to the steel shaft.
grabcad
free

walking robot
...leys carried by the two shafts which causes the rotation of the two legs and therefore the robot advances in a rectilinear manner
thingiverse
free

Measure the coefficient of friction between materials by WillemvD
...al combinations is can be found on http://www.engineeringtoolbox.com/friction-coefficients-d_778.htmlhttps://youtu.be/07uaidhy9ju
thingiverse
free

MoonWalker by WillemvD
...be
simple 3d printed walking mechanisme. the frame sizes depend on the gearwheels and geared motor you have "in stock".
thingiverse
free

Rocking Body Walking Robot Drone #5 by RobotHut
...d as a pivot shaft for the motor frame unit. a shaky video will be posted to you tube for this build.https://youtu.be/jbndiefmkrs
Willemvd
thingiverse
free

MarbleFun by WillemvD
...marblefun by willemvd
thingiverse
https://youtu.be/hrd8kk79cdc
your (grand)children will love it!
thingiverse
free

MarbleMover by WillemvD
...marblemover by willemvd
thingiverse
https://youtu.be/hrd8kk79cdc
your (grand)children will love it!
thingiverse
free

Three in a row by WillemvD
...three in a row by willemvd
thingiverse
three in a row classic version.
thingiverse
free
Whistling propellor by WillemvD
...istling propellor by willemvd
thingiverse
https://youtu.be/qjzllndmnp4
a two component sound generator. works on a toy dc motor.
thingiverse
free

Candy Bucket by WillemvD
...y willemvd
thingiverse
printed buckets full of candy, carried by the robot. the kids will have fun.
https://youtu.be/sd_6ownlv54
thingiverse
free

Static Candy Dispenser by WillemvD
...static candy dispenser by willemvd
thingiverse
hopefully you do a better paint job.
thingiverse
free

EggcupPlus by WillemvD
....thingiverse.com/thing:606963
add a spoon holder and a place to put the shells and your easter table will look like never before.
thingiverse
free
Marble mania by WillemvD
...thingiverse
a marble in orbit...
https://youtu.be/reivgsk-oai
a drop of oil on the four contact points and the tip of the rotor.
thingiverse
free

ServoSpirograph by WillemvD
...
by changing the parameters in the sketch, different patterns are generated.
the disk is cd size and fits on a 5mm stepper shaft.
thingiverse
free
MoonWalker by WillemvD
...be
simple 3d printed walking mechanisme. the frame sizes depend on the gearwheels and geared motor you have "in stock".
Buggy
3d_ocean
$45

High Quality Buggy Buggy
...high quality buggy buggy
3docean
buggy car race rally sport car vehicle
car model, like buggy buggy style
turbosquid
$20

Buggy
...y
turbosquid
royalty free 3d model buggy for download as max on turbosquid: 3d models for games, architecture, videos. (1372762)
3d_export
$5

buggy chassi
...buggy chassi
3dexport
chassis of a simple ride buggy.
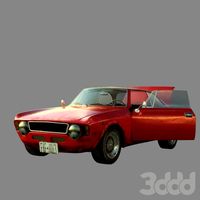
3ddd
$1

Buggy
...buggy
3ddd
коляска
без модификаторов
turbosquid
$89

buggy
... available on turbo squid, the world's leading provider of digital 3d models for visualization, films, television, and games.
turbosquid
$50

Buggy
... available on turbo squid, the world's leading provider of digital 3d models for visualization, films, television, and games.
turbosquid
$10

Buggy
... available on turbo squid, the world's leading provider of digital 3d models for visualization, films, television, and games.
turbosquid
$2

Buggy
... available on turbo squid, the world's leading provider of digital 3d models for visualization, films, television, and games.
turbosquid
free

buggy
... available on turbo squid, the world's leading provider of digital 3d models for visualization, films, television, and games.
3d_ocean
$49

Buggy Concept
... poly massive outdoor robust vehicle
just a model of are own buggy concept vehicle. maybe you can make a beautiful renders of it!
Junior
3ddd
$1

Scandia Junior
...scandia junior
3ddd
scandia , junior
scandia junior
design_connected
$13

Scandia Junior
...scandia junior
designconnected
fjordfiesta.furniture scandia junior computer generated 3d model. designed by brattrud, hans.
3ddd
$1

ARRI 150 Junior
... junior
высокополигональная модель источника света arri 150 junior, студийное освещение.
3ddd
free

Leander / Junior bed
... дания
кровать junior bed, leander (дания)
размеры, мм: 1500х700х495http://www.leander.com/produkter/junior-bed
turbosquid
$12
Deathwing (Junior)
...3d model deathwing (junior) for download as obj, c4d, and fbx on turbosquid: 3d models for games, architecture, videos. (1259098)
3d_export
free

disney junior cartoon text
...disney junior cartoon text
3dexport
maya model disney junior cartoon text
turbosquid
$30

Belle Epoque Junior
...royalty free 3d model belle epoque junior for download as skp on turbosquid: 3d models for games, architecture, videos. (1475562)
3ddd
free
Alfa Romeo GT 1300 Junior
... gt , junior , машина
alfa romeo gt 1300 junior
turbosquid
$20

Junior with skateboard 0795
...h skateboard 0795 for download as max, fbx, wrl, obj, and stl on turbosquid: 3d models for games, architecture, videos. (1709242)
turbosquid
$16

Leander Junior Bed
... available on turbo squid, the world's leading provider of digital 3d models for visualization, films, television, and games.