Thingiverse
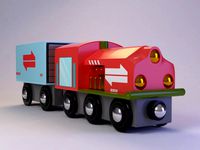
Brio - Mechanical Switch - Signals by cgillstrap
by Thingiverse
Last crawled date: 3 years ago
This is an accessory/add-on to the Mechanical (Geared) Interchange/Switches that I designed earlier:
Brio - Mechanical (Geared) Interchange/Switch O1/P1 Trackhttps://www.thingiverse.com/thing:4813429
Brio - Mechanical (Geared) Interchange/Switch M1 Trackhttps://www.thingiverse.com/thing:4793935
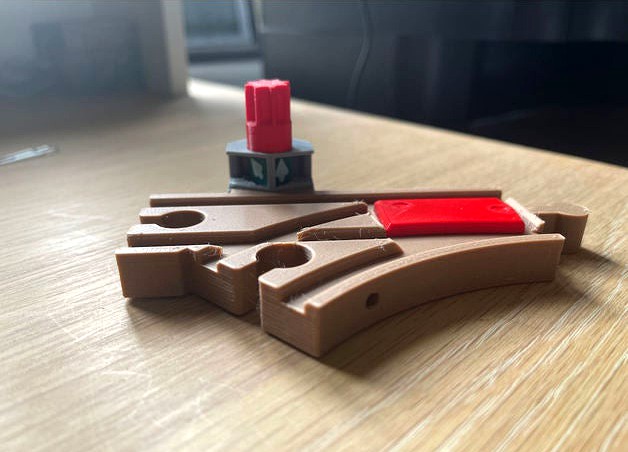
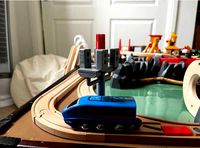
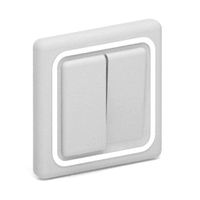
Basically, after attempting the ambitious Signal Lights (https://www.thingiverse.com/thing:4807078) I discovered that these don't work that well if you have a 2 year old in the house that takes after Wreck It Ralph. I sought to design something that was more simple in assembly and didn't require a reprint of the core track to create.
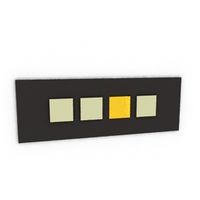
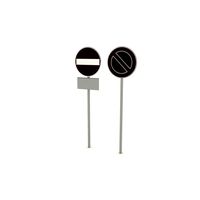
The design is meant to evoke a dwarf signal such as what one may find here (https://en.wikipedia.org/wiki/Railway_signal#/media/File:CSX_BAILEY-Marc-1-CPL-Dwarf-STOP.jpg). It is not perfect in that since you are relying on the knob to drive the signal 90 degrees you only have four options. However if all you are looking for is some for tactile play vs. accuracy, these should be perfect for a little one to enjoy.
This was printed in PolyMax grey PLA for the shroud and ProtoPasta red, green, white & black HTPLA for the coloured signs. The knob was printed in PrimaSelect Red PETG.
Assembly Notes
It is taken as given that you have already printed and assembled one of the geared interchanges/switches in advance and that you are looking to add this on to your assembled print.
In testing and prototyping, I found trying to print the shrouds in wood PLA did not work well. The brittleness of the material at these tolerances is such that the moment you try to assemble the shroud it may break and more importantly get stuck in the top recess. I would recommend against using wood PLA for this print.
1) Print the shroud that corresponds to the track type and orientation you have. The shrouds are keyed to Right Handed (RH) and Left Handed (LH) turns.
2) Print the revised Gear Knob which will have the faces for your signs
3) Print the signs. If you want a multicolour effect, you will need to don a filament change at 0.80mm
4) You will need to glue the signs onto the Gear Knob. Any commercially available superglue should do the trick. It is important that you think through how you want to glue the signs onto the knob. Think through what the signal will look like with the track going straight vs going into a turn. It may help to write this out on paper before you glue.
5) If you are adding this on to an already assembled track, you will need to knock out the existing knob from the 20mm diameter gear. I found a tiny screwdriver and a light tap from a hammer or mallet does the trick
6) Assemble the shroud onto the track paying attention to how the walls extend down to the track base. Have a look at schematics on the print for guidance.
7) Ensure the shroud ring is firmly seated into the grooves for the track before assembling the gear knob
8) Slot in the gear knob, paying attention to the aspect(direction) of the switch, you will want to make sure that the signs align to the direction the track is in before the knob is assembled into the 20mm gear at the base.
Hopefully, you should be good to go.
Brio - Mechanical (Geared) Interchange/Switch O1/P1 Trackhttps://www.thingiverse.com/thing:4813429
Brio - Mechanical (Geared) Interchange/Switch M1 Trackhttps://www.thingiverse.com/thing:4793935
Basically, after attempting the ambitious Signal Lights (https://www.thingiverse.com/thing:4807078) I discovered that these don't work that well if you have a 2 year old in the house that takes after Wreck It Ralph. I sought to design something that was more simple in assembly and didn't require a reprint of the core track to create.
The design is meant to evoke a dwarf signal such as what one may find here (https://en.wikipedia.org/wiki/Railway_signal#/media/File:CSX_BAILEY-Marc-1-CPL-Dwarf-STOP.jpg). It is not perfect in that since you are relying on the knob to drive the signal 90 degrees you only have four options. However if all you are looking for is some for tactile play vs. accuracy, these should be perfect for a little one to enjoy.
This was printed in PolyMax grey PLA for the shroud and ProtoPasta red, green, white & black HTPLA for the coloured signs. The knob was printed in PrimaSelect Red PETG.
Assembly Notes
It is taken as given that you have already printed and assembled one of the geared interchanges/switches in advance and that you are looking to add this on to your assembled print.
In testing and prototyping, I found trying to print the shrouds in wood PLA did not work well. The brittleness of the material at these tolerances is such that the moment you try to assemble the shroud it may break and more importantly get stuck in the top recess. I would recommend against using wood PLA for this print.
1) Print the shroud that corresponds to the track type and orientation you have. The shrouds are keyed to Right Handed (RH) and Left Handed (LH) turns.
2) Print the revised Gear Knob which will have the faces for your signs
3) Print the signs. If you want a multicolour effect, you will need to don a filament change at 0.80mm
4) You will need to glue the signs onto the Gear Knob. Any commercially available superglue should do the trick. It is important that you think through how you want to glue the signs onto the knob. Think through what the signal will look like with the track going straight vs going into a turn. It may help to write this out on paper before you glue.
5) If you are adding this on to an already assembled track, you will need to knock out the existing knob from the 20mm diameter gear. I found a tiny screwdriver and a light tap from a hammer or mallet does the trick
6) Assemble the shroud onto the track paying attention to how the walls extend down to the track base. Have a look at schematics on the print for guidance.
7) Ensure the shroud ring is firmly seated into the grooves for the track before assembling the gear knob
8) Slot in the gear knob, paying attention to the aspect(direction) of the switch, you will want to make sure that the signs align to the direction the track is in before the knob is assembled into the 20mm gear at the base.
Hopefully, you should be good to go.
Similar models
thingiverse
free
Brio M1 - Signal Lights by cgillstrap
..., most of the parts are reusable, with the exception of the 20mm open gear and the gear knob, which are superseded by this print.
thingiverse
free

Brio - Mechanical (Geared) Interchange/Switch - O1/P1 Track by cgillstrap
...was to only develop the o1 switch. assembly notes similar to the m1 instructions, the installation is pretty much...
thingiverse
free

Brio - Mechanical (Geared) Interchange/Switch - M1 Track by cgillstrap
...that should help push the shaft into the gear. similar to the retaining plate you may find success if...
thingiverse
free

1/8 length Brio Track by magnuznilzzon
...e with most wooden railway systems, but i know that the knobs and holes can have slightly different sizes, so print one and test?
thingiverse
free

Retractable landing gear practice switch by M_Clarke
...nel. have file for realistic knob to attach to toggle switch as well.
realistic knob: https://www.thingiverse.com/thing:4648902
thingiverse
free

Brio switchable Stop Signal
...little yellow knob under the engine (see photos). does not work with other models!
you need two 3mm screws and a paper stop sign.
thingiverse
free

Nintendo Switch anti-dust fan cap by alpinenapo
...th glue. it doens't let the dust to go inside the console if you have the switch always in the dock in an open space as i do.
thingiverse
free
Black Hawks Logo by Alex_Marovec
...n tight before the logo was going to print. i switched the filament to white. please post a picture if you make it. go blackhawks
thingiverse
free

One Piece Track for "Snow Tracks"
...sembling the "snow tracks" wheels. i will update when tested. if anyone prints in the meantime let me know how it went.
thingiverse
free

Fexible Treads for geared wheel tracks by 1stDegreeRobotBuilder
...to be printed and glued onto the track pieces. a dab of silicone may do the trick or super glue. 100% silicone works well though.
Cgillstrap
thingiverse
free

Brio - Shipping Container Bogey/Trailer by cgillstrap
...ndard brio car.
for a two tone print, do a colour change at 10mm.
printed using prusament pla grey and proto-pasta htpla black
thingiverse
free
Brio M1 - Signal Lights by cgillstrap
..., most of the parts are reusable, with the exception of the 20mm open gear and the gear knob, which are superseded by this print.
thingiverse
free

ZeroView Raspberry Pi Cover by cgillstrap
...berry pi dealers such as here:
https://thepihut.com/products/zeroview
(no endorsement to thepihut, i just bought mine from there)
thingiverse
free
Brio - Mechanical (Geared) Interchange/Switch - M1 Track by cgillstrap
... mentioned above, the next remix of this will include stop and go signals when you switch the track. that is a work in progress.
thingiverse
free
Brio - Mechanical (Geared) Interchange/Switch - O1/P1 Track by cgillstrap
...ys, interested in comments. i haven't found a mechanical switch of any sort for this pattern so hope people find this useful
thingiverse
free

Brio - British Rail Class 67 battery powered train by cgillstrap
...rd and reverse movement.
once all is assembled and in place, it should all close snugly and hopefully give you hours of enjoyment
Brio
3ddd
$1

Piermaria | Brio
...piermaria | brio
3ddd
brio , piermaria
фабрика piermaria, кресло brio
3ddd
free

NATUZZI brio
...natuzzi brio
3ddd
natuzzi , brio
47 000 полигонов
2180 * 1060 * 720 (мм.)
3ddd
free

Andromeda murano brio
... andromeda
наименование: murano brio
фабрика: andromeda
высота: 445мм
ширина:445мм
глубина:70мм
материал: метал, стекло
3ddd
free
Roche Bobois / BRIO
...obois / brio
3ddd
roche bobois , комод
комод brio sideboard. производитель: roche bobois
3ddd
free
Roche Bobois / BRIO
...ois / brio
3ddd
roche bobois , консоль
консоль brio console. производитель: roche bobois
turbosquid
$5

Brio Toy Plane
...ree 3d model brio toy plane for download as max, obj, and fbx on turbosquid: 3d models for games, architecture, videos. (1152544)
turbosquid
$8
Brio Toy Train
...l brio toy train 3d model for download as blend, fbx, and obj on turbosquid: 3d models for games, architecture, videos. (1542682)
turbosquid
$26
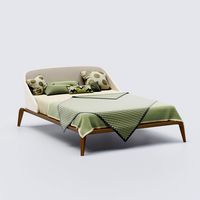
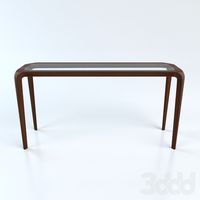
Brio Bed Roche Bobois
... brio bed roche bobois for download as mat, max, obj, and fbx on turbosquid: 3d models for games, architecture, videos. (1194760)
turbosquid
$39
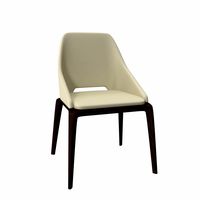
Chair BRIO Roche Bobois
... available on turbo squid, the world's leading provider of digital 3d models for visualization, films, television, and games.
humster3d
$75

3D model of Honda Brio 2012
...y a detailed 3d model of honda brio 2012 in various file formats. all our 3d models were created maximally close to the original.
Signals
archibase_planet
free
Signals
...signals
archibase planet
lift equipment elevator signals
elevator signals - 3d model for interior 3d visualization.
archibase_planet
free

Signal
...e planet
fire-extinguishing equipment fire-alarm fire signal
fire signal - 3d model (*.gsm+*.3ds) for interior 3d visualization.
turbosquid
$3
Signal
... available on turbo squid, the world's leading provider of digital 3d models for visualization, films, television, and games.
3ddd
free
Signal H-134
...signal h-134
3ddd
signal
стул signal h-134
3ddd
free

SIGNAL обеденная группа
...signal обеденная группа
3ddd
signal
обеденная группа signal loreto
3ddd
free
Signal q-088
...signal q-088
3ddd
signal , стул
кресло signal q-088
3ddd
$1
LN-SC Signal
...ln-sc signal
3ddd
стул , signal
стул ln-sc signal, польша
archive3d
free

Signals 3D Model
...ve3d
lift equipment elevator signals
elevator signals - 3d model for interior 3d visualization.
3d_export
$15

Signal Tower
...signal tower
3dexport
3ddd
$1
Berlin Signal
...al (польша)
высота: 105 см
размеры матраса: 200х160 см
материал: дерево (гевея), металл
цвет: дерево - белый, металл – чёрный
Switch
archibase_planet
free
Switch
...switch
archibase planet
switch cluster switch
light switch 1 - 3d model for interior 3d visualization.
archibase_planet
free
Switch
...switch
archibase planet
switches switch
switch 1 - 3d model (*.gsm+*.3ds) for interior 3d visualization.
archibase_planet
free
Switch
...switch
archibase planet
closer button switch cluster switch
switch - 3d model (*.3ds) for interior 3d visualization.
archibase_planet
free
Switch
...switch
archibase planet
switch closer
light switch 2 - 3d model for interior 3d visualization.
archibase_planet
free
Switch
...switch
archibase planet
closer button switch
switch n300808 - 3d model (*.gsm+*.3ds) for interior 3d visualization
archibase_planet
free
Switch
...switch
archibase planet
closer button switch
switch n141108 - 3d model (*.gsm+*.3ds) for interior 3d visualization.
archibase_planet
free

Switch
...switch
archibase planet
cluster switch closer
switch n260609 - 3d model (*.gsm+*.3ds) for interior 3d visualization.
archibase_planet
free

Switch
...switch
archibase planet
button switch closer
switch 2 - 3d model (*.gsm+*.3ds) for interior 3d visualization.
archibase_planet
free

Switch
...switch
archibase planet
button switch closer
switch n070510 - 3d model (*.gsm+*.3ds) for interior 3d visualization.
3d_export
$5

switch
...switch
3dexport
3d model of a low-poly switch
Mechanical
3d_export
$50

Mechanism
...mechanism
3dexport
mechanism -------- animation is present only in the blender file.
3d_export
$5

mechanics
...mechanics
3dexport
turbosquid
$50
mechanic
... available on turbo squid, the world's leading provider of digital 3d models for visualization, films, television, and games.
3ddd
$1
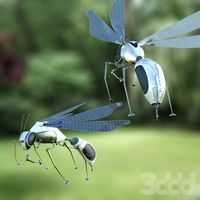
Mechanical Wasp
...mechanical wasp
3ddd
робот
mechanical wasp
3d_export
$20
Mechanical tail
...mechanical tail
3dexport
mechanical tail<br>four-part movement
3d_export
$5
mechanical ballista
...mechanical ballista
3dexport
a mechanical ballista useful for medieval or fantasy games does not contain animations
turbosquid
$59

Mechanical Part
...id
royalty free 3d model mechanical part for download as c4d on turbosquid: 3d models for games, architecture, videos. (1410833)
turbosquid
$50
Mechanical Spider
...royalty free 3d model mechanical spider for download as blend on turbosquid: 3d models for games, architecture, videos. (1599864)
turbosquid
$45

Mechanical Pencil
...royalty free 3d model mechanical pencil for download as blend on turbosquid: 3d models for games, architecture, videos. (1503379)
turbosquid
$35

Mechanical fish
...id
royalty free 3d model mechanical fish for download as max on turbosquid: 3d models for games, architecture, videos. (1152530)