Thingiverse
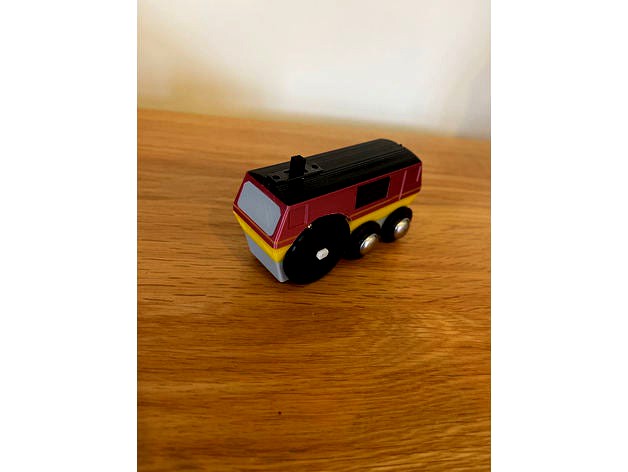
Brio - British Rail Class 67 battery powered train by cgillstrap
by Thingiverse
Last crawled date: 3 years ago
Overview
After designing track and accessories for a while, I thought I would have a go with designing and printing a battery powered train. This was probably ambitious and whilst my son is happy with it, I think the design limitations of the TT motor make this very much a compromise. That said, it is a good foundation for other train designs and a good project if you want to toy with simple electrics and printing.
Inspiration was taken from British Rail Class 67 engines which I would often see when commuting into London Paddington (https://en.wikipedia.org/wiki/British_Rail_Class_67)
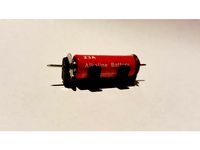
Bill of Materials
The bill of materials is as follows:
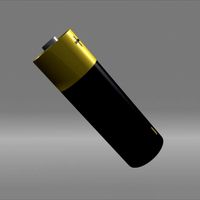
TT Motor
https://www.amazon.co.uk/gp/product/B07ZKRF6DN/ref=ppx_yo_dt_b_asin_title_o09_s00?ie=UTF8&psc=1
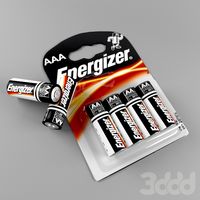
AAA Battery Holder
https://www.amazon.co.uk/gp/product/B07MSFXVFJ/ref=ppx_yo_dt_b_asin_title_o08_s00?ie=UTF8&psc=1
Switch
https://www.amazon.co.uk/gp/product/B008DFYHV2/ref=ppx_yo_dt_b_asin_title_o07_s00?ie=UTF8&psc=1
You may be able to find these at other suppliers, but this is where I sourced things. Where possible, I tried to keep things to Amazon as that seems to have a global reach. You can probably however source things locally or with a marketplace of your choice
Brio or wooden train type wheels seem very hard to source and in the end the ones I found aren’t perfect. Often the ones I found have a wider diameter than what normally comes with a completed train set. That said, the best I was able to find was with AliExpress and the supplier I used was reliable and the goods were as expected
Wheels
https://www.aliexpress.com/item/4000089359002.html
To give things an authentic look and run I sourced the wheel hubcaps from a hobbyist in the UK, one may have different success in finding things in your geography
Spring Caps/Hubcaps
https://www.hobbies.co.uk/spring-caps-pack-of-4-sp5
Axle Rod
https://www.hobbies.co.uk/axle-rods-ar5
Alternately, you may be able to print these on your own if you are good with a 3D tool.
Printing
The design is pretty straightforward, the Lower Engine Cradle holds the TT Motor and slots in quite well. The Upper Engine Cover does pretty much what it says on the tin and slots into the cradle nicely. The left and right shaft pegs are for the middle holes in the Lower Engine Cradle as the front holes should use the Axle Rods that were sourced. Alternately if you want to print the front axle, that has been sized for a 4.8-5mm shaft.
The windows and engine grill are optional and if used, likely will need to be superglued to the Upper Engine Cover
Colour Changes
Lower Engine Cradle
0 - 13.10mm Grey
13.10mm - 23.15mm Yellow
23.15mm - 30.95mm Maroon
Upper Engine Cover
0 - 2.90mm Maroon
2.90mm - 3.35mm Yellow
3.35mm - 16.85mm Maroon
16.85mm - 20.15mm Black
Assembly
The TT motor engine sandwiches between the Lower Engine Cradle and the Upper Engine Cover. It is useful to route the black and red leads under the protruding hooks before bringing it up to where the switch is.
The AAA battery holder should be positioned as far forward in the Lower Engine Cradle as possible with the leads facing the the rear. This should rest on top of the TT Motor and in between the protrusions in the Lower Engine Cradle.
The Drive Wheels will require some force to slot into the TT Motor shaft. They are printed with no tolerance to ensure proper grip. The Drive Wheels are notched in the middle to accept a rubber band to provide traction. Place a rubber band of about 15mm in diameter around the wheel to help ensure that there is dig onto the surface.
Electrical assembly will require some soldering or could be possibly done with electrical tape. You will need to connect the leads per the wiring diagram picture provided. The switch is a double throw double pole switch which allows for forward and reverse movement.
Once all is assembled and in place, it should all close snugly and hopefully give you hours of enjoyment
After designing track and accessories for a while, I thought I would have a go with designing and printing a battery powered train. This was probably ambitious and whilst my son is happy with it, I think the design limitations of the TT motor make this very much a compromise. That said, it is a good foundation for other train designs and a good project if you want to toy with simple electrics and printing.
Inspiration was taken from British Rail Class 67 engines which I would often see when commuting into London Paddington (https://en.wikipedia.org/wiki/British_Rail_Class_67)
Bill of Materials
The bill of materials is as follows:
TT Motor
https://www.amazon.co.uk/gp/product/B07ZKRF6DN/ref=ppx_yo_dt_b_asin_title_o09_s00?ie=UTF8&psc=1
AAA Battery Holder
https://www.amazon.co.uk/gp/product/B07MSFXVFJ/ref=ppx_yo_dt_b_asin_title_o08_s00?ie=UTF8&psc=1
Switch
https://www.amazon.co.uk/gp/product/B008DFYHV2/ref=ppx_yo_dt_b_asin_title_o07_s00?ie=UTF8&psc=1
You may be able to find these at other suppliers, but this is where I sourced things. Where possible, I tried to keep things to Amazon as that seems to have a global reach. You can probably however source things locally or with a marketplace of your choice
Brio or wooden train type wheels seem very hard to source and in the end the ones I found aren’t perfect. Often the ones I found have a wider diameter than what normally comes with a completed train set. That said, the best I was able to find was with AliExpress and the supplier I used was reliable and the goods were as expected
Wheels
https://www.aliexpress.com/item/4000089359002.html
To give things an authentic look and run I sourced the wheel hubcaps from a hobbyist in the UK, one may have different success in finding things in your geography
Spring Caps/Hubcaps
https://www.hobbies.co.uk/spring-caps-pack-of-4-sp5
Axle Rod
https://www.hobbies.co.uk/axle-rods-ar5
Alternately, you may be able to print these on your own if you are good with a 3D tool.
Printing
The design is pretty straightforward, the Lower Engine Cradle holds the TT Motor and slots in quite well. The Upper Engine Cover does pretty much what it says on the tin and slots into the cradle nicely. The left and right shaft pegs are for the middle holes in the Lower Engine Cradle as the front holes should use the Axle Rods that were sourced. Alternately if you want to print the front axle, that has been sized for a 4.8-5mm shaft.
The windows and engine grill are optional and if used, likely will need to be superglued to the Upper Engine Cover
Colour Changes
Lower Engine Cradle
0 - 13.10mm Grey
13.10mm - 23.15mm Yellow
23.15mm - 30.95mm Maroon
Upper Engine Cover
0 - 2.90mm Maroon
2.90mm - 3.35mm Yellow
3.35mm - 16.85mm Maroon
16.85mm - 20.15mm Black
Assembly
The TT motor engine sandwiches between the Lower Engine Cradle and the Upper Engine Cover. It is useful to route the black and red leads under the protruding hooks before bringing it up to where the switch is.
The AAA battery holder should be positioned as far forward in the Lower Engine Cradle as possible with the leads facing the the rear. This should rest on top of the TT Motor and in between the protrusions in the Lower Engine Cradle.
The Drive Wheels will require some force to slot into the TT Motor shaft. They are printed with no tolerance to ensure proper grip. The Drive Wheels are notched in the middle to accept a rubber band to provide traction. Place a rubber band of about 15mm in diameter around the wheel to help ensure that there is dig onto the surface.
Electrical assembly will require some soldering or could be possibly done with electrical tape. You will need to connect the leads per the wiring diagram picture provided. The switch is a double throw double pole switch which allows for forward and reverse movement.
Once all is assembled and in place, it should all close snugly and hopefully give you hours of enjoyment
Similar models
thingiverse
free

18650 Charging station
...plan to make a lot i recommend aliexpress or similar for the parts. the flexible battery holder is not...
thingiverse
free

Adjustable Power Source - Hot Wheels by NHSE
...o-universal-switching-replacement-connectors/dp/b013p01udc?ie=utf8&psc=1&redirect=true&ref_=oh_aui_detailpage_o01_s00
thingiverse
free

Adafruit Trinket Project Box (Skate Lights) by chillsdon
...s a little over engineered... snap fit might have been good or even replacing the bottom bolt for a tab and slot system, but hey.
thingiverse
free

Lithophane Holder/Wall Light
...ted to a wall.
switches i usedhttps://www.amazon.co.uk/gp/product/b07gbbgds3/ref=ppx_yo_dt_b_asin_title_o00_s00?ie=utf8&psc=1
thingiverse
free

Replicator 2 build plate leveler by alexh
....co.uk/gp/product/b00991ba5a/ref=oh_aui_detailpage_o05_s00?ie=utf8&psc=1
designed from scratch but idea based on thing 222379
thingiverse
free

Model ferris wheel for steam engine by boxermad84
... cap bolts
8x m3 x 4mm grub screw
12 x m3 x 15mm socket head cap bolts
3mmx2mm etal tube for cart bushings
8x 22 x 8 x 7 bearings
thingiverse
free
Aqara Light Switch Bracket by Madman1027
...00?ie=utf8&psc=1
magnets:
https://www.amazon.co.uk/gp/product/b06x977k8l/ref=ppx_yo_dt_b_asin_image_o07_s00?ie=utf8&psc=1
thingiverse
free

Curved Lithophane Holder by vbdcbrenner
..._s00?ie=utf8&psc=1
switch - https://www.amazon.com/gp/product/b07cg2vgwg/ref=ppx_yo_dt_b_asin_title_o01_s00?ie=utf8&psc=1
thingiverse
free
23A Battery Holder by jack_dark
...an get this office supply assortment: https://www.amazon.com/gp/product/b01eim4yvq/ref=oh_aui_search_detailpage?ie=utf8&psc=1
thingiverse
free

Desk Fan by NebNorse
...lpages04?ie=utf8&psc=1
motor control: https://www.amazon.com/gp/product/b01cnl6imc/ref=od_aui_detailpages04?ie=utf8&psc=1
Cgillstrap
thingiverse
free

Brio - Shipping Container Bogey/Trailer by cgillstrap
...ndard brio car.
for a two tone print, do a colour change at 10mm.
printed using prusament pla grey and proto-pasta htpla black
thingiverse
free

Brio M1 - Signal Lights by cgillstrap
..., most of the parts are reusable, with the exception of the 20mm open gear and the gear knob, which are superseded by this print.
thingiverse
free

ZeroView Raspberry Pi Cover by cgillstrap
...berry pi dealers such as here:
https://thepihut.com/products/zeroview
(no endorsement to thepihut, i just bought mine from there)
thingiverse
free
Brio - Mechanical Switch - Signals by cgillstrap
...o the direction the track is in before the knob is assembled into the 20mm gear at the base.
hopefully, you should be good to go.
thingiverse
free

Brio - Mechanical (Geared) Interchange/Switch - M1 Track by cgillstrap
... mentioned above, the next remix of this will include stop and go signals when you switch the track. that is a work in progress.
thingiverse
free

Brio - Mechanical (Geared) Interchange/Switch - O1/P1 Track by cgillstrap
...ys, interested in comments. i haven't found a mechanical switch of any sort for this pattern so hope people find this useful
Brio
3ddd
$1

Piermaria | Brio
...piermaria | brio
3ddd
brio , piermaria
фабрика piermaria, кресло brio
3ddd
free

NATUZZI brio
...natuzzi brio
3ddd
natuzzi , brio
47 000 полигонов
2180 * 1060 * 720 (мм.)
3ddd
free

Andromeda murano brio
... andromeda
наименование: murano brio
фабрика: andromeda
высота: 445мм
ширина:445мм
глубина:70мм
материал: метал, стекло
3ddd
free
Roche Bobois / BRIO
...obois / brio
3ddd
roche bobois , комод
комод brio sideboard. производитель: roche bobois
3ddd
free
Roche Bobois / BRIO
...ois / brio
3ddd
roche bobois , консоль
консоль brio console. производитель: roche bobois
turbosquid
$5

Brio Toy Plane
...ree 3d model brio toy plane for download as max, obj, and fbx on turbosquid: 3d models for games, architecture, videos. (1152544)
turbosquid
$8

Brio Toy Train
...l brio toy train 3d model for download as blend, fbx, and obj on turbosquid: 3d models for games, architecture, videos. (1542682)
turbosquid
$26

Brio Bed Roche Bobois
... brio bed roche bobois for download as mat, max, obj, and fbx on turbosquid: 3d models for games, architecture, videos. (1194760)
turbosquid
$39
Chair BRIO Roche Bobois
... available on turbo squid, the world's leading provider of digital 3d models for visualization, films, television, and games.
humster3d
$75

3D model of Honda Brio 2012
...y a detailed 3d model of honda brio 2012 in various file formats. all our 3d models were created maximally close to the original.
67
3ddd
$1
ГАЗ 67
...газ 67
3ddd
газ 67, текстуры в архиве.
3ddd
$1

Pillows 67
...pillows 67
3ddd
подушка
pillows 67.i hope you like it.thank you !
turbosquid
$29
Landscape 67
...squid
royalty free 3d model landscape 67 for download as obj on turbosquid: 3d models for games, architecture, videos. (1642734)
turbosquid
$15

67 Mustang
...bosquid
royalty free 3d model 67 mustang for download as dwg on turbosquid: 3d models for games, architecture, videos. (1163583)
turbosquid
$17

Set-67
...oyalty free 3d model set-67 for download as max, obj, and fbx on turbosquid: 3d models for games, architecture, videos. (1213848)
turbosquid
$15

Chair 67
...alty free 3d model chair 67 for download as max, obj, and fbx on turbosquid: 3d models for games, architecture, videos. (1497572)
turbosquid
$10

Bedcloth 67
...y free 3d model bedcloth 67 for download as max, fbx, and obj on turbosquid: 3d models for games, architecture, videos. (1531145)
turbosquid
$6

Table 67
...alty free 3d model table 67 for download as max, obj, and fbx on turbosquid: 3d models for games, architecture, videos. (1503893)
turbosquid
$6
Lamp 67
...yalty free 3d model lamp 67 for download as max, obj, and fbx on turbosquid: 3d models for games, architecture, videos. (1500794)
turbosquid
$20

Bath 67
... free 3d model bath 67 for download as max, dxf, fbx, and dwg on turbosquid: 3d models for games, architecture, videos. (1277105)
British
3d_ocean
$9

British Clock
...british clock
3docean
british clock interior
quality model british clock for your interior.
3d_export
$6
british car
...british car
3dexport
british car
3ddd
$1

British flag
...british flag
3ddd
флаг
british flag
3d_ocean
$5

Decorative british box
...decorative british box
3docean
box british decorative
decorative. quality model british box
turbosquid
$10
British sofa
...squid
royalty free 3d model british sofa for download as max on turbosquid: 3d models for games, architecture, videos. (1435097)
turbosquid
$5

British Flag
...squid
royalty free 3d model british flag for download as max on turbosquid: 3d models for games, architecture, videos. (1332182)
3ddd
$1
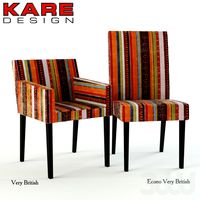
Kare Very British
...
szerokość (cm):54
wysokość (cm):79
głębokość (cm):59
econo very british
szerokość (cm):49
wysokość (cm):99
głębokość (cm):58
3ddd
$1

British Collection
... чашка
british collection.
в наборе: кресло, две подушки, картина, чашка.
3ds max 2011,2014,obj + textures
turbosquid
$30

British Policewoman
... available on turbo squid, the world's leading provider of digital 3d models for visualization, films, television, and games.
turbosquid
$15

British Guitar
... available on turbo squid, the world's leading provider of digital 3d models for visualization, films, television, and games.
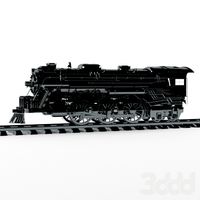
Train
archibase_planet
free

Train
...train
archibase planet
train fast train high-speed train
train speed n221014 - 3d model (*.3ds) for exterior 3d visualization.
3d_ocean
$29

Train
...train
3docean
locomotive train
hello i havolk train
3d_export
$5

train
...train
3dexport
train
3d_export
$5

train
...train
3dexport
train
3d_export
$10

train
...train
3dexport
a lowpoly train...
3ddd
$1
train
...train
3ddd
паровоз
train old
3d_ocean
$12

Train
...train
3docean
child children model old retro toy train wood wooden
old wooden children’s train.
3d_ocean
$5

toy train
...toy train
3docean
kids toy train
3d model toy train
turbosquid
$55
train
...n
turbosquid
royalty free 3d model train for download as max on turbosquid: 3d models for games, architecture, videos. (1477635)
turbosquid
$50

train
...n
turbosquid
royalty free 3d model train for download as max on turbosquid: 3d models for games, architecture, videos. (1419091)
Battery
3d_ocean
$2
Battery
...battery
3docean
battery electronic
a high quality battery .
3d_export
free
battery
...battery
3dexport
battery
3d_ocean
$5
Battery
...battery
3docean
battery electronics
a classic 6 v battery, high poly with materials
3d_ocean
$3
Batteries
...batteries 3docean aa aaa batteries battery d electronics energy materials power subdivision uv unwrapped aa,...
3d_export
$19
Lead-acid battery storage battery lithium battery
...ttery storage battery lithium battery
3dexport
1.lead-acid battery storage battery lithium battery 2.files include 3dmax obj fbx
3d_ocean
$7

Battery Model
...battery model
3docean
big battery car battery vehicle battery
car battery, big battery, vehicle battery.
3ddd
free
battery energier
...battery energier
3ddd
battery energier , батарейка
battery energier
turbosquid
free
battery
...battery
turbosquid
free 3d model battery for download as obj on turbosquid: 3d models for games, architecture, videos. (1151676)
3d_ocean
$1
Battery Model
...lack minus plus white yellow
this is battery model is about 1000 triangles. turntable preview is smoothed version of the battery.
3d_export
$10
battery 18650
...battery 18650
3dexport
battery 18650
Rail
3d_ocean
$5
rails
...rails
3docean
old rails rails sleepers
old rails
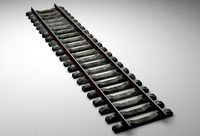
archibase_planet
free
Rail
...chibase planet
rail railing handrail guard-rail
rail forged fence n310814 - 3d model (*.gsm+*.3ds) for exterior 3d visualization.
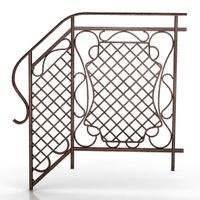
archibase_planet
free
Rail
...rail
archibase planet
handrail railing guard-rail
rail n220914 - 3d model (*.gsm+*.3ds) for interior 3d visualization.
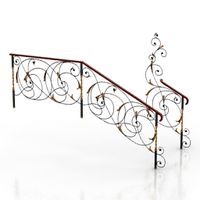
archibase_planet
free

Rail
...rail
archibase planet
railing hand-rail banisters
rail n130309 - 3d model (*.gsm+*.3ds) for interior 3d visualization.
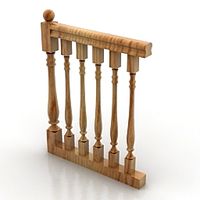
archibase_planet
free
Rail
...rail
archibase planet
railing hand-rail banisters
rail n270510 - 3d model (*.gsm+*.3ds) for interior 3d visualization.
archibase_planet
free
Railing
...
archibase planet
railing handrail fence guard-rail
railing n140314 - 3d model (*.gsm+*.3ds+*.max) for exterior 3d visualization.
archibase_planet
free

Railing
...railing
archibase planet
railing
railing- 3d model (*.gsm+*.3ds) for interior 3d visualization.
archibase_planet
free
Railing
...railing
archibase planet
railing enclosure barrier
light railing - 3d model for interior 3d visualization.
archibase_planet
free
Rail
...rail
archibase planet
metal railing
rail n280608 - 3d model (*.gsm+*.3ds) for interior 3d visualization.
archibase_planet
free
Railing
...railing
archibase planet
railing kitchen ware
railing 1 - 3d model (*.gsm+*.3ds) for interior 3d visualization.
Class
3d_export
free

Class room
...class room
3dexport
class room 3d model
3ddd
free

Capellini / Class
...capellini / class
3ddd
capellini
стул class фирмы capellini
3ddd
free

Valmori - Class
...valmori - class
3ddd
valmori
bed from valmori model class
3ddd
$1
LUCECREA CLASS
...lucecrea class
3ddd
lucecrea class
торшер фабрики lucecrea class_коллекция
bakara contract_art.376351 da a
turbosquid
$15
BaikaL class Frigate and UraL class Corvette
... available on turbo squid, the world's leading provider of digital 3d models for visualization, films, television, and games.
3ddd
$1
vibieffe class armchair
...vibieffe class armchair
3ddd
vibieffe
vibieffe class armchair
3ddd
$1
Baccarat Glass Class
...
источник:http://www.select-interiormarket.com/en/baccarat-glass-class-chair-2601025-philippe-starck
текстуры имеются
turbosquid
$85

Class Brooklyn
...alty free 3d model class brooklyn for download as jpg and max on turbosquid: 3d models for games, architecture, videos. (1461215)
3d_export
$5

class room
...class room
3dexport
turbosquid
$69

Mercedes Class
...d model mercedes class for download as 3ds, obj, c4d, and fbx on turbosquid: 3d models for games, architecture, videos. (1440493)
Powered
turbosquid
$100

power
...ower
turbosquid
royalty free 3d model power for download as on turbosquid: 3d models for games, architecture, videos. (1421990)
3d_export
$5

Power
...power
3dexport
3d_export
$5

power outlets
...power outlets
3dexport
power outlets
3ddd
$1

lion power
...lion power
3ddd
лев , статуя
lion power gold sculpture
3ddd
$1

Sea Power
...
компас , море , часы
часы с компасом sea power
3ddd
free

Meridiani / Power
...power
3ddd
meridiani , круглый
стол power производитель meridiani, диаметр 120,высота 67
3d_export
$5

Power Surge
...power surge
3dexport
the power surge is a all mesh carnival ride to lower in game part count and lag
turbosquid
$8

Airport Ground Power Unit (AXA Power )
... available on turbo squid, the world's leading provider of digital 3d models for visualization, films, television, and games.
turbosquid
$50

Power Houser
...rbosquid
royalty free 3d model power houser for download as on turbosquid: 3d models for games, architecture, videos. (1333800)
3d_export
$5

power outlet
...power outlet
3dexport
power outlet<br>format file maya 2018, 3d max 2017, obj, fbx