Thingiverse

BoxEnder v3a Remix/Additions by DPS Design by DPS_Design
by Thingiverse
Last crawled date: 3 years, 3 months ago
Update 01/02/2021: After several complaints that the Czech file naming was confusing and or irritating, I have removed ALL Czech named files and replaced them with only English. The zip file has been removed.
I have added another choice for the right side cover. The new side cover will allow for the use of the Raspberry Pi video cable as well as the camera cable.
Update 11/27/2020: Added a new version of the back cover. This has a large hole for cables to exit out the lower right side. I've added a picture of the new rear cover - it's white so you can see the detail better.
Update 11/22/2020: I added a new version of the right side panel that has the Raspberry Pi camera ribbon cable in a better place - it's now more in line with the connector on the board.
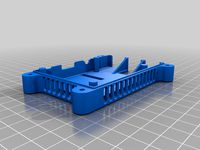
I found intommy to have made the best external enclosure for the Ender 3 Pro, but I needed to add my two cents.
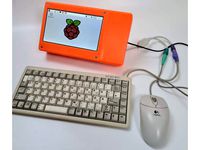
First, I needed to add my 7" LCD panel for OctoPrint. I needed something sturdy that will last, so the base and case are thick. I added a hole to the top cover to allow HDMI and USB cables to pass through.
My touch panel is the MakerFocus Raspberry Pi Screen 7 Inch Capacitive Touch Screen TFT LCD Display HDMI Module 800x480 for RPI 4B/3B+
https://www.amazon.com/gp/product/B07NYRBLPJ/ref=ppx_yo_dt_b_asin_title_o02_s03?ie=UTF8&psc=1
Then I thought the front panel was a little boring, so I extruded Creality and a panel behind it to add three LEDs and give it some life. Print that inner panel whatever color you wish and use white LEDs to shine through, or any combination of plastic colors - LED colors, color shifting, or controllable
I use two buck converters like intommy does, but with a slight difference. The first powers the Raspberry Pi. I used a 24V fan, so I use the second for my LEDs. If you need a wiring drawing for this, leave a comment asking for it and I will sketch some different options for you.
I have all screws holes tapped to M3-0.5 for ease of assembly, except for the 12864 original LCD panel screws, they are M4-0.7.
I use the Raspberry Pi IR camera with the ribbon cable, so I added a right side panel allowing that cable to enter near the raspberry.
I remixed the left side panel to direct airflow (through the Creality extrusion) across the motherboard, the Raspberry Pi, the LCD panel and the LEDs up front.
The 92mm fan does a great job of cooling all of this.https://www.amazon.com/gp/product/B08BLH5GSN/ref=ppx_yo_dt_b_search_asin_title?ie=UTF8&psc=1
I have the printer cables webbed and exiting to the right through a hole I added to the rear panel.
Yes, these are 230mm wide. The firmware on the Ender 3 (+ pro) is 220x220mm, yet the stock bed is actually 235x235mm. I changed my bed size to 230x230 in the firmware and in Cura - it took about 5 minutes.
The original files have some different options. You can get the rest of intommy's .stl files from their site: https://www.thingiverse.com/intommy/designs
I have added another choice for the right side cover. The new side cover will allow for the use of the Raspberry Pi video cable as well as the camera cable.
Update 11/27/2020: Added a new version of the back cover. This has a large hole for cables to exit out the lower right side. I've added a picture of the new rear cover - it's white so you can see the detail better.
Update 11/22/2020: I added a new version of the right side panel that has the Raspberry Pi camera ribbon cable in a better place - it's now more in line with the connector on the board.
I found intommy to have made the best external enclosure for the Ender 3 Pro, but I needed to add my two cents.
First, I needed to add my 7" LCD panel for OctoPrint. I needed something sturdy that will last, so the base and case are thick. I added a hole to the top cover to allow HDMI and USB cables to pass through.
My touch panel is the MakerFocus Raspberry Pi Screen 7 Inch Capacitive Touch Screen TFT LCD Display HDMI Module 800x480 for RPI 4B/3B+
https://www.amazon.com/gp/product/B07NYRBLPJ/ref=ppx_yo_dt_b_asin_title_o02_s03?ie=UTF8&psc=1
Then I thought the front panel was a little boring, so I extruded Creality and a panel behind it to add three LEDs and give it some life. Print that inner panel whatever color you wish and use white LEDs to shine through, or any combination of plastic colors - LED colors, color shifting, or controllable
I use two buck converters like intommy does, but with a slight difference. The first powers the Raspberry Pi. I used a 24V fan, so I use the second for my LEDs. If you need a wiring drawing for this, leave a comment asking for it and I will sketch some different options for you.
I have all screws holes tapped to M3-0.5 for ease of assembly, except for the 12864 original LCD panel screws, they are M4-0.7.
I use the Raspberry Pi IR camera with the ribbon cable, so I added a right side panel allowing that cable to enter near the raspberry.
I remixed the left side panel to direct airflow (through the Creality extrusion) across the motherboard, the Raspberry Pi, the LCD panel and the LEDs up front.
The 92mm fan does a great job of cooling all of this.https://www.amazon.com/gp/product/B08BLH5GSN/ref=ppx_yo_dt_b_search_asin_title?ie=UTF8&psc=1
I have the printer cables webbed and exiting to the right through a hole I added to the rear panel.
Yes, these are 230mm wide. The firmware on the Ender 3 (+ pro) is 220x220mm, yet the stock bed is actually 235x235mm. I changed my bed size to 230x230 in the firmware and in Cura - it took about 5 minutes.
The original files have some different options. You can get the rest of intommy's .stl files from their site: https://www.thingiverse.com/intommy/designs
Similar models
thingiverse
free
Raspberry Pi Case Cover with Cutouts
...d display ribbon cables.
designed to be used with my other remix ender 5 lcd cover case:https://www.thingiverse.com/thing:4066411
thingiverse
free

Ender-5 station (LCD + Raspberry Pi + Camera + Power Cable Hole) by Simonp22
...e for a raspberry pi camera ribbon cable and an extra hole for a power cable to fit through. printed on an ender 5 with supports
thingiverse
free

Raspberry Pi Zero single-case by leadpan
...i and micro-usb.
update:
added hole for power-led.
single-case for raspberry pi zero. slides right in with gpio pins.
click like
thingiverse
free

Raspberry Pi 7 inch LCD stand by Stevezuki
...r.
i have used m3*8mm screws
7th january 2016. as requested, i have added 1 extra file with 70mm hole spacing to suit a 5inch lcd
thingiverse
free

Raspberry Pi tablet by laird
...ickey mouse.
still looking for an hdmi cable that's short and flexible, so that i can pack the raspberry pi into the display.
thingiverse
free

Eleduino 7" TFT Front for Raspberry Pi by JPgxuAHFR22RQo
...t side to cover the connectionports (hdmi/usb). i will use it to add some triggers/buttons too (to turn off/on the lcd or light).
thingiverse
free

Raspberry Pi 4 case designed for HDMI connected screen and pi camera ribbon by chiefpeon1
...hdmi to hdmi mini connector for the 3.5" touch screen. i also added a slot for the pi camera ribbon cable to exit the case.
thingiverse
free

Raspberry Pi camera cable holder by Celta
...to the side with a top cover to prevent the cable from getting out
the wall side has a tiny cover to hide double sided tape (1mm)
thingiverse
free

Ender 3 LCD Case for Raspberry Pi 4 with hexagon nut for drill arm by petemagnusson
...dded a hole for the pi camera to go out the back and added a hexagon nut fitting for my drill arm where i have a web cam mounted.
thingiverse
free
Case for Raspberry Pi with 7inch HDMI Display by MegaCadler
...back side provide cooling air as well as access to raspi pins and sd card.
the side cap can be removed to plug usb or lan cables.
V3A
thingiverse
free

V3A & MR11 Altoids Insert by jlaqua
...v3a & mr11 altoids insert by jlaqua
thingiverse
an altoids tin insert to hold a maggards mr11, v3a safety razor, and blades.
thingiverse
free

Custom Handle For AM8 2040 V3a by dstasiak
...custom handle for am8 2040 v3a by dstasiak
thingiverse
i've modified this handel to accept an m5 bold with a 8mm head.
thingiverse
free
MHQ Arm-V3a, Modified for 3 Bolt Motor Mounts by cmreel
...so updated the solidworks file to include both bolt patters so one or the other can be selected when making future modifications.
thingiverse
free

Case for BusPirate (v3a) by Jake
...abel, as i could have made mistakes or errors. make your own label, check your coloring and pinout and proceed at your own risk.
thingiverse
free

3D printed RC truck V3: Gearbox V3A by MrCrankyface
...nstagram.com/mr.crankyface/
3d hubs: https://www.3dhubs.com/malm%c3%b6/hubs/mrcrankyface
patreon: http://patreon.com/mrcrankyface
thingiverse
free

k40 printed helpers by jorgerobles
...metal sheet folds. use v3a for main area, and v3av3b (or v3c) for laser cabinet. used a dremel trio...
thingiverse
free

Ultimaker 2 filament guide by dhg864
...guide for the filament in the base. filaguide-basemount-v3 and v3a added. in contains an additional cleaner/oiler section combined with...
thingiverse
free
![[Updated] Tom's easy spool holder with 8mm rod for Prusa i3 MK2 (or Plus) V3 by tomulinek](/t/8829690.jpg)
[Updated] Tom's easy spool holder with 8mm rod for Prusa i3 MK2 (or Plus) V3 by tomulinek
...part "v3a" (less material, faster print) and filament guide (v3a for full spools where filament tends to slide aside....
thingiverse
free

Cobbllebot Vertical Mounted dual extruder by azndud3
...possible to use two v3b in place of the v3a bothrequire a 15-20mm m3 screw to mount v3c. v3c...
Dps
turbosquid
$2

DP
... available on turbo squid, the world's leading provider of digital 3d models for visualization, films, television, and games.
3ddd
$1

DP 119 Led + DP 118 R7s
...romehttp://www.slvlightingdirect.com/shop-office-lighting/display-lights/slv-146782-dp-118-r7s-mirror-light-chrome.html
turbosquid
$40

DP-28
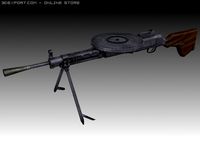
...royalty free 3d model dp-28 for download as 3ds, max, and obj on turbosquid: 3d models for games, architecture, videos. (1301599)
turbosquid
$20

DP 28
...yalty free 3d model dp 28 for download as blend, obj, and fbx on turbosquid: 3d models for games, architecture, videos. (1571923)
3d_export
$20
Accuphase DP-450
...accuphase dp-450
3dexport
turbosquid
$60

GunShip DP-20
...yalty free 3d model gunship dp-20 for download as max and fbx on turbosquid: 3d models for games, architecture, videos. (1195768)
3d_ocean
$5

Airplane DP interior
...0/0/0/0/mtv360/www/dp/index.html 360 degree view,texture,3ds cube box, interior, texture:psd, texture:png (transparent)!!!, 6/...
3d_export
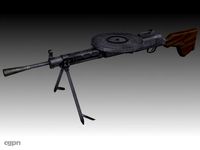
$105
DP 28 3D Model
...
dp 28 russian 762 gun firearm world war ii machine automatic textured low poly game ready
dp 28 3d model plutonius 3754 3dexport
3ddd
$1
Люстра Sylcom 1386/DP
...тра sylcom 1386/dp
3ddd
sylcom
http://www.sylcomsrl.com/index_en.html
люстра sylcom 1386/dp.
высота 70см, диаметр 78см.
cg_studio
$50
DP-28 Textured3d model
... textured3d model
cgstudio
.3ds .max - dp-28 textured 3d model, royalty free license available, instant download after purchase.
Remix
turbosquid
$5

MODA Collection Remix Chair
... available on turbo squid, the world's leading provider of digital 3d models for visualization, films, television, and games.
3d_export
$12

remix yamaha rm1x
...remix yamaha rm1x
3dexport
geometry triangles 15.2k vertices 7.6k pbr no textures 1 materials 1 uv layers yes
3d_ocean
$5

Vray fabric Kvadrat remix green - tileable
...th vray and 3dsmax. high-resolution texture images (2000×2000 px) file included: shader vray 2.40 texture image 3ds max 2011 file
turbosquid
$20

Gerrit Rietveld 1938 Zig Zag Chair Remix
... available on turbo squid, the world's leading provider of digital 3d models for visualization, films, television, and games.
3d_export
$10

multicolored remix parametric table furniture
... fbx, obj, mtl, archive with textures. the model has no glitches. render and materials - vray . without using plugins. good use!
3ddd
$1

Barovier&Toso / Manhattan Remix 7192
... 004293-142405
в коллекции есть люстры 7, 9, 12 рожковые. диаметр соответственный 1000, 1250, 1500 мм.
3ddd
$1

Muuto fiber chair
...grey/grey, dusty green/dusty green, nature/oak, natural white/oak upholstery options remix 183/black, remix 133/grey, remix 643/dusty red leather options black...
3ddd
$1

Barovier&Toso 7190-7195
...7190-7195 3ddd barovier&toso потолочнай люстра фабрики barovier&toso;, коллекция manhattan remix артикул 7190-7195. размеры в inches: 39"...
3d_export
$5

3D Locking Handle Weatherproof Storage Box Container
...handle weatherproof storage box container 3dexport new, improved and remixd! no screws required. print-in-place. weatherproof. parametric. 2 parts. easy...
cg_studio
$49

HTC One Mini 2 Amber Gold3d model
...cell phone mobile cellular super lcd touchscreen touch screen remix amber gold .max .obj .mb .lwo .fbx .c4d .3ds...
Additions
turbosquid
$5

addition
... available on turbo squid, the world's leading provider of digital 3d models for visualization, films, television, and games.
design_connected
$16

Addit Swift
...addit swift
designconnected
danerka addit swift computer generated 3d model. designed by pelikan design.
3d_export
$7

FIREPLACE ADDITIONALS 3D Model
...tionals 3d model
3dexport
fireplace plier coal brush shovel screen fire
fireplace additionals 3d model loscarpello 55166 3dexport
turbosquid
$7

PAHL Table With Additional Module
...pahl table with additional module for download as max and fbx on turbosquid: 3d models for games, architecture, videos. (1682973)
3ddd
$1

Illulian carpets (addition 3)
...lulian , ковер
количество текстур: 18
размер min/max: 637 x 4156
производитель: illulian
3ddd
free

Illulian carpets (addition 2)
...lulian , ковер
количество текстур: 17
размер min/max: 660 x 2953
производитель: illulian
turbosquid
$24
Modern table in green,blue with addition of red
... available on turbo squid, the world's leading provider of digital 3d models for visualization, films, television, and games.
turbosquid
$10

MIWE Cube additional components 3D model
...nts 3d model for download as max, max, max, fbx, obj, and max on turbosquid: 3d models for games, architecture, videos. (1601300)
turbosquid
$10

MIWE Cube additional components 3D model
...nts 3d model for download as max, max, max, fbx, obj, and max on turbosquid: 3d models for games, architecture, videos. (1601309)
turbosquid
$10

MIWE Cube additional components 3D model
...nts 3d model for download as max, max, max, fbx, obj, and max on turbosquid: 3d models for games, architecture, videos. (1601304)
Design
3ddd
$1
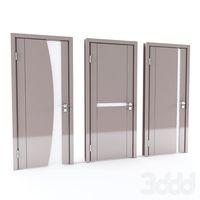
LINE DESIGN (Doors Design)
...line design (doors design)
3ddd
дверь
modern doors design - line design concept
turbosquid
$5

designer
...alty free 3d model designer for download as max, obj, and fbx on turbosquid: 3d models for games, architecture, videos. (1422665)
3ddd
$1
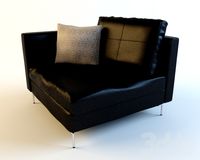
VER DESIGN
...ver design
3ddd
ver design
кресло ver design
3ddd
$1
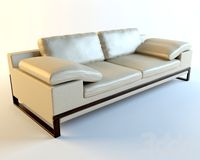
VER DESIGN
...ver design
3ddd
ver design
диван ver design
3ddd
$1
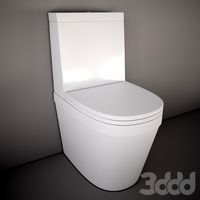
Bagno design
...bagno design
3ddd
bagno design , унитаз
санитария bagno design
3ddd
free
VER DESIGN
...ver design
3ddd
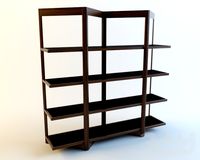
ver design , стеллаж
полка ver design
3ddd
$1
VER DESIGN
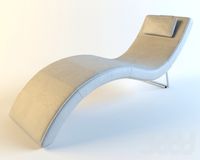
...ver design , лежак , шезлонг
шезлонг ver design
3d_export
free
designer
..., trees and much more. the model has 3 types of parts: - 4 cells - 6 cells - 8 cells the *.max file contains 5 colored materials.
3d_export
$19

level design
...level design
3dexport
you can use this design (level design) in your own game.
3d_export
$7
Crusher design
...crusher design
3dexport
crusher design