Thingiverse
Bondtech BMG on a Taz 4 (or Taz 3-5--needs slight mod for Taz 6) by jaln
by Thingiverse
Last crawled date: 3 years, 1 month ago
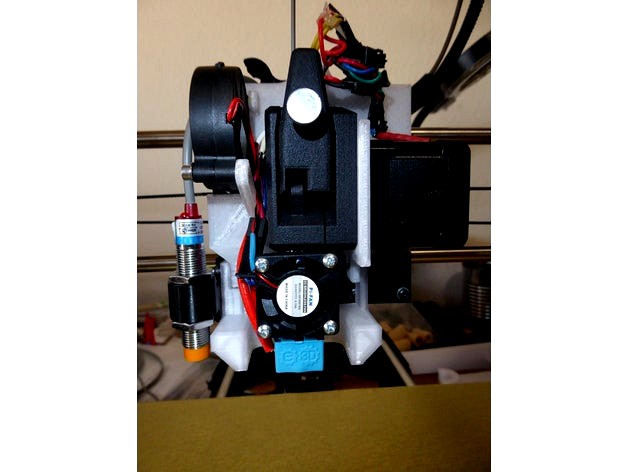
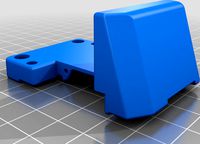
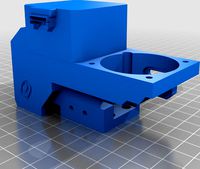
This is my Bondtech BMG with E3D V6 hotend mod for my Taz 4. I will also work on a Taz 3-5. It will work on a Taz 6 but it needs a minor mod to attach the +X limit switch. I will eventually get around to that and include the new part when i get time. You might be able to glue or drill a hole to attach the limit switch until I get around to it.
This setup is great. Accurate and reliable, especially after my removable metal bed and precision bearing upgrades.
I forgot to mention that I switched to 1.75mm filament. I don't recall if the Bondtech BMG has a 3.0mm filament model.
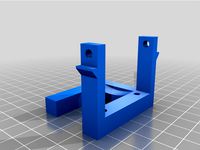
When printing the lower air duct I did not use support inside of the duct itself. I used some on the outside. Internal walls are designed to eliminate the need for support which would be difficult to remove. The duct on the extruder holder needs some internal support. Try to keep it to a minimum because it can be difficult to remove if you over do it.
Parts:
Standard (not mirrored) Bondtech BMG
E3d V6 hotend
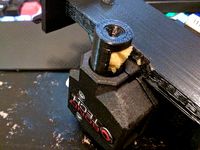
A 24V blower fan (the one in the photo is actually a 12V version which runs fast. I have 24V ones on the way but the 12V works. I just keep the speed turned down some).
A 5V 30mm fan for the hotend cooling fins. The duct comes with the E3d kit. Also a short hunk of PTFE tube to connect inside the Bondtech BMG
I used a NEMA17 40mm length stepper.
The BMG and E3D I ordered from 3DMakerworld.
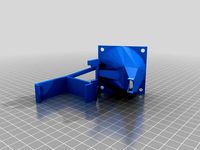
Note that the extruder mounting bracket has two plugs for the duct to the left of the BMG extruder. The bottom screw on the BMG needs to be tightened from the left sid of the fan duct and the two plugs then cove the hole for the 2.5mm hex wrench. The outside left plug is not problem but the inner (right) plug require some finesse. I used some fine needle nose pliers and a small flat blade screwdriver to coax it into the hole.
A few M3 x 10-12mm screws and washers.
2 M3 x18-20 screws and washers.
I used 4 brass M3 inserts (3x3x4mm O.D.) for the hotend blower fan and in the lower air duct to attach it to the extruder holder.
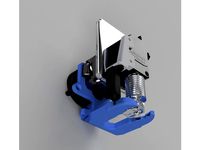
I also included the mount for the 12mm inductive probe which I show here, but really that should be elsewhere because it requires a metal bed to work. If you do not have a metal bed or intend to use a probe to auto level than just ignore the probe clamp.
The interface between the air duct and the extruder holder duct should be clean and carefully fitted to prevent air leaks.
You have to change your E-steps to about 455. I think that was the starting suggestion and after calibrating be extruding 100mm of filament a few times, I did not make any changes to the starting number. That cange can be made from the LCD panel Control settings. Remember to save the settings afterwards so it persists. This can also be accomplished from a command line in Simplify3D, Slic3r/Pronterface, etc.
I'll try to add some more photos later.
This setup is great. Accurate and reliable, especially after my removable metal bed and precision bearing upgrades.
I forgot to mention that I switched to 1.75mm filament. I don't recall if the Bondtech BMG has a 3.0mm filament model.
When printing the lower air duct I did not use support inside of the duct itself. I used some on the outside. Internal walls are designed to eliminate the need for support which would be difficult to remove. The duct on the extruder holder needs some internal support. Try to keep it to a minimum because it can be difficult to remove if you over do it.
Parts:
Standard (not mirrored) Bondtech BMG
E3d V6 hotend
A 24V blower fan (the one in the photo is actually a 12V version which runs fast. I have 24V ones on the way but the 12V works. I just keep the speed turned down some).
A 5V 30mm fan for the hotend cooling fins. The duct comes with the E3d kit. Also a short hunk of PTFE tube to connect inside the Bondtech BMG
I used a NEMA17 40mm length stepper.
The BMG and E3D I ordered from 3DMakerworld.
Note that the extruder mounting bracket has two plugs for the duct to the left of the BMG extruder. The bottom screw on the BMG needs to be tightened from the left sid of the fan duct and the two plugs then cove the hole for the 2.5mm hex wrench. The outside left plug is not problem but the inner (right) plug require some finesse. I used some fine needle nose pliers and a small flat blade screwdriver to coax it into the hole.
A few M3 x 10-12mm screws and washers.
2 M3 x18-20 screws and washers.
I used 4 brass M3 inserts (3x3x4mm O.D.) for the hotend blower fan and in the lower air duct to attach it to the extruder holder.
I also included the mount for the 12mm inductive probe which I show here, but really that should be elsewhere because it requires a metal bed to work. If you do not have a metal bed or intend to use a probe to auto level than just ignore the probe clamp.
The interface between the air duct and the extruder holder duct should be clean and carefully fitted to prevent air leaks.
You have to change your E-steps to about 455. I think that was the starting suggestion and after calibrating be extruding 100mm of filament a few times, I did not make any changes to the starting number. That cange can be made from the LCD panel Control settings. Remember to save the settings afterwards so it persists. This can also be accomplished from a command line in Simplify3D, Slic3r/Pronterface, etc.
I'll try to add some more photos later.
Similar models
thingiverse
free
BMG-M and Mosquito Hotend RHD Mount by FunctionOverForm
... an ezabl.
use petg/abs and .2mm layer heights, infill 40%+, 4 walls, 5 bottom/top layers, no supports. i used carbon fiber petg.
thingiverse
free

TAZ 5 Hexagon Left Side Fan Duct by wantmys2000
...e glass bed corner hold down. no loss of travel.
it is designed to attach using the existing left side hotend attachment bolt.
thingiverse
free

TAZ 5 Toolhead with Bondtech QR Universal Extruder by DreadedBunny
...uch mount, a 1 mm shim for the bltouch, and an adapter to mount a 40 mm fan to the 30 mm extruder fan shroud of an e3d v6 hotend.
grabcad
free

BondTech BMG Parts Cooling Assembly
...assembly-2016-1
bondtech in render used from: https://grabcad.com/library/cr-10-cr-10s-bondtech-bmg-e3d-v6-ezabl-mount-assembly-1
thingiverse
free

Prusa Mk3 Fan Duct for MK3s with mosquito hotend and BMG extruder
...er. fits extruder found here: https://www.thingiverse.com/thing:3730004
allows to use sock on mosquito without touching anything.
thingiverse
free

Bond Tech BMG Parts Cooling Fan
...mm screws: https://amzn.to/339lhfx
2mm self tapping screws: https://amzn.to/2wamwj6
mini turbo fan (24v): https://amzn.to/2c6dhsp
thingiverse
free
FT5 Bondtech+E3D V6 Part Cooling Fan by Snipsey
...part cooling fan mount and claw designed for the ft-5 with 713maker ultralight carriage, bondtech bmg extruder and e3d v6 hotend.
thingiverse
free
Bulldog XL / E3D-V6 cooling fan mount (60mm) by markusbart
...ing here. the circuit switches on when the hotend gets power and switches off after it is left without power for like 10 minutes.
thingiverse
free

Tenlog TL-D3 BMG Clone Extruders by andrewseago
...tock 40mm fan
2 stock d3 hotend assemblies
2 stock tenlog d3 vga breakout boards
1 capacitive probe (optional)
assorted 3mm bolts
thingiverse
free
Vivedino/Formbot T-Rex 3.0 BMG Dragon Hotend Mod by Nionax
...in place.
this is still in progress and i did´t test it. but i´ll update and add more details for everthings as soon as possible.
Jaln
thingiverse
free

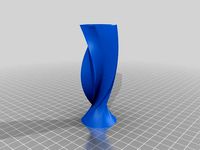
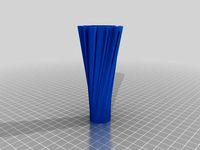
Vase-X3 by jaln
...awn.
there are two sizes of this triangle to hex transition.
they are printed upside to insure that they stay stuck to the bed.
thingiverse
free

AmanteVase by jaln
...is especially useful when you are using pause to change filament colors. pausing on the inner wall will help conceal the change.
thingiverse
free
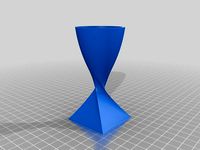
Vase-X4 by jaln
...t 100mm.
the smaller one is printed upside down for stability while printing.
this design is my favorite of this series.
enjoy!
thingiverse
free
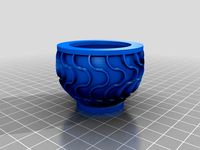
Turbowlz II by jaln
...r the other designs to make your own designs.
lid knob made bigger on 01/22/15. deleted old file-- new file has a designation.
thingiverse
free

Turbo-Bowl: Turbo-Vase+, the Sequel Continues by jaln
...the sequel continues by jaln
thingiverse
here's some matching bowls for vase10a.
(turbo-vase+, the sequel).
scaled 1x and 2x
thingiverse
free

TurBowlz I by jaln
...ed .33mm layers, i am amazed that this even printed with no support!
a testament to lulzbot taz4 and gizmo dorks transparent abs.
thingiverse
free

BublaVase by jaln
... print job. not intentional, but i often recommend printing partial prints to make bowls from vases. some look great both ways.
thingiverse
free
Vase-X2 three versions by jaln
...previous vases were rotations, sweeps along splines, and boolean functions.
scale em, stretch em. have fun.
show us your work.
thingiverse
free

FlamoVase by jaln
...nt at about 30% of its full height, it makes a great screw on lid for the full print of the same scale. see the last two photos.
thingiverse
free
Vase-X1 by jaln
...ave slots. x3 is thicker.
the x1 in the photo was printed right side up and decided to leave the heated bed prior to completion.
Bondtech
thingiverse
free

x5s bondtech
...x5s bondtech
thingiverse
this allow using a bondtech dual drive on x5s machines
thingiverse
free

Bondtech mount by Nicoande99
...bondtech mount by nicoande99
thingiverse
custom bondtech mount for my velleman k8200 3d printer.
thingiverse
free

Trex2+ Bondtech adpter by fong504
...trex2+ bondtech adpter by fong504
thingiverse
bondtech makerbot 2 clone adapter for the trex2+.
thingiverse
free

Bondtech PTFE tube Holder
...bondtech ptfe tube holder
thingiverse
adjusted a bit to fit my bondtech clone.
thingiverse
free
Bondtech DDX by sebbzor
...of the ddx incase you want to build adapters for it. original stepfile can be found on bondtechs website, all credits go to them.
thingiverse
free

Support BONDTECH Anet_A8 By SergioFPV by SergioFPV
...support bondtech anet_a8 by sergiofpv by sergiofpv
thingiverse
support bondtech anet_a8
thingiverse
free

CR-10S-Bondtech-Mosquito_Mount_Bl_Touch by enoblk
...cr-10s-bondtech-mosquito_mount_bl_touch by enoblk
thingiverse
cr-10s-bondtech-mosquitomount-_bl_touch
thingiverse
free

Bondtech Flying mount by Yakandu
...du
thingiverse
lightweight flying extruder mount for the bondtech bmg with design centred around filament path.
this is a remix.
thingiverse
free
Bondtech Oiler by bamhm182
...t a piece of sponge and put it in the hole. oil it up and you're good to go! been using it for a few months with no problems.
thingiverse
free

RatRig V-Core Pro Bondtech Carriage (Prusa MK3S Bondtech Extruder)
...dtech can be mounted 1:1 :)
i have the mk3s with bondtech and mosquito magnum. i'll try out if my ratrig arrives...
have fun!
Taz
3d_ocean
$19

TAZ RIGGED
...ax version only texture is used only for wb logo, taz dont need texture no special render engine needed, just unzip and render...
3d_export
$5

Taz character 3D Model
...taz character 3d model
3dexport
taz toon character cartoon
taz character 3d model supercigale 22095 3dexport
cg_studio
$10

Taz 3D3d model
...taz 3d3d model
cgstudio
.3ds .max - taz 3d 3d model, royalty free license available, instant download after purchase.
cg_studio
$15

Taz Rigged3d model
...ged3d model
cgstudio
.3ds .fbx .max .obj - taz rigged 3d model, royalty free license available, instant download after purchase.
3d_export
$10

Taz Toy Calendar 3D Model
... 3d model
3dexport
taz toy calendar day month year looney tunes cartoon kid child
taz toy calendar 3d model nkfrds 49687 3dexport
3d_export
$10

Taz Tasmanian Devil RIGGED 3D Model
...y tunes anime bunny rigged material fantasy creature diable dessin
taz tasmanian devil rigged 3d model supercigale 28390 3dexport
3d_export
$19
Thylacine 3D Model
...animalia chordata mammalia marsupial dog extinct animals tiger tassie taz thylacine 3d model poly3dmodels 90790...
3d_export
$12
Bowl Decorated 3D Model
...bowl decorated 3d model 3dexport bowl tazn elements ceramics kitchen plastic cup container decorative cake biscuits...
3ddd
$1

Crate & Barrel Serveware
...crate & barrel поднос -http://www.crateandbarrel.com/feast-platter/s186961 набор ножей для сыра -http://www.crateandbarrel.com/tazcheese-knife-3-piece-set/s681377 бокал...
thingiverse
free
TAZ by Taz8373
...taz by taz8373
thingiverse
my 1st print
Bmg
turbosquid
$3

.50 BMG
... available on turbo squid, the world's leading provider of digital 3d models for visualization, films, television, and games.
turbosquid
$2

.50 BMG
... available on turbo squid, the world's leading provider of digital 3d models for visualization, films, television, and games.
turbosquid
$25
50 BMG Cartridge
...e 3d model 50 bmg cartridge for download as 3ds, max, and obj on turbosquid: 3d models for games, architecture, videos. (1303035)
turbosquid
$30

Sniper 50 bmg
... available on turbo squid, the world's leading provider of digital 3d models for visualization, films, television, and games.
turbosquid
free

Cal 50 BMG
... available on turbo squid, the world's leading provider of digital 3d models for visualization, films, television, and games.
cg_studio
$25
.50 BMG Cartridge3d model
...odel
cgstudio
.3ds .max .obj .wrl - .50 bmg cartridge 3d model, royalty free license available, instant download after purchase.
3d_export
$5
50 caliber BMG round 3D Model
...d 3d model
3dexport
50cal caliber 50 round bullet bmg cartridge browning rifle
50 caliber bmg round 3d model csw92 27660 3dexport
3d_export
$22
.50 BMG Cartridge 3D Model
...ectile rifle round pistol cartridge m2 hb 127x99mm nato browning barrett m82a1
.50 bmg cartridge 3d model plutonius 8091 3dexport
turbosquid
free
LAR Grizzly .50 BMG Sniper
... available on turbo squid, the world's leading provider of digital 3d models for visualization, films, television, and games.
3d_export
$8
cartrige m50 bmg
...aterials are logically named<br>the main format is in 3ds max 2009.<br>satisfcation garranteed..<br>thank you !
Slight
3ddd
$1

True Slight
...менный стул от итальянской фабрики true, модель slight .
подробнее на сайтеhttp://www.truedesign.it/product.php?id=69
3ddd
$1
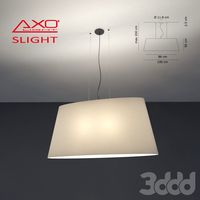
Axo Light SLIGHT
...axo light slight
3ddd
axo light
axo light slight
d=100(26)cm
3ddd
$1
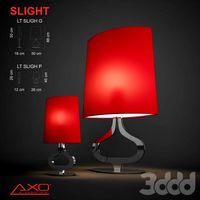
axo light slight
...с абажуром из ткани красного цвета.
на сайте производителя:http://www.axolight.it/europe/en_gb/products/ltslighg#images
turbosquid
$6

Pendant Lamp 21 - Slight
...el pendant lamp 21 - slight for download as max, fbx, and obj on turbosquid: 3d models for games, architecture, videos. (1537306)
3ddd
$1

Axo Light Slight
...axo light slight
3ddd
axo light
в архиве 2 светильника с абажурами из ткани красного и ванильного цвета.
3d_export
$40

Nissan Skyline 2000 GTR game ready model
...ready model 3dexport game car model with interior. sticker, slight rust, dirt present on the model. textures included.<br>formats: fbx...
3d_export
$60

mary with child statue 01
...watertight and ready for printing/milling. although there are some slight undercuts, it was created with molding and casting in...
3ddd
$1
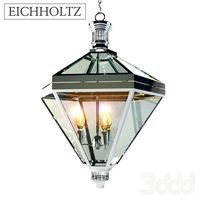
Eichholtz Lantern Mistery
...with meticulous care. given their handmade and hand-finished nature, slight variations in appearance are to be expected and celebrated....
3ddd
$1
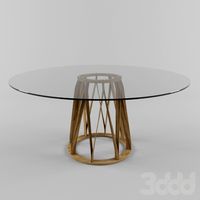
Miniforms Acco Table
...canaletto walnut. the solid slats are characterized by a slight twist that makes the base surprisingly strong and...
3d_export
$5

Teenage backpack
...teenage backpack 3dexport model of a teenage backpack with slight scuffs, folds and dirt<br>includes textures<br>there is no inscription on...
Mod
design_connected
$13

MOD. 4233 - MOD. 4234 Table Lamp
...mod. 4233 - mod. 4234 table lamp
designconnected
arcahorn mod. 4233 - mod. 4234 table lamp computer generated 3d model.
design_connected
$11

MOD.1095
...mod.1095
designconnected
mod.1095 computer generated 3d model. designed by sarfatti, gino.
3ddd
$1

fireplaces mod Spec
...fireplaces mod spec
3ddd
камин
fireplaces mod spec 180x90x125h
3ddd
free

Flos Mod. 2129
... mod
фабрика: flos
модель: mod. 2129
описание: подвесной светильник, металл, белый, черный.
сайт: www.flos.com
turbosquid
$34
Mod Lamp.c4d
... available on turbo squid, the world's leading provider of digital 3d models for visualization, films, television, and games.
turbosquid
$32

MOD A 001
... available on turbo squid, the world's leading provider of digital 3d models for visualization, films, television, and games.
turbosquid
$29

Maars Mod
... available on turbo squid, the world's leading provider of digital 3d models for visualization, films, television, and games.
turbosquid
$15

Mod 70..
... available on turbo squid, the world's leading provider of digital 3d models for visualization, films, television, and games.
turbosquid
$10

MOD Sofa
... available on turbo squid, the world's leading provider of digital 3d models for visualization, films, television, and games.
turbosquid
$1

Mod-Lite
... available on turbo squid, the world's leading provider of digital 3d models for visualization, films, television, and games.
6
3d_export
$18

tulip 6
...tulip 6
3dexport
tulip 6
3d_export
$5
hinge 6
...hinge 6
3dexport
hinge 6
3ddd
$1

MASIERO / FLASHWOOD STL 6 + 6
...6
3ddd
masiero
торшер flashwood stl 6 + 6 фабрики masiero
http://www.masierogroup.com/c87_697/it/flashwood%20stl%206%20+%206.ashx
turbosquid
$110

Atmos Cannon 2000 6*6
...yalty free 3d model atmos cannon 2000 6*6 for download as skp on turbosquid: 3d models for games, architecture, videos. (1528591)
turbosquid
$1
ae 6 6 electric locomotive
... free 3d model ae 6 6 electric locomotive for download as obj on turbosquid: 3d models for games, architecture, videos. (1707537)
turbosquid
$39
A-6
... available on turbo squid, the world's leading provider of digital 3d models for visualization, films, television, and games.
3ddd
$1
6 ковров
...6 ковров
3ddd
ковры , ковер
6 ковров
turbosquid
$12

Calligraphic Digit 6 Number 6
...hic digit 6 number 6 for download as max, obj, fbx, and blend on turbosquid: 3d models for games, architecture, videos. (1389336)
turbosquid
$19

Case For Phone 6 Girl 6
... available on turbo squid, the world's leading provider of digital 3d models for visualization, films, television, and games.
turbosquid
$35

Iphone 6 & 6 Plus All
... available on turbo squid, the world's leading provider of digital 3d models for visualization, films, television, and games.
5
turbosquid
$6

Rock 5-5
...urbosquid
royalty free 3d model rock 5-5 for download as obj on turbosquid: 3d models for games, architecture, videos. (1639063)
3d_export
$5

hinge 5
...hinge 5
3dexport
hinge 5
turbosquid
$10

A-5
... available on turbo squid, the world's leading provider of digital 3d models for visualization, films, television, and games.
turbosquid
$2

A-5
... available on turbo squid, the world's leading provider of digital 3d models for visualization, films, television, and games.
turbosquid
$12

Calligraphic Digit 5 Number 5
...hic digit 5 number 5 for download as max, obj, fbx, and blend on turbosquid: 3d models for games, architecture, videos. (1389333)
3ddd
$1

5 роз
...5 роз
3ddd
5 роз в стеклянной вазе
design_connected
$11

iPhone 5
...iphone 5
designconnected
apple iphone 5 computer generated 3d model.
3ddd
$1

Lola 5
...lola 5
3ddd
miniforms
lola 5 miniforms 300*65*134
3ddd
$1

Nexus 5
...dd
nexus , phone , телефон
google nexus 5 phone
3d_ocean
$15

iPhone 5
...iphone 5
3docean
3d 4d apple cinema iphone model modeling phone screen texture
iphone 5 3d model and texture realistic iphone 5.
4
turbosquid
$9

Office Chair 4-4
... available on turbo squid, the world's leading provider of digital 3d models for visualization, films, television, and games.
3d_export
$5

doors- 4
...doors- 4
3dexport
doors 4
3d_export
$5

hinge 4
...hinge 4
3dexport
hinge 4
3ddd
$1

Штора №4
...штора №4
3ddd
штора №4
3d_export
free

playstation 4
...playstation 4
3dexport
playstation 4
turbosquid
$1

re 4-4 electric locomotive
... free 3d model re 4 4 electric locomotive for download as obj on turbosquid: 3d models for games, architecture, videos. (1707845)
3ddd
$1

nexus 4
...nexus 4
3ddd
lg , телефон
nexus 4
3ddd
$1

4 Poufs
...4 poufs
3ddd
пуф
4 soft poufs
turbosquid
$12

Calligraphic Digit 4 Number 4
...hic digit 4 number 4 for download as max, obj, fbx, and blend on turbosquid: 3d models for games, architecture, videos. (1389332)
3ddd
$1

Dauphin 4+
...dauphin 4+
3ddd
кресло
dauphin 4+ конференц кресло
Needs
turbosquid
$15

needs ligth?
... available on turbo squid, the world's leading provider of digital 3d models for visualization, films, television, and games.
3d_export
$5

I need a new job
...i need a new job
3dexport
i need a new job funny sign. include a *.obj file
3d_export
$10

Dog house that doesnt need laundry
...painter available for all software<br>ue4. ue5. blender. maya. 3d max. unity. c4d.<br>formats: .obj .gltf .fbx .blend
3d_export
free

the wall and the sidewalk i give it away for free but in return you need a comment whether it was
...dexport
the wall and the sidewalk, i give it away for free, but in return you need a comment whether it was useful to you or not
turbosquid
$20
3D Animated High Resolution White Liquid 2 Flow Swirl Splash Animation. No Need To Use Realflow Software 3D Animation. It Can Be Used In Virtually Any Animation Software 3D model
...y any animation software 3d model for download as c4d and fbx on turbosquid: 3d models for games, architecture, videos. (1359187)
3d_export
$5
akm - unfinished project
...akm - unfinished project 3dexport model of akm, needs some work.<br>-no textures<br>-uv mapping needed<br>-geometry fixes...
3d_export
$5

Boots
...
3dexport
does your character need flying boots to make their adventure even more memorable? then this is exactly what you need!
3d_export
$9
marantz sr7013
...need to add a material or shader to. "glass" needs to be a glass material, "powerlight" needs an emission...
3d_export
free

nail
...nail
3dexport
a nail for what is needed
3d_export
$5

oil can
...ort
can container for oil or any liquid. volume = 1200135 mm3 dimensions in mm ping me if need stl or need customize dimensions.
3
turbosquid
$10

Mountain Bike 3 -3 of 3
...model mountain bike 3 (#3 of 3) for download as fbx and blend on turbosquid: 3d models for games, architecture, videos. (1438752)
turbosquid
$6

Rock 3-3
...urbosquid
royalty free 3d model rock 3-3 for download as obj on turbosquid: 3d models for games, architecture, videos. (1628065)
turbosquid
$29

Books 150 pieces 3-3-3
...books 150 pieces 3-3-3 for download as max, obj, fbx, and stl on turbosquid: 3d models for games, architecture, videos. (1384033)
turbosquid
$3

Genesis 3 Clothing 3
... available on turbo squid, the world's leading provider of digital 3d models for visualization, films, television, and games.
3d_export
$5

hinge 3
...hinge 3
3dexport
hinge 3
3ddd
$1

Розетка 3
...розетка 3
3ddd
розетка
розетка 3
turbosquid
$50

is-3
... available on turbo squid, the world's leading provider of digital 3d models for visualization, films, television, and games.
turbosquid
$10

Mountain Bike 3 -2 of 3
...model mountain bike 3 (#2 of 3) for download as fbx and blend on turbosquid: 3d models for games, architecture, videos. (1438750)
turbosquid
$10

Mountain Bike 1 -3 of 3
...model mountain bike 1 (#3 of 3) for download as fbx and blend on turbosquid: 3d models for games, architecture, videos. (1438743)
3d_export
$5

3 CATS
...3 cats
3dexport
3 cats pen holder