Thingiverse

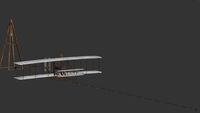
Boeing 737 Ceiling Flyer by Zippitybamba
by Thingiverse
Last crawled date: 3 years ago
When strung up to the ceiling, the plane will "fly" in circles under the power of its propeller. If there's enough interest I may release other aircraft including some actual prop-jobs, maybe even twin-engine. Like it if you want more.
Watch it fly with short propeller, slower: https://youtu.be/3tPDYEYpzAM
Long propeller, faster / bigger loops: https://youtu.be/QQKlanOFjk4
Materials:
1) Motor + switch + battery case ($12 for a set of 5 each): http://a.co/elPTgfI
2) Steel rod ($7.87 for a set of 20), 50mm length: http://a.co/7UfjWzZ
[You do not need the rods if using the "Shaft and Prop", but I think the rods work better.]
3) M3 screws, 5-10mm x 2
4) Two AA batteries
5) Soldering iron, flux, solder
6) Transparent filament to suspend plane, ~100cm
7) Screws to mount axis to ceiling
8) Glue, either E6000 or cyanoacrylate.
9) Hot glue gun
A note on printing: The body + wings part should be printed upside-down and rotated 45 degrees to fit on a 20x20cm build plate. This model cannot be printed on a smaller build plate if you intend to install the motor and batteries.
Assembly
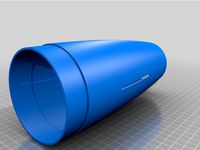
1) Insert engine in tail with wires facing up, then glue tail to lower fuselage.
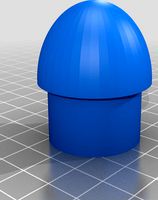
2) Glue nose cone to lower fuselage.
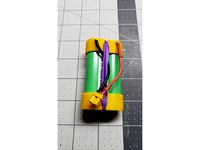
3) Remove electrical hardware from battery compartments (spring and gromet) with wires intact. I found nippers to do this easily.
4) Hot glue gun the electrical hardware in place on the lower fuselage. Be careful not to cover the conducting parts that will contact the batteries.
5) Pass the red wire from the motor up through the fuselage, into the nose cone, and out the rectangular hole in the top of the nose.
6) Pass the red wire from the battery compartment into the nose cone and out the rectangular hole.
7) Solder the red wires, 1 to each terminal on the switch.
8) Solder the black wire at the back of the battery terminal to the motor black terminal.
9) Insert 2 AA batteries, then screw on the fuselage top.
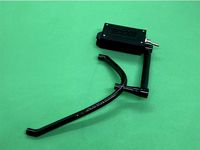
10) Insert the 2mm steel rod into the coupler and push though hole in back of tail, onto the motor spindle. If using the "Shaft and Prop", you won't need the steel rod.
11) Push the propeller onto the back of the steel rod.
12) Hang from the ceiling axis, flip the switch, and go fly!
Thanks to Navy876 for the cool model.
Watch it fly with short propeller, slower: https://youtu.be/3tPDYEYpzAM
Long propeller, faster / bigger loops: https://youtu.be/QQKlanOFjk4
Materials:
1) Motor + switch + battery case ($12 for a set of 5 each): http://a.co/elPTgfI
2) Steel rod ($7.87 for a set of 20), 50mm length: http://a.co/7UfjWzZ
[You do not need the rods if using the "Shaft and Prop", but I think the rods work better.]
3) M3 screws, 5-10mm x 2
4) Two AA batteries
5) Soldering iron, flux, solder
6) Transparent filament to suspend plane, ~100cm
7) Screws to mount axis to ceiling
8) Glue, either E6000 or cyanoacrylate.
9) Hot glue gun
A note on printing: The body + wings part should be printed upside-down and rotated 45 degrees to fit on a 20x20cm build plate. This model cannot be printed on a smaller build plate if you intend to install the motor and batteries.
Assembly
1) Insert engine in tail with wires facing up, then glue tail to lower fuselage.
2) Glue nose cone to lower fuselage.
3) Remove electrical hardware from battery compartments (spring and gromet) with wires intact. I found nippers to do this easily.
4) Hot glue gun the electrical hardware in place on the lower fuselage. Be careful not to cover the conducting parts that will contact the batteries.
5) Pass the red wire from the motor up through the fuselage, into the nose cone, and out the rectangular hole in the top of the nose.
6) Pass the red wire from the battery compartment into the nose cone and out the rectangular hole.
7) Solder the red wires, 1 to each terminal on the switch.
8) Solder the black wire at the back of the battery terminal to the motor black terminal.
9) Insert 2 AA batteries, then screw on the fuselage top.
10) Insert the 2mm steel rod into the coupler and push though hole in back of tail, onto the motor spindle. If using the "Shaft and Prop", you won't need the steel rod.
11) Push the propeller onto the back of the steel rod.
12) Hang from the ceiling axis, flip the switch, and go fly!
Thanks to Navy876 for the cool model.
Similar models
thingiverse
free
Nose cone 63mm x 36.10mm O-Dia. by Protoman68
...e. it can be used as a starting point for any of this type of prop termination.
not to be used on gasoline outboard motor prop!!!
thingiverse
free
TrackIR TrackClip PRO Battery Compartment Headphones Clip by falken_gt4
...der the red wire to the leds to the other terminal on the switch.
4) make sure to insulate properly, i used heat shrink sleeving.
thingiverse
free

Popwing/Teksumo nose reinforcement plate by Murgo
...ued it in with 5 minute epoxy. foam around the battery compartment needs to be cut to fit.
fits typical 1300 mah 3s/4s batteries.
thingiverse
free

9v battery holder by mlindekugel
...ooves for the terminals, then soldered the wires to the tape; seems to hold well enough, especially once the battery is inserted.
thingiverse
free

Linear Servo Mount
...or terminals. this bypasses the electronics and made the motor usable with just two aaa batteries and a momentary toggle switch.
thingiverse
free

Sony NP-BN1 External Battery by danjoannis
...e grooves
4) connect to battery/psu
5) insert into camera. there should be a little flap on the camera for the wires to poke out.
thingiverse
free

Sabertooth 2X60 Wire Shield
... wire could go out the back of the terminal and short out against the heatsink causing fairly of this expensive motor controller.
thingiverse
free
4" V2 rocket boat tail and nose by srbell
...4" v2 rocket boat tail and nose by srbell
thingiverse
a nose cone and boat tail for a 4" v2 rocket.
thingiverse
free
18650 holder 1S / 2S
...make sure they are correctly oriented. 1s instructions follow similar steps as described in the2s construction, however: solder two...
grabcad
free

Propeller with nose cone
...propeller with nose cone
grabcad
propeller with nose cone
Zippitybamba
thingiverse
free

No Solicitors by Zippitybamba
...olicitors by zippitybamba
thingiverse
set the print to stop at 4mm and switch filament colors to get the text and border to pop.
thingiverse
free

Sad dog by Zippitybamba
...sad dog by zippitybamba
thingiverse
a very sad dog, sculpted in oculus medium.
prints well if you use supports.
thingiverse
free

Frosty statue by Zippitybamba
...deo of a christmas decoration. shiny surfaces meant a lot of editing was needed. processed through 3df zephyr free and meshmixer.
thingiverse
free

Ferris Wheel for Minis by Zippitybamba
...eel for minis by zippitybamba
thingiverse
a request from my daughter. you need to glue the caps on the pegs to hold it together.
thingiverse
free

Plates and Bowls by Zippitybamba
...late or bowl or cup-shaped models. most are printable as is, but some values lead to non-manifold shapes. check before you slice!
thingiverse
free

Merry Christmoose by Zippitybamba
...d be fun to print and paint for next year.
created from 32 photos processed through 3df zephyr free and meshmixer, both freeware.
thingiverse
free

Duplo-compatible Cross Track by Zippitybamba
...for duplo train tracks. designed to minimize print time and plastic use.
does not require support. does need around 20% infill.
thingiverse
free

Pineapple Vase by Zippitybamba
...can load a video showing how to do this in tinkercad.
i'm sure you know this, but be certain to set your slicer to vase mode.
thingiverse
free

Apple Corer by Zippitybamba
... i used 4 shells, maybe overkill. 20% infill so the handle will be solid.
print the plunger much simpler, 2-3 shells, 15% infill.
thingiverse
free

Boatswain's Pipe by Zippitybamba
...ou want to sand it, it's easier to do so before gluing together.
you will need to glue the halves together with cya or e6000.
Flyer
turbosquid
$79
Flyer
...quid
royalty free 3d model flyer for download as max and fbx on turbosquid: 3d models for games, architecture, videos. (1636696)
turbosquid
$3

Flyer
... available on turbo squid, the world's leading provider of digital 3d models for visualization, films, television, and games.
turbosquid
$3

Flyer
... available on turbo squid, the world's leading provider of digital 3d models for visualization, films, television, and games.
turbosquid
$3

Flyer
... available on turbo squid, the world's leading provider of digital 3d models for visualization, films, television, and games.
3d_export
$21
dragon ball flyer
...dragon ball flyer
3dexport
dragon ball flyer
3ddd
$1
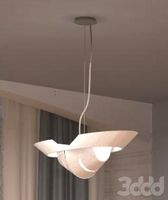
itre flyer
...itre flyer
3ddd
itre
подвесной светильник и бра itre flyer из каталога itre, текстур не требуется, материалы vray
turbosquid
$19

flyer Wagon
...y free 3d model flyer wagon for download as max, obj, and fbx on turbosquid: 3d models for games, architecture, videos. (1505790)
turbosquid
$40

kite flyer
...ee 3d model kite flyer for download as 3ds, obj, c4d, and fbx on turbosquid: 3d models for games, architecture, videos. (1442906)
3d_export
$100
Singapore Flyer 3D Model
...singapore flyer 3d model
3dexport
singapore flyer ferris wheel render
singapore flyer 3d model lvgart 57063 3dexport
turbosquid
$30
Metabaron's flyer
... available on turbo squid, the world's leading provider of digital 3d models for visualization, films, television, and games.
737
3d_export
$27

Boeing 737-700
...boeing 737-700
3dexport
boeing 737-700
3d_export
$17

Boeing 737-800
...boeing 737-800
3dexport
boeing 737-800
3d_export
$40

Boeing 737 3D Model
...boeing 737 3d model
3dexport
boeing 737
boeing 737 3d model evermotion 92785 3dexport
turbosquid
$50
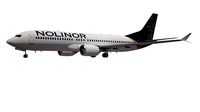
Nolinor Aviation 737
...oyalty free 3d model nolinor aviation 737 for download as max on turbosquid: 3d models for games, architecture, videos. (1409074)
evermotion
$24

Boeing 737 am73
...of airplane with all textures, shaders and materials. it is ready to use, just put it into your scene. evermotion 3d models shop.
turbosquid
$139

737-800 - United
... available on turbo squid, the world's leading provider of digital 3d models for visualization, films, television, and games.
turbosquid
$59

Boeing 737 800
... available on turbo squid, the world's leading provider of digital 3d models for visualization, films, television, and games.
turbosquid
$20

Boeing 737-400
... available on turbo squid, the world's leading provider of digital 3d models for visualization, films, television, and games.
cg_studio
$129
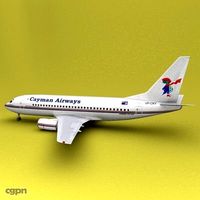
Boeing 737 Cayman3d model
...rwegian cayman
.3ds .c4d .max .obj - boeing 737 cayman 3d model, royalty free license available, instant download after purchase.
cg_studio
$120

Boeing 737 ANA3d model
...ing norwegian ana
.3ds .c4d .max .obj - boeing 737 ana 3d model, royalty free license available, instant download after purchase.
Boeing
3d_export
$26

Boeing 777
...boeing 777
3dexport
boeing 777
3d_export
$17

Boeing-757
...boeing-757
3dexport
boeing-757
3d_export
$17

Boeing Chinook
...boeing chinook
3dexport
boeing chinook
3d_export
$27
Boeing 737-700
...boeing 737-700
3dexport
boeing 737-700
3d_export
$27

BOEING 787-800
...boeing 787-800
3dexport
boeing 787-800
3d_export
$17
Boeing 737-800
...boeing 737-800
3dexport
boeing 737-800
3d_export
$17

Boeing-747-400
...boeing-747-400
3dexport
boeing-747-400
3d_export
$17

Boeing 717-200
...boeing 717-200
3dexport
boeing 717-200
3d_export
free

lowpoly boeing 707
...lowpoly boeing 707
3dexport
lowpoly boeing 707
3ddd
$1

Boeing 747
...boeing 747
3ddd
самолет
high detailed boeing 747 plane present russia air line best regard
Ceiling
3d_ocean
$5
ceiling lamp
...ceiling lamp
3docean
ceiling decoration lamp light
ceiling lamp
3ddd
$1
Ceil - Lamp
...ceil - lamp
3ddd
mouhamad asswad , ceil
ceil - lamp from i max render
3d_export
$269
ceiling lamp
...ceiling lamp
3dexport
ceiling lamp
3ddd
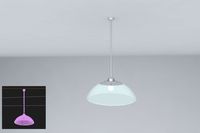
free
ceiling light
...ceiling light
3ddd
ceiling light
3d_export
$10

ceiling light
...ceiling light
3dexport
ceiling light branches
3ddd
$1
Ceiling Lamp
...ceiling lamp
3ddd
подвес
ceiling lamp
3d_ocean
$6
Ceiling fan
...ce blades ceiling ceiling fan cool cooling fan fixture
ceiling fan created in cinema4d. comes with various other formats as well.
turbosquid
$20
Plaster ceiling ornament, ceiling medallion
...iling ornament, ceiling medallion for download as max and obj on turbosquid: 3d models for games, architecture, videos. (1376554)
turbosquid
$17

Ceiling
... free 3d model ceiling for download as max, obj, fbx, and stl on turbosquid: 3d models for games, architecture, videos. (1367286)
3d_export
$5

ceiling fan
...ceiling fan
3dexport
a simple ceiling fan model.