Thingiverse
Blower Control Unit 2, Particle Photon by albertk836
by Thingiverse
Last crawled date: 3 years, 1 month ago
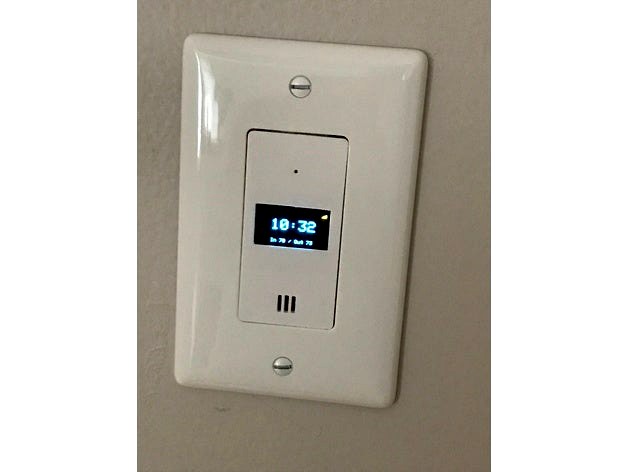
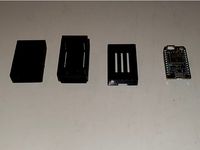
An update to a previous project, https://www.thingiverse.com/thing:572282. Wanted to make the room controller less intrusive in the room. I updated some of the hardware and eliminated others. As shown, it all fits into the previous 2 X 4 electrical box and uses a standard modern cover plate.
Below the display is a small vent with a mount for a Dallas Temperature sensor which I epoxy in place. The CPU tray included in the download section, is setup for a Pro-Mini clone which presses into place. I also have created a tray for a SPARK CORE / Particle Photon. Under the CPU tray between the I2C .96" OLED two color display is also a .5" X .5" push button switch for selecting options on the OLED.
I had to create a "Switch Bridge" for the back of the display because the back of the display is not flat. Components mounted on the back side of the display are of different heights. This caused the display to stick if pressed on the right side. The bridge corrects this. Please note the thickness here is critical, print only in .1 mm Layer Height.
Additionally another .5" X .5" push button switch is mounted just above the display with a pin hole to access, as a reset switch. At the top just above the reset switch is a slot for the 433 Mhz receiver. The switches I epoxy in place and use screws hold the CPU tray into place. Additionally the very top and bottom holes must be tapped using a 6/32 tap for the cover plate.
The pictures shown is the first one, and can use some serious wire management.
I do have a plate for the MicroView Display/CPU combo. Message me if interested. The MicroView works Very Well and is much easier to wire however, with the cost of the MicroView being $40, I chose to stay with the Pro-Mini and update to a two color OLED.
UPDATE: CPU tray for the Particle Photon has been added to the .stl files.
UPDATE: The OLED I use is the DIYMall display (Printed on the back on the display). It measures 1.062" by 1.062". I tried what appeared to be the same display directly from China but found their dimensions are 1.125 by 1.125" which will not fit.
Similar models
grabcad
free

SparkFun MicroView - OLED
...sparkfun microview - oled
grabcad
sparkfun microview - oled display
thingiverse
free

Wall Mount Particle Photon Display by albertk836
...rically connect it all together. the touch sensors i used have a red power led. i used black finger nail polish the black it out.
thingiverse
free

Enclosure for Photon (Particle) with OLED 1306 display by g1ll
...
the photon slides upside down into the bottom part and the 3 openings align with the reset, mode button and led of the photon
thingiverse
free

M2 screw mount for 2.42" OLED display by mrbillyj03
...for 2.42" oled display by mrbillyj03
thingiverse
a cover for 2.42" oled display. mounts with 4 m2 self tapping screws.
thingiverse
free

Room_Monitor, Particle Photon by albertk836
...t mounts in a standard (usa) 2x4 electrical box.
i printed it in white pla (to match the cover plate) at .2mm height and 10% fill
thingiverse
free

Cover for 0.91" 128x64 OLED - M2 self tapping screw mount by mrbillyj03
...cover for 0.91" oled display. uses m2 self tapping screws to fasten the oled to the cover. easy print, no supports required.
thingiverse
free

Amiga 600 OLED Gotek USB disk drive emulator base by Lemaru
...small retainer plate that slides into place, so no need for any glue, which also makes it easy to remove the display if required.
thingiverse
free

Mount for Arduino Mega and 2.42 inch OLED display by mrbillyj03
...llyj03
thingiverse
mount for arduino mega and 2.42" oled display.
additional materials needed:
(8) m2*4 self tapping screws
thingiverse
free

2.42" OLED Mount for Wide Breadboard by mrbillyj03
...ps into the base. i have included the original breadboard file for convenience.
required: 4x m2x5mm self tapping screws for oled.
thingiverse
free

SSD1306 0.96" OLED display back plate by NilsR
...down a small oled behind a piece of glass. this is a holder to put on the back of the display - it will snap down on the pillars.
Albertk836
thingiverse
free

Baluster Shoe by albertk836
...baluster shoe by albertk836
thingiverse
cover that goes around the base and top of baluster.
thingiverse
free

Battery Door by albertk836
...battery door by albertk836
thingiverse
replacement battery door for afro micro panel 1 variometer
thingiverse
free

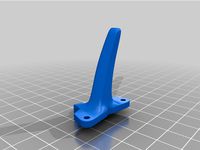
Earlex Hose holder by albertk836
...oke the original hose holder and got a replacement from the company and a few months later it broke. : ( designed a replacement.
thingiverse
free

Relay Mount by albertk836
...(usa) electrical box (2 x 4) relay mount. uses a standard cover plate. i found white pla matches the white cover plate very well.
thingiverse
free

Battery Bin by albertk836
...
just a simple wall bin to store extra / off-size batteries.
2" deep x 2 3/4" tall x 7" wide (outside dimensions)
thingiverse
free

4 " PVC Cap Male by albertk836
...4 " pvc cap male by albertk836
thingiverse
male version of vented 4 inch pvc cap for furnace flu.
thingiverse
free

Desk Wire Grommet by albertk836
...erse
wire grommet for small cables, ie. network cables, 2 wire power cords, etc. hole in the counter/desk needs to be 1.25"
thingiverse
free

Board Clamp by albertk836
... because of the shape of the wood i was dealing with.
placed some holes in the clamping section to reduce the amount of pla used.
thingiverse
free

Bose RC48S2-27 Remote Wall Mount by albertk836
...8s2-27 remote wall mount by albertk836
thingiverse
wall mount holder for lifestyle remote control (the one with an lcd display).
thingiverse
free

Mosquito Like Model Rocket by albertk836
...ket similar to the old estes mosquito rocket kit. it accepts standard a - c rocket engines and has an 1/8" launch rod guide.
Photon
3d_export
$7

swimming pool waterfall
...caustics<br>-disable the vraymtl's affect shadows parameter when using caustics.<br>-set photon emit radius (v-ray sun)<br>-increase caustics subvids (vray properties >...
3d_sky
$8
PHOTON
...photon
3dsky
wall lamp table lamp floor lamp
photon
3d_sky
free
PHOTON
...photon
3dsky
wall lamp table lamp floor lamp
photon factory
thingiverse
free
Photons
...photons
thingiverse
my last test before i print real things.
files come with the anycubic photon s
thingiverse
free
knocker for photon by Mckymn2000
...hoton by mckymn2000
thingiverse
was redon for photon you wont the 4kcnoker for photon
https://www.thingiverse.com/thing:1458545
thingiverse
free
Antimatter Photon Fin
...antimatter photon fin
thingiverse
antimatter photon fin, dieborr fpv style.
3d_sky
free
PHOTON
...photon
3dsky
chandelier lamp light floor lamp
chandelier table lamp and floor lamp from the factory "foton"
thingiverse
free

Photon Torpedoes by Mike1701
...photon torpedoes by mike1701
thingiverse
star trek's primary means of blowing the crap out of something, the photon torpedo.
thingiverse
free
Anycubic Photon Door Holder
...anycubic photon door holder
thingiverse
anycubic photon door holder
thingiverse
free
Particle Photon Case by mpleander
...particle photon case by mpleander
thingiverse
case for particle photon iot device.
Particle
3d_export
$23

Particle
...particle
3dexport
a rendering of a small part of a particle accelerator
3d_ocean
$20

Gorilla with hair particles
...logy designed for animation. 3 procedural textures only. the fur was made with hair particles. have eyes and mouth with all it...
turbosquid
$9

Particl black coin
...
royalty free 3d model particl black coin for download as max on turbosquid: 3d models for games, architecture, videos. (1554456)
turbosquid
$9

Particl gold coin
...
royalty free 3d model particl gold coin for download as max on turbosquid: 3d models for games, architecture, videos. (1554453)
3d_ocean
$10

Fountain with Particle System
...he same particle system with modified or completly new fountain elements and make your unique fountain. effect are tuned for p...
turbosquid
$10

Particula - Particle Rifle
...ula - particle rifle for download as blend, dae, obj, and stl on turbosquid: 3d models for games, architecture, videos. (1573363)
turbosquid
$59

Diesel Particle Filtering
... available on turbo squid, the world's leading provider of digital 3d models for visualization, films, television, and games.
turbosquid
$40

Positron - Particle Physics
... available on turbo squid, the world's leading provider of digital 3d models for visualization, films, television, and games.
turbosquid
$40
Tachyon - Particle Physics
... available on turbo squid, the world's leading provider of digital 3d models for visualization, films, television, and games.
turbosquid
$25
Particle Strings Pro
... available on turbo squid, the world's leading provider of digital 3d models for visualization, films, television, and games.
Blower
3d_export
$5
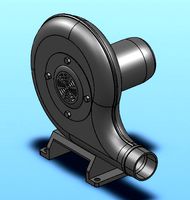
ball blower
...ball blower
3dexport
ball blower
3d_export
$10

engine blower assambly
...engine blower assambly
3dexport
engine blower assambly
3d_export
$5
air pipe blower
...air pipe blower
3dexport
air pipe blower
3d_export
$5
air hand blower
...air hand blower
3dexport
air hand blower
3d_export
$5
Blower Boom 3D Model
...blower boom 3d model
3dexport
boom blower
blower boom 3d model bkl1989 63079 3dexport
turbosquid
$44
blower-dxf
... available on turbo squid, the world's leading provider of digital 3d models for visualization, films, television, and games.
turbosquid
$39

Old Blower
...l old blower for download as ma, max, gltf, fbx, obj, and stl on turbosquid: 3d models for games, architecture, videos. (1638848)
3d_export
$7
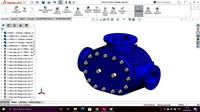
zy series centrifugal blower
...zy series centrifugal blower
3dexport
zy series centrifugal blower
3d_export
$5
root blower compressor
...oot blower compressor
3dexport
you will get both .stl and .sldprt format of root blower compressor from here at very cheap rate.
turbosquid
$5
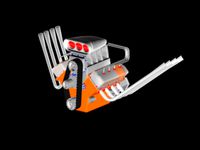
V8 engine with blower
... available on turbo squid, the world's leading provider of digital 3d models for visualization, films, television, and games.
Control
3d_ocean
$4
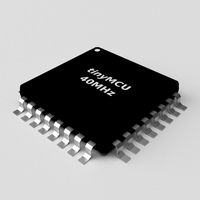
Controller TQFP32
...qfp32
3docean
chip controller cpu electronic gpu mcu micro controller silicon smd tqfp wafer
a micro controller in tqfp32 package
3d_ocean
$4
Controller TQFP44
...44
3docean
chip controller cpu electronic gpu mcu micro controller package smd tqfp tqfp44
a micro controller in a tqfp44 package
3d_export
$15
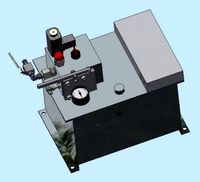
control unit
...control unit
3dexport
control unit
3ddd
$1
Yacht control
...yacht control
3ddd
yacht control
3d_export
$5
controle pgdm
...controle pgdm
3dexport
carcaca controle pgdm
turbosquid
free
controler
... available on turbo squid, the world's leading provider of digital 3d models for visualization, films, television, and games.
3ddd
$1
Control
...
http://www.schmitz-leuchten.de/html-ru/einzelleuchten-lampentyp-details.php?lamptype_no=700&group;=917&id;=731
3d_ocean
$4
Controller TQFP100
...100
3docean
chip computer cpu electronic gpu mcu micro controller pin platine silicon wafer
a micro controller in tqfp100 package
3d_ocean
$4
Controller TQFP64
...qfp64
3docean
chip computer cpu gpu mcu micro controller package silicon tqfp tqfp64 wafer
a micro controller in a tqfp64 package
3d_ocean
$7

Remote controller
... control switcher tv remote
remote controller for tv, sound systems etc easy to edit textures photo real rendered with mental ray
Unit
turbosquid
$4

UNIT
...unit
turbosquid
royalty free 3d model unit for download as on turbosquid: 3d models for games, architecture, videos. (1196686)
archibase_planet
free
Unit
...unit
archibase planet
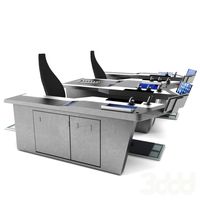
desk board
entertainment unit 02 - 3d model (*.gsm+*.3ds) for interior 3d visualization.
3d_export
$15
control unit
...control unit
3dexport
control unit
3ddd
$1
bathroom unit
...bathroom unit
3ddd
bathroom unit
3ddd
$1

Crockery unit
...crockery unit
3ddd
сервант
crockery unit
3ddd
$1
Process unit
...process unit
3ddd
статуэтка
process unit
3d_export
$5

united nations
...united nations
3dexport
united nations-logo -cnc plant
turbosquid
$3
TV unit-1 / 2 unit
...-1 / 2 unit for download as 3ds, max, obj, fbx, dwg, and dae on turbosquid: 3d models for games, architecture, videos. (1207609)
3d_export
$5
tv unit
...tv unit
3dexport
the tv unit design simple design with texture for interior
3d_ocean
$5

Tv Unit
...gh quality apple tv unit. the model is made using 3ds max. hope you enjoy it and if you have any queries feel free to contact me.
2
design_connected
$11

No 2
...no 2
designconnected
sibast no 2 computer generated 3d model. designed by sibast, helge.
turbosquid
$6

Cliff Rock 2-2
...uid
royalty free 3d model cliff rock 2-2 for download as obj on turbosquid: 3d models for games, architecture, videos. (1619161)
turbosquid
$29

Book variation 2 2
...3d model book variation 2 2 for download as max, obj, and fbx on turbosquid: 3d models for games, architecture, videos. (1366868)
turbosquid
$22

Classic baluster (2) (2)
...assic baluster (2) (2) for download as max, obj, fbx, and stl on turbosquid: 3d models for games, architecture, videos. (1483789)
turbosquid
$99

Smilodon 2 Pose 2
... available on turbo squid, the world's leading provider of digital 3d models for visualization, films, television, and games.
turbosquid
$20

Barrel Barricade 2-2
... available on turbo squid, the world's leading provider of digital 3d models for visualization, films, television, and games.
turbosquid
$6

Wall Trophy (2) (2)
... available on turbo squid, the world's leading provider of digital 3d models for visualization, films, television, and games.
turbosquid
free

Tire label 2 of 2
... available on turbo squid, the world's leading provider of digital 3d models for visualization, films, television, and games.
3ddd
$1

Кровать, 2 тумбочки, 2 светильника
...кровать, 2 тумбочки, 2 светильника
3ddd
кровать, 2 тумбочки, 2 светильника
нормальное качество
формат 3ds max
без текстур
3ddd
free

Кровать, 2 тумбочки, 2 светильника
...кровать, 2 тумбочки, 2 светильника
3ddd
кровать, 2 тумбочки, 2 светильника
нормальное качество
формат 3ds max
без текстур