Thingiverse
Black Hole case for Pi-hole by OutpostKodelia
by Thingiverse
Last crawled date: 4 years, 1 month ago
Overview
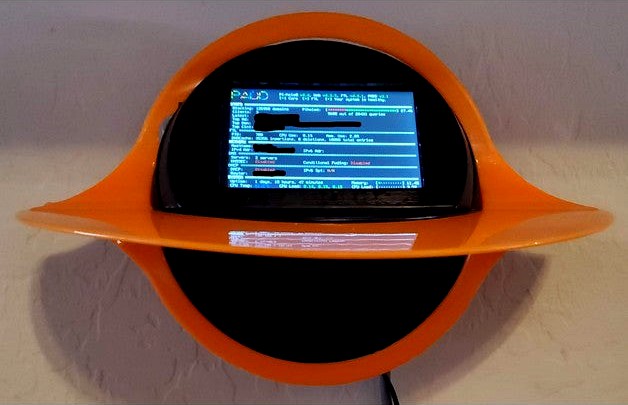
When we decided to set up or own Pi-hole ad blocker, we knew it needed to have a killer case. Inspired by the scientifically accurate depictions of a black hole, we got to work, and this case was born!
We're not going to address how to set up your Pi, install the software, or how to configure your network (though we have included a link to a great article that will). You're on your own for that.
For now, this is designed to be wall mounted. We may add an optional desk mount down the road, but this just works better as wall decor.
Skills required for a successful outcome:
Installing thermal set inserts. (https://www.youtube.com/watch?v=iR6OBlSzp7I)
Basic familiarity with Linux operating systems.
Intermediate home networking/router configuration skills.
(Optional) Printing and vapor polishing ABS filament.
Prior to assembly:
You should assemble the Pi and the TFT screen, install the applications, and get everything working. Then power it down and disassemble it (but leave the SD card inserted).
You will need a network cable where the plug is crimped to the wire without a boot on the plug. You don't want one where there's a big strain relief boot around the plug and first inch of the cable, otherwise it won't tuck neatly out of the way.
You will need 5x4mm thermal screw inserts.
You will need an M3 screw kit with various short (6-10mm) screws.
You will need four 6x3mm neodymium magnets.
If you need to use the optional wall standoff, you will need two #6 sheet metal or wood screws, anywhere from 1/2 to 1" long.
Pi-hole w/ PADD - Setup Info:
https://learn.adafruit.com/pi-hole-ad-pitft-tft-detection-display/overview
Note: As of this writing, recent versions of PADD have had some issues with the 3.5" TFT. If it doesn't render correctly for you, check out the PADD github repo for more info. (https://github.com/jpmck/PADD)
Part Links:
3.5" TFT Screen: https://www.amazon.com/PiTFT-Plus-480x320-Touchscreen-Raspberry/dp/B017PDWNKE
Network Cable: https://www.amazon.com/Monoprice-ZerobootCat6-Ethernet-Patch-Cable/dp/B00Y42DS1I
Thermal Inserts: https://www.amazon.com/gp/product/B07LBRHXKK
M3 Screws: https://www.amazon.com/270pcs-Machine-Assortment-Phillips-Tapping/dp/B083FNJWR2
Magnets: https://www.amazon.com/GBYMIUY-Refrigerator-Magnets-Cylinder-Whiteboard/dp/B07873ZCY4
Assembly:
Install the thermal inserts where shown in the image with the red arrows. They should sit flush to the surface and should be installed as straight as possible. If any plastic bubbles up in the process, carefully shave it off with a sharp blade. Test fit all screws into all screw holes to determine the best length (may vary based on your printer, insert mount depth, print warping, etc), and enlarge any holes with a drill bit, if needed, to allow the screws to pass easily.
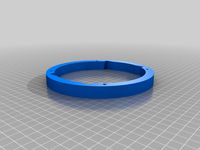
Assemble the accretion disc by screwing the top and bottom arches together with the disc sandwiched in between them. You can optionally use superglue between the pieces and clamp them until it dries in order to minimize any gaps.
Install the bare Pi into the rectangular case. It should just snap into place over the screw post clips. Install the TFT screen onto the Pi.
Place the rectangular case into the angled parts of the wall plate and the lower surround, hold the three together (the pi case should be settled all the way into and retained between the wall plate and lower surround) and secure the lower surround to the wall plate with two screws.
Install the upper surround around the pi case and secure to the lower surround with two screws. Secure the upper surround to the wall plate with one screw.
Secure the assembled accretion disc to the wall plate with four screws through the two flanges on the wall plate.
Use superglue to fix the four magnets into place on the backside of the cover and the front side of the upper surround. IMPORTANT: ensure you are installing the magnets flipped correctly to ensure that they attract instead of repel. An easy trick here is to let each pair of magnets snap together on the table before gluing them in and mark a dot on the outer face of each magnet in the pairing. When gluing in the magnets, make sure to keep the pairs matched and the side with the dot is the side that gets the glue. Once the glue is dry, simply snap the cover into place.
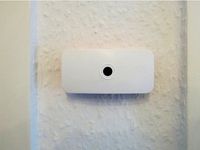
Install the power cord and network cord and ensure everything still works. If so, then you're ready to mount it. Route the power and network cords into the grooves in the back of the wall plate. If you notice that your cords just aren't flexing enough to allow a flush wall mount, print the optional standoff and use it to mount the black hole with a gap from the wall to allow your cords to flex and run behind the Black Hole.
Wall mount it. You will need two screws 52mm apart for mounting. Install them (preferably with drywall anchors or into a stud... but, honestly, this thing is pretty light and you can probably get away without using them as long as no one will be banging into it).
Printing tips:
0.2mm layers work great for everything. No reason to mess with thinner layers.
Accretion disc parts: print flat, no supports.
Lower surround: print with the large face down, you might need supports for the angled indentation.
Upper surround: print magnet face down, no supports.
Pi case: print flat side down, no supports.
Wall plate: print wall side down, with supports.
Face plate: print face down, no supports.
Wall standoff: wall-side up, with supports (for the screw head catches).
Filament / Finishing tips:
Print the main body parts in black, PLA works great for the body..
If you want a smooth glossy accretion disc, as shown in our final result, print it with ABS filament, assemble it, then carefully vapor polish it with the wall side down. Go slow with the vapor polishing, maybe a 15-30m session, and let it rest for a day or so before doing another session. This should help to prevent it from warping in the process. Ours is slightly warped because we went too fast. Note that vapor polishing can alter the shape slightly, so the fit to the wall plate may be affected by polishing, as you can see the gap in the top in our pic... again polish it slowly to minimize this.
Consider using a UV reactive filament for the accretion disc if you want it to glow in a black light.
If you're artistic (we're not), consider hand painting some swirls onto the accretion disc!
Notes:
In our finished product, the Pi core temp seems to sit right around 62C in a 23C room. The Pi's tolerance is up to 80C, so this should be fine. It probably helps to order a Pi kit with the two little aluminum heat sinks, or to order a standalone heat sink set if you already have a Pi you plan to use and it didn't come with them.
I have only tried this with the Raspberry Pi 3B. Other variants (excluding the 4 and Zero) should fit too, but we don't have any to test the fit with.
Have fun and enjoy watching the black hole swallow up those ads!
When we decided to set up or own Pi-hole ad blocker, we knew it needed to have a killer case. Inspired by the scientifically accurate depictions of a black hole, we got to work, and this case was born!
We're not going to address how to set up your Pi, install the software, or how to configure your network (though we have included a link to a great article that will). You're on your own for that.
For now, this is designed to be wall mounted. We may add an optional desk mount down the road, but this just works better as wall decor.
Skills required for a successful outcome:
Installing thermal set inserts. (https://www.youtube.com/watch?v=iR6OBlSzp7I)
Basic familiarity with Linux operating systems.
Intermediate home networking/router configuration skills.
(Optional) Printing and vapor polishing ABS filament.
Prior to assembly:
You should assemble the Pi and the TFT screen, install the applications, and get everything working. Then power it down and disassemble it (but leave the SD card inserted).
You will need a network cable where the plug is crimped to the wire without a boot on the plug. You don't want one where there's a big strain relief boot around the plug and first inch of the cable, otherwise it won't tuck neatly out of the way.
You will need 5x4mm thermal screw inserts.
You will need an M3 screw kit with various short (6-10mm) screws.
You will need four 6x3mm neodymium magnets.
If you need to use the optional wall standoff, you will need two #6 sheet metal or wood screws, anywhere from 1/2 to 1" long.
Pi-hole w/ PADD - Setup Info:
https://learn.adafruit.com/pi-hole-ad-pitft-tft-detection-display/overview
Note: As of this writing, recent versions of PADD have had some issues with the 3.5" TFT. If it doesn't render correctly for you, check out the PADD github repo for more info. (https://github.com/jpmck/PADD)
Part Links:
3.5" TFT Screen: https://www.amazon.com/PiTFT-Plus-480x320-Touchscreen-Raspberry/dp/B017PDWNKE
Network Cable: https://www.amazon.com/Monoprice-ZerobootCat6-Ethernet-Patch-Cable/dp/B00Y42DS1I
Thermal Inserts: https://www.amazon.com/gp/product/B07LBRHXKK
M3 Screws: https://www.amazon.com/270pcs-Machine-Assortment-Phillips-Tapping/dp/B083FNJWR2
Magnets: https://www.amazon.com/GBYMIUY-Refrigerator-Magnets-Cylinder-Whiteboard/dp/B07873ZCY4
Assembly:
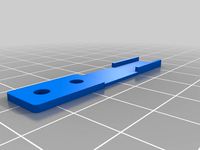
Install the thermal inserts where shown in the image with the red arrows. They should sit flush to the surface and should be installed as straight as possible. If any plastic bubbles up in the process, carefully shave it off with a sharp blade. Test fit all screws into all screw holes to determine the best length (may vary based on your printer, insert mount depth, print warping, etc), and enlarge any holes with a drill bit, if needed, to allow the screws to pass easily.
Assemble the accretion disc by screwing the top and bottom arches together with the disc sandwiched in between them. You can optionally use superglue between the pieces and clamp them until it dries in order to minimize any gaps.
Install the bare Pi into the rectangular case. It should just snap into place over the screw post clips. Install the TFT screen onto the Pi.
Place the rectangular case into the angled parts of the wall plate and the lower surround, hold the three together (the pi case should be settled all the way into and retained between the wall plate and lower surround) and secure the lower surround to the wall plate with two screws.
Install the upper surround around the pi case and secure to the lower surround with two screws. Secure the upper surround to the wall plate with one screw.
Secure the assembled accretion disc to the wall plate with four screws through the two flanges on the wall plate.
Use superglue to fix the four magnets into place on the backside of the cover and the front side of the upper surround. IMPORTANT: ensure you are installing the magnets flipped correctly to ensure that they attract instead of repel. An easy trick here is to let each pair of magnets snap together on the table before gluing them in and mark a dot on the outer face of each magnet in the pairing. When gluing in the magnets, make sure to keep the pairs matched and the side with the dot is the side that gets the glue. Once the glue is dry, simply snap the cover into place.
Install the power cord and network cord and ensure everything still works. If so, then you're ready to mount it. Route the power and network cords into the grooves in the back of the wall plate. If you notice that your cords just aren't flexing enough to allow a flush wall mount, print the optional standoff and use it to mount the black hole with a gap from the wall to allow your cords to flex and run behind the Black Hole.
Wall mount it. You will need two screws 52mm apart for mounting. Install them (preferably with drywall anchors or into a stud... but, honestly, this thing is pretty light and you can probably get away without using them as long as no one will be banging into it).
Printing tips:
0.2mm layers work great for everything. No reason to mess with thinner layers.
Accretion disc parts: print flat, no supports.
Lower surround: print with the large face down, you might need supports for the angled indentation.
Upper surround: print magnet face down, no supports.
Pi case: print flat side down, no supports.
Wall plate: print wall side down, with supports.
Face plate: print face down, no supports.
Wall standoff: wall-side up, with supports (for the screw head catches).
Filament / Finishing tips:
Print the main body parts in black, PLA works great for the body..
If you want a smooth glossy accretion disc, as shown in our final result, print it with ABS filament, assemble it, then carefully vapor polish it with the wall side down. Go slow with the vapor polishing, maybe a 15-30m session, and let it rest for a day or so before doing another session. This should help to prevent it from warping in the process. Ours is slightly warped because we went too fast. Note that vapor polishing can alter the shape slightly, so the fit to the wall plate may be affected by polishing, as you can see the gap in the top in our pic... again polish it slowly to minimize this.
Consider using a UV reactive filament for the accretion disc if you want it to glow in a black light.
If you're artistic (we're not), consider hand painting some swirls onto the accretion disc!
Notes:
In our finished product, the Pi core temp seems to sit right around 62C in a 23C room. The Pi's tolerance is up to 80C, so this should be fine. It probably helps to order a Pi kit with the two little aluminum heat sinks, or to order a standalone heat sink set if you already have a Pi you plan to use and it didn't come with them.
I have only tried this with the Raspberry Pi 3B. Other variants (excluding the 4 and Zero) should fit too, but we don't have any to test the fit with.
Have fun and enjoy watching the black hole swallow up those ads!
Similar models
thingiverse
free

Case Base with 8x2mm Magnet Mount for Malolo's screw-less / snap fit Raspberry Pi 3 Model B+ by Adiyahu
...fit raspberry pi 3 model b+ by adiyahu
thingiverse
4 mount holes for 8x2mm magnets.
you need to glue the magnets into the holes.
thingiverse
free

Raspberry Pi 2 wall plate by willfly
...simple plate for mounting pi model 2 on wall. should also work with pi model b+. the plate holes are sized for #6 drywall screws.
thingiverse
free

Raspberry Pi case mount for FFCP and PowerSpec Ultra by jack_dark
...iginal screws. if you want it on the back, you'll need to purchase longer screws. not sure what mounting is like on the ffcp.
thingiverse
free

Raspberry Pi case with click-on wall plate and slot for GPIO cable by philwild
...t results.
just an update. this thing print well on a makerbot. the board fits snugly inside when fastened with the two screws.
thingiverse
free

Yi Home Cam Wall Mount with screw hole by phettsack
...s! use 2-3 small screws to fix your camera-disc-feet to a wall. mount the cam again.
i made some photos that explains everything.
thingiverse
free
Raspberry Zero Cam magnetic mount by assin
... pi w cam. place a magnet into the hole on the back side and place a little self-adhesive metal plate to the back of the pi case.
thingiverse
free

PSVR Move Controller Mount
...e, screw the base to the wall then insert holders, should friction fit just fine (cant access screw holes with mounts installed).
thingiverse
free

Raspberry Pi Display Flush-Mount wall case by julakali
...tark/dp/b007wsnue6
screws and wall plugs, the holes at the back are 4mm diameter
original raspberry pi display 7", dsi cable
thingiverse
free
Vesa mount spacer 100x100 20mm
...an do around 160x160mm to print the mount. i used a brim but you should be able to print without it if you have good bed adhesion
thingiverse
free

Magnet Hole Components (SKP Components) by sroyalty
...l files with examples of the holes in use.
these have been used with these magnets: http://www.amazon.com/gp/product/104800001x
Outpostkodelia
thingiverse
free
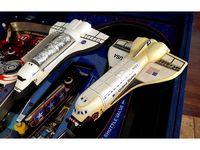
Space Shuttle mod for Space Shuttle Pinball by OutpostKodelia
... or gets mangled, you can buy this replacement then cut/bend it as needed.
https://www.marcospecialties.com/pinball-parts/12-smsb
thingiverse
free

Voron 2 - LED Wire Guide by OutpostKodelia
...dard t connectors, such as hammer heads. use m3x8mm cap head screws for the two wire option, or m3x12mm screws for the four wire.
thingiverse
free

Voron Raspberry Pi v2.1 Camera Mount by OutpostKodelia
...l and simple).
that's it! now you just need to focus the camera and adjust it to where you get the best view. happy printing!
thingiverse
free

Voron 2 - Switch Holder and Labels by OutpostKodelia
...t. if not, these claim to work with 24v for sure:
https://www.amazon.com/qofowin-rocker-toggle-switch-marine/dp/b07s8tvc5j
enjoy!
thingiverse
free

Williams Wedge Top T-Base Drop Target by OutpostKodelia
... others. these have become nearly impossible to find in any pinball store, so we made our own. hope this helps someone out there!
thingiverse
free
Wico Arcade Joystick Guard Actuator - Screw In Style by OutpostKodelia
...hotos.
v0.1 - initial creation.
print recommendations:
supports: no
print at high resolution (recommend 0.1 or 0.05 layer height)
thingiverse
free

Generic Coin Mech for Standard Arcade Video/Pinball Games by OutpostKodelia
...ommendations:
supports: yes, though they will be minimal.
accuracy isn't super critical so 0.2mm layer height should be fine.
thingiverse
free
Wico Arcade Joystick 8-way Actuator by OutpostKodelia
...s - attribution
this is designed to fit on a standard wico joystick shaft. this is a direct replacement.
v0.1 - initial creation.
thingiverse
free

ST:TNG Pinball - Klingon Bird of Prey Mounting Stand by OutpostKodelia
... pla, this has enough rigidity to hold it up, but enough flex to give the kbop some fun bounce as you play and nudge the cabinet.
thingiverse
free
LED Holder for Pirahna Super-Flux RGB LEDs and Williams/Bally Pop Bumper Bodies by OutpostKodelia
...ils
print at high resolution
this should work with the following williams/bally parts:
03-7443-5
3a-7443
wico 19-0155
545-5199-00
Pi
3ddd
$1
Sea Container письменный стол
...для крупных планов так и для средних. подробней о модели:http://loft-art.ru/sea-container-pi-mennyj-stol.html ...
3ddd
$1

SILVA Vario UT11315-PI
...silva vario ut11315-pi
3ddd
silva , vario
silva vario ut11315-pi
3ddd
$1

SILVA Vario UT11124-PI
...silva vario ut11124-pi
3ddd
silva , vario
silva vario ut11124-pi
3ddd
$1

Sea Container письменный стол (4 цвета)
...для крупных планов так и для средних. подробней о модели:http://loft-art.ru/sea-container-pi-mennyj-stol.html ...
3ddd
$1

Blu Dot / Pi Coffee Table
... круглый , журнальный
• powder-coated steel top
• solid walnut legs
3ddd
$1
Blu Dot / Pi Coffee Table
... кофейный , круглый
модель стола blu dot. 3dsmax2012
3ddd
$1

PRESIDENT P101 ПИСCУАР + ПЕРЕГОРОДКА
...+ перегородка 3ddd president , писcуар писcуар president артикул p-pia101 подвод воды сверху ширина [мм] 320 глубина [мм] 280...
3ddd
free
набор светильников
...набор светильников 3ddd emme pi light ,...
3ddd
free
Emme pi light | Masiero
... light | masiero
3ddd
emme pi light , masiero
masiero lampa,emme pi light – masiero,art.
3ddd
free

Emme pi light Masiero 3050
...emme pi light masiero 3050
3ddd
emme pi light , masiero
masiero, emme pi light 3050
Case
3d_export
$8

Iphone 6 case Batman 3D Model
... model
3dexport
iphone iphone6 case batman smarthphone gadgets phone cases
iphone 6 case batman 3d model ffranco95 88201 3dexport
3d_export
$10
Flask with leather case 3D Model
...flask with leather case 3d model
3dexport
flask case
flask with leather case 3d model valgrush63640 93243 3dexport
3d_export
$59

Old workbag 3D Model
...beach travel trip dress clothes wheels people airport plane briefcase old work old workbag 3d model dzejsi.models 72700...
3d_export
$12

Shelf MAX 2011 3D Model
...shelf max 2011 3d model 3dexport books cd case lamp bookshelf modern wood art colours furniture livingroom house...
3d_ocean
$9

Workplace Low Poly
...workplace low poly 3docean book case computer cup desk grass keyboard lamp mouse phone picture...
3d_ocean
$15

Apple watch v1
...apple watch v1 3docean aluminum apple band blue buckle case classic clock edition gold iphone iwatch modern silver sport...
3d_ocean
$15

Apple watch v5
...apple watch v5 3docean aluminum apple band blue buckle case classic clock edition gold iphone iwatch modern silver sport...
3d_export
free

Download free Curio Cabinet 3D Model
...cabinet 3d model 3dexport curio cabinet furniture wood display case shelf shelves knickknacks curio cabinet 3d model download free...
3d_export
$15
Toothpick Holder 3D Model
...cocktail stick wooden bamboo clean oral pick casing holder case tube carry key chain toothpick holder 3d model download...
3d_ocean
$4

i Phone Casing
...i phone casing
3docean
casing i phone i phone casing phone casing
i phone casing,casing,i phone,phone casing
Black
3d_export
$15
Pendant lamp Original BTC Stirrup Pendant Size 2 3D Model
...3d model 3dexport pendant lamp hanging original btc stirrup black stainless steel silver pendant lamp original btc stirrup pendant...
3d_export
$59
Zepter BlackWhite set 3D Model
...ishes magic harmony fine set black white champagne wine flutes stems classic
zepter blackwhite set 3d model mega3d 60680 3dexport
3d_export
$30

Samsung Galaxy Note 4 Charcoal Black 3D Model
...four phone flagship iphone apple quality blender cycles
samsung galaxy note 4 charcoal black 3d model dragosburian 96596 3dexport
3d_export
$15

Earth Moon Texture 3D Model
...travel universe galaxy star sun meteor asteroid comet blackhole black hole nebula earth moon texture 3d model clutchtrigger 49835...
3d_export
$10

Planet Mercury 3D Model
...travel universe galaxy star sun meteor asteroid comet blackhole black hole nebula planet mercury 3d model clutchtrigger 49645...
3d_export
$10

Planet Venus 3D Model
...travel universe galaxy star sun meteor asteroid comet blackhole black hole nebula planet venus 3d model clutchtrigger 49657...
3d_export
$10

Planet Earth 3D Model
...travel universe galaxy star sun meteor asteroid comet blackhole black hole nebula planet earth 3d model clutchtrigger 49647...
3d_export
$20

Headphones 1 3D Model
...c4d detailed music instrument sound studio headphone headphones ear black dark headphones 1 3d model cgaxis 70077...
3d_export
$19
Black table 3D Model
...black table 3d model
3dexport
black coffee table quadratic furniture
black table 3d model archicube.3d 74286 3dexport
3d_export
$39

Table 007 3D Model
...table 007 3d model 3dexport coffee table black wooden glossy table 007 3d model archicube.3d 74277...
Hole
3d_export
$15

Low Poly Mini Golf Hole C4H2 3D Model
...utt club ball hole course goal flag par sport sports low
low poly mini golf hole c4h2 3d model tronitecgamestudios 71749 3dexport
3d_export
$15

Low Poly Mini Golf Hole C4H4 3D Model
...utt club ball hole course goal flag par sport sports low
low poly mini golf hole c4h4 3d model tronitecgamestudios 71751 3dexport
3d_export
$15

Low Poly Mini Golf Hole C4H18 3D Model
...tt club ball hole course goal flag par sport sports low
low poly mini golf hole c4h18 3d model tronitecgamestudios 71765 3dexport
3d_export
$15
Earth Moon Texture 3D Model
...universe galaxy star sun meteor asteroid comet blackhole black hole nebula earth moon texture 3d model clutchtrigger 49835...
3d_export
$10
Planet Mercury 3D Model
...universe galaxy star sun meteor asteroid comet blackhole black hole nebula planet mercury 3d model clutchtrigger 49645...
3d_export
$10
Planet Venus 3D Model
...universe galaxy star sun meteor asteroid comet blackhole black hole nebula planet venus 3d model clutchtrigger 49657...
3d_export
$10
Planet Earth 3D Model
...universe galaxy star sun meteor asteroid comet blackhole black hole nebula planet earth 3d model clutchtrigger 49647...
3d_export
$59

Giant Tentacular Monster 3D Model
...blood game ready low poly fps master man satanic hole humanoid giant tentacular monster 3d model codethislab 64208...
3d_ocean
$12
Washbasin 14
...washbasin 14 3docean basin blister conch hole lavatory pit shell sink stand wash-hand washbasin washing-stand washstand...
3d_ocean
$6
Washbasin 3
...washbasin 3 3docean basin blister conch hole lavatory pit shell sink stand wash-hand washbasin washing-stand washstand...