Thingiverse
Bird Nest Spy Cam by Snille
by Thingiverse
Last crawled date: 3 years ago
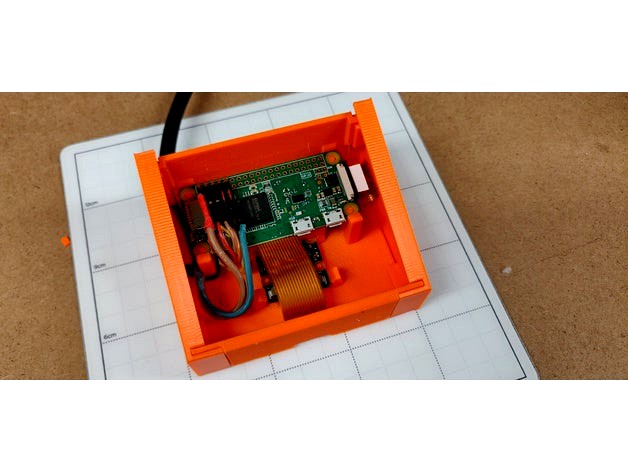
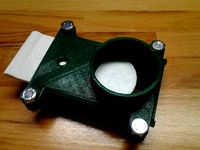
This has been in my mind a while. I wanted my daughter to see how the bird nests and feed the young. So, I decided to build a "Spy Cam Module" for birds nests. ;)
It's a fairly simple print.
Then this is what you will need to get this up and running:
2019-03-02: Updated the design because the old one let (to big) bugs in and they got cozy on the Raspberry Pi. This new version should be more bug safe. Also changed so it is possible to set the focus on the IR-camera (using the little adapter you get) without having to disassemble the whole thing. You can simply remove the transparent plastic from "outside" and access the camera lens that way. Also I added a transparent plastic in front of the leds. So now you can diffuse the leds if you want. Made the "top-plate" (the one you screw in to the inside of your nest roof) more robust. Added a small "Door" for the cable to enter in. I'm using "big" waterproof connectors and they have to "go trough" the nest wall, this gives a big hole that the "Door" will cover. I have also switched to Zero W instead of having a Wifi Dongle.
2017-03-24: Removed lights.zip and replaced it with leds.zip. For some reason the old script stopped working when updating to latest version of MotionEyeOS. So I decided to make the leds turn on and off via sh scripts that runs via cron instead. Read inside the scripts how to do it. :)
2017-03-07: Added live streams: http://nest.snille.net
2017-01-10: Updated the case a bit, it was a little too big when I glued the bird nest together. Also added small "locks" for the back, so it's more stable. All four nests will be placed in the trees soon, just waiting for the last RPiZ. :)
Hardware:
Birds Nest (I'm using this one): https://www.rusta.com/se/fagelholk-p756601270101.aspx
Zero W: https://thepihut.com/collections/raspberry-pi/products/raspberry-pi-zero-w
Raspberry Pi NoIR Camera module: https://thepihut.com/collections/raspberry-pi-camera/products/raspberry-pi-noir-camera-module
Pi Zero Cam Adapter: https://thepihut.com/collections/raspberry-pi-camera/products/raspberry-pi-zero-camera-adapter
Bright Pi: https://www.pi-supply.com/product/bright-pi-bright-white-ir-camera-light-raspberry-pi/
USB hub with Ethernet (sort of optional but makes life easier when setting up): http://www.newegg.com/Product/Product.aspx?Item=0J2-001S-00071
Oh, and two small pieces of transparent plastic to cover the camera lens and the Leds. Cut it from any annoying packing material. :)
You will have to solder a bit. The PI headers and the Bright-Pi is a kit. Both very easy to build. Observe that I solder the angled header pins in the "wrong" direction a bit "tilted" to save space on top. It is possible to use straight ones, but it will be tight. :)
Then the software:
MotionEyeOS: https://github.com/ccrisan/motioneyeos/wiki
Some small scripts to turn on and off the LEDs. (in the zip).
Start with the build of the hardware.
All parts are just snap in place or push together. :)
Then install MotionEyeOS on an microSD Card.
Check out the MotioEyeOS Wiki for lodas of good information.
Use my scripts (or make your own) to turn off and on the LEDs.
Of course you shall NOT use the visual lights (LEDs) when the birds are in there!
It's only for show. :) You can even skip to solder them if you want...
I'm writing this just out of the top of my head, if you want to know more, just ask. :)
Open up the SketchUp file if you want to make your own version. :)
Similar models
thingiverse
free

dual mount for Raspberry Pi Zero Wall Mount case for NoIR camera
... motioneyeos with this camera as a live stream bird nest cam and will mount it in either orientaion so need a mount on both sides
thingiverse
free

NOIR Webcam Case for RaspberryPi Zero by Wherzog
...o switch the ir-led on and off via the web-browser using action-buttonshttps://github.com/ccrisan/motioneyeos/wiki/action-buttons
thingiverse
free

case for "raspberry pi zero/zero w" with "Camera Module for Raspberry Pi Zero" by atsushi_kbt
...ducts/raspberry-pi-zero-w
camera module for raspberry pi zero
https://shop.pimoroni.com/products/raspberry-pi-zero-camera-module
thingiverse
free

Raspberry Pi Zero and third party mini Pi camera case by ht0
...edit: with third party mini camera i mean something like this: https://thepihut.com/products/zerocam-camera-for-raspberry-pi-zero
thingiverse
free
Pi Zero W Camera Arm Case by jctots
...ng:2307685
the short camera cable is from the official pi zero case:https://thepihut.com/products/official-raspberry-pi-zero-case
thingiverse
free

Raspberry Pi Zero flat camera enclosure by kieranc
...raspberry pi zero w and a camera module, to be screwed to a flat surface. intended for use as a security camera with motioneyeos.
thingiverse
free

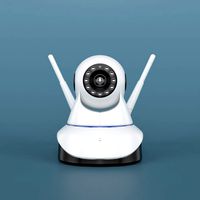
Bright Pi - Bright White and IR Camera Light for Raspberry Pi by PiSupply
...formation you can do so from our website at http://www.pi-supply.com/product/bright-pi-bright-white-ir-camera-light-raspberry-pi/
thingiverse
free

Raspberry Pi Zero With Camera and Envirophat Case by nerdymark
...t/3099
pimoroni envirophat: https://www.adafruit.com/product/3194
this can be a nature camera, pet monitor, security camera, etc.
thingiverse
free
Raspberry Pi Cam
...lder and raspberry pi 3 case. using this for my at home raspberry pi motioneyeos setup. everything should be close to a snap-fit.
thingiverse
free

Raspberry Pi Zero Camera case
...om https://shop.pimoroni.com/products/raspberry-pi-zero-camera-module?variant=1473069416458
i am using this as a motioneye camera
Snille
3ddd
$1
IKEA / SNILLE
...ikea / snille
3ddd
ikea , стул
snille swivel chair / ikea
3ddd
$1

СНИЛЛЕ IKEA (Рабочий стул)
...ikea (рабочий стул) 3ddd ikea , стул модель стула snille от ikea. turbo...
3d_sky
free

IKEA / SNILLE
...ikea / snille
3dsky
snille swivel chair/ikea
3d_sky
free

IKEA: Chair SNILLE
...nille
3dsky
ikea
two chairs ikeevskih snille link to manufacturer:http://www.ikea.com/ru/ru/catalog/products/s79877709/
thingiverse
free

40mm Pulley by Snille
...40mm pulley by snille
thingiverse
just a simple pulley for any type of rope. :)
thingiverse
free

Wire Holder by Snille
...snille
thingiverse
a simple thing for holding the wire when you are hanging a lamp. it helps to relieve the stress on the cable.
thingiverse
free

Small Funnel by Snille
...unnel by snille
thingiverse
just a small funnel for the kitchen.
update: added another funnel with a bigger "pipe". :)
thingiverse
free

Wire Holder v3 by Snille
...wire holder v3 by snille
thingiverse
simple wire lock for laps hanging in the wire.
thingiverse
free

45x45 Leg hinge by Snille
...45x45 leg hinge by snille
thingiverse
this can be used if you need to have a foldable 45x45 leg.
thingiverse
free
40mm valve by Snille
...se this to block airflow in my saw-dust suck system. it fits on a 40mm pipe.
update: complete redesign due to overhang problem...
Spy
3ddd
$1
Billiani spy
...billiani spy
3ddd
billiani , spy
кресло billiani spy
turbosquid
$29

Spy
...
royalty free 3d model spy for download as max, obj, and fbx on turbosquid: 3d models for games, architecture, videos. (1310859)
turbosquid
free

Spy
... available on turbo squid, the world's leading provider of digital 3d models for visualization, films, television, and games.
design_connected
$7
Spy Faretto
...spy faretto
designconnected
manufacturer spy faretto wall lights computer generated 3d model. designed by hannes wettstein.
3ddd
$1
Кресло SPY GAY
...кресло spy gay
3ddd
spy gay
по фотографии
turbosquid
$50

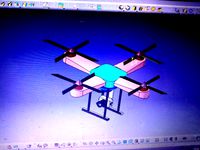
Spy Drone
...osquid
royalty free 3d model spy drone for download as blend on turbosquid: 3d models for games, architecture, videos. (1351381)
3d_export
free
spy drone
...spy drone
3dexport
turbosquid
$3

SPY FOCUS
...lty free 3d model spy focus for download as max, fbx, and obj on turbosquid: 3d models for games, architecture, videos. (1659281)
3d_ocean
$25

Bodyguard Spy
...that will enhance detail and realism to any of your rendering/animation projects. -the model was made in maya 2014. -4k resolu...
turbosquid
$20

Spy Cat
...ree 3d model spy cat for download as blend, fbx, obj, and stl on turbosquid: 3d models for games, architecture, videos. (1563397)
Nest
3ddd
$1
Nest
...nest
3ddd
вешалка
nest 50x50x180
design_connected
$16

Nest
...nest
designconnected
kr design nest computer generated 3d model.
3ddd
free
Armchair Nest
...armchair nest
3ddd
nest
armchair nest
design_connected
$18

Nest
...nest
designconnected
autoban nest computer generated 3d model. designed by özdemir, seyhan.
3ddd
$1

Rifra Nest
...rifra nest
3ddd
rifra , nest
rifra nest
turbosquid
$2

nest
...squid
royalty free 3d model nest for download as max and obj on turbosquid: 3d models for games, architecture, videos. (1337430)
3ddd
$1
Торшер Nest
... joa herrenknecht
http://www.krdesign.de/de/produktuebersicht/nest/bodenleuchte/
3ddd
$1

Nest Decoration Ball
...d
ball , decoration , nest
nest decoration ball
3d_export
$15

birds nest
...nest model. the scene has the nest, 4 eggs and the grass background as seen in the images. sent as .blend .obj .fbx .stl and .jpg
3ddd
$1
Nest
...timum levels of interior air quality, it symbolises the convergence of craft and modern manufacturing. designed by edward linacre
Cam
archibase_planet
free

Cam
...cam
archibase planet
tv camera equipment
cam dolly - 3d model (*.gsm+*.3ds) for interior 3d visualization.
3d_export
$8

Cam and Follower
...ry to linear (reciprocating) motion. as the cam rotates, the follower rises and falls in a process known as reciprocating motion.
3d_ocean
$15
Studio Cam
...p. made in 3ds max 2013 1- 3dsmax with vray render included material and light 2- obj file 3- fbx file hope you like it please...
3d_export
$37

thermal cam
...thermal cam
3dexport
turbosquid
$19
Security cam
...oyalty free 3d model security cam for download as ige and obj on turbosquid: 3d models for games, architecture, videos. (1331128)
turbosquid
$40
Security Cam
...y free 3d model security cam for download as ma, fbx, and obj on turbosquid: 3d models for games, architecture, videos. (1601103)
3d_export
$40
security cam
...security cam
3dexport
home security camera
turbosquid
$280

cam-bot
... available on turbo squid, the world's leading provider of digital 3d models for visualization, films, television, and games.
turbosquid
$33

AT_minivan_(CAM)
... available on turbo squid, the world's leading provider of digital 3d models for visualization, films, television, and games.
turbosquid
$10

Security Cam
... available on turbo squid, the world's leading provider of digital 3d models for visualization, films, television, and games.
Bird
design_connected
$18
Birds Birds Birds
...oto-realistic 3d models of the birds birds birds pendant from ingo maurer for 3d architectural and interior design presentations.
archibase_planet
free
Bird
...bird
archibase planet
humming-bird hummingbird bird
humbird - 3d model (*.gsm+*.3ds) for interior 3d visualization.
design_connected
$13
Birds
...birds
designconnected
architectmade birds computer generated 3d model. designed by vedel, kristian.
3ddd
$1
Birds
...birds
3ddd
статуэтка
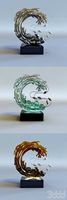
modern abstract resin animal bird sculpture,casting sculpture
3d_ocean
$7
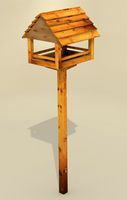
bird feeders
...bird feeders
3docean
bird feeders wood
bird feeders
3ddd
$1
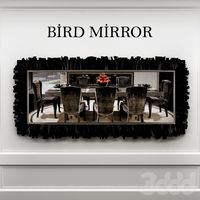
Bird mirror
...bird mirror
3ddd
visionnaire , bird
visionnaire - bird mirror
3ddd
free
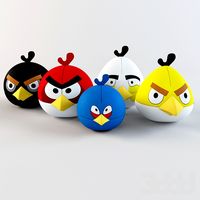
Angry birds
...angry birds
3ddd
angry birds , птица
angry birds
archibase_planet
free
Bird
...bird
archibase planet
parrot birds macaw
macaw n200908 - 3d model (*.gsm+*.3ds) for interior 3d visualization.
3d_export
$25

heron bird
...heron bird
3dexport
heron bird
3d_export
$25

crane bird
...crane bird
3dexport
crane bird