Thingiverse
Bed Leveling Tool by urkansan
by Thingiverse
Last crawled date: 3 years ago
10/09/2020
Added file "Bed Leveling Tool export objects v1.step with all objects.
07/09/2020
Added file "Bed Leveling Tool export objects v1.f3d with all objects.
23/07/2018
Today I added another video in which I try to show the extend of accuracy that this tool provide. I did not mention yet. Space between arrows on mirrored wing like scale present 1 mm in reality. They are in aprox. 5:1 ratio. Arrows are most precise in horizintal position. That why I suggest to calibrate bed level in this position.
Most of the time I print with 0.5 nozzles. That why objects are designed to fit the resolution of details that 0.5 nozzle can provide.
Today I also deleted previous uploaded of not-tested 2020 aluminium profile adapter. From then I was able to find some pieces and test it. It was no good. That why I draw a new one. I printed it with many walls to make it strong. The easyiest way to attach it on (2020 frame) is to rotate it on. That why I cut it and put some fillet from sides.
16/7/2018
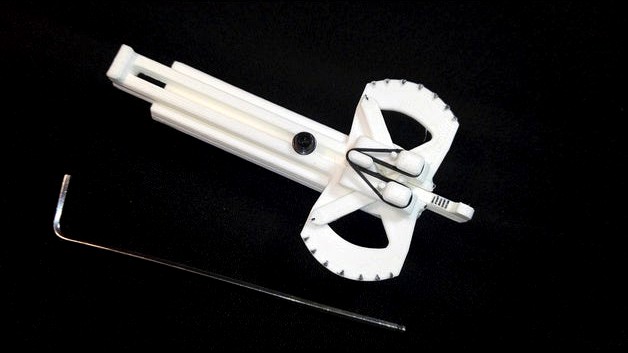
This is tool that designed and that I use to level bed when I need to do that on my GEEETech i3 3D printer.
It is used for “fast” leveling or cheking if bed is still leveled evenly.
Tool is attached to both two 8 mm rods that extruder rides on.
Bottom “stick to rod”part of tool is fixed, top one is moveable so it can be adjust if your distance between top and bottom rod is different.
After cleaning support from printed parts they all need to be assembled together. I printed them with brim so I had a little more cleaning to do. I also helped myself with small round pile and 1.5mm drill bit for removing support from holes. I used pile ONLY to make fillet and that way the insertion of filament pice to hole axis of moving parts easier.
Additonal parts that are needed for assembly are:
M3 screw, M3 washer, M3 nut, small length of 1.75mm filament and Ruber band (Loom bands).
I used black permanent marker to colour scale stripes.
I also uploaded video with useful and not so useful info about this model. I suggest to look at it if you have any dubs or questions...
Assembly:
“Main Slider.stl” is slided and screwed with M3 15mm long screw on “Base.stl”.
(Screw, nut and washer are some of leftovers after assembly of my printer)
“Fixed Slider.stl” is slided into “Main Slider.stl”. I used black Loom band on model anchors.
“Left Arrow.stl” and “Right Arrow.stl” are fixed on to “Fixed slider.stl” and “Main slider.stl” with 3 pieces of 1.75mm filament.
Moveable “Rod Sslider.stl” is slided at back side into “Main slider.stl”. Bump at the bottom part of “Rod slider.stl” prvents it to freely fall from “Main slider.stl”.
Parts need to be moved up and down manualy few times to make them run smoothly...
I also added some TEST files of moving and snapping parts of the model.
Usage:
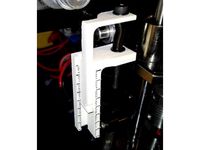
You choose one place of the bed (center or some corner of bed) and attach tool to both rods.
Then you uncrew “Main Slider.stl” and screw it back after you move it to the bed so the “Fixed Slider.stl” is pushing against bed and the scale is aligned at some chosen point (picture X).
Now all you need to do is to move bed and reattach tool to adjust hight of all for corners of the bed to the same scale point that you choose at previous “calibration” step.
https://youtu.be/KKVZionPe8E
https://youtu.be/eFlLIdxJpXk
Added file "Bed Leveling Tool export objects v1.step with all objects.
07/09/2020
Added file "Bed Leveling Tool export objects v1.f3d with all objects.
23/07/2018
Today I added another video in which I try to show the extend of accuracy that this tool provide. I did not mention yet. Space between arrows on mirrored wing like scale present 1 mm in reality. They are in aprox. 5:1 ratio. Arrows are most precise in horizintal position. That why I suggest to calibrate bed level in this position.
Most of the time I print with 0.5 nozzles. That why objects are designed to fit the resolution of details that 0.5 nozzle can provide.
Today I also deleted previous uploaded of not-tested 2020 aluminium profile adapter. From then I was able to find some pieces and test it. It was no good. That why I draw a new one. I printed it with many walls to make it strong. The easyiest way to attach it on (2020 frame) is to rotate it on. That why I cut it and put some fillet from sides.
16/7/2018
This is tool that designed and that I use to level bed when I need to do that on my GEEETech i3 3D printer.
It is used for “fast” leveling or cheking if bed is still leveled evenly.
Tool is attached to both two 8 mm rods that extruder rides on.
Bottom “stick to rod”part of tool is fixed, top one is moveable so it can be adjust if your distance between top and bottom rod is different.
After cleaning support from printed parts they all need to be assembled together. I printed them with brim so I had a little more cleaning to do. I also helped myself with small round pile and 1.5mm drill bit for removing support from holes. I used pile ONLY to make fillet and that way the insertion of filament pice to hole axis of moving parts easier.
Additonal parts that are needed for assembly are:
M3 screw, M3 washer, M3 nut, small length of 1.75mm filament and Ruber band (Loom bands).
I used black permanent marker to colour scale stripes.
I also uploaded video with useful and not so useful info about this model. I suggest to look at it if you have any dubs or questions...
Assembly:
“Main Slider.stl” is slided and screwed with M3 15mm long screw on “Base.stl”.
(Screw, nut and washer are some of leftovers after assembly of my printer)
“Fixed Slider.stl” is slided into “Main Slider.stl”. I used black Loom band on model anchors.
“Left Arrow.stl” and “Right Arrow.stl” are fixed on to “Fixed slider.stl” and “Main slider.stl” with 3 pieces of 1.75mm filament.
Moveable “Rod Sslider.stl” is slided at back side into “Main slider.stl”. Bump at the bottom part of “Rod slider.stl” prvents it to freely fall from “Main slider.stl”.
Parts need to be moved up and down manualy few times to make them run smoothly...
I also added some TEST files of moving and snapping parts of the model.
Usage:
You choose one place of the bed (center or some corner of bed) and attach tool to both rods.
Then you uncrew “Main Slider.stl” and screw it back after you move it to the bed so the “Fixed Slider.stl” is pushing against bed and the scale is aligned at some chosen point (picture X).
Now all you need to do is to move bed and reattach tool to adjust hight of all for corners of the bed to the same scale point that you choose at previous “calibration” step.
https://youtu.be/KKVZionPe8E
https://youtu.be/eFlLIdxJpXk
Similar models
thingiverse
free

Bed Adjust tool by centerridge
...ust threaded rod to level bed. use z home to verify. move to back, should only need slight adjust to level, use z home to verify.
thingiverse
free
Bed Leveling Knob
... standard you can use this in any bed that has m3 bolts for leveling.
just slide a m3 nut in the slot and swap the old levelers!
thingiverse
free

2020 Aluminium Profile Adapter for Bed Leveling Tool by urkansan
... use bed leveling tool on 2020 aluminium rail frame.
i printed it with many walls to make it strong.
https://youtu.be/pwc6b_vd7qg
thingiverse
free

MendelMax bed leveler by Amplivibe
...it is necessary to put springs on the bottom side. i use ducttape to prevent the screws falling out when the nut is not in place.
thingiverse
free

Printrbot Plus Bed Leveling Tool by B222222
...e. screw holes are 4.2 mm so you can cut the threads while inserting your screws. or tap them fo' real if you're fancy.
thingiverse
free

Z-limit endstop switch support for FLSUN Cube by tato_713
...u need to screw the endstop with the original m2.5 sets, this part is attached by force in one side carry bar.
version 5 assembly
thingiverse
free

Caster Wheel by WiMa88
... application, i use 2x m3-100mm screws
m3 spacer and a nut
for the wheel m2 screws can be use alternatively small rod can be use
grabcad
free

Smartphonehalterung
...n fix the assembly with a rubberband to your bike. you should now be able to slide the handyhuellenadapter in the handyhalterung.
thingiverse
free
Kossel 240mm bed support with lock screw by masterviana
..., its only for aluminium 3mm heat bed.
you just need put a screw 16mm at least and insert a m3 nut a hole (only enter in one way)
thingiverse
free

Rubber Band Gun (single shot) by Codachrome
... gun toy.
parts needed:
x7 m3 machine screws
x7 m3 nuts
x3 or 4 small rubber bands (rainbow loom size)
small rubber bands as ammo
Urkansan
thingiverse
free

Bed Wing Nut Replacemant by urkansan
...ind.
publishig it on the thingverse and making video... well that is another story;)
https://www.youtube.com/watch?v=h39h6gvbtzg
thingiverse
free
2020 Aluminium Profile Adapter for Bed Leveling Tool by urkansan
... use bed leveling tool on 2020 aluminium rail frame.
i printed it with many walls to make it strong.
https://youtu.be/pwc6b_vd7qg
thingiverse
free

FLYSKY FS-i6X RC gimbal protection by urkansan
...re.
i am using flysky fs-i6x rc.
used 0.3 nozzle for print and no support.
for more dimension informations i uploaded few photos.
thingiverse
free
Geeetech Z axis switch screw scale by urkansan
.... i changed filaments during print (bottom part only). one of the uploaded pictures shows hights on object when stripes starts...
thingiverse
free

Modular Foldable Flysky i6 Protector by urkansan
... not so stiff that some others variants of pla that i had tried. probably petg would be best option.
https://youtu.be/sze5p-r2z_a
thingiverse
free

Bed Leveling Tool - Mount Adapter for Many Creality Printers (not all) by BustedChain
...of the corners is out of level? that's where urkansan#39;s tool comes in:https://www.thingiverse.com/thing:3007018 one tip: the less "slop" or...
Leveling
design_connected
$11

Levels
...levels
designconnected
one nordic levels computer generated 3d model. designed by form us with love.
design_connected
$7
Level
...level
designconnected
zanotta level shelves and storage computer generated 3d model. designed by arik levy.
turbosquid
$29
level
...ty free 3d model level for download as 3ds, obj, c4d, and fbx on turbosquid: 3d models for games, architecture, videos. (1272856)
turbosquid
$1
level
... available on turbo squid, the world's leading provider of digital 3d models for visualization, films, television, and games.
3d_export
$5

Mario level
...mario level
3dexport
mario level low quality for fun videos
3ddd
$1
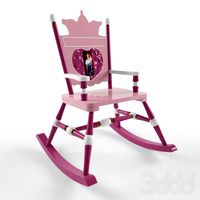
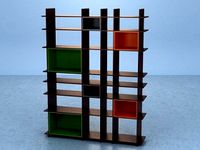
LEVELS OF DISCOVERY
...етская мебель "levels of discovery". rab10003 princess mini rocker
кресло-качалка (мини) "принцесса навсегда"
3d_export
$19

level design
...level design
3dexport
you can use this design (level design) in your own game.
turbosquid
$60
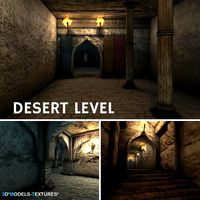
Desert level
...squid
royalty free 3d model desert level for download as fbx on turbosquid: 3d models for games, architecture, videos. (1208131)
turbosquid
$15
Transit Level
...quid
royalty free 3d model transit level for download as max on turbosquid: 3d models for games, architecture, videos. (1158112)
turbosquid
$14

Districts Level
...id
royalty free 3d model districts level for download as max on turbosquid: 3d models for games, architecture, videos. (1408410)
Tool
turbosquid
$21
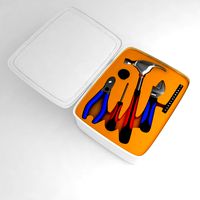
Tool box with tools
... available on turbo squid, the world's leading provider of digital 3d models for visualization, films, television, and games.
archibase_planet
free
Tools
...tools
archibase planet
tools instruments implements
tools n070114 - 3d model (*.gsm+*.3ds+*.max) for interior 3d visualization.
3d_ocean
$12
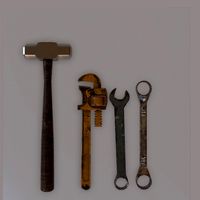
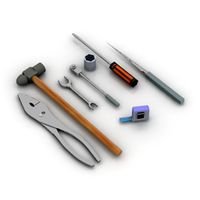
Tools
...tools
3docean
hammer metal old screw tools wrench
maya
turbosquid
$6

Tool Cart / Tool Box
...
royalty free 3d model tool cart / tool box for download as on turbosquid: 3d models for games, architecture, videos. (1241859)
3d_ocean
$15
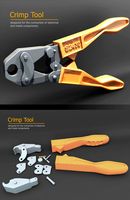
crimp tool
... tool copper cutter crimp crimp tool electrical electrical tools press tools pressing tool tools wire cutter
created in maya 2013
3d_ocean
$5

Tools
...tools
3docean
3d models paint tools work
3d,models,works,paint,art,create,working,
3d_export
free
tools
...tools
3dexport
coldsteel
turbosquid
$15
Tools
...turbosquid
royalty free 3d model tools for download as blend on turbosquid: 3d models for games, architecture, videos. (1331352)
3ddd
$1
bar tool
...bar tool
3ddd
барный
bar tool
turbosquid
$35

tools
... available on turbo squid, the world's leading provider of digital 3d models for visualization, films, television, and games.
Bed
3ddd
$1

bed
...bed
3ddd
bed , постельное белье
bed
3ddd
$1

bed
...bed
3ddd
bed , постельное белье
bed
3ddd
$1

bed
...bed
3ddd
bed , постельное белье
bed
3ddd
$1

bed
...bed
3ddd
bed , постельное белье
bed
3ddd
$1

bed
...bed
3ddd
bed , постельное белье
bed
3ddd
$1

bed
...bed
3ddd
bed , постельное белье
bed
3ddd
free

bed
...bed
3ddd
bed , постельное белье
bed
3ddd
free

bed
...bed
3ddd
bed , постельное белье
bed
3ddd
$1

Bed
...bed
3ddd
bed , постельное белье , постель
bed
3d_export
$7

bed adairs bed
...rs bed
3dexport
bed adairs bed in modern style. if you want a smoother surface, please turn on turbosmooth in the modifier list.