Thingiverse
Bed adhesion torture test by crisd
by Thingiverse
Last crawled date: 3 years, 3 months ago
Having trouble with small-footprint objects sticking to the bed plate?
This torture test will help you check your bed levelling and find troublesome areas.
The test print fits beds of size larger than 195 x 195 mm^2.
Step 1
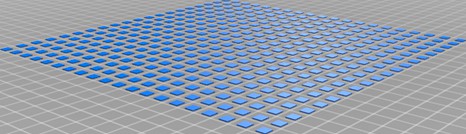
Slice and print 'bed adhesion squares.stl'. Make sure it's centered on the build plate!
Print settings:
Bed adhesion: none (no skirt/brim etc)
Layer height: 0.28 mm
Line width: 0.4
Optional, for an even more torturous test: wall count: 2, top/bottom layers: 0.
When hitting a "rough patch" on the bed plate, material that doesn't stick will accumulate and ruin a few more squares, but will likely repair itself.
I suggest you do keep an eye on this print!
(It's rather quick at <15 min on conservative settings)
Take a look at the photo of the bad print: you can see where my greasy fingers touched the build plate.
The only difference between the "bad" and the "good" print is a good washing of the build plate with soapy water, followed by spraying with sanitary alcohol and leaving to dry (a hot bed dries it in no time!)
I have also included the gcode for the model if you want to compare your results with mine without slicer-induced variations.Warning! Works on MY machine (Ender 3), use at your own risk!
Step 2
Have fun removing 400 tiny squares from the build plate!
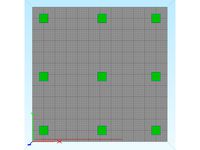
Or... print the second stl (removal grid.stl) OVER of the 1st one!
This way you can easily peel off the whole sheet in one go.
Start from the lower-left corner.
Trust me, it's better than popping bubble wrap!
Like in step 1, make sure this is also centered on the build plate, otherwise it will not align with the squares.
If your slicer adds a purge line at the beginning of the print, remove it manually before printing step 2.
If you have auto-bed levelling hardware like BL Touch, disable it for this step.
An off-the-bed min-Z sensor works best. If the min-Z sensor touches the build plate, it might hit an actual square and get a wrong measurement, in which case you'll probably have to manually lower the print head to get enough adhesion.
I have added the gcode file for this step too. If you want to use this, it's a good idea to peel the purge line on the left (from step 1).
Step 3: for masochists
By popular request, added two more torturous models that print high(er) square columns instead of a single layer.
One prints 2cm high "straight" columns, the other prints 4cm high, tilted (60 deg, both X and Y) columns.
Be warned, these take a LOT more time and material than the original single-layer model!
Update:
Added a "sample nightmare" STL that prints 5x5 slanted towers instead of the full 20x20.
This torture test will help you check your bed levelling and find troublesome areas.
The test print fits beds of size larger than 195 x 195 mm^2.
Step 1
Slice and print 'bed adhesion squares.stl'. Make sure it's centered on the build plate!
Print settings:
Bed adhesion: none (no skirt/brim etc)
Layer height: 0.28 mm
Line width: 0.4
Optional, for an even more torturous test: wall count: 2, top/bottom layers: 0.
When hitting a "rough patch" on the bed plate, material that doesn't stick will accumulate and ruin a few more squares, but will likely repair itself.
I suggest you do keep an eye on this print!
(It's rather quick at <15 min on conservative settings)
Take a look at the photo of the bad print: you can see where my greasy fingers touched the build plate.
The only difference between the "bad" and the "good" print is a good washing of the build plate with soapy water, followed by spraying with sanitary alcohol and leaving to dry (a hot bed dries it in no time!)
I have also included the gcode for the model if you want to compare your results with mine without slicer-induced variations.Warning! Works on MY machine (Ender 3), use at your own risk!
Step 2
Have fun removing 400 tiny squares from the build plate!
Or... print the second stl (removal grid.stl) OVER of the 1st one!
This way you can easily peel off the whole sheet in one go.
Start from the lower-left corner.
Trust me, it's better than popping bubble wrap!
Like in step 1, make sure this is also centered on the build plate, otherwise it will not align with the squares.
If your slicer adds a purge line at the beginning of the print, remove it manually before printing step 2.
If you have auto-bed levelling hardware like BL Touch, disable it for this step.
An off-the-bed min-Z sensor works best. If the min-Z sensor touches the build plate, it might hit an actual square and get a wrong measurement, in which case you'll probably have to manually lower the print head to get enough adhesion.
I have added the gcode file for this step too. If you want to use this, it's a good idea to peel the purge line on the left (from step 1).
Step 3: for masochists
By popular request, added two more torturous models that print high(er) square columns instead of a single layer.
One prints 2cm high "straight" columns, the other prints 4cm high, tilted (60 deg, both X and Y) columns.
Be warned, these take a LOT more time and material than the original single-layer model!
Update:
Added a "sample nightmare" STL that prints 5x5 slanted towers instead of the full 20x20.
Similar models
thingiverse
free

Bridge Torture Test 2 by ademuri
...it difficult to remove from the bed. the additional layers make the foot more rigid so it's easier to remove on a spring bed.
thingiverse
free
Bed Level Calibration Test - 300x300 - ASWX1
...d to be adjusted higher than the rest of the bed in terms of how "tight" the paper felt between the nozzle and the bed.
thingiverse
free
Basic Adhesion Torture Tests by LostInTech
...slow but it's up to you.
as featured in my video on how to get a new creality glass bed working.https://youtu.be/w9h4ofwlgno
thingiverse
free
15 Minute 4-Sided Cooling Torture Test by OwenD30
... print. if you have a good first layer and bed adhesion, print the original. you can also upscale it if you want better adhesion.
thingiverse
free

First Layer Test Square by _Happy_
...lines to close. but just touch enough to close.
slice this with a 0.2 layer height. i've only tested this with a 0.4 nozzle.
thingiverse
free

Bed Clean 205 x 205 x .06
... the walls
i would not use a skirt or brim
at 205 x 205 you should be fine with purge line buy can remove it from gcode if needed
thingiverse
free

3d Printer Bed Adhesion Test Print by irvshapiro
...top of the model.
as with all tests, it should print relatively fast.
i used this model for a youtube video on the drvax channel.
thingiverse
free

Ender 3 Level Test by elmerohueso
...r if you want to insert and test with your own auto-leveling code. edit the "g28" on line 18 to perform auto-leveling.
thingiverse
free

Bed leveling square and line by DaveBZH
...x test with multiple lines along x, same with y or mix x and y lines. same with squares, only one in the middle or ever you want.
thingiverse
free

Bed Adhesion Torture Test by Sumerlin_Designing
...ough. rough surfaces should be good with most layer heights, even lower ones.
if you would like to see my other designs, go here
Crisd
thingiverse
free

Headphones holder by crisd
... 3 bed, if placed diagonally.
i suggest you print it face down for a smooth finish on the front (the back will have layer steps).
thingiverse
free

Catch for spring-loaded toolbox lid by crisd
...pring-loaded toolbox lid by crisd
thingiverse
replacement catch piece to keep the lid closed on a boxed set of screwdriver bits.
thingiverse
free
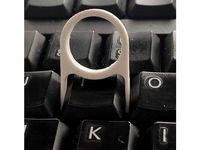
Keyboard keycap remover by crisd
...ould yield even better results.
edit: a lot of people seem to like this <3
where are you all coming from?! (leave a message!)
Torture
turbosquid
$33

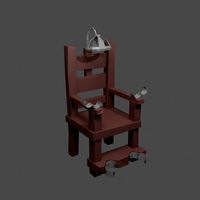
Torture Chair
...quid
royalty free 3d model torture chair for download as obj on turbosquid: 3d models for games, architecture, videos. (1509182)
turbosquid
$30

Chair for torture
...odel chair for torture for download as 3ds, max, obj, and fbx on turbosquid: 3d models for games, architecture, videos. (1312159)
3d_export
$20

Warrior torturer 3D Model
...warrior torturer 3d model
3dexport
warrior torturer
warrior torturer 3d model vinin 101273 3dexport
turbosquid
$29

Torture tools
... available on turbo squid, the world's leading provider of digital 3d models for visualization, films, television, and games.
turbosquid
$3

Torture Devices
... available on turbo squid, the world's leading provider of digital 3d models for visualization, films, television, and games.
turbosquid
$10

Torture Series 1
... available on turbo squid, the world's leading provider of digital 3d models for visualization, films, television, and games.
turbosquid
$6

medieval torture room
... available on turbo squid, the world's leading provider of digital 3d models for visualization, films, television, and games.
turbosquid
$45
Iron Chair Torture Device
... available on turbo squid, the world's leading provider of digital 3d models for visualization, films, television, and games.
3d_export
$12
torture chair
...g is available.<br>the original file was created in blender.<br>all preview images were rendered with blender cycles.
turbosquid
$2
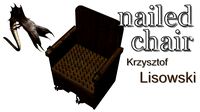
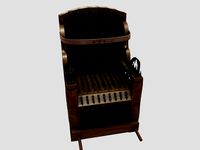
A Spanish torture nailed chair
...wnload as skp, unitypackage, dae, fbx, 3ds, stl, dxf, and obj on turbosquid: 3d models for games, architecture, videos. (1601601)
Adhesion
turbosquid
$1
Adhesive tape
...quid
royalty free 3d model adhesive tape for download as obj on turbosquid: 3d models for games, architecture, videos. (1352737)
3d_export
$5
adhesive tape carrier
...adhesive tape carrier
3dexport
adhesive tape carrier
turbosquid
$18
adhesive tape
... available on turbo squid, the world's leading provider of digital 3d models for visualization, films, television, and games.
turbosquid
$20
NORDSK STYLISH ADHESIVE TAPE DISPENSER IGES
... available on turbo squid, the world's leading provider of digital 3d models for visualization, films, television, and games.
3d_export
$20
power cord adhesive tape machine
...anipulator: 0.005 mm, repeated positioning accuracy of manipulator: ≤ ± 0.01 mm, and material change mode: manual material change
3d_export
$1000
bead triangle adhesive laminating machine
...m onto the steel ring (3) the outlet of the rubber conveying device is connected with the inlet of the winding laminating device.
3d_export
$16

Two White Round Stickers - smooth and bended adhesive labels
...rt editable mesh object to editable poly and load *stickers_uvw.uvw* in unwrap uvw modifier; -studio environment is not included;
3d_export
$20
Black Stickers set - 8 adhesive sticky labels
...bject to editable poly and load<br>*stickers_uvw.uvw* in unwrap uvw modifier;<br>-studio environment is not included;
3d_export
$20

White Stickers set - 8 adhesive sticky labels
...bject to editable poly and load<br>*stickers_uvw.uvw* in unwrap uvw modifier;<br>-studio environment is not included;
3d_export
$20
8 Stickers set - silver adhesive sticky labels
...bject to editable poly and load<br>*stickers_uvw.uvw* in unwrap uvw modifier;<br>-studio environment is not included;
Bed
3ddd
$1

bed
...bed
3ddd
bed , постельное белье
bed
3ddd
$1

bed
...bed
3ddd
bed , постельное белье
bed
3ddd
$1

bed
...bed
3ddd
bed , постельное белье
bed
3ddd
$1

bed
...bed
3ddd
bed , постельное белье
bed
3ddd
$1

bed
...bed
3ddd
bed , постельное белье
bed
3ddd
$1

bed
...bed
3ddd
bed , постельное белье
bed
3ddd
free

bed
...bed
3ddd
bed , постельное белье
bed
3ddd
free

bed
...bed
3ddd
bed , постельное белье
bed
3ddd
$1

Bed
...bed
3ddd
bed , постельное белье , постель
bed
3d_export
$7

bed adairs bed
...rs bed
3dexport
bed adairs bed in modern style. if you want a smoother surface, please turn on turbosmooth in the modifier list.
Test
turbosquid
$99

test
...st
turbosquid
royalty free 3d model test for download as max on turbosquid: 3d models for games, architecture, videos. (1251637)
turbosquid
$63
TEST
...st
turbosquid
royalty free 3d model test for download as max on turbosquid: 3d models for games, architecture, videos. (1446233)
turbosquid
$1
test
...st
turbosquid
royalty free 3d model test for download as fbx on turbosquid: 3d models for games, architecture, videos. (1360941)
3d_export
free

johnny test
...johnny test
3dexport
johnny test 3d
turbosquid
$15
Test
... available on turbo squid, the world's leading provider of digital 3d models for visualization, films, television, and games.
turbosquid
$2

test
... available on turbo squid, the world's leading provider of digital 3d models for visualization, films, television, and games.
turbosquid
free
Test
... available on turbo squid, the world's leading provider of digital 3d models for visualization, films, television, and games.
turbosquid
free

test
... available on turbo squid, the world's leading provider of digital 3d models for visualization, films, television, and games.
turbosquid
free

Test
... available on turbo squid, the world's leading provider of digital 3d models for visualization, films, television, and games.
3d_export
$5
gripper test
...gripper test
3dexport
robot gripper test model