Thingiverse
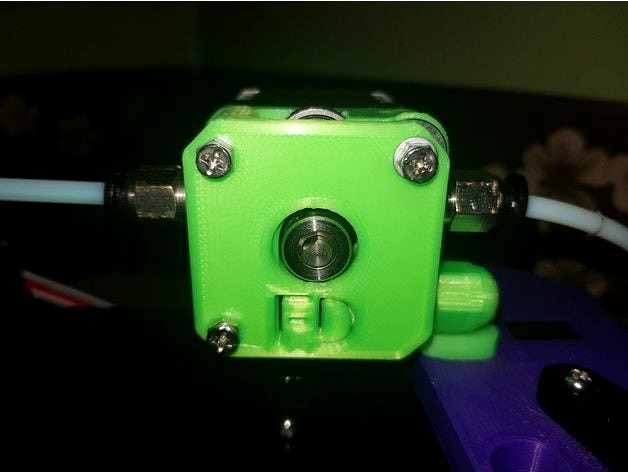
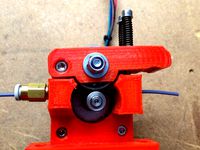
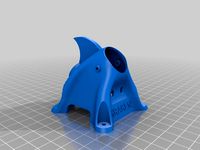
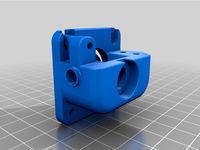
Basic Bowden Extruder V2 by FerociousDesigns
by Thingiverse
Last crawled date: 3 years ago
Please consider leaving a tip or donating via paypal on my website: http://ferociousdesigns.co.uk/ if you like this design! All support is very much appreciated!
Update 10/02/18: Updated both main body and arm to v2. Moved filament hole down 0.5mm to make loading easier as it was hitting the bearing.
This is a further iteration from my 'Simple Bowden Exruder' based on the Anet A8 stock extruder design but optimised for TPU. It requires more parts than the previous iteration, however should perform even better!
Features:
Small Size: Only 2mm deeper than the standard Anet A8 extruder when used as a bowden.
Compatibility: Mounts to any bowden mount that can take a Nema 17 Stepper
Works with flexible filament as well as PLA / ABS etc
Works with various extruder gears from 12 - 14mm diameter
Near 100% supported filament path
PC4M6 In / Out: Prevents grinding on the edge of the arm, and provides more support for the filament to make loading easier.
Printing:
I have tried to orient the parts into the best position for printing, however you are free to print how you want to of course :) I use 10% line supports on everything in Cura as they are very easy to remove. Printed with 25% infill using Anet PLA. During cleanup, bore the filament hole out to 2mm if it is not already.
Required parts:
3x M3x17mm Bolts to mount to bowden mount and stepper
1x M3x12mm Cap head bolt for arm retainer
1x M3x20mm Cap head bolt for spring adjuster
5x M3 Washers (Arm Hinge x3, spring adjuster x2)
4x M3 Nuts (Arm retainer, arm bolt, spring adjuster x2)
4x F623zz bearings (arm hinge x2, spring adjuster x2)
1x 625 bearing (filament idler)
1x Spring 8mm wide x 20mm long
1x MK7 Extruder Gear (Other gears may work but not tested)
Building:
Assemble the arm first and then bolt it to the main body piece. Wind the tensioner out all the way to make it easier to mount.
The arm hinge should go: Washer between bearing on the arm and the front plate, bearing, bearing, washer, m3 nut, washer. Then attach to bowden mount / stepper.
The spring tensioner on the arm should be: M3 bolt with nut tightend all the way up to its head (this should push fit into the 'Extuder button' piece), washer, bearing, bearing, washer, M3 nut, Spring retainer with embedded M3 nut facing the arm.
To set the extruder gear into the right position on the shaft, you can attach the built arm without the front plate.
Similar models
grabcad
free

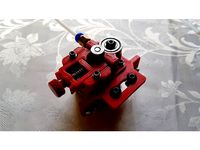
Geared extruder v.3
... some m4 nuts and washers to adjust spring tension
~ 25mm spring
mk8 gear for driving filament
2x 625zz bearings
1x 608zz bearing
thingiverse
free
Bowden Extruder for 2020 Profile - 1.75 MK7 608zz by Enrike_X5
...around 15mm lenth)
1x nema17 stepper
1x ptfe tube
you may need a tap kit (m5 and m8) to correct the threads, and a 2mm drill bit.
thingiverse
free

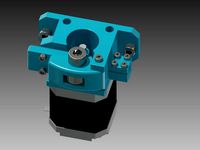
Alpha Direct Drive Extruder by engineglue
...upply list; this is a minimal design. you can use m4 bolts and nuts to mount it. it mounts to a standard aluminum mounting plate.
thingiverse
free
Rackprint Bowden Extruder by Alex_RP
...x m3 screw ~20mm and nuts
2x m3 screw 15mm
bearing 608zz
mk8 drive gear
2x spring ~20mm with ~3mm inner diameter
thingiverse
free

Filament holder
...n testing stage.
required parts
8mm shaft
2x fl08 bearings
2x m5 bolts
4x m5 washers
2x m5 nuts
1x m3 bolt
1x m3 washer
1x m3 nut
thingiverse
free

Super Simple Bowden Extruder V2 by _AlexY
...aring
nema 17 stepper
4x m3x8mm screws
m3x30mm screw
extruder spring
m3 locknut
2x m5x8mm screws + 2x t-nuts for mounting to 2020
thingiverse
free

Bowden Extruder with captured connector by bradjshannon
...nt path removed for now. not needed except for flexible filaments, anyways
public fusion 360 project link: http://a360.co/2devcfk
thingiverse
free
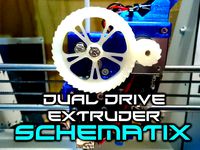
Schematix: Dual Drive Extruder (Fits E3D v6) by Schematix
....d 4mm o.d
springs (some experimentation may be required) however i use the following:
wire diameter: 0.7mm x 6mm o.d x 18mm long
thingiverse
free
Mini Kossel 1.75mm extruder by wallie
...et head cap screw
2x spring
1x m5 pneumatic straight threaded-to-tube adapter, push in 4 mm 4mm male
tools
m5 manual screw tap
thingiverse
free

Dual stepper MK8 gear direct drive bowden extruder
...
2x m3 washer for holding the bearings in place
2x pneumatic push-in fittings with m5 threads for the bowden tube diameter in use
Ferociousdesigns
thingiverse
free

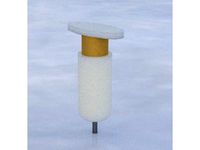
Bong mouthpiece by FerociousDesigns
...bong mouthpiece by ferociousdesigns
thingiverse
it is what it is, i printed it with tpu. fits on an acrylic water pipe :)
thingiverse
free
KTM Keyring by FerociousDesigns
...tm keyring by ferociousdesigns
thingiverse
it is what it is, i will be printing from tpu personally but use whatever you want :)
thingiverse
free

'Shaguar' Keyring by FerociousDesigns
...;shaguar' keyring by ferociousdesigns
thingiverse
it is what it is, i will be printing from tpu but use whatever you want :)
thingiverse
free

Ford RS Keyring by FerociousDesigns
...ford rs keyring by ferociousdesigns
thingiverse
it is what it is, i will be printing from tpu but use whatever you want :)
thingiverse
free

Tiger Racing Keyring by FerociousDesigns
...tiger racing keyring by ferociousdesigns
thingiverse
it is what it is, i will be printing from tpu but use whatever you want :)
thingiverse
free
BL Touch Mockup by FerociousDesigns
... ferociousdesigns
thingiverse
a model for use in making brackets and holders. obviously is not functional!
added fusion 360 file
thingiverse
free
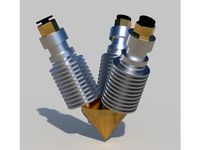
3 Colour Mixing 'Diamond' Hotend Mockup by FerociousDesigns
...#39; hotend mockup by ferociousdesigns
thingiverse
this is wip!
i still need to confirm the cold ends are at the correct angles.
thingiverse
free
BoltRC Kraken Pod - Remix by FerociousDesigns
...he original design.
someone asked me to modify it to allow a bit less camera angle. all i have done is elongated the camera hole.
thingiverse
free
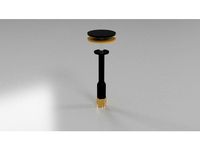
Lumenier Pagoda 2 - Short Version - Mockup by FerociousDesigns
...ousdesigns
thingiverse
created this to help with designing pods for quadcopters.
fusion 360 file included to use in your models.
thingiverse
free
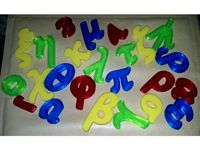
Greek Alphabet - Lowercase by FerociousDesigns
...ts already on thingiverse but none suited what they wanted.
maybe someone else would find them useful, so i have uploaded here :)
Bowden
turbosquid
$199
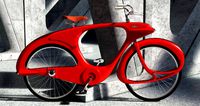
Vintage Ben Bowden Spacelander bike
... available on turbo squid, the world's leading provider of digital 3d models for visualization, films, television, and games.
3ddd
$1

Manooi Artica
...and pendants in various sizes and forms. suspension: galvanized bowden - dia. 1,5 mm. bulb: max 60 w -...
thingiverse
free
Remix Compact Bowden extruder - m6 bowden couplers and bowden tube pass-through
...ouplers and bowden tube pass-through
thingiverse
remix compact bowden extruder - m6 bowden couplers and bowden tube pass-through
thingiverse
free

Bowden Extruder
...bowden extruder
thingiverse
i have created bowden extruder for flsun delta 3d printer.
thingiverse
free

bowden 3mm by spee_D
...bowden 3mm by spee_d
thingiverse
for bowden 3mm
thingiverse
free
Bowden Tube Cutter
...bowden tube cutter
thingiverse
bowden tube cutter
thingiverse
free
Customizable Bowden Clip
...customizable bowden clip
thingiverse
customizable bowden clip
thingiverse
free
Bowden Oiler by fcheshire
...bowden oiler by fcheshire
thingiverse
inline bowden oiler
thingiverse
free

Bowden adapter by helkaroui
...bowden adapter by helkaroui
thingiverse
this is a fixed bowden adapter
thingiverse
free

Adventure3 Bowden Clip
...adventure3 bowden clip
thingiverse
adventure3 bowden clip
V2
3d_export
free

Lamp v2
...lamp v2
3dexport
lamp v2 with solar panel
3d_export
$5

hammerhead v2
...hammerhead v2
3dexport
razer hammerhead v2 headphones, modeled in cinema 4d, render in corona
3d_export
$5

manometer v2
...manometer v2
3dexport
3d_export
$5

potato v2
...potato v2
3dexport
turbosquid
$52

Lifebuoys v2
...squid
royalty free 3d model lifebuoys v2 for download as fbx on turbosquid: 3d models for games, architecture, videos. (1560870)
turbosquid
$2

Mask v2
...turbosquid
royalty free 3d model mask v2 for download as stl on turbosquid: 3d models for games, architecture, videos. (1527741)
turbosquid
free

Flashlight V2
...d
free 3d model flashlight v2 for download as , obj, and fbx on turbosquid: 3d models for games, architecture, videos. (1663559)
turbosquid
$29

Thanos v2
...
royalty free 3d model thanos v2 for download as ztl and obj on turbosquid: 3d models for games, architecture, videos. (1651077)
turbosquid
$29

Titan v2
...d
royalty free 3d model titan v2 for download as ztl and obj on turbosquid: 3d models for games, architecture, videos. (1540228)
turbosquid
$29

Frieza v2
...
royalty free 3d model frieza v2 for download as ztl and obj on turbosquid: 3d models for games, architecture, videos. (1701238)
Extruder
3ddd
$1

Extruded Chair
...extruded chair
3ddd
extruded , tom dixon
inspired by tom dixon extruded chair
turbosquid
$15

Extruded Table
... extruded table for download as blend, dae, fbx, obj, and stl on turbosquid: 3d models for games, architecture, videos. (1634137)
turbosquid
$2

3D Printer Extruder
...d
royalty free 3d model 3d printer extruder for download as on turbosquid: 3d models for games, architecture, videos. (1537359)
turbosquid
$1

Zombie extruded text
...oyalty free 3d model zombie extruded text for download as obj on turbosquid: 3d models for games, architecture, videos. (1322198)
turbosquid
$4

Extruder conical screw
...el extruder conical screw for download as sldpr, ige, and stl on turbosquid: 3d models for games, architecture, videos. (1524433)
turbosquid
$50

3d PRINTER - Extruder
... available on turbo squid, the world's leading provider of digital 3d models for visualization, films, television, and games.
turbosquid
$15

Extruded Table 2
...xtruded table 2 for download as blend, dae, fbx, obj, and stl on turbosquid: 3d models for games, architecture, videos. (1621846)
turbosquid
$10

Maya Extrude Tool
... available on turbo squid, the world's leading provider of digital 3d models for visualization, films, television, and games.
3d_export
$5

world earth extrude map
...world earth extrude map
3dexport
3ddd
$1

Simply Elegant Extruded Tree Coffee Table Design
...ble by link studios. the silhouette of a tree is visible at one angle, extruded from the surface to create the support structure.
Basic
3d_export
$5

basic hand
...basic hand
3dexport
basic hand, made in blender
3d_export
$10
Basic coat
...basic coat
3dexport
basic coat<br>arm and waist movement
3ddd
$1
PixMolda Basic Bed
...pixmolda basic bed
3ddd
basic bed , pixellin
pixmolda basic bed by pixellin
3ddd
free
Детский стол Basic
...етский стол basic
3ddd
basic , стол
детский стол для письма basic от производителя moll.
turbosquid
$1

Basic Chair
...urbosquid
royalty free 3d model basic chair for download as on turbosquid: 3d models for games, architecture, videos. (1269713)
turbosquid
$1

Basic Keyboard
...osquid
royalty free 3d model basic keyboard for download as on turbosquid: 3d models for games, architecture, videos. (1298685)
turbosquid
$1

basic table
...urbosquid
royalty free 3d model basic table for download as on turbosquid: 3d models for games, architecture, videos. (1271450)
turbosquid
free

Basic Bandit
...
turbosquid
free 3d model basic bandit for download as blend on turbosquid: 3d models for games, architecture, videos. (1250561)
turbosquid
free

Turret basic
...
turbosquid
free 3d model turret basic for download as blend on turbosquid: 3d models for games, architecture, videos. (1382326)
turbosquid
free
Basic Sword
...urbosquid
royalty free 3d model basic sword for download as on turbosquid: 3d models for games, architecture, videos. (1331031)