GrabCAD
Back to the future mind reading helmet
by GrabCAD
Last crawled date: 1 year, 10 months ago
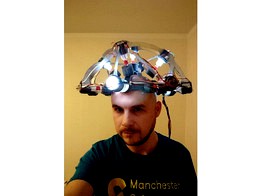
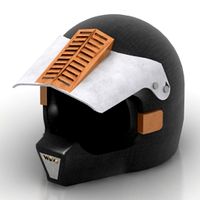
Here is my Doc Brown's mind reading helmet from 'Back to the future'. I absolutely love this film and I could find a lot of props for 3D printing but not this helmet, so here it is.
I'm not going to lie to you, it's not easy project, but for a massive geek and movie fan like me it was totally worth it. On the 3D model all parts fit perfectly, but it's difficult to put all the parts symmetrically exactly as in the model, so I had to use good old hair dryer technique for couple of connectors. (For those who are new in 3D printing, you can use hair dryer to warm up the plastic part and then reshape it slightly).
One the pictures is color coded and colors correspond to the file names so it should make assembly easier. The main coils can be screw to the headband and I glued all the connectors between cylinders. I glued them in this order: blue, yellow, pink, red and green.
(3 red connectors needed hair dryer technique, but you might do better than me)
There is also file perspex_tube.stl and you can print it in clear PLA or use clear perspex tube. I bought 10mm (outside diameter) long tube and then i cut it into 90mm long cylinders. I think it look slightly better with clear perspex, but of course it's more work.
On the main coils i wind few turns of grey cable and I glue it permanently. On the clear perspex I wind few turns or single core red wire and glued it too.
the order of assembly: main coil (with grey cable) then glue 10mm perspex tube inside, then slot clear_cylinder (printer in clear PLA). Clear cylinder will go inside inside_cylinder and all that will go into outside_cylinder. All connectors are glued to outside_cylinder.
Electronics: Solder 220 ohm resistors to positive leg of 5mm white LED (protective resistor) and then solder cables to both legs of LED. Slot LED into perspex tube and tidy up wires using clear cable ties. Connect all to Arduino Nano and 9V battery. All will fit inside the Arduino_box and you can then clip it to your belt. There is a hole for mini on/off rocker switch. Schematic for connection is attached and arduino code too. The code randomly switch LED's and it's my addition to the project :)
It's a big project, but if you decide to go ahead and make I would appreciate pictures and any comments or suggestions of course.
Similar models
thingiverse
free

christmas tree with leds by LeonardoFerlito
...iron will do the job) leds can be had for cheap on ebay just search for "3mm leds" and you should find them no problem.
thingiverse
free

iPhone 6 Dock MSI Style by stunner2211
...t i glue the bottom piece on the main part and its done :). optional i put two 3mm holes in the bottom to screw the bottom piece.
grabcad
free

Hair dryer
...ole dryer and here it is.
due to the intricate structure of coil (too many elements), file size of the assembly becomes gigantic.
thingiverse
free
RGB Lighting for Kolink Rocket Push Power Button with Asus Aura
...is used for the power switch cable,
the three drillings off-center for the leds.
if you have further questions, feel free to ask.
thingiverse
free
1W power led usb case by tcbilge
...led,
led pcb,
4.7 ohm 1w resistor,
led lens and black holder,
usb a connector.
the resistor is soldered between led(+) and usb(+)
thingiverse
free

NeoPixel 24 LED Ring Connector (No more SOLDERING pins!!) by Valec
...r smaller cable to a ring.
it should be printed as i showed in the pictures to prevent cracking. read more info in print settings
thingiverse
free

Simple Solder Pen Tube by alnwlsn
...verything inside.
tallest part is 140mm. if there is stringing inside the straw tube, you can clean it with a piece of filament.
thingiverse
free

Hollow spark plug for 3mm LED by RobinSwa
...in abs.
drilling and grinding on either abs or pla is best done with care but pla will be softer and melt at a lower temperature.
thingiverse
free

Dino Spikes For Helmet by ShuttleSpace
...ingle/587abcb90f9d650ca7cf1329/58e97f723cd46e0bcd60a82d
i can supply led's to go inside and edit this for a custom look also.
thingiverse
free

StormTrooper Resculpt base + Led by Polpus
...39;t be able to light inside the plastic . and afterall you have to make a hole inside the head , just use a 10-12 mm drill bit .
Mind
3ddd
$1
Mind
...mind
3ddd
новый стиль , стул
новый стиль - mind
turbosquid
$10

Mind
... available on turbo squid, the world's leading provider of digital 3d models for visualization, films, television, and games.
turbosquid
$29

set10 - open mind
... available on turbo squid, the world's leading provider of digital 3d models for visualization, films, television, and games.
3ddd
$1
Тумбочка Open Minded
...есто для хранения книг и аксессуаров. воздушный дизайн тумбочки не усложнит интерьер вашей комнаты. естественность всегда в моде.
turbosquid
$5

Mind game wooden toy
... model mind game wooden toy for download as 3ds, max, and skp on turbosquid: 3d models for games, architecture, videos. (1203437)
turbosquid
$10

Mind First Arm Cheir
...first arm cheir for download as 3ds, obj, fbx, blend, and dae on turbosquid: 3d models for games, architecture, videos. (1187877)
3ddd
$1

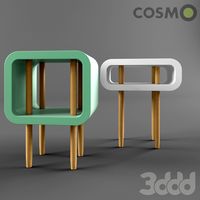
Cosmorelax \ Тумбочка Open Minded mint
...а: дерево
столешница: зеленый
каркас: дерево/woodhttp://www.cosmorelax.ru/catalog/tumby_i_komody/tumbochka_open_minded/
turbosquid
$12

Open mind Cantilever chair with armerests membrane-covered backrest
... available on turbo squid, the world's leading provider of digital 3d models for visualization, films, television, and games.
turbosquid
$12

Open mind Cantilever chair with armerests membrane-covered backrest and flat cushion
... available on turbo squid, the world's leading provider of digital 3d models for visualization, films, television, and games.
3d_export
$10
inquieta - open mind series
....<br>i think this has been everything. i hope you liked it and if you have any questions you can write me without problems.
Reading
design_connected
$16

Lou Read
...lou read
designconnected
driade lou read computer generated 3d model. designed by starck, philippe.
design_connected
$11

Read Noon
...read noon
designconnected
zeitraum read noon computer generated 3d model. designed by el schmid.
turbosquid
$10

Reading Table
...id
royalty free 3d model reading table for download as blend on turbosquid: 3d models for games, architecture, videos. (1412229)
turbosquid
$3

Reading Table
...yalty free 3d model reading table for download as max and fbx on turbosquid: 3d models for games, architecture, videos. (1475359)
turbosquid
free

Reading Lamp
...
free 3d model reading lamp for download as ige, obj, and 3dm on turbosquid: 3d models for games, architecture, videos. (1174095)
3d_export
$5

Jar for reading
...jar for reading
3dexport
3d_export
free

reading chair
...reading chair
3dexport
turbosquid
$5

Reading Lamp
... free 3d model reading lamp for download as 3ds, fbx, and dae on turbosquid: 3d models for games, architecture, videos. (1486900)
turbosquid
$30

Reading Chair
... available on turbo squid, the world's leading provider of digital 3d models for visualization, films, television, and games.
turbosquid
$25

Reading lamp
... available on turbo squid, the world's leading provider of digital 3d models for visualization, films, television, and games.
Helmet
archibase_planet
free

Helmet
...helmet
archibase planet
helmet crash helmet safety helmet
helmet - 3d model for interior 3d visualization.
archibase_planet
free
Helmet
...t
archibase planet
helmet motorcycle helmet motorbike helmet
helmet n271115 - 3d model (*.gsm+*.3ds+*.max) for 3d visualization.
archibase_planet
free
Helmet
...t
helmet motorcycle helmet motorbike helmet
helmet hamilton n040915 - 3d model (*.gsm+*.3ds+*.max) for interior 3d visualization.
archibase_planet
free
Helmet
...t
helmet helm casque crash helmet baseball helmet
helmet baseball n111213 - 3d model (*.gsm+*.3ds) for interior 3d visualization.
3d_export
$10

helmet
...helmet
3dexport
helmet
3d_export
$5

helmet
...helmet
3dexport
helmet
3d_export
$5

Helmet
...helmet
3dexport
helmet space
archibase_planet
free
Helmet
...et
archibase planet
helmet divinghelmet diver's helmet
helmet n180313 - 3d model (*.gsm+*.3ds) for interior 3d visualization.
3d_export
$5

helmet
...helmet
3dexport
an ordinary medieval helmet
3ddd
$1

helmet
...helmet
3ddd
шлем
helmet modeling
Future
3d_export
$5

future
...future
3dexport
its very beautiful future
3d_export
free
The city of the future
...the city of the future
3dexport
the city of the future.
turbosquid
$10

FUTURE sOLDIER
...osquid
royalty free 3d model future soldier for download as on turbosquid: 3d models for games, architecture, videos. (1246987)
turbosquid
$3
Future chair
...rbosquid
royalty free 3d model future chair for download as on turbosquid: 3d models for games, architecture, videos. (1602634)
turbosquid
$1

glass of the future
...d
royalty free 3d model glass of the future for download as on turbosquid: 3d models for games, architecture, videos. (1371285)
3d_export
$40
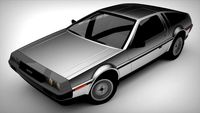
delorean back to the future
...delorean back to the future
3dexport
delorean back to the future
3d_export
$5
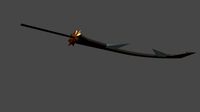
Sword future samuray
...sword future samuray
3dexport
sword future samuray
3d_export
free

pistol of the future
...pistol of the future
3dexport
is free
turbosquid
$59

future gun
...bosquid
royalty free 3d model future gun for download as fbx on turbosquid: 3d models for games, architecture, videos. (1381359)
turbosquid
$24

Future Home
...osquid
royalty free 3d model future home for download as obj on turbosquid: 3d models for games, architecture, videos. (1391068)
Back
3d_export
free
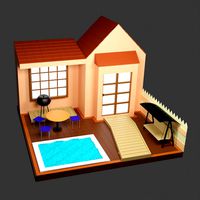
Back yard
...back yard
3dexport
back yard 3d model in isometric art style
design_connected
$27
Get Back
...get back
designconnected
erba italia get back computer generated 3d model. designed by soressi, giorgio.
turbosquid
$1

Back Pack
...osquid
royalty free 3d model back pack for download as blend on turbosquid: 3d models for games, architecture, videos. (1463340)
3d_export
$40
delorean back to the future
...delorean back to the future
3dexport
delorean back to the future
3ddd
$1
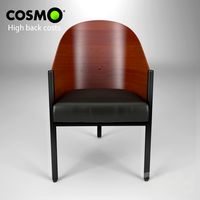
Chair High back
... офисный стул , cosmo
офисный стул high back от cosmo
3d_export
$10

Back Stage
...back stage
3dexport
3d_export
$5

back of the chair
...back of the chair
3dexport
3ddd
$1
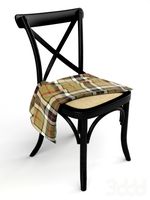
cross back chairs
...cross back chairs
3ddd
flexform
cross back chairs
turbosquid
$5

BACK CARRIAGE
...3d model back carriage for download as c4d, 3ds, fbx, and obj on turbosquid: 3d models for games, architecture, videos. (1560468)
3ddd
$1
494 back
...494 back
3ddd
tsinps , барный
www.tsinos.gr