Thingiverse
Baby Yoda electro mechanical switch by Brosion
by Thingiverse
Last crawled date: 3 years ago
DISCLAIMER
This is not a project for beginners!!! You should know how to handle Arduino Software and build electronic circuits!!!
I myself am not an expert, so please doublecheck and let me know if i made any mistakes, so others can profit from it too!!!
I do not take responsibility for any accidents that result from building this project!!!
DISCLAIMER
Hello everyone!
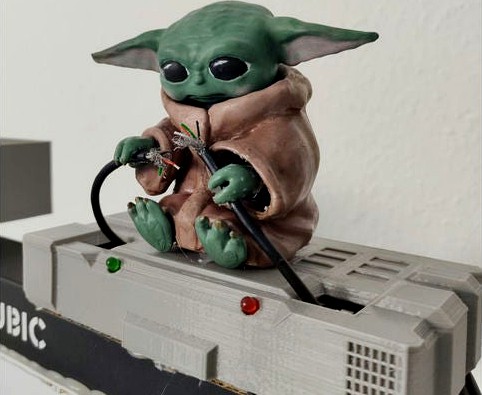
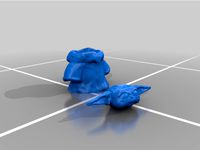
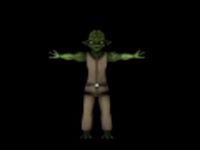
I designed a Baby Yoda that is controlled by an Arduino Nano and moves his arm to connect 2 prop cables (there is no Voltage on them) when i activate the Wifi socket. Parallel the Wifi socket connects to my 3D Printer, so both the Baby Yoda and my printer get activated at the same time. That makes it look like the Baby Yoda would "activate" my 3D printer with connecting his cables. pretty cool, huh?;)
You will need a few things to build this thing:
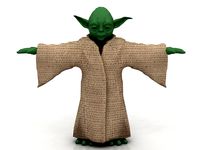
1 Printed Baby Yoda (download STL file)
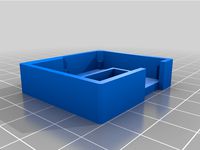
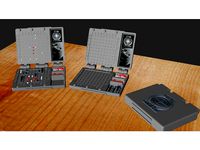
1 Printed Baby Yoda Box (download STL file)
1 Arduino Code (download .ino file)
1 Arduino Nano
https://www.amazon.de/YXPCARS-Entwicklerboard-Arduino-Atmega328P-Vorgel%C3%B6tet/dp/B08L9396K1/ref=sr_1_16?__mk_de_DE=%C3%85M%C3%85%C5%BD%C3%95%C3%91&dchild=1&keywords=arduino+nano&qid=1614109615&sr=8-16
1 Servo Motor
https://www.amazon.de/Longruner-Helicopter-Airplane-Controls-KY66-5/dp/B07236KYVC/ref=sr_1_5?dchild=1&keywords=Longruner+SG90+Micro+Servo+Motor&qid=1614109706&sr=8-5
1 Wifi Socket
https://www.amazon.de/gp/product/B06W586CDZ/ref=ppx_yo_dt_b_asin_image_o05_s00?ie=UTF8&psc=1
1 Multiport-Socket (plug it into the wifi socket to be able to connect two devices to it. That will let you handle the 3D Printer power supply and the signal cable for the Arduino together over the wifi socket)
https://smile.amazon.de/dp/B0888P6BTY/ref=cm_sw_r_cp_apa_i_MN7VBSH0AQB6AZ20SBGH?_encoding=UTF8&psc=1
2 USB Smartphone charger Sockets (or similar)
https://www.amazon.de/Netzteil-Ladeger%C3%A4t-Player-AGPTEK-Schwarz/dp/B07DDHGSFB/ref=sr_1_3?__mk_de_DE=%C3%85M%C3%85%C5%BD%C3%95%C3%91&dchild=1&keywords=5v+0.5A+netzteil&qid=1614109834&sr=8-3
2 prop cables for the baby Yoda
2 Resistors (about 200 Ohm)
1 High Ohm resistor (i took 10 KOhm)
1 on and off switch (to turn off the Baby Yoda completely if you wish to)
https://www.amazon.de/Sourcingmap-A12013100UX0116-Schiebeschalter-50-St%C3%BCck/dp/B007QAJUUS/ref=sr_1_4?__mk_de_DE=%C3%85M%C3%85%C5%BD%C3%95%C3%91&dchild=1&keywords=arduino+switch&qid=1614109869&sr=8-4
1 USB cable (for the Signal. Cut the end leading to the Baby Yoda so you can connect it to Ground and Signal Port like shown in the sketch below)
1 USB cable to power your Arduino
1 LED red
1 LED green
https://www.amazon.de/KINGSO-Leuchtdioden-Dioden-Elektronik-komponenten/dp/B01KVH6NA2/ref=sr_1_5?__mk_de_DE=%C3%85M%C3%85%C5%BD%C3%95%C3%91&dchild=1&keywords=led+arduino&qid=1614109937&sr=8-5
After you soldered everything the way its suppost to be and loaded the Arduino Code onto your Arduino Nano you should double check with a multimeter and a weak power supply if the Signal cable does not carry any current but just the voltage. Also check all other cables to make sure there is no high Voltage or Current going around anywhere.
How it works (small summary):
If you activate the wifi socket the voltage in your Signal cable will rise up to the voltage provided by your USB socket (make sure its a regular Smartphone charger Socket with max. 5V). The Arduino will read the Voltage of the Signal Input Pin and set the Servo motor to position 1 and activate the green LED if Voltage=High. If Voltage=LOW he will set the Servo motor to position 2 and activate the red LED.
Update:
-Ive added a FDM "optimised" file, as the other model did not have a perfectly even bottom which would have made probelms when printing the first layer on an FDM printer.
-Ive updated the schematic and eliminated a mistake.
-Ive added a manual with a written step by step explanation.
If you want an even more detailed instruction, video tutorial, or found any mistakes in the Code or print file please let me know in the comments. Ill try my best to optimize it even further over time.
This is not a project for beginners!!! You should know how to handle Arduino Software and build electronic circuits!!!
I myself am not an expert, so please doublecheck and let me know if i made any mistakes, so others can profit from it too!!!
I do not take responsibility for any accidents that result from building this project!!!
DISCLAIMER
Hello everyone!
I designed a Baby Yoda that is controlled by an Arduino Nano and moves his arm to connect 2 prop cables (there is no Voltage on them) when i activate the Wifi socket. Parallel the Wifi socket connects to my 3D Printer, so both the Baby Yoda and my printer get activated at the same time. That makes it look like the Baby Yoda would "activate" my 3D printer with connecting his cables. pretty cool, huh?;)
You will need a few things to build this thing:
1 Printed Baby Yoda (download STL file)
1 Printed Baby Yoda Box (download STL file)
1 Arduino Code (download .ino file)
1 Arduino Nano
https://www.amazon.de/YXPCARS-Entwicklerboard-Arduino-Atmega328P-Vorgel%C3%B6tet/dp/B08L9396K1/ref=sr_1_16?__mk_de_DE=%C3%85M%C3%85%C5%BD%C3%95%C3%91&dchild=1&keywords=arduino+nano&qid=1614109615&sr=8-16
1 Servo Motor
https://www.amazon.de/Longruner-Helicopter-Airplane-Controls-KY66-5/dp/B07236KYVC/ref=sr_1_5?dchild=1&keywords=Longruner+SG90+Micro+Servo+Motor&qid=1614109706&sr=8-5
1 Wifi Socket
https://www.amazon.de/gp/product/B06W586CDZ/ref=ppx_yo_dt_b_asin_image_o05_s00?ie=UTF8&psc=1
1 Multiport-Socket (plug it into the wifi socket to be able to connect two devices to it. That will let you handle the 3D Printer power supply and the signal cable for the Arduino together over the wifi socket)
https://smile.amazon.de/dp/B0888P6BTY/ref=cm_sw_r_cp_apa_i_MN7VBSH0AQB6AZ20SBGH?_encoding=UTF8&psc=1
2 USB Smartphone charger Sockets (or similar)
https://www.amazon.de/Netzteil-Ladeger%C3%A4t-Player-AGPTEK-Schwarz/dp/B07DDHGSFB/ref=sr_1_3?__mk_de_DE=%C3%85M%C3%85%C5%BD%C3%95%C3%91&dchild=1&keywords=5v+0.5A+netzteil&qid=1614109834&sr=8-3
2 prop cables for the baby Yoda
2 Resistors (about 200 Ohm)
1 High Ohm resistor (i took 10 KOhm)
1 on and off switch (to turn off the Baby Yoda completely if you wish to)
https://www.amazon.de/Sourcingmap-A12013100UX0116-Schiebeschalter-50-St%C3%BCck/dp/B007QAJUUS/ref=sr_1_4?__mk_de_DE=%C3%85M%C3%85%C5%BD%C3%95%C3%91&dchild=1&keywords=arduino+switch&qid=1614109869&sr=8-4
1 USB cable (for the Signal. Cut the end leading to the Baby Yoda so you can connect it to Ground and Signal Port like shown in the sketch below)
1 USB cable to power your Arduino
1 LED red
1 LED green
https://www.amazon.de/KINGSO-Leuchtdioden-Dioden-Elektronik-komponenten/dp/B01KVH6NA2/ref=sr_1_5?__mk_de_DE=%C3%85M%C3%85%C5%BD%C3%95%C3%91&dchild=1&keywords=led+arduino&qid=1614109937&sr=8-5
After you soldered everything the way its suppost to be and loaded the Arduino Code onto your Arduino Nano you should double check with a multimeter and a weak power supply if the Signal cable does not carry any current but just the voltage. Also check all other cables to make sure there is no high Voltage or Current going around anywhere.
How it works (small summary):
If you activate the wifi socket the voltage in your Signal cable will rise up to the voltage provided by your USB socket (make sure its a regular Smartphone charger Socket with max. 5V). The Arduino will read the Voltage of the Signal Input Pin and set the Servo motor to position 1 and activate the green LED if Voltage=High. If Voltage=LOW he will set the Servo motor to position 2 and activate the red LED.
Update:
-Ive added a FDM "optimised" file, as the other model did not have a perfectly even bottom which would have made probelms when printing the first layer on an FDM printer.
-Ive updated the schematic and eliminated a mistake.
-Ive added a manual with a written step by step explanation.
If you want an even more detailed instruction, video tutorial, or found any mistakes in the Code or print file please let me know in the comments. Ill try my best to optimize it even further over time.
Similar models
thingiverse
free

Blaster DL-44 Han Solo with Mechanics and space for electronics by rinsewind
...b07vccnvzp/ref=sr_1_19?__mk_de_de=%c3%85m%c3%85%c5%bd%c3%95%c3%91&dchild=1&keywords=taster&qid=1614853734&sr=8-19
thingiverse
free

Slingshot by b3sD
..._10?__mk_de_de=%c3%85m%c3%85%c5%bd%c3%95%c3%91&dchild=1&keywords=zwille+gummi&qid=1621256847&s=sports&sr=1-10
thingiverse
free
Smart Home Temp & Humidty Sensor with ESP8266 by Fabshh
...07d8tpvvy/ref=sr_1_4?__mk_de_de=%c3%85m%c3%85%c5%bd%c3%95%c3%91&dchild=1&keywords=bmp+bosch&qid=1604832312&sr=8-4
thingiverse
free
I30 N Schaltknauf Abdeckung Multicolor by AndreasBlum
...vqyzlbmnyexb0zwrbzelkpuewoty1njeyte9br09xtenvm0jwjndpzgdlde5hbwu9c3bfyxrmjmfjdglvbj1jbglja1jlzglyzwn0jmrvtm90tg9nq2xpy2s9dhj1zq==
thingiverse
free
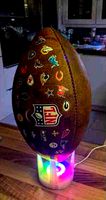
Illuminated Football-Stand by froetz
...swq/ref=sr_1_10?__mk_de_de=%c3%85m%c3%85%c5%bd%c3%95%c3%91&dchild=1&keywords=wemos+mini+d1&qid=1614665976&sr=8-10
thingiverse
free

Encoderknob for AZ-Delivery by T4printing
...mjmvuy3j5chrlzefkswq9qta3otc3mdqyodlruzdfvdrmmucxjndpzgdlde5hbwu9c3bfyxrmjmfjdglvbj1jbglja1jlzglyzwn0jmrvtm90tg9nq2xpy2s9dhj1zq==
thingiverse
free

TL-WR802N Loxone by Willihias
...00tqex8bo/ref=sr_1_1?__mk_de_de=%c3%85m%c3%85%c5%bd%c3%95%c3%91&dchild=1&keywords=tl-wr802n&qid=1615553991&sr=8-1
thingiverse
free

I30 N Multicolor Tankmulde by AndreasBlum
...5%c3%91&crid=319vyn15ha9yo&dchild=1&keywords=decorrom&qid=1622563037&sprefix=decorrum%2caps%2c198&sr=8-13
thingiverse
free

I30 N Tankmulde (negativ) by AndreasBlum
...5%c3%91&crid=319vyn15ha9yo&dchild=1&keywords=decorrom&qid=1622563037&sprefix=decorrum%2caps%2c198&sr=8-13
thingiverse
free

Corsair Air 540 ATX dust filter by Xander23669
...%c5%bd%c3%95%c3%91&crid=36oj893g5bii8&dchild=1&keywords=magnete&qid=1619289367&sprefix=mag,aps,182&sr=8-7
Brosion
thingiverse
free
Baby Yoda standing by Brosion
...baby yoda standing by brosion
thingiverse
a pritable little baby yoda figure. head and torso are seperate.
thingiverse
free
Star Citizen Battleships boardgame by Brosion
...hat this is a model based on content of a brand i dont own! all rights on the form of this spaceship lay at cloud imperium games.
thingiverse
free
Star Citizen Kraken 3D model by Brosion
...hat this is a model based on content of a brand i dont own! all rights on the form of this spaceship lay at cloud imperium games.
thingiverse
free

Cyberpunk 2077 Police Helmet Psycho Squad by Brosion
...ense to "no derivatives" as im not quite familiar with uploading stuff on thingiverse, so i better wanted to be safe :)
thingiverse
free

Star Citizen Idris 3D model by Brosion
...hat this is a model based on content of a brand i dont own! all rights on the form of this spaceship lay at cloud imperium games.
thingiverse
free

Chocolate mold Santa Claus (with mask, Corona Edition) by Brosion
... to the 3d model, so the problem should be solved).
et voila, you have a chocolate santa with corona mask.
enjoy and stay healthy
Electro
3d_export
$10

electro drums
...electro drums
3dexport
electro drums
3d_export
$5
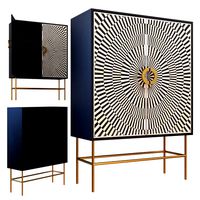
highboard electro
...highboard electro
3dexport
highboard electro kare design
3d_export
$5
sideboard electro
...sideboard electro
3dexport
sideboard electro kare design
3ddd
$1
Electro Retro Bulps
...tro retro , bulp , лампочка
electro retro bulps
turbosquid
$15

Electro boat
...rbosquid
royalty free 3d model electro boat for download as on turbosquid: 3d models for games, architecture, videos. (1661339)
turbosquid
$29

Electro Guitar
...uid
royalty free 3d model electro guitar for download as max on turbosquid: 3d models for games, architecture, videos. (1304059)
3d_export
$11

Electro scarlett
...electro scarlett
3dexport
turbosquid
$14
Electro Product
...electro product for download as 3ds, obj, fbx, blend, and dae on turbosquid: 3d models for games, architecture, videos. (1276721)
turbosquid
$10

Electro Bike
... available on turbo squid, the world's leading provider of digital 3d models for visualization, films, television, and games.
3ddd
$1
Ретро Микрофон Electro-Voice
...рофон , ретро
ретро микрофон фирмы electro-voice. исполнитель - дизайнерское бюро 27unit
Yoda
3d_export
$5

Evil yoda
...evil yoda
3dexport
evil yoda<br>stl
3d_export
free

baby yoda
...baby yoda
3dexport
baby yoda 3d modeling archive in obj, stl
design_connected
$27

Yoda Sofa
...yoda sofa
designconnected
kenneth cobonpue yoda sofa computer generated 3d model. designed by cobonpue, kenneth.
3d_export
$15

baby yoda yedi
...baby yoda yedi
3dexport
baby yoda. thanks
3d_export
$25
Yoda 3D Model
...yoda 3d model
3dexport
yoda star wars green small jedi
yoda 3d model rohy 67203 3dexport
turbosquid
$14

baby yoda
...rbosquid
royalty free 3d model beby yoda for download as obj on turbosquid: 3d models for games, architecture, videos. (1654320)
turbosquid
$15

Master Yoda
...e 3d model master yoda for download as max, 3ds, fbx, and obj on turbosquid: 3d models for games, architecture, videos. (1618570)
turbosquid
$15
Master Yoda
...e 3d model master yoda for download as max, 3ds, fbx, and obj on turbosquid: 3d models for games, architecture, videos. (1618566)
turbosquid
$25

YODA-chair
... available on turbo squid, the world's leading provider of digital 3d models for visualization, films, television, and games.
turbosquid
$20
Master Yoda
...del master yoda for download as obj, fbx, blend, dae, and stl on turbosquid: 3d models for games, architecture, videos. (1192390)
Baby
3ddd
$1

Baby
...baby
3ddd
baby
3d_export
$5
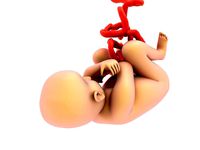
baby
...baby
3dexport
3d human fetus baby in womb anatomy
3d_ocean
$7
Baby Playpens
... playpens soft furniture
baby playpens creating to 3ds max 2011 and include the vray materials and texture and standart metarials
3d_export
$5
Thinking baby
...thinking baby
3dexport
thinking baby
3d_export
$5
Fighter baby
...fighter baby
3dexport
fighter baby
turbosquid
$240

Babies
...
turbosquid
royalty free 3d model babies for download as max on turbosquid: 3d models for games, architecture, videos. (1315651)
turbosquid
$5

baby
...by
turbosquid
royalty free 3d model baby for download as fbx on turbosquid: 3d models for games, architecture, videos. (1553385)
turbosquid
$50
Baby
...squid
royalty free 3d model baby for download as max and fbx on turbosquid: 3d models for games, architecture, videos. (1629723)
turbosquid
$39

Baby
...squid
royalty free 3d model baby for download as max and fbx on turbosquid: 3d models for games, architecture, videos. (1561374)
turbosquid
$3

Baby
...squid
royalty free 3d model baby for download as obj and jpg on turbosquid: 3d models for games, architecture, videos. (1581971)
Switch
archibase_planet
free
Switch
...switch
archibase planet
switch cluster switch
light switch 1 - 3d model for interior 3d visualization.
archibase_planet
free
Switch
...switch
archibase planet
switches switch
switch 1 - 3d model (*.gsm+*.3ds) for interior 3d visualization.
archibase_planet
free
Switch
...switch
archibase planet
closer button switch cluster switch
switch - 3d model (*.3ds) for interior 3d visualization.
archibase_planet
free
Switch
...switch
archibase planet
switch closer
light switch 2 - 3d model for interior 3d visualization.
archibase_planet
free
Switch
...switch
archibase planet
closer button switch
switch n300808 - 3d model (*.gsm+*.3ds) for interior 3d visualization
archibase_planet
free
Switch
...switch
archibase planet
closer button switch
switch n141108 - 3d model (*.gsm+*.3ds) for interior 3d visualization.
archibase_planet
free

Switch
...switch
archibase planet
cluster switch closer
switch n260609 - 3d model (*.gsm+*.3ds) for interior 3d visualization.
archibase_planet
free

Switch
...switch
archibase planet
button switch closer
switch 2 - 3d model (*.gsm+*.3ds) for interior 3d visualization.
archibase_planet
free

Switch
...switch
archibase planet
button switch closer
switch n070510 - 3d model (*.gsm+*.3ds) for interior 3d visualization.
3d_export
$5

switch
...switch
3dexport
3d model of a low-poly switch
Mechanical
3d_export
$50
Mechanism
...mechanism
3dexport
mechanism -------- animation is present only in the blender file.
3d_export
$5

mechanics
...mechanics
3dexport
turbosquid
$50
mechanic
... available on turbo squid, the world's leading provider of digital 3d models for visualization, films, television, and games.
3ddd
$1
Mechanical Wasp
...mechanical wasp
3ddd
робот
mechanical wasp
3d_export
$20
Mechanical tail
...mechanical tail
3dexport
mechanical tail<br>four-part movement
3d_export
$5
mechanical ballista
...mechanical ballista
3dexport
a mechanical ballista useful for medieval or fantasy games does not contain animations
turbosquid
$59

Mechanical Part
...id
royalty free 3d model mechanical part for download as c4d on turbosquid: 3d models for games, architecture, videos. (1410833)
turbosquid
$50
Mechanical Spider
...royalty free 3d model mechanical spider for download as blend on turbosquid: 3d models for games, architecture, videos. (1599864)
turbosquid
$45

Mechanical Pencil
...royalty free 3d model mechanical pencil for download as blend on turbosquid: 3d models for games, architecture, videos. (1503379)
turbosquid
$35

Mechanical fish
...id
royalty free 3d model mechanical fish for download as max on turbosquid: 3d models for games, architecture, videos. (1152530)