Thingiverse
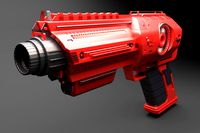
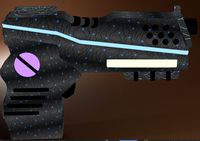
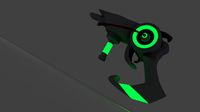
Ba'al Blaster: Rival Charger to P90 Conversion by UPWDesign
by Thingiverse
Last crawled date: 3 years ago
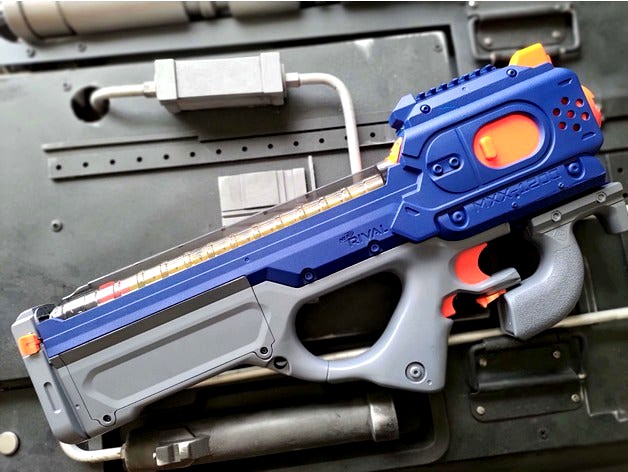
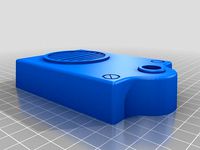
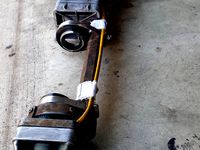
Here's my P90 conversion for a Rival Charger! I've seen a few concepts and other similar bodges, but I figured I'd take some time to sit down and work it all out. It's mag-fed and full-auto, with 95% drop-in 3D printed parts. Most of it can just be printed and dropped into the existing mounting points, but there are some (non nerf standard) screws, a pen spring, and Bondo. Had it out at a Nerf war recently, and even with the short ammo capacity, it's a blast to run around with!
The name isn't just a play on words, it's also a tribute to the actor who played Ba'al in Stargate SG-1, Cliff Simon. He tragically passed away a few days ago. I watched all of the Stargate series in quarantine this year and seeing the presence and charisma Cliff Simon bought to his role really made him my favorite Stargate villain. Seeing how prominently the P90 is featured in Stargate really was also what inspired me to make this work.
"This is a weapon of nerf war. It is made to blast your enemy." -Col. Jack O'Neill, probably.
Some Notes:
14 - March - 2021 ====================================================
Engagement with the Magazine interface (Insert1) can be finicky.
~ Working on engagement ramp to release balls more easily
~ There may be remaining balls upon reloading, the dimensions more or less make that a certainty, so be ready for it.
~ There's a slot for a zip tie near the N20 Motor, but just epoxy seems to work just fine. Block the support in the inside corner of the channel.
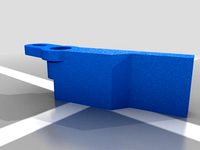
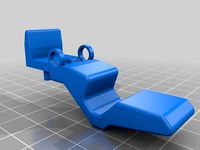
Mag eject spring:
~ Should be printed in a stiff material and may need to be supplemented with a battery spring or an additional stiff spring, as sufficient compression to engage Ammo release on the magazine creates a LOT of friction to be overcome by the eject spring.
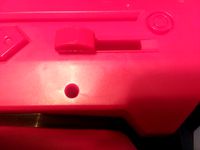
~ Stiff version also included which should be more than enough at the expense of tilting the rear of the mag up slightly. You need to pick the right spot to cut a slot into the back of the magazine. Too low, and you won't catch the retainer. Too high and the bottom chamfer may make enough room for the mag to become unseated.
~ Forward nub is for alignment, predrill with center hole to align, then go through with a 1/4 inch bit.
Definitely use a 3S. 2S is very anemic.
Safety switch extension meant for use with Worker S grip, but other Picatinny grips should work as well.
The leading-edge of Magazine Release may need to be trimmed slightly.
Shell trimming should be obvious, but feel free to ask for clarification.
Parts that require Support:
~ Magazine Eject Spring (only on the nub)
~ Lower Delete Rail
~ Insert 1
See Imgur album for other notes and Video:https://imgur.com/a/2Fv4Cld
Future Work:
~ I Will be modifying the magazine and forward area of the battery tray to accept OOD's Proton pack as soon as I get it in the mail.
~ The plan is to feed it in through the bottom and modify a special magazine with a hole in the bottom to have loaded when in proton pack mode.
~ I may add a new buttplate to make genuine Rival mags usable.
The name isn't just a play on words, it's also a tribute to the actor who played Ba'al in Stargate SG-1, Cliff Simon. He tragically passed away a few days ago. I watched all of the Stargate series in quarantine this year and seeing the presence and charisma Cliff Simon bought to his role really made him my favorite Stargate villain. Seeing how prominently the P90 is featured in Stargate really was also what inspired me to make this work.
"This is a weapon of nerf war. It is made to blast your enemy." -Col. Jack O'Neill, probably.
Some Notes:
14 - March - 2021 ====================================================
Engagement with the Magazine interface (Insert1) can be finicky.
~ Working on engagement ramp to release balls more easily
~ There may be remaining balls upon reloading, the dimensions more or less make that a certainty, so be ready for it.
~ There's a slot for a zip tie near the N20 Motor, but just epoxy seems to work just fine. Block the support in the inside corner of the channel.
Mag eject spring:
~ Should be printed in a stiff material and may need to be supplemented with a battery spring or an additional stiff spring, as sufficient compression to engage Ammo release on the magazine creates a LOT of friction to be overcome by the eject spring.
~ Stiff version also included which should be more than enough at the expense of tilting the rear of the mag up slightly. You need to pick the right spot to cut a slot into the back of the magazine. Too low, and you won't catch the retainer. Too high and the bottom chamfer may make enough room for the mag to become unseated.
~ Forward nub is for alignment, predrill with center hole to align, then go through with a 1/4 inch bit.
Definitely use a 3S. 2S is very anemic.
Safety switch extension meant for use with Worker S grip, but other Picatinny grips should work as well.
The leading-edge of Magazine Release may need to be trimmed slightly.
Shell trimming should be obvious, but feel free to ask for clarification.
Parts that require Support:
~ Magazine Eject Spring (only on the nub)
~ Lower Delete Rail
~ Insert 1
See Imgur album for other notes and Video:https://imgur.com/a/2Fv4Cld
Future Work:
~ I Will be modifying the magazine and forward area of the battery tray to accept OOD's Proton pack as soon as I get it in the mail.
~ The plan is to feed it in through the bottom and modify a special magazine with a hole in the bottom to have loaded when in proton pack mode.
~ I may add a new buttplate to make genuine Rival mags usable.
Similar models
thingiverse
free

Nerf Rival Zeus Stop & Mag Release by UNL3ASH3D
...nerf rival zeus stop & mag release by unl3ash3d
thingiverse
couldnt find on so i make one. works a treat.
thingiverse
free
Nerf Stryfe Mag Release by ShanEngineering
...e mag release by shanengineering
thingiverse
alternate short magazine release for the nerf stryfe. tested to work on the stryfe.
thingiverse
free

Nerf Rival mag holder(belt attached) by GreyFowler01
...l mag holder(belt attached) by greyfowler01
thingiverse
this is a nerf rival mag holder to be attached to a belt.
that's it.
thingiverse
free

Nerf Kronos Vertical Magazine Adaptor
.... (you will probably need to drill it out)
5) glue extension spring to mag release lever
6) screw extension spring to mag adaptor
thingiverse
free

NERF Redi Mag adapter by reversehaven
...anly when you pull the mag release catch.
this device should function as accordingly:http://www.youtube.com/watch?v=undmxqjwnqo
thingiverse
free

(Updated) Nerf Rival mag holder(belt attached) by GreyFowler01
...tible with 12 round magazines so i took the design and edited it. i also increased the belt loops strength so it should not fail.
thingiverse
free
Nerf Perses Slim Hopper Release
...t was designed to stop accidental ejections of the hopper. please comment if you have any problems or thoughts to make it better.
thingiverse
free
Nerf Rayven Extended Mag Release by NAS_Cobalt
...nas_cobalt
thingiverse
replaces the magazine release on nerf rayven blasters.
reduces the reach needed to release the magazine.
thingiverse
free

p90 nerf magazine by RickD
...p90 nerf magazine by rickd
thingiverse
magazine for p90 nerf
thingiverse
free

Nerf Rival Zeus 7 Round Mag Adapter by skills2paybills
...g adapter by skills2paybills
thingiverse
simple spacer that allows a 7 round nerf rival mag to fit and work in the zeus blaster!
Upwdesign
thingiverse
free

Space Dandy Blaster by UPWDesign
... be cut prior to printing, recommend cutting along panel lines to preserve detail.
come more of my work on instagram @upwdesign!
thingiverse
free

Lina The Slayer Posed by UPWDesign
...rame extruder printers utilize the cut versions instead.
repaired model updated!
come more of my work on instagram @upwdesign!
thingiverse
free

Worker Talon magazine follower by UPWDesign
...agazine follower by upwdesign
thingiverse
replica of a stock follower. if you want it in a different color or something i guess.
thingiverse
free
Speaker Thing from Fallout 4 by UPWDesign
...e it worn by the general and preston. you also will need a switch to put inside it.
come more of my work on instagram @upwdesign!
thingiverse
free
Fallout 4 Laser Focuser Mod by UPWDesign
... on here (i dont recall which one) so the fit will vary from rifle to rifle. enjoy!
come more of my work on instagram @upwdesign!
thingiverse
free

Caliburn Spring Quick Swap Butt by UPWDesign
...20 seconds, or even quicker in a hurry.
https://www.youtube.com/watch?v=mbo2dr-pdbs
come more of my work on instagram @upwdesign!
thingiverse
free

ODST Helmet by UPWDesign
...sively a test for conversion from .pdo>.obj>.stl. i would not recommend printing this for props without heavy modification.
thingiverse
free
Sliding Bar Dart Retainer for Nerf Rapidstrike by UPWDesign
...m door while holding down runaway darts.
sliding tolerances will require sanding.
amount of sanding depends on quality of print.
thingiverse
free

3D Printed Hardware for 1530 series (8020) HOTAS Mounts by UPWDesign
...ps used for base dimensions!
push clamp mounts must be printed solid! (or sufficiently strong, if you know what you're doing)
thingiverse
free

Fallout 4 Laser Musket Printed Parts (Requires Extra Hardware) by UPWDesign
...9-laser-rifle/
fallout 4 laser focuser mod:http://www.thingiverse.com/thing:1363174
come more of my work on instagram @upwdesign!
P90
turbosquid
$19

P90
...p90
turbosquid
royalty free 3d model p90 for download as fbx on turbosquid: 3d models for games, architecture, videos. (1537885)
turbosquid
$25

P90
...osquid
royalty free 3d model p90 for download as fbx and obj on turbosquid: 3d models for games, architecture, videos. (1563979)
turbosquid
$5

P90
...osquid
royalty free 3d model p90 for download as obj and dae on turbosquid: 3d models for games, architecture, videos. (1562381)
turbosquid
$4

P90
...
royalty free 3d model p90 for download as 3ds, max, and fbx on turbosquid: 3d models for games, architecture, videos. (1350010)
turbosquid
$20

P90
... available on turbo squid, the world's leading provider of digital 3d models for visualization, films, television, and games.
turbosquid
$5

P90
... available on turbo squid, the world's leading provider of digital 3d models for visualization, films, television, and games.
turbosquid
$2

P90
... available on turbo squid, the world's leading provider of digital 3d models for visualization, films, television, and games.
turbosquid
$1

P90
... available on turbo squid, the world's leading provider of digital 3d models for visualization, films, television, and games.
turbosquid
$1

P90
... available on turbo squid, the world's leading provider of digital 3d models for visualization, films, television, and games.
turbosquid
$1

Stylized P90
...rbosquid
royalty free 3d model stylized p90 for download as on turbosquid: 3d models for games, architecture, videos. (1297860)
Rival
turbosquid
$18

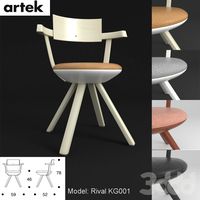
Artek Rival Chair
...artek rival chair for download as max, max, max, obj, and fbx on turbosquid: 3d models for games, architecture, videos. (1688375)
3d_export
$61
Rival boy 3D Model
... boys kids scfi next gen fantasy knight male warrior high low jean shoes game cloth
rival boy 3d model lahbibforce 74336 3dexport
humster3d
$75

3D model of Savage Rivale GTR 2014
...ailed 3d model of savage rivale gtr 2014 in various file formats. all our 3d models were created maximally close to the original.
humster3d
$75

3D model of MV Agusta Rivale 800 2015
...ed 3d model of mv agusta rivale 800 2015 in various file formats. all our 3d models were created maximally close to the original.
3d_export
$12

double blade ax
...blade ax 3dexport medieval double-bladed ax used to execute rival ...
3d_export
$18
BoxingWrestling Ring 3D Model
...3dexport boxing fight stage ring sport sports event vs rival competition wrestling wrestle wwf boxingwrestling ring 3d model xellow...
3d_export
$29
Box Arena 3D Model
...3dexport boxing fight stage ring sport sports event vs rival competition wrestling wrestle wwf kick show tournament olympics box...
3d_export
$89

Boxing Stadium 3D Model
...3dexport boxing fight stage ring sport sports event vs rival competition wrestling wrestle wwf kick show tournament olympics stadium...
3ddd
$1
birch chair
...birch chair 3ddd artek , rival contemporary style upholstered birch chair, design by konstantin grcic...
3d_export
$10

pirate captain pbr low-poly
...pirate captain pbr low-poly 3dexport the pirate captain, the rival of my sea captain has arrived. he is a...
Blaster
turbosquid
free
Blaster
...id
free 3d model blaster for download as obj, fbx, and blend on turbosquid: 3d models for games, architecture, videos. (1259706)
3d_export
free
Blaster
...blaster
3dexport
turbosquid
$35
blaster
... available on turbo squid, the world's leading provider of digital 3d models for visualization, films, television, and games.
turbosquid
$29
Blaster
...d model blaster for download as 3ds, obj, fbx, blend, and dae on turbosquid: 3d models for games, architecture, videos. (1296833)
turbosquid
$5

Blaster
... available on turbo squid, the world's leading provider of digital 3d models for visualization, films, television, and games.
turbosquid
free

blaster
... available on turbo squid, the world's leading provider of digital 3d models for visualization, films, television, and games.
turbosquid
$10

Blaster Machine
...squid
royalty free 3d model blaster machine for download as on turbosquid: 3d models for games, architecture, videos. (1407293)
3d_export
$5
Blaster 3D Model
...blaster 3d model
3dexport
blaster weapon game gun wars star shoter movie
blaster 3d model daniilbondar 93841 3dexport
3d_ocean
$15

Ghetto Blaster
...o blaster
3docean
audio boombox cassette ghettoblaster music radio stereo
fully modeled ghetto blaster including uvw texture psd.
turbosquid
$1
Alien Blaster
...id
royalty free 3d model alien blaster for download as blend on turbosquid: 3d models for games, architecture, videos. (1258055)
Ba
3ddd
$1
BAS Nikol
..., bas nikol , bas
моделирование ванны bas nikol
3ddd
free
BAS Alegra
...bas alegra
3ddd
bas , ванна
угловая ванна, фирма bas
3ddd
$1
BAS Fantasy
...bas fantasy
3ddd
bas , ванна
ванна
3ddd
$1
BAS Laguna
...bas laguna
3ddd
bas , ванна
ванна
3ddd
$1
BAS Riola
...bas riola
3ddd
bas , ванна
ванна
3ddd
$1
BAS Mega
...bas mega
3ddd
bas , ванна
ванна
3ddd
$1
BAS Sagra
...bas sagra
3ddd
bas , ванна
ванна
3ddd
free
BAS Imperial
...bas imperial
3ddd
bas , ванна
ванна
3d_export
free

Bas Guitar
...bas guitar
3dexport
red bas guitar. made in blender
archibase_planet
free

Bas-relief
...hibase planet
bas-relief decoration sculpture
bas-relief elephant n190813 - 3d model (*.gsm+*.3ds) for interior 3d visualization.
Charger
3d_export
$5
charger
...ers in battle. this is the 18th century meaning of charger, and it’s based on the verb charge and its meaning “rush into battle.”
3d_export
free
Charger
...charger
3dexport
turbosquid
$15
Charger
... available on turbo squid, the world's leading provider of digital 3d models for visualization, films, television, and games.
turbosquid
$3

Charger
...d model charger for download as skp, max, blend, stl, and obj on turbosquid: 3d models for games, architecture, videos. (1654816)
turbosquid
$1
charger
... available on turbo squid, the world's leading provider of digital 3d models for visualization, films, television, and games.
3d_export
$20

dodge charger 1972
...dodge charger 1972
3dexport
dodge charger 1972
3d_export
$20
dodge charger 1969
...dodge charger 1969
3dexport
dodge charger 1969
3d_export
free

dodge charger 1969
...dodge charger 1969
3dexport
dodge charger 1969
3d_export
$18

dodge charger
...dodge charger
3dexport
3d_export
$89
Charger 3D Model
...charger 3d model
3dexport
charger sea transopt industry 3d models
charger 3d model vitaly amurskiy 2286 3dexport
Conversion
3ddd
$1

Conversation Seat
...шетка
the conversation seat made in englandhttp://www.squintlimited.com/products/the_conversation_seat/gold
+ max 2011
3d_export
$10

Converse 3D Model
...converse 3d model
3dexport
converse shoe pc unix mac
converse 3d model electropainter17075 38067 3dexport
turbosquid
$100

converse-shoe
...quid
royalty free 3d model converse-shoe for download as c4d on turbosquid: 3d models for games, architecture, videos. (1398427)
turbosquid
$10

Conversation Furniture
... available on turbo squid, the world's leading provider of digital 3d models for visualization, films, television, and games.
turbosquid
$7

Converse Allstars
... available on turbo squid, the world's leading provider of digital 3d models for visualization, films, television, and games.
design_connected
$16

Conversation Club Chair
...conversation club chair
designconnected
donghia conversation club chair chairs computer generated 3d model. designed by n/a.
design_connected
$27

Hemicycle Conversation Chair
...rsation chair
designconnected
ligne roset hemicycle conversation chair computer generated 3d model. designed by nigro, philippe.
3d_export
$24

Converse keds 3D Model
...converse keds 3d model
3dexport
converse all star ked shoe clothes sports
converse keds 3d model vermi1ion 26201 3dexport
3ddd
$1

Converse All-Star Shoes
...converse all-star shoes
3ddd
кеды , обувь
converse all-star shoes
design_connected
$18

CONVERSE Jack Purcell Sneakers
...converse jack purcell sneakers
designconnected
converse jack purcell sneakers computer generated 3d model.
Al
design_connected
$11

Ales
...ales
designconnected
willisau ales computer generated 3d model. designed by kössl , ulrich.
3ddd
$1

GINGER ALE CHAIR
...ginger ale chair
3ddd
ginger , ale
ginger ale chair
turbosquid
$100
abed al kader al jaziery house
... available on turbo squid, the world's leading provider of digital 3d models for visualization, films, television, and games.
turbosquid
$3

Ale Horn
...turbosquid
royalty free 3d model ale horn for download as ma on turbosquid: 3d models for games, architecture, videos. (1390503)
3ddd
$1
Стол Bene AL
...водителя bene al
длина 2000, ширина 1000, высота 755http://bene.com/ru/ofisnye-reshenija/ofisnye-interery/al-executive/
3ddd
$1

stool al
...stool al
3ddd
барный
www.tsinos.gr
turbosquid
$20

als AutoLoading.max
... available on turbo squid, the world's leading provider of digital 3d models for visualization, films, television, and games.
turbosquid
$14

Bene Al
... available on turbo squid, the world's leading provider of digital 3d models for visualization, films, television, and games.
3d_export
$10

al-jazeera representative
...al-jazeera representative
3dexport
colgante alusivo a la isla- al jazeera. diseño sencillo pero audaz
cg_studio
$19

Al Pacino3d model
...al pacino3d model
cgstudio
.max - al pacino 3d model, royalty free license available, instant download after purchase.