
Thingiverse
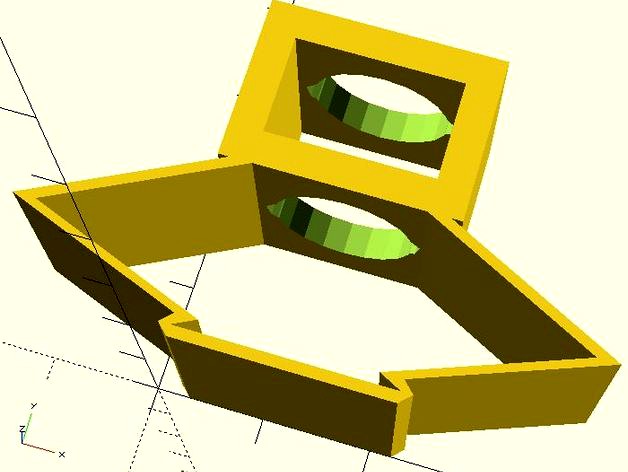
Auto-level trigger for induction bed sensor by neveroddoreven
by Thingiverse
Last crawled date: 5 years, 2 months ago
This is an updated version of my "Poor Man's BLTouch" induction auto-trigger. It works for any printer that leaves enough of the induction sensor barrel exposed to attach this trigger part. USE AT YOUR OWN RISK.
This trigger relieves the user from having to attach pieces of metal to a non-metallic bed, exposing the full bed surface for printing after performing a fully automatic leveling calibration. After the measurements, just remove the trigger and put it away until your next bed leveling calibration is needed.
IMPORTANT: If you are using the fully automated auto-leveling behavior in your printer firmware, you MUST remember to attach this trigger to the carriage before starting the bed level measurements! Failure to do so may result in a forcible nozzle crash, and related mechanical/electrical damage.
The part works for me when printed in TPU. The part will become slightly warped if used for extended duration over a heated bed, but should still have plenty of flex in it and press the trigger down firmly when used. Take it off the printer and put it safely away when not in use to help retain its shape.
Build Instructions:
Print this part out in TPU (aka Ninjaflex) or something similarly rubbery. I found that semiflex PLA was not flexible enough, didn't return to shape, and couldn't withstand a high temperature heated bed without becoming permanently warped. YMMV.
REMEMBER TO REATTACH THE TRIGGER BEFORE AUTO-LEVELING AGAIN, OR YOU'LL HAVE (FOR STARTERS) A NOZZLE CRASH!
For those using Repetier firmware 0.91 or higher, and new to automated bed leveling with an induction sensor, I've attached a text file walking you through the process of using this trigger after you've followed Repetier's documentation. Consult the Repetier community if you have issues, before even attempting to use this trigger part.http://www.repetier.com/documentation/repetier-firmware/z-probing/
Outline drawn in Qcad as DXF, then extruded in OpenSCAD with holes for the barrel. Save the DXF file in the same folder with the SCAD file.
This trigger relieves the user from having to attach pieces of metal to a non-metallic bed, exposing the full bed surface for printing after performing a fully automatic leveling calibration. After the measurements, just remove the trigger and put it away until your next bed leveling calibration is needed.
IMPORTANT: If you are using the fully automated auto-leveling behavior in your printer firmware, you MUST remember to attach this trigger to the carriage before starting the bed level measurements! Failure to do so may result in a forcible nozzle crash, and related mechanical/electrical damage.
The part works for me when printed in TPU. The part will become slightly warped if used for extended duration over a heated bed, but should still have plenty of flex in it and press the trigger down firmly when used. Take it off the printer and put it safely away when not in use to help retain its shape.
Build Instructions:
Print this part out in TPU (aka Ninjaflex) or something similarly rubbery. I found that semiflex PLA was not flexible enough, didn't return to shape, and couldn't withstand a high temperature heated bed without becoming permanently warped. YMMV.
REMEMBER TO REATTACH THE TRIGGER BEFORE AUTO-LEVELING AGAIN, OR YOU'LL HAVE (FOR STARTERS) A NOZZLE CRASH!
For those using Repetier firmware 0.91 or higher, and new to automated bed leveling with an induction sensor, I've attached a text file walking you through the process of using this trigger after you've followed Repetier's documentation. Consult the Repetier community if you have issues, before even attempting to use this trigger part.http://www.repetier.com/documentation/repetier-firmware/z-probing/
Outline drawn in Qcad as DXF, then extruded in OpenSCAD with holes for the barrel. Save the DXF file in the same folder with the SCAD file.