Thingiverse
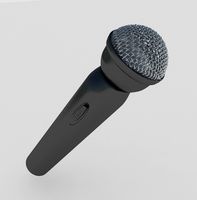
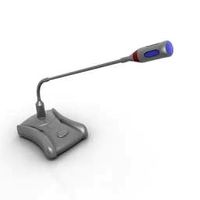
Audio-technica MX-50 Lavaliere Microphone Add on by ricci07
by Thingiverse
Last crawled date: 3 years, 4 months ago
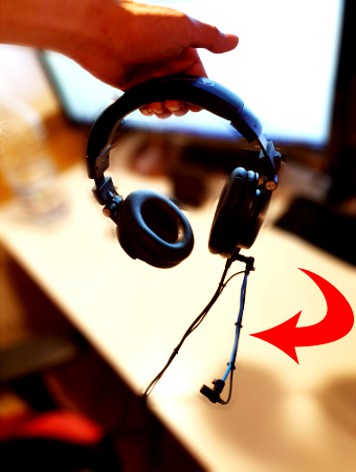
The official audio technica mic addon is expensive so I created this. I believe its actually better in some ways because you don't have to stick it onto the headphone-CAN and it be used obtain brilliant audio by using the nicama LVM3 lav mic for very cheap. I purchased the mic refurbished for £6-ish. Normally it is £17-ish. See the link below.
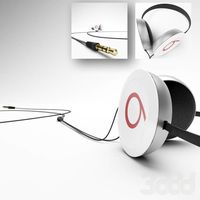
Because it attaches directly to the headphone cable and not the headphone you can detach it very easily for whatever reason.
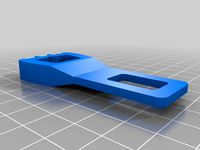
The pivot arm joint requires a short (10mm) M3 hex socket bolt. To insert it into the headphone cable clamp, you need to stretch the clamp apart using a method of your choosing in order to insert the screw. This is why use must use 100% infill to avoid breaking the PLA from the stretching. Then tighten the screw until the pivot arm is brought as close as possible to the clamp. The bolt should rotate with the pivot arm. The head of the bolt stops the pivot arm from detaching. You may need to pre-tap the pivot arm hole with the screw as it is purposely undersized to allow thread creation. It may be too difficult to get the pivot arm the bite into the plastic if you don't pre-thread it. A plastic tapping screw with a sharp point may be a better solution but I have not tested that.
...For the boom...
It was designed to use a single solid-core copper conductor taken from a PVC/PVC flat 2 core and earth cable 1mm^2 to 2.5mm^2. I used a 150mm long piece which seemed to be the perfect length. I tested it with a 150mm length of 2.5mm^2 solid core cable. However this may be over-kill as it as more rigidness than is required to support the microphone at the other end. I recommend trying a 150mm length of 1.5mm^2 piece of cable.
Strip 5-10mm of insulation from each end of the conductor and insert one end into the lav microphone holder and one end into the pivot arm. Use m3 set screws, ideally, to secure the cables into place at each end. I used very short ordinary m3 hex socket bolts because I didn't have any set screws. Set screws would look better because they don't have a big unnecessary heads left visible.
The microphone holder clip was designed to hold a 6.5mm diameter nicama LVM3 lav mic (https://www.amazon.co.uk/Lavalier-Microphone-Nicama-Smartphone-Recording-Lav-Mic-adapter-cable/dp/B075ZDKDY5)
If you intend to use a different diameter lav mic, you may need to modify the STL file. If you would like the original files, please message me.
Print about 3-4 mic cable clips to couple the mic wire with the 2.5mm^2 cable. You may need to modify these clips if you use a 1.0mm^2 or 1.5mm^2 conductor. Please let me know if you want these included in the original files as I haven't considered these yet.
Print about 12 or so headphone cable clips to couple the mic wire with the original audio technica cable. Again different brand headphone cable may require a different clip diameter.
Compress the headphone cable clamp with a m3 bolt and nut. One side of the clamp allows the bolt to drop through and one side with bite into the plastic. Ideally insert the bolt through the side which is doesn't bite into first
When inserting the lav mic into the mic holder be careful and "test the waters" by not pressing too hard and let the PLA flex around the mic itself. Pushing too hard will likely break the PLA. If you are uncertain it will be flex without breaking you can increase the gap with a file.
Use the increased friction pivot arm file and headphone cable clamp to obtain a stiffer response from the rotating arm. I haven't tested it, but I'm certain it will work fine.
Because it attaches directly to the headphone cable and not the headphone you can detach it very easily for whatever reason.
The pivot arm joint requires a short (10mm) M3 hex socket bolt. To insert it into the headphone cable clamp, you need to stretch the clamp apart using a method of your choosing in order to insert the screw. This is why use must use 100% infill to avoid breaking the PLA from the stretching. Then tighten the screw until the pivot arm is brought as close as possible to the clamp. The bolt should rotate with the pivot arm. The head of the bolt stops the pivot arm from detaching. You may need to pre-tap the pivot arm hole with the screw as it is purposely undersized to allow thread creation. It may be too difficult to get the pivot arm the bite into the plastic if you don't pre-thread it. A plastic tapping screw with a sharp point may be a better solution but I have not tested that.
...For the boom...
It was designed to use a single solid-core copper conductor taken from a PVC/PVC flat 2 core and earth cable 1mm^2 to 2.5mm^2. I used a 150mm long piece which seemed to be the perfect length. I tested it with a 150mm length of 2.5mm^2 solid core cable. However this may be over-kill as it as more rigidness than is required to support the microphone at the other end. I recommend trying a 150mm length of 1.5mm^2 piece of cable.
Strip 5-10mm of insulation from each end of the conductor and insert one end into the lav microphone holder and one end into the pivot arm. Use m3 set screws, ideally, to secure the cables into place at each end. I used very short ordinary m3 hex socket bolts because I didn't have any set screws. Set screws would look better because they don't have a big unnecessary heads left visible.
The microphone holder clip was designed to hold a 6.5mm diameter nicama LVM3 lav mic (https://www.amazon.co.uk/Lavalier-Microphone-Nicama-Smartphone-Recording-Lav-Mic-adapter-cable/dp/B075ZDKDY5)
If you intend to use a different diameter lav mic, you may need to modify the STL file. If you would like the original files, please message me.
Print about 3-4 mic cable clips to couple the mic wire with the 2.5mm^2 cable. You may need to modify these clips if you use a 1.0mm^2 or 1.5mm^2 conductor. Please let me know if you want these included in the original files as I haven't considered these yet.
Print about 12 or so headphone cable clips to couple the mic wire with the original audio technica cable. Again different brand headphone cable may require a different clip diameter.
Compress the headphone cable clamp with a m3 bolt and nut. One side of the clamp allows the bolt to drop through and one side with bite into the plastic. Ideally insert the bolt through the side which is doesn't bite into first
When inserting the lav mic into the mic holder be careful and "test the waters" by not pressing too hard and let the PLA flex around the mic itself. Pushing too hard will likely break the PLA. If you are uncertain it will be flex without breaking you can increase the gap with a file.
Use the increased friction pivot arm file and headphone cable clamp to obtain a stiffer response from the rotating arm. I haven't tested it, but I'm certain it will work fine.
Similar models
thingiverse
free

audio technica pro 70 lav mic clip by mburgess00
...ica pro 70 lav mic clip by mburgess00
thingiverse
this is a mic clip for audio technica pro 70 or others that are 10mm diameter.
thingiverse
free

Mic arm stand cable clip by Rubster_
...arm. i do not know if it works with other microphone arms. the mic arm i am using is an "innogear microphone arm stand"
thingiverse
free

Mic Arm Cable Clip
...mic arm cable clip
thingiverse
just a little clip i made for my microphone arm to hold the cable in place
thingiverse
free

Cable management clip for Microphone Arm Stand by victornpb
...~4.5mm in diameter.
theres a model for printing 2 at once to save some bed space.
i ended using 6 clips in total, 3 for each arm.
3dwarehouse
free

Audio Technica AT841UG Omni Condenser Boundary Mic
...841ug #audio_technica #boundary #cisco #condenser #ctsmic #ctsmicomnidir #mic #microphone #omni #omnidirectional #table #tandberg
cg_trader
$39
Audio-technica AT2005 USB Dynamic Microphone
...rdingmicrophone sound voice device stereo mic recording audioequipment headset computermicrophone electronicequipment electronics
3dwarehouse
free

Boom arm
...boom arm
3dwarehouse
with audio technica at-2035 microphone
thingiverse
free

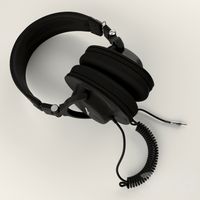
ath-m50x microphone by Ak91
...lack-plug-mic-microphone-mini-/262799701279?hash=item3d3015351f:g:~oiaaosw5cnyc1ia
p.s: yes it cracked alittle bit. dont mind it!
cg_trader
$39

Audio-technica AE5100 condenser microphone recording microphone
... mic recording audioequipment headset computermicrophone electronicequipment electronics audio device musicalinstrumentmicrophone
thingiverse
free

Mic stand headphone hook by doodude
...ll, it seems to be holding up fine supporting my studio headphones. also acts as a counterweight if the mic boom is far extended.
Ricci07
thingiverse
free

Wider Foot - Better Switch Contact by ricci07
...tended outwards further. it seemed easier to just make the foot diameter larger to make sure it contacts switch roller correctly.
thingiverse
free
Seat Belt Nag-beep Suppressor by ricci07
...hird is a simpler handle as i thought the shape was a bit uncomfortable to press on. (this is of the no support material version)
thingiverse
free

18mm Sensor Mount Bracket Rear Bearing by ricci07
...sting designs so made one myself.
you need to tap the lower x-axis bearing holes with a 3mm tap. use stubby m3 screw (about 6mm).
Lavaliere
archibase_planet
free
Pendant
...pendant archibase planet pendant coulomb pendent lavaliere pendant - 3d model (*.gsm+*.3ds) for interior 3d...
archive3d
free

Pendant 3D Model
...pendant 3d model archive3d pendant coulomb pendent lavaliere pendant - 3d model (*.gsm+*.3ds) for interior 3d...
3dbaza
$3
LAVALIERE Pendant (130656)
...lt;br>xform: no<br>box trick: no<br>model parts: 8<br>render: v-ray<br>formats: 3ds max 2013, obj, fbx
3dbaza
$3

LAVALIERE pendant lamp (329944)
...0 см<br>polys: 4 607<br>verts: 4 693<br>xform: yes<br>render: v-ray 5<br>formats: 3ds max 2013, obj
thingiverse
free

Lavaliere Microphone Holder by Charles_Snyder
...re does, if that's the case, then likely this part may not be what you want. as i mentioned, it's locked in really well.
thingiverse
free

Zhiyun Smooth 4 Wireless Mic adapter H-U05-RX
...made this to hold the wireless adapter for a lavaliere mic that i purchased to use with my smooth...
thingiverse
free
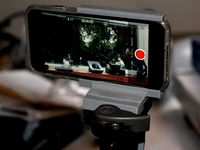
iPhone 6 Tripod Mount by sifugreg
...remote control, the xlr microphone adapter, a boom and lavaliere microphone and a small audio mixing board and you...
thingiverse
free

Audio Technica PRO 70 / AT831B microphone instrument mounts by vdub6127
...at831b microphone instrument mounts by vdub6127 thingiverse audio technica lavaliere condenser microphones like the pro 70 and at831b are...
grabcad
free

DEITY W.Lav lavaliere microphone
...essories for this microphone.
mini lavalier microphone condenser waterproof mic for vlog https://s.click.aliexpress.com/e/_a0tvgh
Technica
3d_export
$10
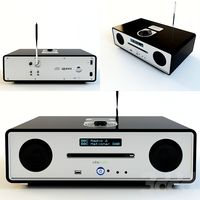
audio-technica player
...audio-technica player
3dexport
turbosquid
$45

Audio-technica AT2020
... available on turbo squid, the world's leading provider of digital 3d models for visualization, films, television, and games.
3ddd
$1
audio technica ATH-M35
...audio technica ath-m35
3ddd
наушники
наушники
3d_export
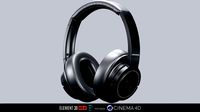
$39

Audio technica ATH-M50x headphones 3D Model
...i dynamic
audio technica ath-m50x headphones 3d model download .c4d .max .obj .fbx .ma .lwo .3ds .3dm .stl djkorg 110672 3dexport
turbosquid
$69
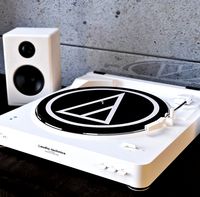
AUDIO-TECHNICA AT-LP60BK-BT BLUETOOTH WIRELESS STEREO TURNTABLE
...h wireless stereo turntable for download as max, obj, and fbx on turbosquid: 3d models for games, architecture, videos. (1265219)
3d_export
$15
Audio Technica ATH-SR50BT
...ers. in these formats, shaders need to be edited for the new studio for the final rendering. preview renders are made in max 2022
3d_ocean
$2

Low Poly Spruce
...spruce on mountain pack. check out this pack! overall technica.. ...
3d_export
$26

renew link workstation celle chair
...celle chair from hermanmiller - high detailed headphone from audio-technica - high detailed microsoft keyboard & mouse - high...
thingiverse
free

Audio Technica Headphone Stand by Vultron_Designs
...audio technica headphone stand by vultron_designs
thingiverse
headphone stand for audio technica .
thingiverse
free

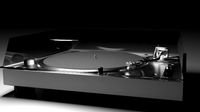
Audio Technica Vinyl Player by joreal
...audio technica vinyl player by joreal
thingiverse
3d model of audio technica vinyl player.
Mx
3ddd
$1
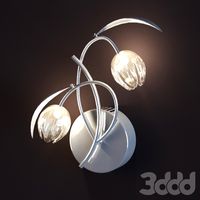
MX 3016
...mx 3016
3ddd
в соответствующем разделе есть люстра mx 3016
3ddd
free
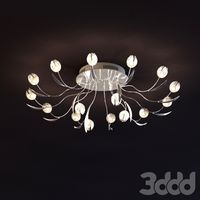
MX 3016
...mx 3016
3ddd
имеется в продаже.
cg_studio
$50

Mazda MX-53d model
...dio
cars mazda mx-5 miata mx 5.
.3ds .max - mazda mx-5 3d model, royalty free license available, instant download after purchase.
3d_export
$150
paccar mx-13
...ccar mx-13
3dexport
highly detailed model of the paccar mx-13 diesel engine, all parts are separate, you can move as you want ;)
3d_export
$60
Mazda MX-5 M3
...mazda mx-5 m3
3dexport
mazda mx-5 c передней частью от вмw m3
turbosquid
$10
20 euros MX
... available on turbo squid, the world's leading provider of digital 3d models for visualization, films, television, and games.
turbosquid
$10

50 euros MX
... available on turbo squid, the world's leading provider of digital 3d models for visualization, films, television, and games.
turbosquid
$2

Building 05 MX
... available on turbo squid, the world's leading provider of digital 3d models for visualization, films, television, and games.
turbosquid
$2

Building 06 MX
... available on turbo squid, the world's leading provider of digital 3d models for visualization, films, television, and games.
turbosquid
$2

Building 04 MX
... available on turbo squid, the world's leading provider of digital 3d models for visualization, films, television, and games.
Microphone
3ddd
$1
microphone
...microphone
3ddd
microphone , микрофон
microphone
3d_ocean
$7
Microphone
...microphone
3docean
mic microphone mike
microphone
3d_ocean
$4

Microphone
...microphone
3docean
mic microphone mike
microphone with spherical grill
archibase_planet
free
Microphone
...hone conference microphone
digital conference selector microphone n170912 - 3d model (*.gsm+*.3ds) for interior 3d visualization.
3d_export
$7

microphone
...microphone
3dexport
black microphone
3d_export
$5

microphone
...microphone
3dexport
black modern microphone for streaming
archibase_planet
free
Microphone
...microphone
archibase planet
microphone audio equipment
microphone n260809 - 3d model (*.3ds) for interior 3d visualization.
archibase_planet
free
Microphone
...microphone
archibase planet
equipment microphone
microphone n230410 - 3d model (*.gsm+*.3ds) for interior 3d visualization.
archibase_planet
free

Microphone
...microphone
archibase planet
microphone audio equipment
microphone n250608 - 3d model (*.gsm+*.3ds) for interior 3d visualization.
archibase_planet
free
Microphone
...microphone
archibase planet
microphone audio equipment
microphone n160309 - 3d model (*.gsm+*.3ds) for interior 3d visualization.
Audio
archibase_planet
free

Audio
...audio
archibase planet
home equipment audio
audio n170109 - 3d model (*.gsm+*.3ds) for interior 3d visualization.
3ddd
$1
Beats Audio
...beats audio
3ddd
наушники
наушники beats audio
3ddd
$1
колонки Monitor Audio
...колонки monitor audio
3ddd
monitor audio , monitor
колонки monitor audio - platinum
3d_ocean
$7
Audio speaker
...peakers stereo studio sub sub-woofer
high quality audio speakers. created in cinema4d but comes in various other formats as well.
3ddd
free

Clear Audio / Innovation
...clear audio / innovation
3ddd
clear audio / innovation
archive3d
free

Audio 3D Model
...ve3d
home equipment audio
audio n170109 - 3d model (*.gsm+*.3ds) for interior 3d visualization.
3ddd
$1
Vita Audio R4i
...vita audio r4i
3ddd
радио
vita audio r4i
turbosquid
$10

Audio Spectrum
...d
royalty free 3d model audio spectrum for download as blend on turbosquid: 3d models for games, architecture, videos. (1568428)
turbosquid
free

Audio Speaker
...quid
royalty free 3d model audio speaker for download as max on turbosquid: 3d models for games, architecture, videos. (1405286)
3d_export
$9
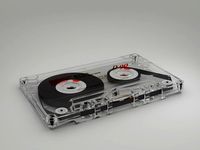
vintage audio cassette
...vintage audio cassette
3dexport
vintage audio cassette 3d model
50
3d_export
$500
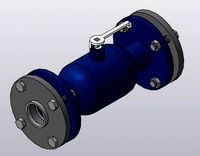
50
...50
3dexport
flanged ball valve dn 50 detailed made in compass 17
3ddd
free
Life 50-50-170
...life 50-50-170
3ddd
life
автор модели: aroslon
3ddd
$1

Pillows 50
...pillows 50
3ddd
подушка
pillows 50
turbosquid
$27
50
... available on turbo squid, the world's leading provider of digital 3d models for visualization, films, television, and games.
3d_export
$18

plants 50
...plants 50
3dexport
plants 50 is a monstera plants or swiss cheese plant,, best suit in both indoor and outdoor.
3d_export
$17

Sukhoi T-50
...sukhoi t-50
3dexport
sukhoi t-50
3ddd
$1
Aqwella Espresso 50
...aqwella espresso 50
3ddd
aqwella espresso 50
3ddd
$1
ELEYUS LINE 50
...тяжка , eleyus
вытяжка eleyus, модель eleyus line 50 ( белый, коричневый) ширина - 50 см
turbosquid
$99
AMX-50
...
turbosquid
royalty free 3d model amx-50 for download as fbx on turbosquid: 3d models for games, architecture, videos. (1521461)
turbosquid
$6
Bedcloth 50
...osquid
royalty free 3d model bedcloth 50 for download as max on turbosquid: 3d models for games, architecture, videos. (1522738)
Add
3ddd
$1

Радиатор_ add-on
... add-on
http://www.tubesradiatori.com/eng.html#/collections/elements/add-on_en_0_2_79_1.html
design_connected
$16

Add Colour
...add colour
designconnected
stelton add colour computer generated 3d model. designed by jacobsen, arne.
3ddd
free
TUBES - Add-on
...tubes - add-on
3ddd
полотенцесушитель
3ddd
$1

Lammhults add chair
...dd
lammhults , add
http://www.lammhults.se/products/chairs-armchairs/add-chair
3d_export
$60

add blimp
...ginei.tga frame_diffuse.tga frame_normal.tga frame_specular.tga flare.tga spikesd.tga spikesi.tga spotlightsd.tga spotlightsd.tga
3ddd
$1

ADD lapalma
...add lapalma
3ddd
lapalma
http://www.lapalma.it/main/product.aspx?p=93
turbosquid
$5

Planetery Material add-on for Blender
... planetery material add-on for blender for download as blend on turbosquid: 3d models for games, architecture, videos. (1678092)
turbosquid
$8
Time Bomb (Mouse Add-on)
... available on turbo squid, the world's leading provider of digital 3d models for visualization, films, television, and games.
3ddd
$1

Add-Lighting 41607/1F NI
...hting
размеры, мм: 200х540х250
производство: испанияhttp://ligting.ru/index/style/styleid/1256/nameid/98170/tid/340867/
3d_ocean
$19

Panzer Add-On for Brutal (for Poser)
...ures: panzer: front shell armor, at 8594 polygons shell: rear shell armor, at 14600 polygons props: bandage/ face mask bangle/...