Thingiverse
Audio Technica ATH-M40X Headphone hinge replacement by taitywaity
by Thingiverse
Last crawled date: 3 years ago
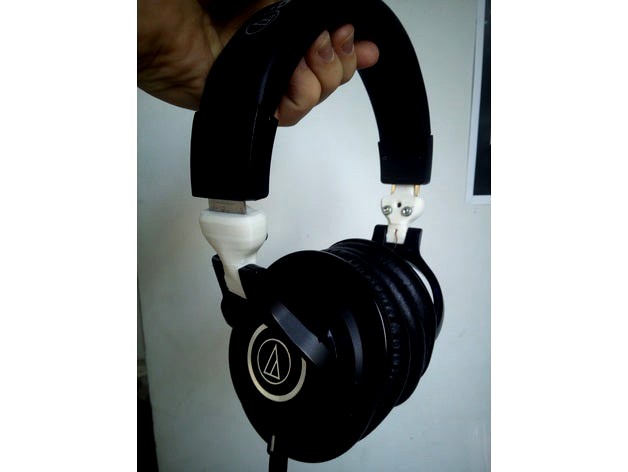
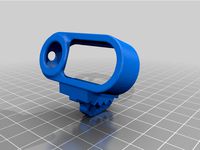
Replacement part designed for Audio Technica ATH-M40X headphones but might work on other similar headphones like M50s (I haven't tested this). If you ask me I would be willing to make a few small changes to the design if its simply widening a hole or something to make it fit, or I can send you the fusion files.
PLEASE READ BEFORE PRINTING
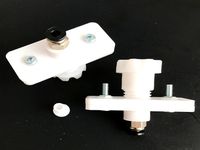
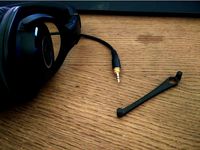
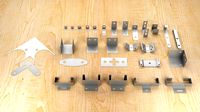
There are 3 parts you need to print, the inner pivot piece, band piece, and outer skin. you will also need 4x M3 x ~5mm long bolts (mine were from an old 'Mechano' toy set), and I can change the dimensions for the bolts you have available if you really can't find any that will work. Also some ~4mm wire/rod (I used a tent peg and cut it down). Additionally you will need some headphone wire and the ability to solder it. there is a <2mm diameter hole to feed this through so most 2 core headphone wire would work, I didn't have any so used individual strands but wouldn't recommend this.
ASSEMBLY:
This is a little awkward,
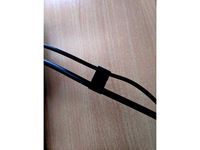
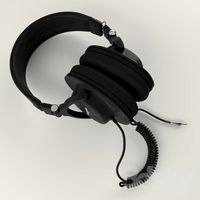
disassemble the hinge part and cut the wire where it starts to go behind the metal adjustable band. you can see in the last photo how far taken apart it needs to be. Keep all screws and the small plastic part that holds the axle and the metal band.
Cut 4mm rod to length (I think this was ~24mm but don't remember but you can measure this and check it fits yourself)
Finish 3D printed parts - minimal required, maybe some aesthetic sanding and cutting the brim off the inner pivot piece. Fit the rod through this and check it fits with the plastic part over the rod. You will now need to sand down the bottom of the inner pivot piece so it just touches the inside of the bracket when it lines up with the bracket. This acts as the stop for the metal rod pivot.
Solder your wire to the headphone wire and insulate with tape/heatshrink only at one end, and feed it through the hole in the inner pivot piece. Now you can solder the other ends together and check continuity with a multimeter - these wires can be awkward to get a solid joint.
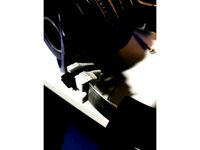
Heat up the metal band with a soldering iron and press the band piece against it to give it a bend. Make sure not to squish it too much as it's easy to buckle it at the cut out for the solder joint.
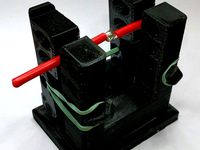
'Tap' the holes by heating up the bolts a little and screwing them through the band piece into the outer skin, ensuring both parts are pressed tightly together. Unscrew them enough so the outer skin can be removed.
Press the outer skin over the inner pivot piece and push it down so the small protrusion goes into the slot. push the band piece into place and try to route the wires in its trough so they aren't clamped when you tighten it (this is very fiddly). Insert the metal band once it's cooled down into the slot that's between the skin and inner pivot piece making sure it is all the way to the bottom. Make sure the solder joint is in the cutout in the band piece, now hidden behind the metal band.
Tighten the bolts so the is a only a very small (<1mm) gap between the outer skin and band piece. If there is still a big gap you can try using pliers to bend the tab on the metal band to be less bent. Screw in the screw that was holding the metal band in place before, making sure it goes through the hole in the metal band.
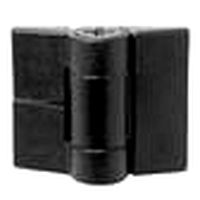
Reassemble. Place the black clip over the band piece (some trimming off the top part with a knife might be needed to get it to fit well) and slide it back into the headphone band. Screw together the plastic ends of the headphone band over the top. File/drill a small hole/slot in the inside part of the headphone cup bracket to pass the wire though and screw back together everything. Finally I pushed the excess wire into the back of this bracket to hide it away.
DONE!! (well except for the other side ;))
PRINTING:
No supports needed for any parts, 2mm wall shell and 1mm top/bottom for strength, 50% infill (there is very little infill volume). Printing time: 1.5-2 hrs.
Inner pivot piece - orient so the axle is facing up and rotate 15 degrees so the bottom surface is on the plate (this is the flat side facing right in the thingview preview), use a brim, 0.15mm layer height
Outer skin - orient so the wide side is o the plate, use 0.1mm layer height for smoothest looking results
Band piece - lay flat (opposite way to how it it in thing view at top), 0.2mm/0.15mm layer height
FEEL FREE TO ASK NY QUESTIONS, I know my instructions aren't great
PLEASE READ BEFORE PRINTING
There are 3 parts you need to print, the inner pivot piece, band piece, and outer skin. you will also need 4x M3 x ~5mm long bolts (mine were from an old 'Mechano' toy set), and I can change the dimensions for the bolts you have available if you really can't find any that will work. Also some ~4mm wire/rod (I used a tent peg and cut it down). Additionally you will need some headphone wire and the ability to solder it. there is a <2mm diameter hole to feed this through so most 2 core headphone wire would work, I didn't have any so used individual strands but wouldn't recommend this.
ASSEMBLY:
This is a little awkward,
disassemble the hinge part and cut the wire where it starts to go behind the metal adjustable band. you can see in the last photo how far taken apart it needs to be. Keep all screws and the small plastic part that holds the axle and the metal band.
Cut 4mm rod to length (I think this was ~24mm but don't remember but you can measure this and check it fits yourself)
Finish 3D printed parts - minimal required, maybe some aesthetic sanding and cutting the brim off the inner pivot piece. Fit the rod through this and check it fits with the plastic part over the rod. You will now need to sand down the bottom of the inner pivot piece so it just touches the inside of the bracket when it lines up with the bracket. This acts as the stop for the metal rod pivot.
Solder your wire to the headphone wire and insulate with tape/heatshrink only at one end, and feed it through the hole in the inner pivot piece. Now you can solder the other ends together and check continuity with a multimeter - these wires can be awkward to get a solid joint.
Heat up the metal band with a soldering iron and press the band piece against it to give it a bend. Make sure not to squish it too much as it's easy to buckle it at the cut out for the solder joint.
'Tap' the holes by heating up the bolts a little and screwing them through the band piece into the outer skin, ensuring both parts are pressed tightly together. Unscrew them enough so the outer skin can be removed.
Press the outer skin over the inner pivot piece and push it down so the small protrusion goes into the slot. push the band piece into place and try to route the wires in its trough so they aren't clamped when you tighten it (this is very fiddly). Insert the metal band once it's cooled down into the slot that's between the skin and inner pivot piece making sure it is all the way to the bottom. Make sure the solder joint is in the cutout in the band piece, now hidden behind the metal band.
Tighten the bolts so the is a only a very small (<1mm) gap between the outer skin and band piece. If there is still a big gap you can try using pliers to bend the tab on the metal band to be less bent. Screw in the screw that was holding the metal band in place before, making sure it goes through the hole in the metal band.
Reassemble. Place the black clip over the band piece (some trimming off the top part with a knife might be needed to get it to fit well) and slide it back into the headphone band. Screw together the plastic ends of the headphone band over the top. File/drill a small hole/slot in the inside part of the headphone cup bracket to pass the wire though and screw back together everything. Finally I pushed the excess wire into the back of this bracket to hide it away.
DONE!! (well except for the other side ;))
PRINTING:
No supports needed for any parts, 2mm wall shell and 1mm top/bottom for strength, 50% infill (there is very little infill volume). Printing time: 1.5-2 hrs.
Inner pivot piece - orient so the axle is facing up and rotate 15 degrees so the bottom surface is on the plate (this is the flat side facing right in the thingview preview), use a brim, 0.15mm layer height
Outer skin - orient so the wide side is o the plate, use 0.1mm layer height for smoothest looking results
Band piece - lay flat (opposite way to how it it in thing view at top), 0.2mm/0.15mm layer height
FEEL FREE TO ASK NY QUESTIONS, I know my instructions aren't great
Similar models
thingiverse
free
Drybox Filament Pass-Through
...
any comments and suggestions for improvements appreciated ;-)
feel free to remix, fusion 360 files are included in the download.
thingiverse
free

Audio-Technica ATH-M40X Replacement Hinge by CuriCre
...r side. i use m3x20mm bolts, but these can be replaced by shorter ones after the nuts have been dragged into the hexagonal holes.
thingiverse
free
Pivoting shower curtain rod bracket by jmcskixc
...t you twist to expand to the length you need. i cut the rubber bumpers off the ends so it would fit in the sockets of the mount.
thingiverse
free

Dual small wire clamp for soldering
...ided tape for improved grip on the wires
clamping force can be adjuster by varying the amout and the position of the rubber bands
thingiverse
free
4 18650 cell thingamajig
...htly looser for the 2 inner ones due to the less support in between. i may put a little wall between the inner 2 cells if needed.
thingiverse
free
Soldering Clamp (Helping Hands) by mistertech
...hey clamp on their own using the rubber band.
slide the rubber band through the bottom hole on each arm and wrap around the pegs.
thingiverse
free

CR-10/S Z Support Brace (M10 rod) by joebywan
...ough easier, reducing the possibility of a crossthread, it doesn't need to thread into the part, so why make things harder :)
thingiverse
free

Rostock Max platform fan bracket by jetpad
...the fan to the bracket.
edit: i've added an stl for a 20mm thick fan (or change the scad file to the exact size you need).
thingiverse
free

MDR XB950BT Hinge Now Solder Less by Dsk001
... to break the plastic on the ear cups). the new pictures in black are the v2, the silver are the v1.
support me on patreon
dsk001
thingiverse
free

OpenRC F1 Adjustable Steering by marcotheboy
... you want to print all 4 pieces at once, you can just download thesteering_tierods_all_2017.stl or steering_tierods_all.stl file.
M40X
thingiverse
free

Audio Technica M40x Swivel Replacement by Fumgles
...audio technica m40x swivel replacement by fumgles
thingiverse
replacement part for audiotechnica m40x's
thingiverse
free

Audio Technica ATH-M40X left hinge
...ge part is a bit too tall and doesn't allow the headphones to fold completely. otherwise this works similar to original part.
thingiverse
free
ATH-M40x jack aux phone stand by Dragon7076
...ent 30 minutes filing down the hole from the original design, the uploaded stl has a bigger hole, but might still need some work.
thingiverse
free
Audio-Technica ATH-M40X Replacement Hinge Connector: thicc edition by theflanman5
...modified version of the root, more friendly for extrusion printers, and for 5mm cable ties. for best results, print on the side.
thingiverse
free

Audio-Technica ATH-M40X Replacement Hinge Connector by OldGlory7474
... fasten it to the metal bar and a zip tie to connect the front to the back. glue is not recommended as it could prevent rotation.
thingiverse
free
Audio-Technica ATH-M40X Replacement Hinge by CuriCre
...r side. i use m3x20mm bolts, but these can be replaced by shorter ones after the nuts have been dragged into the hexagonal holes.
thingiverse
free

Audio Technica ATH-M40x Hinge by mikuslaw
...as this is how i print all my test parts, but i will print it in black after i finish testing. currently it looks very promising.
thingiverse
free
Modmic Magnetic Quick-Release Cable Clips for ATH-M40x by weabui
...d
printed sideways for best clip strength (magnet hole faces outwards instead of down). it's a quick ~10min print so go nuts.
thingiverse
free

Headphone Stand by BurianAttila
...burianattila thingiverse headphone stand i designed for my audio-technica ath-m40x it should work with most headphones, the opening is...
Technica
3d_export
$10
audio-technica player
...audio-technica player
3dexport
turbosquid
$45

Audio-technica AT2020
... available on turbo squid, the world's leading provider of digital 3d models for visualization, films, television, and games.
3ddd
$1
audio technica ATH-M35
...audio technica ath-m35
3ddd
наушники
наушники
3d_export
$39

Audio technica ATH-M50x headphones 3D Model
...i dynamic
audio technica ath-m50x headphones 3d model download .c4d .max .obj .fbx .ma .lwo .3ds .3dm .stl djkorg 110672 3dexport
turbosquid
$69
AUDIO-TECHNICA AT-LP60BK-BT BLUETOOTH WIRELESS STEREO TURNTABLE
...h wireless stereo turntable for download as max, obj, and fbx on turbosquid: 3d models for games, architecture, videos. (1265219)
3d_export
$15
Audio Technica ATH-SR50BT
...ers. in these formats, shaders need to be edited for the new studio for the final rendering. preview renders are made in max 2022
3d_ocean
$2

Low Poly Spruce
...spruce on mountain pack. check out this pack! overall technica.. ...
3d_export
$26

renew link workstation celle chair
...celle chair from hermanmiller - high detailed headphone from audio-technica - high detailed microsoft keyboard & mouse - high...
thingiverse
free

Audio Technica Headphone Stand by Vultron_Designs
...audio technica headphone stand by vultron_designs
thingiverse
headphone stand for audio technica .
thingiverse
free

Audio Technica Vinyl Player by joreal
...audio technica vinyl player by joreal
thingiverse
3d model of audio technica vinyl player.
Ath
3ddd
$1
audio technica ATH-M35
...audio technica ath-m35
3ddd
наушники
наушники
3d_export
$39
Audio technica ATH-M50x headphones 3D Model
...i dynamic
audio technica ath-m50x headphones 3d model download .c4d .max .obj .fbx .ma .lwo .3ds .3dm .stl djkorg 110672 3dexport
3d_export
$15
Audio Technica ATH-SR50BT
...ers. in these formats, shaders need to be edited for the new studio for the final rendering. preview renders are made in max 2022
thingiverse
free

GoPro5 ATH by binaryfpv
...gopro5 ath by binaryfpv
thingiverse
support ath pour gopro session5
thingiverse
free

Insta 360go ATH by binaryfpv
...insta 360go ath by binaryfpv
thingiverse
support ath insta 360 go
thingiverse
free

Support ATH TinyWhoop-Toothpick by binaryfpv
...support ath tinywhoop-toothpick by binaryfpv
thingiverse
support ath tinywhoop-toothpick
thingiverse
free
Insta 360 go ATH by binaryfpv
...insta 360 go ath by binaryfpv
thingiverse
insta 360 go ath
3d_sky
free
audio technica ATH-M35
...audio technica ath-m35
3dsky
headphones
thingiverse
free

ATH-AD700/500 Headpad replacements by merserma
...ath-ad700/500 headpad replacements by merserma
thingiverse
replacement headpads for ath-ad700/500 series.
thingiverse
free

Insta360go mount by Athe
...insta360go mount by athe
thingiverse
i made this mount for a buddy. feel free to use and/or modify.
Headphone
3d_export
$5

headphones
...headphones
3dexport
ordinary headphones.. ordinary black headphones.
3d_ocean
$6
headphones
...headphones
3docean
computer headphones music
stylish headphones with leather lining
3d_export
$10

Headphones
...headphones
3dexport
headphones
3d_export
$5
headphones
...headphones
3dexport
headphones
3d_ocean
$8

Headphone
...headphone
3docean
3d model equipment headphone music
3d headphones with autodesk maya, 3d model, headphone, equipment, music
3d_ocean
$15
headphone
...headphone
3docean
audio cinema4d headphone
headphone max c4d obj model
3d_export
$5

headphones
...headphones
3dexport
they are golden headphones
archibase_planet
free
Headphones
...hones earphone headphone earphones
headphones panasonic rp wf810h n040111 - 3d model (*.gsm+*.3ds) for interior 3d visualization.
3d_export
$5

headphones
...headphones
3dexport
lowpoly model headphones
3d_export
$26

headphones
...headphones
3dexport
low poly model headphones
Audio
archibase_planet
free

Audio
...audio
archibase planet
home equipment audio
audio n170109 - 3d model (*.gsm+*.3ds) for interior 3d visualization.
3ddd
$1
Beats Audio
...beats audio
3ddd
наушники
наушники beats audio
3ddd
$1
колонки Monitor Audio
...колонки monitor audio
3ddd
monitor audio , monitor
колонки monitor audio - platinum
3d_ocean
$7
Audio speaker
...peakers stereo studio sub sub-woofer
high quality audio speakers. created in cinema4d but comes in various other formats as well.
3ddd
free

Clear Audio / Innovation
...clear audio / innovation
3ddd
clear audio / innovation
archive3d
free

Audio 3D Model
...ve3d
home equipment audio
audio n170109 - 3d model (*.gsm+*.3ds) for interior 3d visualization.
3ddd
$1
Vita Audio R4i
...vita audio r4i
3ddd
радио
vita audio r4i
turbosquid
$10

Audio Spectrum
...d
royalty free 3d model audio spectrum for download as blend on turbosquid: 3d models for games, architecture, videos. (1568428)
turbosquid
free

Audio Speaker
...quid
royalty free 3d model audio speaker for download as max on turbosquid: 3d models for games, architecture, videos. (1405286)
3d_export
$9
vintage audio cassette
...vintage audio cassette
3dexport
vintage audio cassette 3d model
Hinge
3d_export
$10
hinge and hinge 148 specifications
...hinge and hinge 148 specifications
3dexport
hinge and hinge (148 specifications)
3d_export
free
hinge
...hinge
3dexport
hinge model
3ddd
free
hinges
...hinges
3ddd
крепление
two types of hinge for furniture.
3d_export
$6
Hinge
...hinge
3dexport
hinge assembly render 3d modelling design
turbosquid
$19
Hinges
...
turbosquid
royalty free 3d model hinges for download as max on turbosquid: 3d models for games, architecture, videos. (1453553)
turbosquid
$19
Hinges
...
turbosquid
royalty free 3d model hinges for download as max on turbosquid: 3d models for games, architecture, videos. (1447125)
3d_export
$5
hinge 1
...hinge 1
3dexport
hinge 1
3d_export
$5
hinge 2
...hinge 2
3dexport
hinge 2
3d_export
$5

hinge 3
...hinge 3
3dexport
hinge 3
3d_export
$5

hinge 4
...hinge 4
3dexport
hinge 4
Replacement
3d_export
$12

replaceable bristle
...replaceable bristle
3dexport
this is 3d printable replaceable bristle toothbrush.
3d_export
$34
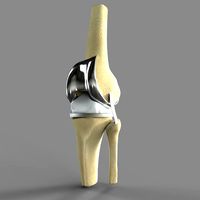
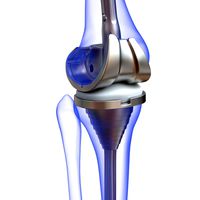
Knee Replacement
...h meets the lower leg. ... during a total knee replacement, the end of the femur bone is removed and replaced with a metal shell.
3d_export
$44
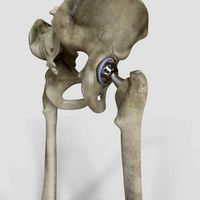
Hip Replacement
...omponents. the damaged femoral head is removed and replaced with a metal stem that is placed into the hollow center of the femur.
turbosquid
$59

Hip replacement
...el hip replacement for download as ma, c4d, lwo, lxo, and obj on turbosquid: 3d models for games, architecture, videos. (1520195)
turbosquid
$10

Module replacment station
...alty free 3d model module replacment station for download as on turbosquid: 3d models for games, architecture, videos. (1271271)
3d_export
$8
tool replacement gearbox
...tool replacement gearbox
3dexport
eccentric lifting mechanism, you can process according to available drawings.
turbosquid
$7

Globe Oil Atomizer Replacement Housing
... oil atomizer replacement housing for download as ige and stl on turbosquid: 3d models for games, architecture, videos. (1253839)
turbosquid
free

SLICE Ceramic Scapel (Replaceable Blade)
... (replaceable blade) for download as obj, fbx, blend, and dae on turbosquid: 3d models for games, architecture, videos. (1363525)
3d_export
$19
Knee Replacement Implant
...ntimeter<br>__________________________<br>poly count :<br>polygon count - 217440<br>vertex count - 108776
turbosquid
$19

(Project) Bad odor filtering sytem with support rail and pulley that assure a comfortable gel filter element replacement.
... available on turbo squid, the world's leading provider of digital 3d models for visualization, films, television, and games.