Thingiverse
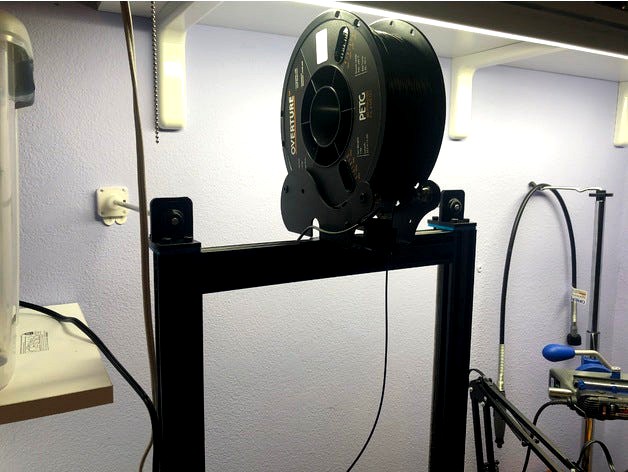
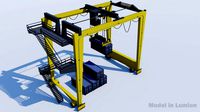
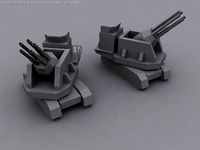
Artillery X1 Gantry Brace using a wall!
by Thingiverse
Last crawled date: 5 years, 3 months ago
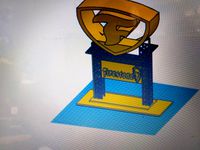
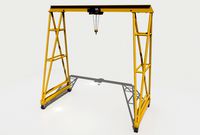
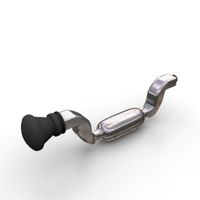
So I really liked the look of the tall free standing gantry, but that wobble was a bit much. I've done the traditional gantry braces that mount to the base of the printer and attach at the top, but wanted to try something new this time so I could keep that clean look. And here is the wacky result I came up with!
Parts:
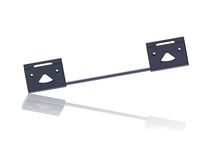
1/4" Aluminum or steel rod. I just used some aluminum ones found at home depot.
4 M5x16 bolts
4 M5x12 bolts
4 M3x8 bolts
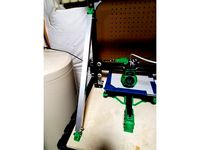
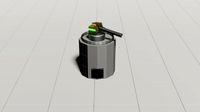
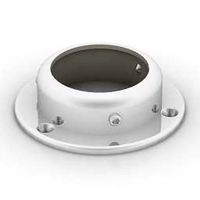
The small bolts are screwed into one of the small holes to retain the rods This was in case you need to move or work on the printer you can just release the screws and slide the rods out.
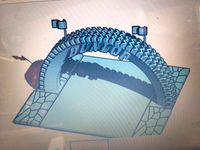
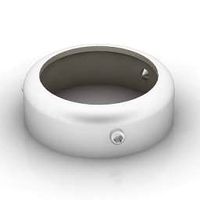
After I mocked up the wall mounts I thought I would try something other than drilling some holes in my wall if I could help it. I figured it wouldn't take much to stabilize the gantry so..... Using some of those commander sticky mounts that can be released easily later, I attached those to the wall mount side.
After getting it all mounted up it did indeed take all the "slop" out of the gantry and looks like these simple sticky mounts will be fine! Wooo! No holes! hah
Printing these:
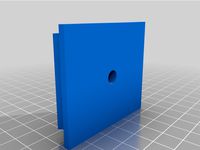
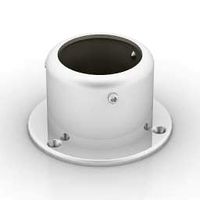
The wall side, no problem. Print's fine with no supports. Bottom side down.
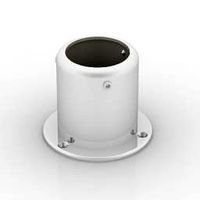
Machine side. Bottom side down. Supports enabled. The bottom bearing area, I won't lie, was a pain to remove the supports from. So be ready to bust out your exact-o knife and some band aids!
I've included the Fusion 360 files in case anyone wants to tweak them or maybe come up with a better way to print that bearing retainer side.
Parts:
1/4" Aluminum or steel rod. I just used some aluminum ones found at home depot.
4 M5x16 bolts
4 M5x12 bolts
4 M3x8 bolts
The small bolts are screwed into one of the small holes to retain the rods This was in case you need to move or work on the printer you can just release the screws and slide the rods out.
After I mocked up the wall mounts I thought I would try something other than drilling some holes in my wall if I could help it. I figured it wouldn't take much to stabilize the gantry so..... Using some of those commander sticky mounts that can be released easily later, I attached those to the wall mount side.
After getting it all mounted up it did indeed take all the "slop" out of the gantry and looks like these simple sticky mounts will be fine! Wooo! No holes! hah
Printing these:
The wall side, no problem. Print's fine with no supports. Bottom side down.
Machine side. Bottom side down. Supports enabled. The bottom bearing area, I won't lie, was a pain to remove the supports from. So be ready to bust out your exact-o knife and some band aids!
I've included the Fusion 360 files in case anyone wants to tweak them or maybe come up with a better way to print that bearing retainer side.
Similar models
thingiverse
free

PrintNC - X Gantry Cable Chain Mount 2x4" Tubing by pastorhealer
...unter sunk screws (in the aluminum angle) with the nuts at under.
i laid the part on it's side to print and it came out fine.
thingiverse
free

Anet A6 Linear Rod Braces by fcollingwood
... main hole is 8mm, in practise i found that i had to pass an 8mm drill through them to open the hole up a little due to shrinkage
thingiverse
free

Ps2 slim wall mount by beastroyer
...ttom clip should need supports
side note i was thinking of adding a bolt hole to the bottom clip to mount it directly to the ps2
thingiverse
free
Velbon QB-5LC Tripod Quick Release Plate (1/4-20) by ajacocks
...anged the enter hole to fit a 1/4"-20 hex bolt. the bolt head is tightly retained from the bottom, so no adhesive is needed.
thingiverse
free
2020 Rail Brace by Straith
...ndicular to the hole. the mount should be printed as is in the picture. this is to provide the best strength from the material.
thingiverse
free

Aluminatus Print Bed Retainer by jon_bondy
...urce code if you are using smaller mounting hardware.
i inserted paper shims between the bed and the bolt heads to level the bed.
thingiverse
free

USB Multiport Charger Wall Holder V2 by bbtinkerer
...rews.
freecad file included so you can update the spreadsheet to resize to your hubs that have a power cord on the bottom middle.
thingiverse
free

E16 Proto-Chassis Center Brace for shocks by TiedToMemory
...hassis i've been working on. shocks mount to the bottom holes through the chassis holes and the top hole is for more support.
thingiverse
free

Malyan M150 Z Brace by nullandvoid
...e stable.
square up your z axis, adjust the brace ends til all the holes line up (this might take some grunting) and screw it on.
thingiverse
free
Plexi Wandhalter 5mm by MachWas
...and the plexiglas, than on the picture shown mounted on the wall.
to save material there is some hollow space on the bottom side.
Gantry
3d_export
free
firestone advertising gantry
...rs premises and<br>these advertisement gantries, were very popular in the 30-70's at grand prix races advertising tyres
3d_export
$50

RMG Gantry Crane 3D Model
...t hoist rail rubber tyre tire rtg eot beam portal heigh tonne shipyard port
rmg gantry crane 3d model 5starsmodels 42860 3dexport
3d_export
$29
gantry crane
...istic model that will enhance the detail and realism of any of your rendering projects.<br>file formats: max, obj, fbx, 3ds
cg_studio
$64

Rubber Tire Gantry Crane3d model
...d model
cgstudio
.3ds .max - rubber tire gantry crane 3d model, royalty free license available, instant download after purchase.
3d_export
free
dunlop advertising arch gantry
...y popular in the 30-70's at grand prix races advertising dunlop tyres and sometime assisting in foot traffic across the track
3d_export
$29
gantry container crane
...orealistic model that will enhance the detail and realism of any of your rendering projects.<br>file formats: max, obj, fbx
3d_export
$11
gantry crane for harbor - rtg
...max<br>.fbx<br>.obj<br>.3ds<br>.fbx for lumion (attachado / material standard) to be imported into lumion
3d_export
$15

gantry feeder with centerless mill
...ere is a special large silo to reduce the feeding times.<br>4. when feeding, reduce the work of bumping, reduce scrap rate.
3d_export
$120

gantry stacker assembly
... you can email to me.<br>designed with solidworks 2017, render with keyshot<br>**************************************
3d_export
$10
gantry crane 3
...;br>lod0- 23000 verts total<br>lod1 - 8000 verts total<br>lod2 - 4000 verts total<br>lod3 - 2000 verts total
Artillery
3d_export
$7

middle artillery
...eavy, and high maneuverability, that have wide range of shells, and high accuracy. suitable for support as well as quick punches.
3d_export
$10
artillery turret
...artillery turret
3dexport
3d model created by blender 2.90 render eevee.
3d_export
$25

Pak38 Artillery Gun 3D Model
...pak38 artillery gun 3d model
3dexport
gun weapon artillery pak38
pak38 artillery gun 3d model steve1112 8954 3dexport
3d_export
$5

Artillery Gun Model 3D Model
...artillery gun model 3d model
3dexport
artillery gun model bomb army war old
artillery gun model 3d model demyxa93 100479 3dexport
3d_export
$24

Firework Artillery Shells 3D Model
...rt
hobby firework artillery shell 3ds obj directx dxf visualmotion
firework artillery shells 3d model visualmotion 76399 3dexport
3d_export
$5

Gaubica ML20 artillery 3D Model
...лерия военная техника машина machina machine mashine technique armour arms
gaubica ml20 artillery 3d model alexdab 64729 3dexport
cg_studio
$10
Hog Artillery Tank3d model
...e gaming
.3ds .dxf .lwo .max .obj - hog artillery tank 3d model, royalty free license available, instant download after purchase.
3d_export
$5
Hog Artillery Tank 3D Model
...ussian usa armor armed armored personal carrier military war zone gaming
hog artillery tank 3d model martialartist 24502 3dexport
3d_export
$10

SU101 experimental Soviet artillery 3D Model
...type soviet russia ussr artillery world war texture textured
su101 experimental soviet artillery 3d model robby88n 31780 3dexport
3d_export
$37

Hamas Qassam Artillery Rockets 3D Model
...artillery military truespace cob 3ds dxf obj directx textures
hamas qassam artillery rockets 3d model visualmotion 48231 3dexport
X1
design_connected
$11

X1
...x1
designconnected
dränert x1 chairs computer generated 3d model. designed by oswald mathias ungers.
3ddd
$1

Leica X1
...leica x1
3ddd
leica , фотоаппарат
leica x1 profi
3ddd
$1

Francis Francis X1
...francis francis x1
3ddd
кофемашина
кофемашина francis francis x1
3d_export
$5

X1 3D Model
...x1 3d model
3dexport
x1
x1 3d model download .c4d .max .obj .fbx .ma .lwo .3ds .3dm .stl gorgsalvatore 106035 3dexport
3d_export
$55

Nokia X1 3D Model
...nokia x1 3d model
3dexport
nokia x1 phone smartphone mobile
nokia x1 3d model fedia 45159 3dexport
3ddd
$1
Wood x1
...wood x1
3ddd
размер 1024-1024 бесшовная 8-)
3d_export
$35

Nokia X1 3D Model
...nokia x1 00 01 mobile cell smart phone vr c4d maya 3ds obj max cellphone cellular
nokia x1 3d model artem_shvetsov 40061 3dexport
3d_ocean
$89

BMW X1 2010
... new driving experience in the premium compact segment. it expands and enhances the range of bmw x models by yet another innov...
3d_ocean
$89

BMW X1 2013
...y, in real units of measurement, qualitatively and maximally close to the original. model formats: - *.max (3ds max 2008 scanl...
3d_ocean
$89

BMW X1 2010 AC Schnitzer
...he latest welcome addition to the compact vehicles segment, and brings the characteristic bmw ‘driving pleasure’ to this class...
Brace
archive3d
free
Bracing 3D Model
...
holder bracing strengthening
bracing 4 - 3d model (*.gsm+*.3ds) for interior 3d visualization.
archive3d
free
Bracing 3D Model
...
bracing strengthening holder
bracing 2 - 3d model (*.gsm+*.3ds) for interior 3d visualization.
archive3d
free
Bracing 3D Model
...older fastening strengthening
bracing 1 - 3d model (*.gsm+*.3ds) for interior 3d visualization.
archive3d
free
Bracing 3D Model
...older fastening strengthening
bracing 3 - 3d model (*.gsm+*.3ds) for interior 3d visualization.
3ddd
$1

CROSS-BRACED STOOL Ralph Lauren
...cross-braced stool ralph lauren
3ddd
пуф , ralph lauren
cross-braced stool ralph lauren
archibase_planet
free
Bitbrace
...bitbrace
archibase planet
brace bitrace
bitbrace n240408 - 3d model (*.gsm+*.3ds) for interior 3d visualization.
archibase_planet
free

Stay
...stay archibase planet prop support brace stay - 3d model (*.gsm+*.3ds) for interior 3d...
3d_export
$8

Glass Shelves 3D Model
...helves 3d model
3dexport
shelf shelves metal bracing wall back backwall glass
glass shelves 3d model azzamatta2571 96859 3dexport
3d_export
$10
Binder clips 3D Model
...clips 3d model 3dexport binder clips office holder clamp brace paper 3ds fbx obj max binder clips 3d model...
3d_export
$10

Lug Wrench 3D Model
...model 3dexport lug wrench industrial tool automobile wheel nut brace spider socket car trunk cross loosen tools diy lug...
Wall
archibase_planet
free
Wall
...wall
archibase planet
batten wall plywood partition
batten wall - 3d model for interior 3d visualization.
3d_ocean
$5
Wall
...wall
3docean
low polgon wall low stone old wall stone wall
2048*2048 tex obj,fbx,blend format. low polygon. game ready.
3ddd
$1
wall
...wall
3ddd
камень , кладка
damaged stone wall
3ddd
$1

WALL FREAMS
...wall freams
3ddd
wall freams
wall freams
3ddd
$1
WALL PANNEL
...wall pannel
3ddd
панель
wall pannel for enterance wall.
3ddd
$1

WALL-E
...wall-e
3ddd
wall-e , робот
wall-e
3d_export
$18
great wall-city wall-dianjiangtai
...great wall-city wall-dianjiangtai
3dexport
great wall-city wall-dianjiangtai<br>3ds max 2015
3d_ocean
$12
Wall E
...wall e
3docean
character robot wall e
its a 3d model of wall e….
3d_export
$5
wall light
...wall light
3dexport
wall light
3ddd
$1
wall-lamp
...wall-lamp
3ddd
wall-lamp
Using
3ddd
$1

US flag
...us flag
3ddd
флаг
us flag
design_connected
$13
Use Me
...use me
designconnected
sitland use me computer generated 3d model. designed by paolo scagnellato.
3d_export
$5

among us
...among us
3dexport
enjoy this beautifull 3d model, rendered in evee.
3d_export
$10

navy among us
...navy among us
3dexport
enjoy travel in the navy with among us 3d
3d_ocean
$5

Candlestick - New AnD Used
...ndle candlestick decorative gold hound interior lassical light new stearin used wax
candlestick 3d model with new candle and used
3ddd
$1
Elledue Use 2734
...e use 2734
3ddd
elledue use , кресло
http://www.ib-gallery.ru/goods/18496.html
3d_ocean
$4

Used football
...ts: -.blend, rendered with cycles, as seen in the images; -.obj, with material applied; -.dae, with material applied; -.stl, r...
3d_export
free
among us
...nting.<br>this model contains a slot for led light.<br>thanks very much for viewing my model. hope you guys like him.
3d_export
$5

us flag
...or jpg<br>materials: yes, v-ray materials only<br>for any questions, please contact us and we'll respond quickly.
3d_ocean
$17
Photorealistic Used Sneaker
...irt and wrinkles. rigged (just for maya formats) and unrigged version. the rig is simple and allows to control the laces and s...