Thingiverse
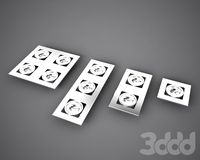
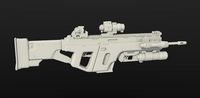
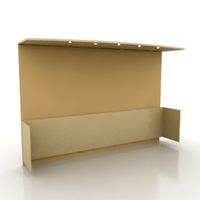
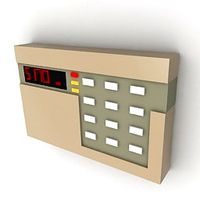
Artemis Starship Bridge Simulator Control Panel V2 (Weapons)
by Thingiverse
Last crawled date: 4 years, 1 month ago
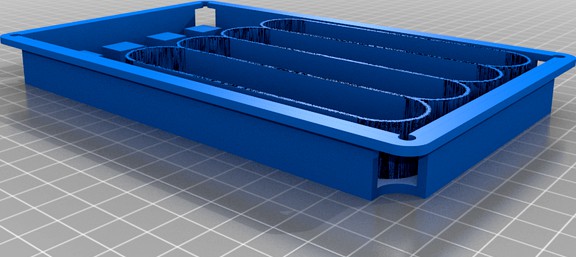
This is my first V2.0 Control panel for Artemis. Right now it is only Weapons and it will likely only be weapons for awhile, but here it is if you want to use it.
If you want to know more about Artemis: Starship Bridge Simulator, take a look at this link;https://artemisspaceshipbridge.com/
This is a fully 3d printed control panel. It was designed to fit in my homemade consoles, so they may not be usable you you as is. However they could be a good starting point to make some custom control panels if you are so inclined.
The top and bottom are sit into the control panel frame and then are secured with m4 or 8-32 screws (either works fine); there should be enough room for up to 2" of screw, but you should only need about .5" of screw. The frame is designed so that the screw will create a thread, so no nuts are needed.
Printed on Ender 3 and CR10. Printed at .2mm in inland black and clear PETG (LEDs can get hot, you will want something that wont melt) at 30mm/s, 7mm retraction, 1.2mm shell thickness on all sides and combing mode: All turned on.
I printed the frame so that the face was down on a glass bed using supports. the supports can leave the recess a little messed up, but it makes the surface really smooth. I then glue the two sections of frame together with epoxy and coated the top surface of the frame with bed liner (I like the surface texture).
I printed the top panel face down with no support using black PETG and then changed over to clear after 3-4 layers of black. I find it usually takes at least 3 layers of the black before it is opaque enough to block the LED light.
The words/numbers are either raised or lowered from the surface .05", so you should have around 6-7 layers before you HAVE to change to transparent.
Similar models
thingiverse
free

Artemis Starship Bridge Simulator Control Panels
...mentary tactile buttons. i am going to update this a bit more in future, but i wanted to put something up. use it if you want to.
grabcad
free

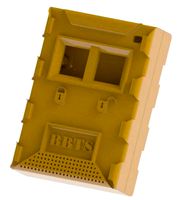
PETG Test
... printing petg. especially clear petg. it is really small so if you want something larger you will have to scale it in the slicer
thingiverse
free
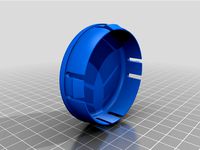
Volvo Rim Cap 62mm Diameter by fehergandalf
...painted the rest black afterwards, so the finish is similar to the original one. you can also print this...
thingiverse
free

Traxxas Bigfoot Wheelie Bar by ontiK
...rews to install to the frame and m3x75mm for installation of the wheels
i recommend using appropriate washers too all around too.
thingiverse
free

Bachmann HO Bridge support 4" by dddienst
... "height" dimension only, to get supports of other heights.
the notches on the top are to hold decorative bridge sides.
thingiverse
free

Cobra Kai Logo Emblem by Tronicpixel
...its starts at the "wrong" layer.
please show me yours makes. would be nice to see what colors you use. happy printing!
thingiverse
free

gopro mount extender
... can print it by pla, petg and abs/pc.
thanks for your support.
if you like it, please collect it and give me a "like".
thingiverse
free

Ikea Clock TROMMA digits and support by valeriuene
... x 16mm screw and one m3 nut is required for the support.
30pcs screws 2,9x4,5 (ex. 5001390 bossard) are required for the digits.
thingiverse
free

Minecraft squid by ryanbacon
...
this print should work with no supports if you print it so that it is doing a headstand and should work with either abs or pla.
thingiverse
free

Tronxy X3 control panel to frame brackets by baldrick131
...s with self tapping screws or m3 screws if you use a m3 tap.
print on the side with a support to help print the locating spigot.
Artemis
3ddd
$1
Artemis
...artemis
3ddd
artemis
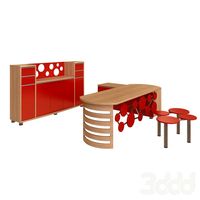
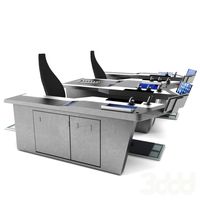
modern office furniture sets
turbosquid
$10

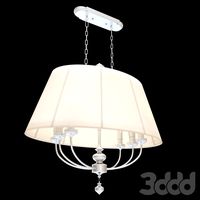
Lampatron ARTEMIS ARTEMIS 4
...free 3d model lampatron artemis artemis 4 for download as max on turbosquid: 3d models for games, architecture, videos. (1634723)
3ddd
$1
Schuller ARTEMIS
...schuller artemis
3ddd
schuller
schuller artemis
turbosquid
$15

Artemis
... available on turbo squid, the world's leading provider of digital 3d models for visualization, films, television, and games.
turbosquid
$15

Artemis
... model artemis for download as ma, c4d, max, ma, fbx, and obj on turbosquid: 3d models for games, architecture, videos. (1707124)
turbosquid
$6

Artemis Tempel
... available on turbo squid, the world's leading provider of digital 3d models for visualization, films, television, and games.
3ddd
$1
Светильники MASSIVE коллекция Artemis
...светильники massive коллекция artemis
3ddd
massive , artemis
http://svetocenter.com/
3ddd
$1
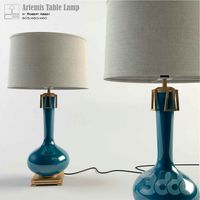
Artemis Table Lamp
...artemis table lamp
3ddd
robert abbey
artemis table lamp
by robert abbey
805/460/460
+ pdf catalog
cg_studio
$49

Artemis Temple3d model
...artemis temple3d model
cgstudio
.obj - artemis temple 3d model, royalty free license available, instant download after purchase.
3d_export
$8

artemis ceiling fan
...artemis ceiling fan
3dexport
Starship
3d_export
$5

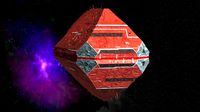
starship
...starship
3dexport
starship berserk.
turbosquid
$60

Starship
...urbosquid
royalty free 3d model starship for download as fbx on turbosquid: 3d models for games, architecture, videos. (1211306)
turbosquid
$36
Starship
...yalty free 3d model starship for download as ma, obj, and fbx on turbosquid: 3d models for games, architecture, videos. (1474834)
turbosquid
$1

Starship
...ee 3d model starship for download as blend, obj, fbx, and dae on turbosquid: 3d models for games, architecture, videos. (1655851)
turbosquid
$20

Starship
... available on turbo squid, the world's leading provider of digital 3d models for visualization, films, television, and games.
turbosquid
$13

StarShip
... available on turbo squid, the world's leading provider of digital 3d models for visualization, films, television, and games.
turbosquid
free

starship
... available on turbo squid, the world's leading provider of digital 3d models for visualization, films, television, and games.
turbosquid
free
Starship
... available on turbo squid, the world's leading provider of digital 3d models for visualization, films, television, and games.
turbosquid
free

Starship
... available on turbo squid, the world's leading provider of digital 3d models for visualization, films, television, and games.
turbosquid
free

StarShip
... available on turbo squid, the world's leading provider of digital 3d models for visualization, films, television, and games.
Simulator
archibase_planet
free
Simulator
...simulator
archibase planet
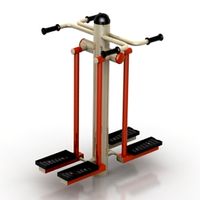
simulator sports equipment sport
simulator full - 3d model for interior 3d visualization.
archibase_planet
free
Simulator
...simulator
archibase planet
sport simulator sports fitness gym
simulator - 3d model for interior 3d visualization.
archibase_planet
free
Simulator
...ulator
archibase planet
simulator sport implements training apparatus
simulator kettler - 3d model for interior 3d visualization.
archibase_planet
free
Simulator
...simulator
archibase planet
weight simulator gym equipment
simulator gym n180111 - 3d model (*.3ds) for interior 3d visualization.
archibase_planet
free
Simulator
...imulator
archibase planet
simulator trainer gym gym equipment
simulator n270711 - 3d model (*.3ds) for interior 3d visualization.
archibase_planet
free
Simulator
...imulator
archibase planet
simulator trainer gym gym equipment
simulator n070511 - 3d model (*.3ds) for interior 3d visualization.
archibase_planet
free
Simulator
...hibase planet
simulator sports equipment gym sport inventory
simulator 12 - 3d model (*.gsm+*.3ds) for exterior 3d visualization.
archibase_planet
free
Simulator
...hibase planet
simulator sports equipment gym sport inventory
simulator 11 - 3d model (*.gsm+*.3ds) for exterior 3d visualization.
archibase_planet
free

Simulator
...chibase planet
simulator sports equipment gym sport inventory
simulator 7 - 3d model (*.gsm+*.3ds) for exterior 3d visualization.
archibase_planet
free
Simulator
...chibase planet
simulator sports equipment gym sport inventory
simulator 1 - 3d model (*.gsm+*.3ds) for exterior 3d visualization.
Bridge
3d_export
free
bridge and destroyed bridge
...bridge and destroyed bridge
3dexport
bridge and destroyed bridge
3d_ocean
$19
Bridge
...bridge
3docean
3d bridge building
3d bridge
archibase_planet
free

Bridge
...bridge
archibase planet
bridge foot-bridge construction
bridge n130715 - 3d model (*.gsm+*.3ds) for exterior 3d visualization.
3ddd
free
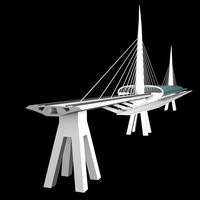
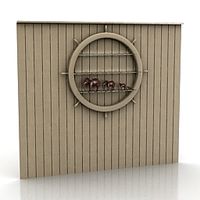
The Bridge
...the bridge
3ddd
мост
the bridge
3d_ocean
$7
Bridge
...bridge
3docean
bridge low polygon medi evil bridge old bridge
2048 * texture obj, fbx and blend format. game ready model.
archibase_planet
free
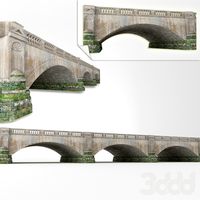
Bridge
...net
bridge foot-bridge construction
bridge ponte de tijolos n250515 - 3d model (*.gsm+*.3ds+*.max) for exterior 3d visualization.
3d_export
$18
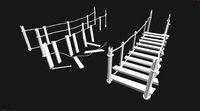
arch bridge-bridge-stairs
...arch bridge-bridge-stairs
3dexport
arch bridge-bridge-stairs<br>3ds max 2015
3d_export
$5

bridge
...bridge
3dexport
bridge - 3d model ( gsm : 3ds )
3d_export
$5

bridge
...bridge
3dexport
wood bridge all textures in 4k
3ddd
$1
Bridge
...bridge
3ddd
bridge , мост
мост для экстерьера
V2
3d_export
free

Lamp v2
...lamp v2
3dexport
lamp v2 with solar panel
3d_export
$5

hammerhead v2
...hammerhead v2
3dexport
razer hammerhead v2 headphones, modeled in cinema 4d, render in corona
3d_export
$5

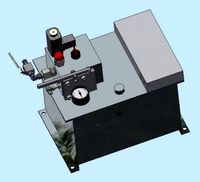
manometer v2
...manometer v2
3dexport
3d_export
$5

potato v2
...potato v2
3dexport
turbosquid
$52

Lifebuoys v2
...squid
royalty free 3d model lifebuoys v2 for download as fbx on turbosquid: 3d models for games, architecture, videos. (1560870)
turbosquid
$2

Mask v2
...turbosquid
royalty free 3d model mask v2 for download as stl on turbosquid: 3d models for games, architecture, videos. (1527741)
turbosquid
free

Flashlight V2
...d
free 3d model flashlight v2 for download as , obj, and fbx on turbosquid: 3d models for games, architecture, videos. (1663559)
turbosquid
$29

Thanos v2
...
royalty free 3d model thanos v2 for download as ztl and obj on turbosquid: 3d models for games, architecture, videos. (1651077)
turbosquid
$29

Titan v2
...d
royalty free 3d model titan v2 for download as ztl and obj on turbosquid: 3d models for games, architecture, videos. (1540228)
turbosquid
$29

Frieza v2
...
royalty free 3d model frieza v2 for download as ztl and obj on turbosquid: 3d models for games, architecture, videos. (1701238)
Weapons
turbosquid
$5

Weapons Pack (14 weapons)
...alty free 3d model weapons pack (14 weapons) for download as on turbosquid: 3d models for games, architecture, videos. (1206290)
3d_ocean
$20
Weapon SS
...weapon ss
3docean
weapon
weapon automatic ss
3d_export
$18
weapon-weapon-sword 32
...eapon-sword 32
3dexport
weapon-weapon-sword 32<br>max 2015 v-ray 3 max 2015<br>textures<br>all files in zip...
turbosquid
$10
Weapons
...turbosquid
royalty free 3d model weapons for download as fbx on turbosquid: 3d models for games, architecture, videos. (1569601)
turbosquid
$8

Weapons
...turbosquid
royalty free 3d model weapons for download as c4d on turbosquid: 3d models for games, architecture, videos. (1195303)
turbosquid
$5

Weapon
...
turbosquid
royalty free 3d model weapon for download as max on turbosquid: 3d models for games, architecture, videos. (1394555)
turbosquid
$3
Weapon
...urbosquid
royalty free 3d model weapon for download as blend on turbosquid: 3d models for games, architecture, videos. (1473452)
turbosquid
$13

Weapon
...d
royalty free 3d model weapon for download as blend and fbx on turbosquid: 3d models for games, architecture, videos. (1682344)
turbosquid
$4

Weapon
...uid
royalty free 3d model weapon for download as max and fbx on turbosquid: 3d models for games, architecture, videos. (1368993)
turbosquid
$4

Weapon
...uid
royalty free 3d model weapon for download as max and fbx on turbosquid: 3d models for games, architecture, videos. (1368992)
Panel
3d_export
$15

panel
...panel
3dexport
panel
archibase_planet
free
Panel
...panel
archibase planet
panel
panel - 3d model for interior 3d visualization.
3d_export
$5

panel
...panel
3dexport
panel with cones
3ddd
$1
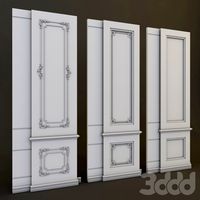
Panels
...panels
3ddd
панель
panels
3d_export
$5

panel
...panel
3dexport
panels grapes with birds
archibase_planet
free
Panel
...panel
archibase planet
panel wainscot dado
play panel n050707 - 3d model for interior 3d visualization.
archibase_planet
free
Panel
...panel
archibase planet
lining panel facing material
panel 2 - 3d model (*.3ds) for interior 3d visualization.
archibase_planet
free

Panel
...panel
archibase planet
lining panel facing material
panel 1 - 3d model (*.gsm+*.3ds) for interior 3d visualization.
archibase_planet
free
Panel
...panel
archibase planet
keyboard patchboard finger-board
security panel - 3d model for interior 3d visualization.
turbosquid
$10

Panel
...l
turbosquid
royalty free 3d model panel for download as stl on turbosquid: 3d models for games, architecture, videos. (1387163)
Control
3d_ocean
$4
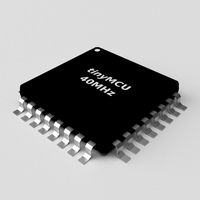
Controller TQFP32
...qfp32
3docean
chip controller cpu electronic gpu mcu micro controller silicon smd tqfp wafer
a micro controller in tqfp32 package
3d_ocean
$4
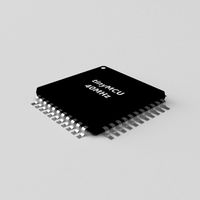
Controller TQFP44
...44
3docean
chip controller cpu electronic gpu mcu micro controller package smd tqfp tqfp44
a micro controller in a tqfp44 package
3d_export
$15
control unit
...control unit
3dexport
control unit
3ddd
$1
Yacht control
...yacht control
3ddd
yacht control
3d_export
$5
controle pgdm
...controle pgdm
3dexport
carcaca controle pgdm
turbosquid
free
controler
... available on turbo squid, the world's leading provider of digital 3d models for visualization, films, television, and games.
3ddd
$1
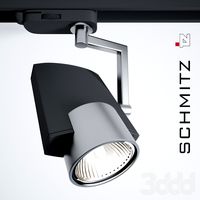
Control
...
http://www.schmitz-leuchten.de/html-ru/einzelleuchten-lampentyp-details.php?lamptype_no=700&group;=917&id;=731
3d_ocean
$4
Controller TQFP100
...100
3docean
chip computer cpu electronic gpu mcu micro controller pin platine silicon wafer
a micro controller in tqfp100 package
3d_ocean
$4
Controller TQFP64
...qfp64
3docean
chip computer cpu gpu mcu micro controller package silicon tqfp tqfp64 wafer
a micro controller in a tqfp64 package
3d_ocean
$7

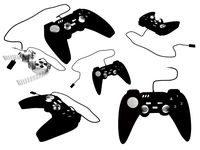
Remote controller
... control switcher tv remote
remote controller for tv, sound systems etc easy to edit textures photo real rendered with mental ray