Thingiverse
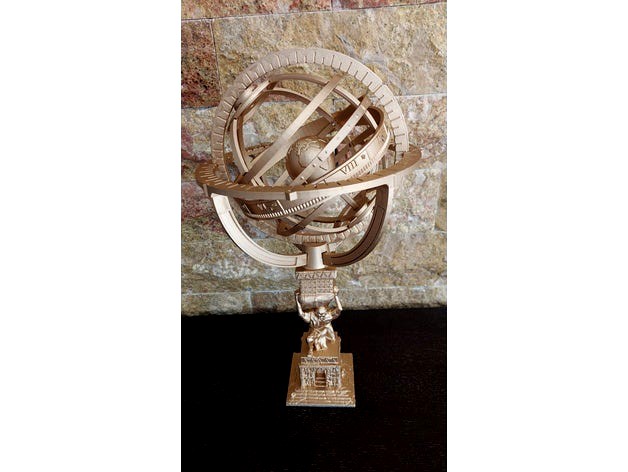
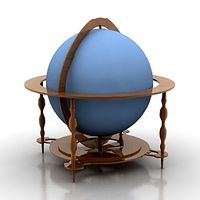
Armillary Sphere with Zodiac Ecliptic and Atlas Statue Base by Christos_
by Thingiverse
Last crawled date: 2 years, 10 months ago
This is a remake of the fantastic work by Zippitybamba (https://www.thingiverse.com/thing:4622334)
There are 2 changes:
I have added the zodiac signs in the ecliptic ring for anyone interested, to make it look even closer to the original earlier concepts.
I have changed the base and used 2 extra works as a base to the armillary sphere, inspired by the exquisite make of Pindio (https://www.thingiverse.com/make:924886).
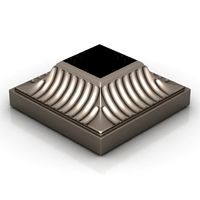
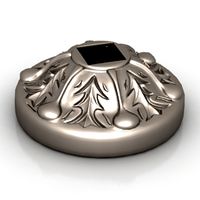
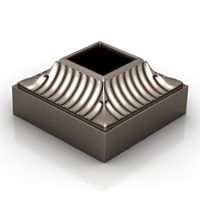
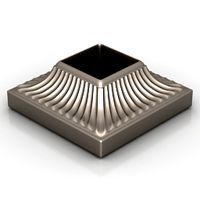
To do that i used theAtlas Column by VirtuallyJason (https://www.thingiverse.com/thing:4782062), and added also the base 40k epic by TomasLA{https://www.thingiverse.com/thing:2972785).
Printing:
First of all i scaled all armillary sphere original concept parts by 97.2% to fit in my Ender 3 table, so i propose you to do the same.
Then i used 0.6mm nozzle with a layer height of 0.2mm to speed up the process for all rings, except the ecliptic ring, earth miniature, and Atlas base statue, that more detail was needed.
Although the result can be quite good with the standard 0.4mm nozzle, if you want more detail, go for a 0.3 or smaller nozzle at least for the earth miniature, and Atlas base statue to have a super fine detail, just be aware that the smaller the nozzle the more time you need to print and the more chances of nozzle clogs you risk of.
I personally used 0.3 nozzle with a layer height of 0.12mm and the result was almost perfect as it is also visible in the pictures.
I have included all the base statue parts with the best possible orientation in terms of details result, and matching the size of 97.2% size reduction of the original armillary sphere, so if you wish to change any size, don't forget to do it for all parts involved.
After that simply glue the 3 pcs that consist the armillary sphere (Original base cut+Atlas column+base 40k) with superglue (just make sure to align them perfectly to make an almost seamless join), and you are ready to go.
After that depending on your choice you can paint it to your color of your choice, or leave it as it is (especially if you have used some colored, metal finish or wood filament.
Personally after some very small sanding and filling i used a bronze gold spray paint, like the one you can find in your local hardware store.
That's all, so have fun building it!!
There are 2 changes:
I have added the zodiac signs in the ecliptic ring for anyone interested, to make it look even closer to the original earlier concepts.
I have changed the base and used 2 extra works as a base to the armillary sphere, inspired by the exquisite make of Pindio (https://www.thingiverse.com/make:924886).
To do that i used theAtlas Column by VirtuallyJason (https://www.thingiverse.com/thing:4782062), and added also the base 40k epic by TomasLA{https://www.thingiverse.com/thing:2972785).
Printing:
First of all i scaled all armillary sphere original concept parts by 97.2% to fit in my Ender 3 table, so i propose you to do the same.
Then i used 0.6mm nozzle with a layer height of 0.2mm to speed up the process for all rings, except the ecliptic ring, earth miniature, and Atlas base statue, that more detail was needed.
Although the result can be quite good with the standard 0.4mm nozzle, if you want more detail, go for a 0.3 or smaller nozzle at least for the earth miniature, and Atlas base statue to have a super fine detail, just be aware that the smaller the nozzle the more time you need to print and the more chances of nozzle clogs you risk of.
I personally used 0.3 nozzle with a layer height of 0.12mm and the result was almost perfect as it is also visible in the pictures.
I have included all the base statue parts with the best possible orientation in terms of details result, and matching the size of 97.2% size reduction of the original armillary sphere, so if you wish to change any size, don't forget to do it for all parts involved.
After that simply glue the 3 pcs that consist the armillary sphere (Original base cut+Atlas column+base 40k) with superglue (just make sure to align them perfectly to make an almost seamless join), and you are ready to go.
After that depending on your choice you can paint it to your color of your choice, or leave it as it is (especially if you have used some colored, metal finish or wood filament.
Personally after some very small sanding and filling i used a bronze gold spray paint, like the one you can find in your local hardware store.
That's all, so have fun building it!!
Similar models
thingiverse
free

Cup Holders by ELRAZ
... my printers, so if you have a 0.3 mm nozzle you can try then all, have fun!!
disclaimer: for best results 03mm nozzle is a must
thingiverse
free

lithophane base x files by Sambeck
...nd depth 0
curve 0
i've add the model with neither letters nor space to the switch in order to modify depending on your needs
thingiverse
free

STL ver Steampunk Deathstarfish by tibuck
...s . please ref to the original design http://www.thingiverse.com/thing:4609 for number of printed parts and assembly instructions
thingiverse
free

A8M nozzle Fan closer support by Kahneolus
...ym: https://www.thingiverse.com/thing:2974599 (original mount)
ikcognito: https://www.thingiverse.com/thing:2009549 (nozzle used)
3dwarehouse
free
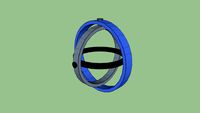
Simple Armillary Sphere
...illary ring that i found in the british historic museum. #armillary #armillary_sphere #british #finger_ring #museum #ring #sphere
cg_trader
$18
Armillary Sphere
...armillary sphere
cg trader
armillary sphere
thingiverse
free

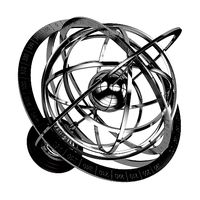
Armillary Sphere by Zippitybamba
... of the structure is original except for the globe model, which is by "bld" at https://www.thingiverse.com/thing:17336.
cg_trader
$13
Armillary Sphere
... sphere
cg trader
armillary sphere sphere 3d armillary sphere, formats include max, obj, mtl, fbx, ready for 3d animation and ot
thingiverse
free

MK7 Assault Marine by alexmartin9999 and other mods
...com/thing:3503879
right shoulder: https://www.thingiverse.com/thing:3875032
bolter/gun: https://www.thingiverse.com/thing:3960242
cg_trader
$60

Atlas Statue
...ue
cg trader
model created in zbrush. the base, the statue and the sphere are separate objects. model is uv mapped and textured.
Ecliptic
thingiverse
free

Infrared Screen with integrated holder/adapter for temperature measurement by MartijnRoozendaal
...with a infrared screen for accurate. measurement. use of eclipticl beams and rounded design for better air flow or...
thingiverse
free

Tărtăria Tablets Disc by Ellie_Valkyrie
...by focusing on spherical astronomy: the role of the ecliptic in the 26000 years of precession cycle: comparison of...
thingiverse
free

Saturn Scale Model by Zippitybamba
...angle of inclination relative to the plane of the ecliptic -the relative dimensions of the major rings, a, b,...
thingiverse
free

Rahu - North Node of the Moon by scanhinduheritage
...the lunar ascending and descending nodes on the earth's ecliptic plane. this also corresponds to a saros, a period...
thingiverse
free

Ketu - South Node of the Moon by scanhinduheritage
...to as shadow planets. they are points on the ecliptic where the moon is in alignment with the sun...
cg_trader
$10

Ecliptic Chess Pieces | 3D
... transparent resin. chess 3dprinting games board printable 3dprint board games pawn king queen knight bishop rook toys games toys
cg_trader
$5

Initial Letters Pendant Ecliptic A | 3D
...old diamond printable diamonds jewel jewellry woman gem alphabet abc language love jewelry pendants jewelry pendant gold necklace
cg_trader
$5

Initial Letters Pendant Ecliptic Z | 3D
...old diamond printable diamonds jewel jewellry woman gem alphabet abc language love jewelry pendants jewelry pendant gold necklace
cg_trader
$5

Initial Letters Pendant Ecliptic Y | 3D
...old diamond printable diamonds jewel jewellry woman gem alphabet abc language love jewelry pendants jewelry pendant gold necklace
Armillary
turbosquid
$5

Armillary Sphere
...model armillary sphere for download as 3ds, max, obj, and fbx on turbosquid: 3d models for games, architecture, videos. (1210963)
turbosquid
free

Armillary Sphere
... available on turbo squid, the world's leading provider of digital 3d models for visualization, films, television, and games.
turbosquid
$29

Astrolabe-Armillary sphere
... astrolabe-armillary sphere for download as max, obj, and fbx on turbosquid: 3d models for games, architecture, videos. (1372601)
turbosquid
$28

Terrestrial Armillary Sphere
...errestrial armillary sphere for download as max, obj, and fbx on turbosquid: 3d models for games, architecture, videos. (1384878)
turbosquid
$25

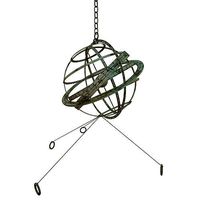
Armillary Sphere Lamp
... available on turbo squid, the world's leading provider of digital 3d models for visualization, films, television, and games.
3d_export
$20

Armillary Sphere 3D Model
...globe cgaxis 3d model detailed 3ds max c4d vray mental fbx obj materials textures
armillary sphere 3d model cgaxis 76918 3dexport
3ddd
$1
Flamant - Console dalou leather with decor
...width - 40 cm length - 139 cm декор: armillary bell maxi, plant holder grey iya, picture frame granada...
3ddd
$1
Arteriors decoration set
...4" fossil sculpture-h: 15" w: 12" d: 3.5" dillon armillary h: 37.5" w: 25" d: 16" lorenzo sculpture- h:...
free3d
free

Armillary
...armillary
free3d
an armillary made in e3d
sketchfab
$15

Armillary Sphere
...armillary sphere
sketchfab
description not set - armillary sphere - buy royalty free 3d model by cgaxis
Christos
design_connected
$11
Monte Christo
...monte christo
designconnected
via monte christo chairs computer generated 3d model. designed by jean-marc gellée.
turbosquid
$10

The Sofa and Chair Co - Christo Armchair
... the sofa and chair co - christo armchair for download as max on turbosquid: 3d models for games, architecture, videos. (1489773)
turbosquid
$10

The Sofa and Chair Co - Christo Large Armchair
...ofa and chair co - christo large armchair for download as max on turbosquid: 3d models for games, architecture, videos. (1489788)
thingiverse
free

Christos Nametag in Greek (Χρήστος) by utechlab
...christos nametag in greek (χρήστος) by utechlab
thingiverse
nametag for christos in greek.
thingiverse
free

Name tag Christos and Kyriakos by utechlab
...name tag christos and kyriakos by utechlab
thingiverse
new name tags for christos and kyriakos
thingiverse
free

3D Bas-relief of Christo Botev by Anar
...end stephen for sending me additional photos and my bulgarian teacher fom the institute for her patience and her professionalism.
thingiverse
free

Guy-Manuel de Homem-Christo Daft Punk Helmet with Programmable LED Lighting by KingHelps
...t2dblsm
ivan's original model: http://cad-unigraphics-projects.blogspot.co.uk/2011/08/daft-punk-helmet-design-tutorial.html
thingiverse
free

Cross - Ichthus by DSqD
...for "jesus". chi (ch) is the first letter of christos (χριστός), greek for "anointed". theta (th) is the first...
grabcad
free

christo house
...christo house
grabcad
christo
cg_trader
$13

Monte Christo Chair
...onte christo chair
cg trader
high quality 3d model of the monte christo chair, designed by jean-marc gellée and produced by via.
Zodiac
3d_ocean
$19
Zodiac
... ship transporter water watercraft wehicle zodiac
lowpoly game model from zodiac patrol boat with included 2048*2048 pbr textures
3d_ocean
$6
Zodiac Circle Sings
...zodiac circle sings
3docean
circle sings zodiac
zodiac circle sings
3d_ocean
$6

Zodiac Virgo Cartoon
...zodiac virgo cartoon
3docean
horoscop virgo zodiac
lowpoly zodiac virgo cartoon
3d_ocean
$6

Zodiac Libra Cartoon
...zodiac libra cartoon
3docean
cartoon horoscop libra zodiac
lowpoly zodiac libra cartoon
3d_ocean
$6

Zodiac Aquarius Cartoon
...zodiac aquarius cartoon
3docean
aquarius cartoon zodiac
lowpoly zodiac aquarius cartoon model
3d_ocean
$6

Zodiac Sagittarius Cartoon
...zodiac sagittarius cartoon
3docean
cartoon sagittarius zodiac
lowpoly model zodiac sagittarius cartoon
3d_ocean
$6
Zodiac Capricorn Cartoon
...zodiac capricorn cartoon
3docean
capricorn cartoon zodiac
lowpoly zodiac capricorn cartoon model
3d_ocean
$6

Zodiac Scorpio Cartoon
...zodiac scorpio cartoon
3docean
cartoon scorpio zodiac
lowpoly zodiac scorpio cartoon model
3d_ocean
$6

Zodiac Pisces Cartoon
...zodiac pisces cartoon
3docean
cartoon pisces zodiac
lowpoly zodiac pisces cartoon model
3d_ocean
$6

Zodiac Aries Cartoon
...zodiac aries cartoon
3docean
aries horoscop horoskop lowpoly zodiac
low poly cartoon model of zodiac sing
Atlas
3ddd
free

Waterworks Atlas
...waterworks atlas
3ddd
waterworks , atlas
waterworks atlas
design_connected
$7
Atlas
...atlas
designconnected
cattelan italia atlas coffee tables computer generated 3d model. designed by nencini & brothers.
turbosquid
$11

atlas
...s
turbosquid
royalty free 3d model atlas for download as max on turbosquid: 3d models for games, architecture, videos. (1282166)
3ddd
$1
MARSET / Atlas
...marset / atlas
3ddd
marset
производитель marset
коллекция atlas
3d_export
$20

atlas the titan
...ing his punishment of holding the world on his back for all of eternity. the work presented is a 3d scanned model of a sculpture.
3d_export
$17

Airbus A400M Atlas
...airbus a400m atlas
3dexport
airbus a400m atlas
3ddd
$1

Atlas Concorde Ribbon
...atlas concorde ribbon
3ddd
панель
atlas concorde ribbon
800x400мм
turbosquid
$5

3D Atlas
...urbosquid
royalty free 3d model 3d atlas for download as obj on turbosquid: 3d models for games, architecture, videos. (1711154)
design_connected
$18

Atlas Floor Lamp
...atlas floor lamp
designconnected
adesso atlas floor lamp computer generated 3d model.
turbosquid
$50

Atlas Rocket
... available on turbo squid, the world's leading provider of digital 3d models for visualization, films, television, and games.
Sphere
3ddd
$1
sphere
...sphere
3ddd
sphere for interior
archibase_planet
free

Spheres
...spheres
archibase planet
balls spheres
spheres - 3d model (*.gsm+*.3ds) for interior 3d visualization.
archibase_planet
free
Sphere
...sphere
archibase planet
globe sphere
sphere n151009 - 3d model (*.gsm+*.3ds) for interior 3d visualization.
3d_export
$5

sphere
...sphere
3dexport
sfgsrybsrtfsz
turbosquid
$1

Sphere
...
turbosquid
royalty free 3d model sphere for download as max on turbosquid: 3d models for games, architecture, videos. (1235365)
3d_export
$5
pendant sphere
...pendant sphere
3dexport
pendant sphere
3d_export
$5

pendant sphere
...pendant sphere
3dexport
pendant sphere
3d_export
$5
pendant sphere
...pendant sphere
3dexport
pendant sphere
3d_export
$5

pendant sphere
...pendant sphere
3dexport
pendant sphere
3d_export
$5
pendant sphere
...pendant sphere
3dexport
pendant sphere
Statue
3d_export
$5

statue
...statue
3dexport
statue of modern art
archibase_planet
free
Statue
...statue
archibase planet
statue figurine statuette
statue n210814 - 3d model (*.gsm+*.3ds) for interior 3d visualization.
archibase_planet
free

Statue
...statue
archibase planet
statue sculpture mannequin
statue 1 - 3d model (*.gsm+*.3ds) for interior 3d visualization.
archibase_planet
free

Statue
...statue
archibase planet
statue figurine statuette
statue n020812 - 3d model (*.gsm+*.3ds) for interior 3d visualization.
archibase_planet
free
Statue
...tatue
archibase planet
statue figurine ornament decoration
statue n180413 - 3d model (*.gsm+*.3ds) for interior 3d visualization.
archibase_planet
free

Statue
...tatue
archibase planet
statue figurine picturesque element
statue n060613 - 3d model (*.gsm+*.3ds) for interior 3d visualization.
archibase_planet
free

Statue
...statue
archibase planet
statue figurine buddha
statue n090913 - 3d model (*.gsm+*.3ds+*.max) for interior 3d visualization.
archibase_planet
free
Statue
...tatue
archibase planet
statue figurine picturesque element
statue n021013 - 3d model (*.gsm+*.3ds) for interior 3d visualization.
archibase_planet
free

Statue
...
archibase planet
statue picturesque element mannequin sculpture
statue 3 - 3d model (*.gsm+*.3ds) for interior 3d visualization.
archibase_planet
free

Statue
...
archibase planet
statue picturesque element mannequin sculpture
statue 2 - 3d model (*.gsm+*.3ds) for interior 3d visualization.
Base
archibase_planet
free
Base
...base
archibase planet
base column column base
base 1 - 3d model (*.gsm+*.3ds) for interior 3d visualization.
archibase_planet
free
Base
...base
archibase planet
base column base column
base 5 - 3d model (*.gsm+*.3ds) for interior 3d visualization.
archibase_planet
free
Base
...base
archibase planet
base column column base
base 7 - 3d model (*.gsm+*.3ds) for interior 3d visualization.
archibase_planet
free
Base
...base
archibase planet
base column column base
base 2 - 3d model (*.gsm+*.3ds) for interior 3d visualization.
archibase_planet
free
Base
...base
archibase planet
base column column base
base 3 - 3d model (*.gsm+*.3ds) for interior 3d visualization.
archibase_planet
free
Base
...base
archibase planet
base column column base
base 4 - 3d model (*.gsm+*.3ds) for interior 3d visualization.
archibase_planet
free
Base
...base
archibase planet
base column base column
base 6 - 3d model (*.gsm+*.3ds) for interior 3d visualization.
archibase_planet
free

Base
...base
archibase planet
foundation base
column base ionic - 3d model (*.gsm+*.3ds) for interior 3d visualization.
archibase_planet
free
Base
...base
archibase planet
foundation base
column base tuscan - 3d model (*.gsm+*.3ds) for interior 3d visualization.
design_connected
$18
Base
...base
designconnected
tom dixon base computer generated 3d model. designed by dixon, tom.