Thingiverse
Argon One - USB 3.0 Hub by JoKneeMo
by Thingiverse
Last crawled date: 2 years, 11 months ago
Background
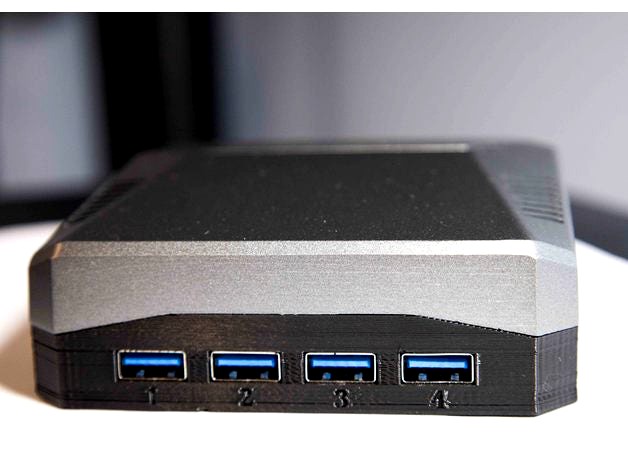
I needed front access to USB on the Argon One Raspberry Pi 4B case. (v1 and v2)
It didn't need to be USB 3, but I figured why limit it to 2.0!
I tried using the Anker 4 port hub but due to the cable on the side of the PCB, this wasn't possible inside the dimensions required.
I was able to find a hub with the cable exiting from the rear which was perfect.
To convert the male A of the hub's cable, I was able to find a right angle keystone jack that did the job.
Parts Needed
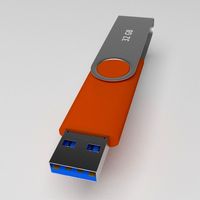
1x - ORICO 4-Port USB 3.0 Hub, 1ft
1x - Poyiccot USB 3.0 Keystone Jack, 90 Degree
2x - M2x3mm screws
1x - USB 3.0 180° Connector Bridge Adapter (multiple sources)
Comes with the Argon One M.2 Case
eBay Item:194014551651
Aliexpress
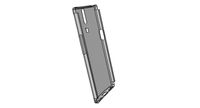
1x Argon One Raspberry Pi 4B Case (all versions are compatible)
Version 1 (Link not available, but it has micro HDMI connections)
Version 2
Version 2 with M.2 Board (Can't use this with the M.2 board attached)
Nanosound HiFi
Electrical tape
Instructions
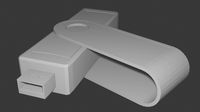
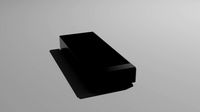
Print the part
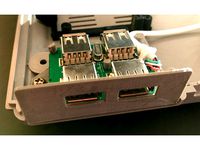
Remove the USB Hub from its housing
Remove the keystone jack from its housing
Place they keystone jack's PCB into the slot on the rear, it should sort of snap into place.
Place the USB hub PCB into the from of the printed part. There are two screw holes that should fit inside the PCB's mounting holes.
Screw down the USB hub PCB using the two M2 screws.
Plug the hub's cable into the inside port of the keystone jack, routing it in a loop.
Secure the keystone jack (or don't) with some hot glue.
Cover the keystone jack and USB ports with electrical tape because it's pretty snug and it could short out the pi.
Unscrew the bottom of the Argon ONE case (keep the screws)
Screw the assembled printed part onto the bottom of the Argon ONE with the screws that were already there.
Connect the USB bridge adapter to the back of the printed part and Pi.
Have a snack, you done good kid!
I needed front access to USB on the Argon One Raspberry Pi 4B case. (v1 and v2)
It didn't need to be USB 3, but I figured why limit it to 2.0!
I tried using the Anker 4 port hub but due to the cable on the side of the PCB, this wasn't possible inside the dimensions required.
I was able to find a hub with the cable exiting from the rear which was perfect.
To convert the male A of the hub's cable, I was able to find a right angle keystone jack that did the job.
Parts Needed
1x - ORICO 4-Port USB 3.0 Hub, 1ft
1x - Poyiccot USB 3.0 Keystone Jack, 90 Degree
2x - M2x3mm screws
1x - USB 3.0 180° Connector Bridge Adapter (multiple sources)
Comes with the Argon One M.2 Case
eBay Item:194014551651
Aliexpress
1x Argon One Raspberry Pi 4B Case (all versions are compatible)
Version 1 (Link not available, but it has micro HDMI connections)
Version 2
Version 2 with M.2 Board (Can't use this with the M.2 board attached)
Nanosound HiFi
Electrical tape
Instructions
Print the part
Remove the USB Hub from its housing
Remove the keystone jack from its housing
Place they keystone jack's PCB into the slot on the rear, it should sort of snap into place.
Place the USB hub PCB into the from of the printed part. There are two screw holes that should fit inside the PCB's mounting holes.
Screw down the USB hub PCB using the two M2 screws.
Plug the hub's cable into the inside port of the keystone jack, routing it in a loop.
Secure the keystone jack (or don't) with some hot glue.
Cover the keystone jack and USB ports with electrical tape because it's pretty snug and it could short out the pi.
Unscrew the bottom of the Argon ONE case (keep the screws)
Screw the assembled printed part onto the bottom of the Argon ONE with the screws that were already there.
Connect the USB bridge adapter to the back of the printed part and Pi.
Have a snack, you done good kid!
Similar models
thingiverse
free
Retro Playstation Pi Usb Hub Holder by jakobwesthoff
... raspberry only has 4 ports total.
additional parts
i used the following usb-hub as inlay for this part:
usb 2.0 hub smile 4-port
thingiverse
free

Case for USB voltage hub
...nning multiple raspberry pi computers
the pcb is designed by my brother, see https://easyeda.com/bartvangorp/usb-voltage-hub-v1-2
thingiverse
free

Anker 4 Port USB Hub 90 Angle by TecHno_Guy
...ugh they are optional.
parts needed:
1x anker 4 port usb hub
parts optional (but recommended):
1x m2 countersunk screw
1x m2 nut
thingiverse
free

MPSM Side Panel Keystone by Geonovast
....com/thing:6647
updated 2-17-17: added stls for double keystones, running a usb cable out to the board, and a blank vented panel.
thingiverse
free

Pi Zero Hubpixed HubPiWi Case by ftk1
...te that the covering of the non-power usb port on the pi zero is intentional. you cannot use that port while the hub is attached.
thingiverse
free
FLIRC Vixen case with integrated power supply by blemasle
... rpi3 case as well.
the version pictured is an old one. i later reversed the step down place to be able to used angled usb cables
thingiverse
free

Headphone Jack Plug for Raspberry Pi Case by sethvoltz
...n, but it does have ports. i don't plan to use the headphone jack, so it is a convenient place to secure everything together.
thingiverse
free

Argon40 ONE M.2 Raspberry Pi Case Dual Stand by BlackRose67
...om/argon-one-v-2-case-for-raspberry-pi-5.html
argon40 m.2 case https://www.argon40.com/argon-one-m-2-case-for-raspberry-pi-4.html
thingiverse
free

Argon One M.2 Raspberry Pi Case stacker by tkamsker
...n one m.2 raspberry pi case
you need an level adjuster. so i made this hack
beware this is work in progress
..
i might improve it
thingiverse
free

Pi Tower by lstubble44
...tower to control the power. the sd card and usb ports are also easily acceptable.
designed for the 'b' shape of pi (2/3).

Argon
turbosquid
$15
Argon bandl
...royalty free 3d model argon bandl for download as max and fbx on turbosquid: 3d models for games, architecture, videos. (1446126)
turbosquid
$10

Argon tank
...
royalty free 3d model argon tank for download as max and fbx on turbosquid: 3d models for games, architecture, videos. (1446078)
turbosquid
$10

Lampatron ARGON Chandelier
... free 3d model lampatron argon chandelier for download as max on turbosquid: 3d models for games, architecture, videos. (1687909)
turbosquid
$7

Rack Argon from solid pine
...n from solid pine for download as max, max, 3ds, fbx, and obj on turbosquid: 3d models for games, architecture, videos. (1672056)
3d_export
$13

Low-poly gas Argon ballon 3D Model
...trial cylinder
low-poly gas argon ballon 3d model download .c4d .max .obj .fbx .ma .lwo .3ds .3dm .stl svyatoslav 111093 3dexport
3d_export
$7
model of automatic argon arc welding machine
...ent can rotate one circle automatically. after welding, the welding is automatically lifted and the weldment is removed manually.
3d_export
$33

Low-poly gas cylinders pack 3D Model
...low-poly gas cylinders pack 3d model 3dexport gas oxygen argon acetylene nitrogen can cylinder ballon container industrial texture low...
3d_export
$26
vacuum sintering furnace
...pressure and holding time are set according to the process.<br>argon or nitrogen can be used to keep sintering in...
thingiverse
free

Argon atomic nucleus
...s shown in 2 pictures after two of argon.
argon is in the air. it is good when ar is taken in larger amounts than carbon dioxide.
3dcadbrowser
free

Argon Tank
...r helium.this 3d object can be downloaded in .max, .obj, .3ds, .fbx, .dxf, .lwo, .stl, .wrl, .ma, .dae, .x and .asc file formats.
Hub
3d_export
free

hub
...hub
3dexport
realistic 3d model of hub. you can use this model in your automotive or mechanical projects.
design_connected
$4

Hub 02
...hub 02
designconnected
glas italia hub 02 dining tables computer generated 3d model. designed by piero lissoni.
turbosquid
$8

Electricity Hub
...id
royalty free 3d model electricity hub for download as fbx on turbosquid: 3d models for games, architecture, videos. (1298030)
turbosquid
$2

Gokart Hub
...bosquid
royalty free 3d model gokart hub for download as ige on turbosquid: 3d models for games, architecture, videos. (1497617)
turbosquid
free

Desert hub
...squid
free 3d model desert hub for download as blend and fbx on turbosquid: 3d models for games, architecture, videos. (1634736)
design_connected
$18

UMBRA Hub Ladder
...umbra hub ladder
designconnected
umbra hub ladder computer generated 3d model.
turbosquid
$48

hub-dxf
... available on turbo squid, the world's leading provider of digital 3d models for visualization, films, television, and games.
turbosquid
$25

Shoulder Hub
... available on turbo squid, the world's leading provider of digital 3d models for visualization, films, television, and games.
turbosquid
$20

BMX Hub
... available on turbo squid, the world's leading provider of digital 3d models for visualization, films, television, and games.
3d_ocean
$5

Stairwell Hub
... is a low polygonal model. - poly count: 323 - formats: max /obj /fbx/3ds/dxf - high detail was preserved with 2048×2048 textu...
Usb
3d_ocean
$3
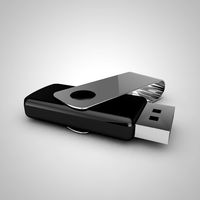
USB Thumbdrive
...usb thumbdrive
3docean
thumbdrive usb usb drive usb stick
this is a swivel type usb thumb drive.
3d_ocean
$5

Usb Stick
...usb stick
3docean
flash stick usb usb memory usb stick
usb stick created using 3ds max 2015 and rendered on mental ray.
3ddd
$1
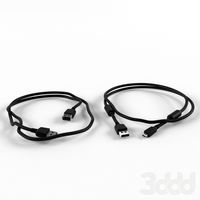
USB cable
... кабель , провод
высокополигональные модели кабелей usb.
3d_ocean
$5
USB Stick
...usb stick
3docean
32gb computer memory plug plugin protection usb usb stick
an usb stick with built-in plug protection
3d_ocean
$6

USB Stick
...tick
3docean
32 gb flash ram gigabyte memory metal nand plug ram stick usb usb 3 usb stick
usb stick with texture and normal map.
turbosquid
$5

USBS
...bs
turbosquid
royalty free 3d model usbs for download as max on turbosquid: 3d models for games, architecture, videos. (1466594)
3d_export
$5

usb flash
...usb flash
3dexport
usb flash
3d_export
free
usb flash
...usb flash
3dexport
usb flash
3d_export
free
usb flash
...usb flash
3dexport
usb flash driver
3ddd
$1

usb
...usb
3ddd
флешка
флешка
0
turbosquid
$12

Calligraphic Digit 0 Number 0
...hic digit 0 number 0 for download as max, obj, fbx, and blend on turbosquid: 3d models for games, architecture, videos. (1389318)
3d_export
$6

set-0
...set-0
3dexport
turbosquid
$6

hedge 0
...yalty free 3d model hedge 0 for download as max, obj, and fbx on turbosquid: 3d models for games, architecture, videos. (1450353)
turbosquid
$5

Nuber 0
...oyalty free 3d model nuber 0 for download as ma, obj, and fbx on turbosquid: 3d models for games, architecture, videos. (1564674)
turbosquid
$22

0.jpg
... available on turbo squid, the world's leading provider of digital 3d models for visualization, films, television, and games.
turbosquid
free

Steam Locomotive Fowler 4F 0-6-0
... available on turbo squid, the world's leading provider of digital 3d models for visualization, films, television, and games.
turbosquid
$10

Liquid Number 0
... model liquid number 0 for download as c4d, 3ds, fbx, and obj on turbosquid: 3d models for games, architecture, videos. (1689919)
turbosquid
$45

Dragon360_perspShape_tmp.0.jpg
... available on turbo squid, the world's leading provider of digital 3d models for visualization, films, television, and games.
turbosquid
$8

Rocks Debris 0
... available on turbo squid, the world's leading provider of digital 3d models for visualization, films, television, and games.
3d_export
$18

wood-guardrail-fence 0
...wood-guardrail-fence 0
3dexport
wood-guardrail-fence 0<br>3ds max 2015
3
turbosquid
$10

Mountain Bike 3 -3 of 3
...model mountain bike 3 (#3 of 3) for download as fbx and blend on turbosquid: 3d models for games, architecture, videos. (1438752)
turbosquid
$6

Rock 3-3
...urbosquid
royalty free 3d model rock 3-3 for download as obj on turbosquid: 3d models for games, architecture, videos. (1628065)
turbosquid
$29

Books 150 pieces 3-3-3
...books 150 pieces 3-3-3 for download as max, obj, fbx, and stl on turbosquid: 3d models for games, architecture, videos. (1384033)
turbosquid
$3

Genesis 3 Clothing 3
... available on turbo squid, the world's leading provider of digital 3d models for visualization, films, television, and games.
3d_export
$5

hinge 3
...hinge 3
3dexport
hinge 3
3ddd
$1

Розетка 3
...розетка 3
3ddd
розетка
розетка 3
turbosquid
$50

is-3
... available on turbo squid, the world's leading provider of digital 3d models for visualization, films, television, and games.
turbosquid
$10

Mountain Bike 3 -2 of 3
...model mountain bike 3 (#2 of 3) for download as fbx and blend on turbosquid: 3d models for games, architecture, videos. (1438750)
turbosquid
$10

Mountain Bike 1 -3 of 3
...model mountain bike 1 (#3 of 3) for download as fbx and blend on turbosquid: 3d models for games, architecture, videos. (1438743)
3d_export
$5

3 CATS
...3 cats
3dexport
3 cats pen holder
One
turbosquid
$2
one plus one
... available on turbo squid, the world's leading provider of digital 3d models for visualization, films, television, and games.
3ddd
$1
One
...one
3ddd
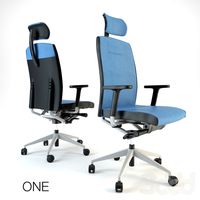
стул
офисный стул one
3ddd
free

one
...
palazetti one ,http://palazzetti.ca/index.php/component/virtuemart/seating/armchairs-lounges/one-chair-detail?itemid=0
turbosquid
$35

One A
... available on turbo squid, the world's leading provider of digital 3d models for visualization, films, television, and games.
turbosquid
free

One
... available on turbo squid, the world's leading provider of digital 3d models for visualization, films, television, and games.
3ddd
$1
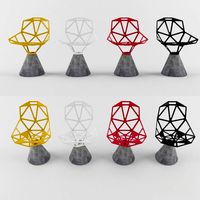
Стул One
...стул one
3ddd
one , magis
кресло magis s.p.a , one
3ddd
$1
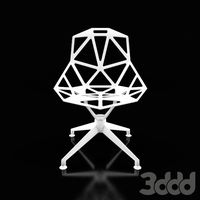
Стул One
...стул one
3ddd
one , magis
кресло one chair (4star), magis s.p.a.
3d_export
$20

xbox one
...xbox one
3dexport
xbox one
3ddd
$1
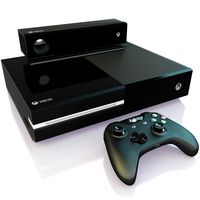
xbox one
... консоль , джойстик
xbox one + kinect + gamepad
3ddd
free
One
...nstantin grcic
артикул ct-284 (cosmorelax.ru)
размер l36xw41xh82.5, sh 77cm
цвет черный, красный
материал алюминий
вес 2,5 кг