Thingiverse
Anycubic Predator Lighting ring Neopixel project. by Gnattycole
by Thingiverse
Last crawled date: 3 years, 3 months ago
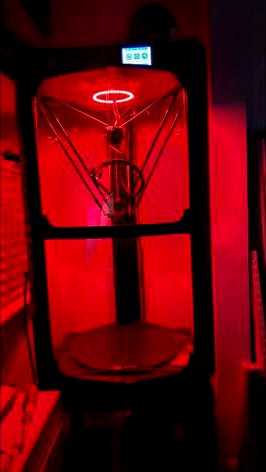
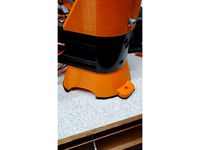
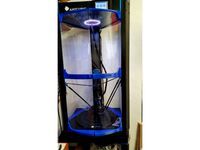
I usually fit my printers into an enclosure of some kind which usually have some form of illumination but the Predator is such a large machine and can be adapted with its own enclosure, I figured I'd install its own independent lighting system.
My Predator is still running the standard mainboard with a Raspberri Pi providing wifi connection via Octoprint. My last dabblings with Neopixels on my Tronxy X5S were controlled via Marlin and they worked well, but that wasn't an option for me with the Predator, at least not in its current state so I had a look around and checked out some Octoprint Plug-ins. I've gone with "WS281x LED Status.".
This project will be split between the hardware and electronics and I'll try to give a few pointers on the software setup too as I go along, especially if I get any issues.
The first thing you need is the hardware.
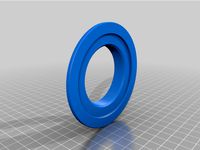
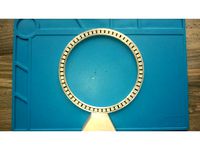
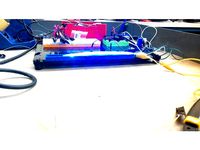
One x 132mm 40 element Neopixel LED ring.https://www.ebay.co.uk/itm/40-LED-132mm-Ring-WS2812B-RGB-LED-Neopixel-compatible/132996155873?hash=item1ef73049e1:g:07wAAOSwLi1ckkf~
2.One x 24 Volt, - 5 volt DC 10Amp buck converter.https://www.amazon.co.uk/gp/product/B07L6528VM/ref=ppx_yo_dt_b_asin_title_o01_s00?ie=UTF8&psc=1
Originally I had a separate buck converter for the Pi but it caused stability issues so I ended up running the Pi and Neopixels from the 10 Amp Buck converter so this small 12 volt to micro USB was removed. Use an old USB to USB micro phone charging lead but make sure it's one with a right angle plug such as :https://www.amazon.co.uk/StarTech-com-30cm-Micro-USB-Cable-Black/dp/B003YKX6W2/ref=sr_1_1?dchild=1&keywords=micro+usb+right+angle&qid=1609430790&sr=8-1
A raspberry Pi and SD card of your choice. You can find these everywhere.
Four off, M2 x 4mm Cap head screws (Neopixel ring fixing). (My screw box)
a bunch of female to female dupont jumper wireshttps://www.amazon.co.uk/AZDelivery-MB-102-Breadboard-Kit/dp/B07KYHBVR7/ref=sr_1_33?dchild=1&keywords=breadboard+jumper+wires&qid=1609174888&sr=8-33
7.A few feet of 1.0mm2 speaker wire.https://www.amazon.co.uk/electrosmart-Black-Strand-Speaker-Cable-Red/dp/B06ZYB5XQF/ref=sxin_9_ac_d_rm?ac_md=3-2-c3BlYWtlciB3aXJlcyByZWQgYW5kIGJsYWNr-ac_d_rm&cv_ct_cx=speaker+wire&dchild=1&keywords=speaker+wire&pd_rd_i=B06ZYB5XQF&pd_rd_r=a8f61600-440b-4163-b3ea-0ec07a734eec&pd_rd_w=vrRwX&pd_rd_wg=oybiG&pf_rd_p=17aec670-a34a-456d-b214-b9a882c785b0&pf_rd_r=FPXZQGEJ9R1A5ENB93XS&psc=1&qid=1609176059&sr=1-3-fe323411-17bb-433b-b2f8-c44f2e1370d4
Some fork crimps and a crimping pliers for that professional touch.
4x M2.5 x 4mm (or 6mm) (Raspberry Pi mounting).
2x M3 x 4mm (or 6mm) (Buck converter mounting).
1x M4 x 12mm screw and nut (Stub plate fixing).
Logic Shifter 3.3V - 5V. :https://www.amazon.co.uk/gp/product/B07LG6RK7L/ref=ppx_yo_dt_b_asin_title_o01_s00?ie=UTF8&psc=1
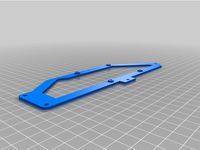
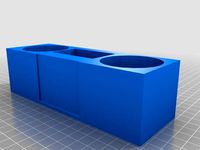
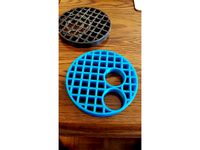
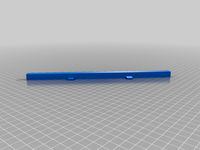
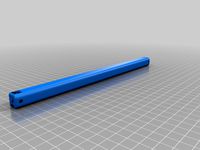
First thing to do is print the mounting plates and the LED ring holder. See printing instructions. While this is going on if you have another printer, you can start preparing the Predator.
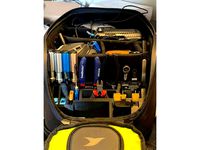
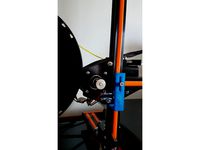
You will need to move the filament runout sensor to inside the control electronics compartment. A lot of folk have already done this due to the potential to snag up on the wiring harness or filament when the printer homes. There's a "Thing" here with a decent guide by Seafax with the caveat that you do not discard the guide tube fitting that you remove from inside the control compartment as these instructions suggest. You'll need it later for this project.https://www.thingiverse.com/thing:3665598
Rest of the instructions follow below.
Update 31 December 2020. Removed the Work in Progress" Status now as it seems to be working as advertised. If anyone has any feedback, feel free to drop me a line.
My Predator is still running the standard mainboard with a Raspberri Pi providing wifi connection via Octoprint. My last dabblings with Neopixels on my Tronxy X5S were controlled via Marlin and they worked well, but that wasn't an option for me with the Predator, at least not in its current state so I had a look around and checked out some Octoprint Plug-ins. I've gone with "WS281x LED Status.".
This project will be split between the hardware and electronics and I'll try to give a few pointers on the software setup too as I go along, especially if I get any issues.
The first thing you need is the hardware.
One x 132mm 40 element Neopixel LED ring.https://www.ebay.co.uk/itm/40-LED-132mm-Ring-WS2812B-RGB-LED-Neopixel-compatible/132996155873?hash=item1ef73049e1:g:07wAAOSwLi1ckkf~
2.One x 24 Volt, - 5 volt DC 10Amp buck converter.https://www.amazon.co.uk/gp/product/B07L6528VM/ref=ppx_yo_dt_b_asin_title_o01_s00?ie=UTF8&psc=1
Originally I had a separate buck converter for the Pi but it caused stability issues so I ended up running the Pi and Neopixels from the 10 Amp Buck converter so this small 12 volt to micro USB was removed. Use an old USB to USB micro phone charging lead but make sure it's one with a right angle plug such as :https://www.amazon.co.uk/StarTech-com-30cm-Micro-USB-Cable-Black/dp/B003YKX6W2/ref=sr_1_1?dchild=1&keywords=micro+usb+right+angle&qid=1609430790&sr=8-1
A raspberry Pi and SD card of your choice. You can find these everywhere.
Four off, M2 x 4mm Cap head screws (Neopixel ring fixing). (My screw box)
a bunch of female to female dupont jumper wireshttps://www.amazon.co.uk/AZDelivery-MB-102-Breadboard-Kit/dp/B07KYHBVR7/ref=sr_1_33?dchild=1&keywords=breadboard+jumper+wires&qid=1609174888&sr=8-33
7.A few feet of 1.0mm2 speaker wire.https://www.amazon.co.uk/electrosmart-Black-Strand-Speaker-Cable-Red/dp/B06ZYB5XQF/ref=sxin_9_ac_d_rm?ac_md=3-2-c3BlYWtlciB3aXJlcyByZWQgYW5kIGJsYWNr-ac_d_rm&cv_ct_cx=speaker+wire&dchild=1&keywords=speaker+wire&pd_rd_i=B06ZYB5XQF&pd_rd_r=a8f61600-440b-4163-b3ea-0ec07a734eec&pd_rd_w=vrRwX&pd_rd_wg=oybiG&pf_rd_p=17aec670-a34a-456d-b214-b9a882c785b0&pf_rd_r=FPXZQGEJ9R1A5ENB93XS&psc=1&qid=1609176059&sr=1-3-fe323411-17bb-433b-b2f8-c44f2e1370d4
Some fork crimps and a crimping pliers for that professional touch.
4x M2.5 x 4mm (or 6mm) (Raspberry Pi mounting).
2x M3 x 4mm (or 6mm) (Buck converter mounting).
1x M4 x 12mm screw and nut (Stub plate fixing).
Logic Shifter 3.3V - 5V. :https://www.amazon.co.uk/gp/product/B07LG6RK7L/ref=ppx_yo_dt_b_asin_title_o01_s00?ie=UTF8&psc=1
First thing to do is print the mounting plates and the LED ring holder. See printing instructions. While this is going on if you have another printer, you can start preparing the Predator.
You will need to move the filament runout sensor to inside the control electronics compartment. A lot of folk have already done this due to the potential to snag up on the wiring harness or filament when the printer homes. There's a "Thing" here with a decent guide by Seafax with the caveat that you do not discard the guide tube fitting that you remove from inside the control compartment as these instructions suggest. You'll need it later for this project.https://www.thingiverse.com/thing:3665598
Rest of the instructions follow below.
Update 31 December 2020. Removed the Work in Progress" Status now as it seems to be working as advertised. If anyone has any feedback, feel free to drop me a line.
Similar models
grabcad
free

Adafruit NeoPixel Stick for Arduino- 8 x WS2812 5050 Addressable RGB LED
...t-neopixel-arduino-integrated-drivers/dp/b00iedh26k/ref=sr_1_1?dchild=1&keywords=neopixel+stick&qid=1611128895&sr=8-1
thingiverse
free

Programmable Power Supply 0-34V & 0-5A with Temperature Controlled Fan by jimwooly
...hem.
the case and the lid were printed with a 45% infill from pla but petg could also be used.
the feet were produced using tpu.
thingiverse
free

DC Buck Converter Module Cover Case by Habuchi
...regulator-converter-1-25-37v/dp/b07xk8xv37/ref=sr_1_1?dchild=1&keywords=adjustable+voltage+buck&qid=1621359452&sr=8-1
grabcad
free

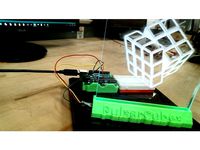
Anjunabeats LED Sign
...el-modular-breakout/)
for the code, i just ran one of the default neopixel example sketches. fast led also has some good ones.
thingiverse
free

Ardino drone prototype by evan1101
...rqizlbmnyexb0zwrbzelkpuewnzqxmzawrjbwuezgskxhmvnxjndpzgdlde5hbwu9c3bfyxrmjmfjdglvbj1jbglja1jlzglyzwn0jmrvtm90tg9nq2xpy2s9dhj1zq==
thingiverse
free
Torvol tool organizer by Collinhasasthma
...ver-electronic-short-circuit-available/dp/b088tvvnvm/ref=sr_1_4?dchild=1&keywords=smoke+stopper&qid=1623510410&sr=8-4
thingiverse
free
InMoov Touchscreen & Raspberry Pi mounting by civrays
...c-raspberry-inch-capacitive-monitor/dp/b07qkt6l58/ref=sr_1_5?dchild=1&keywords=7%22+touchscreen&qid=1602617642&sr=8-5
thingiverse
free
Speaker box by Ratakis
...-4ft/dp/b01kstsv76/ref=sr_1_1_sspa?s=electronics&ie=utf8&qid=1521518432&sr=1-1-spons&keywords=aux+cable&psc=1
thingiverse
free

KNACRO 5V Buck Converter Case by PeacefulPro
...5+volt+converter+usb&qid=1616871899&sr=8-17
print it at 0.2 mm layer height and everything should fit together perfectly.
thingiverse
free

KFC Pi - KFConsole Case for Raspberry Pi by sn3ll
...;ref_=as_li_ss_tl
socials:
website - sn3ll.com
twitter - https://twitter.com/sn3ll_
instagram - https://www.instagram.com/sn3ll_/
Gnattycole
thingiverse
free
Yard Gully Drain cover with two Waste pipe entries by Gnattycole
...fset because that was dictated by my particular situation but it might be useful for someone else out there with a similar issue.
thingiverse
free
YASAR (Yet Another Spool Adaptor Ring) For Emmetts Bearing by Gnattycole
... i made this adaptor ring which some folk might find useful, although there seem to be loads on thingiverse now i've made it.
thingiverse
free
Kossel Linear Plus Feet with screwdown lugs by Gnattycole
...a pair of m4 x 8mm cap head screws and tee nuts per foot.
thanks to airwaves ted for the original design which works really well.
thingiverse
free

Ottoman Bed foot risers (Extensions for Roomba) by Gnattycole
...sn't required. it picks up the entire bed by an additional 80mm which to be honest, i think is a more sensible height anyway.
thingiverse
free

Cole & Mason Salt and Pepper mills button by Gnattycole
...per mill top case and secure it in place. the m4 screw also acts as the plunger to operate the switch on the mill motor assembly.
thingiverse
free
Predator Enclosure Door centre frame for single piece doors by Gnattycole
... screw
4 x neodymium magnets, diameter 8mm x 3mm thick.
2 x clear extruded acrylic sheet, thickness: 2mm, length: 875, width: 225
thingiverse
free

Wansview 1080P USB cam mount for 20mm Ball joint by Gnattycole
...uot;ball and socket" mount.
now i know it all works, i must get round to printing the whole thing in black for the predator.
thingiverse
free

Single sided spool holder Heavy Duty by Gnattycole
...a few cheapo bucket examples which i probably wouldn't buy again. spool widths of 55mm - 75mm and boss diameters of 52- 75mm.
thingiverse
free
Anet E12 Z stop simple adjuster by Gnattycole
...re you have sufficient clearance for it to make the limit switch.
my first upload to thingiverse so hope it is of use to someone.
thingiverse
free

Vice Clams (Soft Jaws) for 3" vice magnetic by Gnattycole
...t printing with supports, raft or brim as this fills the v grooves with filament and you'll spend ages trying to bust it out.
Neopixel
thingiverse
free

NeoPixel Mount
...neopixel mount
thingiverse
geeetech a10m neopixel mount
thingiverse
free
neopixel clock by arradan
...neopixel clock by arradan
thingiverse
this is frame for neopixel clock with 60 led neopixel ring.
thingiverse
free
neopixel cover
...neopixel cover
thingiverse
a basic cover made for neopixel's using clear pla filament
thingiverse
free
Neopixel Cover
...neopixel cover
thingiverse
neopixel cover i made for a knight rider light bar build made in freecad.
thingiverse
free
Joseph Neopixel by ShimmyJ
...joseph neopixel by shimmyj
thingiverse
neopixel shifts colors
thingiverse
free
3DX Neopixel Project
...3dx neopixel project
thingiverse
a design for a neopixel based off of arduino.
thingiverse
free

Neopixel Triplet by reed
...neopixel triplet by reed
thingiverse
holds three single pieces of a neopixel ribbon.
thingiverse
free

3dx neopixel by 21smithe
...3dx neopixel by 21smithe
thingiverse
print, then glue neopixels to the print. plug in the code and go
thingiverse
free
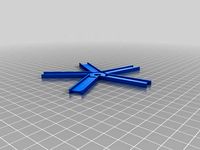
NeoPixel Star by fvan84
...neopixel star by fvan84
thingiverse
a star shape piece to fit 5 neopixel sticks
thingiverse
free

Funny Neopixel glasses
...funny neopixel glasses
thingiverse
tested with arduino uno and adafruit neopixel library :-) d=50mm
Predator
3d_export
$15

predator
...predator
3dexport
predator
3d_export
$18

predator
...predator
3dexport
turbosquid
$9

Predator
...r
turbosquid
royalty free 3d model predator for download as on turbosquid: 3d models for games, architecture, videos. (1322726)
3d_export
free

predator shuriken
...predator shuriken
3dexport
predator shuriken
turbosquid
$10
Predator
...d
royalty free 3d model predator for download as 3ds and obj on turbosquid: 3d models for games, architecture, videos. (1152845)
3d_export
$6
predator mask
...predator mask
3dexport
predator mask lowpoly
turbosquid
$299
Predator
... available on turbo squid, the world's leading provider of digital 3d models for visualization, films, television, and games.
3d_export
$5

mask predator
...mask predator
3dexport
an incredible mask, very detailed. based on predator. any questions write me please
3d_export
$17

MQ-1B Predator
...mq-1b predator
3dexport
mq-1b predator
3d_ocean
$5

Predator
...plane poly predator remote texture uav vehicle
ready to be used in production ready situation including all the major 3d formats.
Anycubic
thingiverse
free

anycubic filament holder
...anycubic filament holder
thingiverse
anycubic filament holder
thingiverse
free

Cableholder Anycubic Mega
...cableholder anycubic mega
thingiverse
cableholder anycubic mega
thingiverse
free

AnyCubic Toolholder by WildManPrinting
...anycubic toolholder by wildmanprinting
thingiverse
anycubic i3 mega toolholder that clips on the side of the spool a-frame.
thingiverse
free

AnyCubic Funnel by phana007
...anycubic funnel by phana007
thingiverse
funnel for anycubic resin and also a reducer for a normal soda bottle.
thingiverse
free

Anycubic Kossel PID calibration
...ir mount:
kossel raspberry camera ir mount
extruder pid calibration.
simple extruder temperature calibration of your 3d printer.
thingiverse
free

anycubic mega i3
...anycubic mega i3
thingiverse
anycubic i3 mega/mega s led 30mm 10-14v 6500k
thingiverse
free

Handle for anycubic by cruiser7
...handle for anycubic by cruiser7
thingiverse
its easier to handle the cover of the anycubic mono x and wash&care
thingiverse
free

anycubic predator Printbed by Lihyon
...anycubic predator printbed by lihyon
thingiverse
anycubic predator printbed
thingiverse
free

Anycubic Predator Triggers by marcelcountry
...anycubic predator triggers by marcelcountry
thingiverse
anycubic predator triggers
thingiverse
free

support anycubic cable by sarpdental
...support anycubic cable by sarpdental
thingiverse
support anycubic cable
Project
3d_export
$7
project
...project
3dexport
project
3d_export
$20
Project
...project
3dexport
design_connected
$16

Project Chair
...project chair
designconnected
rex kralj project chair computer generated 3d model. designed by žitnik, marjan.
3ddd
$1
lectric Project
...настроены. сетка очень плотная.
доступно только для группы "profi"
про группу "profi" можно прочитать в чаво
3d_ocean
$19

Soon project
...kup. made in 3ds max 2013 1- 3dsmax with vray render included material and light 2- obj file 3- fbx file hope you like it plea...
turbosquid
$49

Joint | Project
...squid
royalty free 3d model joint | project for download as on turbosquid: 3d models for games, architecture, videos. (1297983)
turbosquid
$11
house project
...bosquid
royalty free 3d model house project for download as on turbosquid: 3d models for games, architecture, videos. (1672482)
turbosquid
$450
University project
...
royalty free 3d model university project for download as rvt on turbosquid: 3d models for games, architecture, videos. (1463354)
turbosquid
$30

smart projecter
...lty free 3d model smart projecter for download as max and obj on turbosquid: 3d models for games, architecture, videos. (1236214)
3d_export
$5
project drawing
...project drawing
3dexport
project drawing and 3d model<br>format jpg sldprt dwg<br>by 3d make
Ring
3d_export
$5
ring
...ring
3dexport
ring
3d_export
free

ring
...ring
3dexport
ring
3d_export
free

ring
...ring
3dexport
ring
3d_export
free

ring
...ring
3dexport
ring
3d_export
$10

ring
...ring
3dexport
lord of the rings
3d_export
$5

ring
...ring
3dexport
golden ring
3d_export
free
ring
...ring
3dexport
cherub ring
3d_export
$10
ring
...ring
3dexport
3d ring model
3d_export
$5
ring
...ring
3dexport
ring 3d model
3d_export
$5

ring
...ring
3dexport
ring top black...
Lighting
archibase_planet
free

Light
...light archibase planet lamp lighting light light - s2 - 3d model for interior...
archibase_planet
free

Light
...light archibase planet light luminaire lighting light l0465 - 3d model (*.gsm+*.3ds) for interior 3d...
3d_export
$5

lighting
...lighting
3dexport
lighting
3d_export
$5

lighting
...lighting
3dexport
lighting in livingroom
turbosquid
$3

Lighting Tree with Lights
...d model lighting tree with lights for download as max and 3ds on turbosquid: 3d models for games, architecture, videos. (1585507)
archibase_planet
free

Light
...light archibase planet luster lighting solution light - s - 3d model for interior...
archibase_planet
free

Light
...light archibase planet luster lamp lighting light 1 - 3d model for interior 3d...
archibase_planet
free

Lights
...lights
archibase planet
surgical lights surgical lamp
surgical lights (floor) - 3d model for interior 3d visualization.
archibase_planet
free

Light
...light archibase planet lighting luminaire candlelight light l0463 - 3d model (*.gsm+*.3ds) for...
3d_export
$18

street light-lighting-light-xia bing
...
3dexport
street light-lighting-light-xia bing<br>max 2015 v-ray 3 max 2015<br>textures<br>all files in zip...