Thingiverse

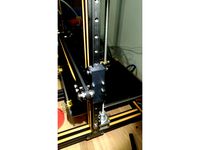
Anycubic Mega Zero X-Axis Linear Rail Upgrade by djos_1475
by Thingiverse
Last crawled date: 2 years, 11 months ago
This X-Axis Linear Rail Upgrade is designed for use with my Orbiter Direct Drive System:
https://www.thingiverse.com/thing:4856555
This uses an MGN12H with 300mm Rail.
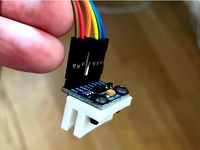
A neat feature for Klipper users is the dedicated ADXL345 accelerometer mount.
This System should be printed in ABS or ABS+ as PETG may not be able to withstand being in such close proximity to the heat-block, even if you are using a silicone sock.
The nuts should all be installed into the X-carriage using a Soldering iron.
Use 3 of the included Linear Rail Holder's to ensure you mount the rail nice and straight.
Please make sure you have a good range of Bolts & Nuts as you'll need the following:
Nuts:
x2 M2
x6 M3
x6 M3 T-nuts
Bolts:
Linear Rail:
x6 M3 x8mm
Linear Rail X-Carraiage:
1x M3 x8mm (for under the extruder heat sink)
3x M3 x6mm
Hot-End heat-sink:
2x M3 x22mm
4x 0.5mm thick M3 Washers/spacers
Orbiter and Fan Mount:
2x M3 x10mm
ADXL345:
2x M3 x10mm
X-Endstop:
2x M2 x12mm
NOTE: You will need to compensate for the loss of 10mm in the Y-axis - this is dead easy in Klipper but I've no idea how Marlin manages this sort of thing.
https://www.thingiverse.com/thing:4856555
This uses an MGN12H with 300mm Rail.
A neat feature for Klipper users is the dedicated ADXL345 accelerometer mount.
This System should be printed in ABS or ABS+ as PETG may not be able to withstand being in such close proximity to the heat-block, even if you are using a silicone sock.
The nuts should all be installed into the X-carriage using a Soldering iron.
Use 3 of the included Linear Rail Holder's to ensure you mount the rail nice and straight.
Please make sure you have a good range of Bolts & Nuts as you'll need the following:
Nuts:
x2 M2
x6 M3
x6 M3 T-nuts
Bolts:
Linear Rail:
x6 M3 x8mm
Linear Rail X-Carraiage:
1x M3 x8mm (for under the extruder heat sink)
3x M3 x6mm
Hot-End heat-sink:
2x M3 x22mm
4x 0.5mm thick M3 Washers/spacers
Orbiter and Fan Mount:
2x M3 x10mm
ADXL345:
2x M3 x10mm
X-Endstop:
2x M2 x12mm
NOTE: You will need to compensate for the loss of 10mm in the Y-axis - this is dead easy in Klipper but I've no idea how Marlin manages this sort of thing.
Similar models
thingiverse
free
CR-10 Z-Axis linear rail mount adapter by Cosmicos
...ed one mgn12h linear rail, block and some screews (m3).
linear rail mounts for the left pillar and the x-axis are comming soon...
thingiverse
free

Linear Rail Block Mount for Blokhead Duct by kgarreau
...hould work with any carriage block on a linear rail x-axis setup. everything is secured using m3 bolts with recesses for m3 nuts.
thingiverse
free
ADXL345 bracket for Ender gantry by MathiasM74
... material thickness). using the screw hole to secure it to the gantry is optional (and will likely leave a mark).
takes m3 bolts.
thingiverse
free

CR6-SE X axis Linear Rail Mount by ScottSword
... a step in bracket to help you align it.
if you have replaced you x axis with full t-slot use 10mm version m4 x 10 and m4 t-nuts.
thingiverse
free

CR-10 Z-axis mount for MGN12H linear rails by 3DBG
...er.
you will need to print two, please mirror the second one.
each mount requires 2 x m5 bolts of 40 mm and 4 x m3 bolts of 30 mm
thingiverse
free

ADXL345 holder for Two Trees Sapphire Pro Plus by REMYBALIGANT
...ingiverse
hi,
this is a holder for adxl345. for use with klipper resonance measurement.
it fit under linear rail carriage screw.
thingiverse
free

Tevo Tarantula Pro Linear Rail Upgrade
...ews (the black bed attachment cap screws should work)
(4) - m5 nuts (the lock nuts in the kit that came with the ttp should work)
thingiverse
free

ADXL345 Mount by Itachai
...://www.thingiverse.com/thing:4548121
adxl345 mount (for klipper)
screws: see picture, rm3*8 to mount adxl345 on the adxl345 mount
thingiverse
free

Creativity ELF Orbiter mount by JMol82
...for orbiter installation
3x m3x8 for cr mount installation
(4x m3x8 for v1.5 mount installation)
2x m3x5 for adxl345 installation
thingiverse
free

Ender 5x (Ender5 linear rail upgrade) by Uncletony
...r these heavy 15mm rails for the ender 5x to match the rest of the overbuilt machine.
2x mgn15c x 400mm
12x t nuts
12x m3 screws
Djos
3dbaza
$4

Djo armchair (318388)
...o armchair 3d model<br>djo armchair charles zana<br>l 81 x w 80 x h 73 cm<br>seating height: h 42 cm<br>
3dbaza
$4

DJO armchair (125932)
...le created in 3ds max 2013 i 2011<br>polygons: 10368<br>vertices: 10348<br>measure: x=810mm i y=800mm i z=730mm
3dbaza
$4

Djo CHARLES ZANA Armchair (130857)
...zana armchair (130857)
3dbaza
djo charles zana armchair 3d model<br>dimensions: l 81 x w 80 x h 73 cm seat height: h 42 cm
thingiverse
free

Cap for DJI OSMO POCKET WATERCASE
...cap for dji osmo pocket watercase
thingiverse
cap for cover the glas/plastic surface of the watercase for djo osmo poket
thingiverse
free

Action Camera Cage!
... want a behind the scene look at what we are working on be sure to follow us on instagram (https://www.instagram.com/diy3dtech/)!
cg_trader
$20

Djo armchair
...djo armchair
cg trader
design djo armchair 3d furniture design modern, available in max, obj, fbx, ready for 3d animation and ot
3dwarehouse
free

djo
...djo
3dwarehouse
djo
3dwarehouse
free

Djo
...djo
3dwarehouse
hey
3dwarehouse
free

garage djo
...garage djo
3dwarehouse
g
3dwarehouse
free

djo nenesse
...djo nenesse
3dwarehouse
maison moutiers les mauxfaits
1475
3d_export
$50

3D Home 1475 3D Model
...chair furniture texture table lamp apartment rug carpet restaurant hotel sitting
3d home 1475 3d model richard3015 45791 3dexport
3d_export
$65

Beer Bottle Vray 3D Model
...poly vray max beer bottle vray 3d model plutonius 1475 ...
3d_export
$15

castle manzanares el real
...fortress, but also as a permanent residence, starting in 1475 however, after the death of the last member of...
3d_export
$16

michelangelo bust
...bust 3dexport michelangelo di lodovico buonarroti simoni 6 march 1475 – 18 february 1564, known as michelangelo, was an...
3dbaza
$2

1475 Elk Lighting chandelier (342698)
...lt;br>xform: no<br>box trick: no<br>model parts: 7<br>render: v-ray<br>formats: 3ds max 2014, obj, fbx
thingiverse
free

usb to boafeng audio by patriciogonzalezvivo
...boafeng audio by patriciogonzalezvivo thingiverse components: usb audio adapter: https://www.adafruit.com/products/1475 boafeng...
thingiverse
free

St. Margaret by bettygoesboop
...st. margaret by bettygoesboop thingiverse saint margaret ca. 1475 this was scanned using 123d catch at the metropolitan...
thingiverse
free

Saint Michael by donnagalea
...with traces of paint and gilding french, touraine, ca. 1475 ...
thingiverse
free

Virgin and Child by ArtInstituteChicago
...child by artinstitutechicago thingiverse central italian virgin and child, 14751500 pigmented terracotta please check the art institute of chicago...
thingiverse
free

David with Goliaths head by GeoffreyMarchal
...by laurent and julien de medicis in the years 1472-1475 preserved in florence (italy) at the national museum bargello....
Anycubic
thingiverse
free

anycubic filament holder
...anycubic filament holder
thingiverse
anycubic filament holder
thingiverse
free

Cableholder Anycubic Mega
...cableholder anycubic mega
thingiverse
cableholder anycubic mega
thingiverse
free

AnyCubic Toolholder by WildManPrinting
...anycubic toolholder by wildmanprinting
thingiverse
anycubic i3 mega toolholder that clips on the side of the spool a-frame.
thingiverse
free

AnyCubic Funnel by phana007
...anycubic funnel by phana007
thingiverse
funnel for anycubic resin and also a reducer for a normal soda bottle.
thingiverse
free

Anycubic Kossel PID calibration
...ir mount:
kossel raspberry camera ir mount
extruder pid calibration.
simple extruder temperature calibration of your 3d printer.
thingiverse
free

anycubic mega i3
...anycubic mega i3
thingiverse
anycubic i3 mega/mega s led 30mm 10-14v 6500k
thingiverse
free

Handle for anycubic by cruiser7
...handle for anycubic by cruiser7
thingiverse
its easier to handle the cover of the anycubic mono x and wash&care
thingiverse
free

anycubic predator Printbed by Lihyon
...anycubic predator printbed by lihyon
thingiverse
anycubic predator printbed
thingiverse
free

Anycubic Predator Triggers by marcelcountry
...anycubic predator triggers by marcelcountry
thingiverse
anycubic predator triggers
thingiverse
free

support anycubic cable by sarpdental
...support anycubic cable by sarpdental
thingiverse
support anycubic cable
Mega
3ddd
$1

BoConcept / Mega
...boconcept / mega
3ddd
boconcept
boconcept mega
3ddd
free

Angelo - Mega shoin
... mega shoin , shoin
angelo - mega shoin - 3dmax 2008
3ddd
$1
Комод MEGA
...вана по фото с учетом реальных размеров.
стек не сколапсен, есть возможность регулировки уровня сглаживания.
текстуры в архиве.
3ddd
$1
Hulsta / Mega-design
...hulsta / mega-design
3ddd
hulsta
hulsta mega-design
design_connected
$18
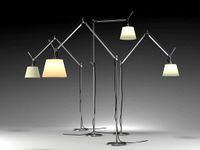
Tolomeo Mega
...
photo-realistic 3d models of the tolomeo mega floor lamps from artemide for 3d architectural and interior design presentations.
turbosquid
$119

Mega Soldier
... free 3d model mega soldier for download as obj, c4d, and fbx on turbosquid: 3d models for games, architecture, videos. (1148568)
turbosquid
$100
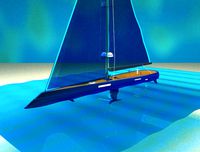
Mega Yacht
... free 3d model mega yacht for download as obj, fbx, and blend on turbosquid: 3d models for games, architecture, videos. (1368903)
3ddd
$1

Massproductions Mega
... massproductions , mega
ширина: 180 см
глубина: 90 см
высота: 79 см
3d_export
$4

mega metro station
...mega metro station
3dexport
mega metro station. ready to game. thanks all downloaders!!
3ddd
$1
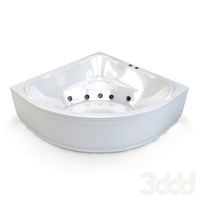
BAS Mega
...bas mega
3ddd
bas , ванна
ванна
Zero
3ddd
$1

ZERO, BEAM
...zero, beam
3ddd
zero
поворотная люстра zero , beam
design_connected
$9

Zero-in
...zero-in
designconnected
established & sons zero-in tables computer generated 3d model. designed by jay osgerby .
3ddd
free

Sub-Zero
...sub-zero
3ddd
sub-zero , голова
sub-zero corona render!
3ddd
$1
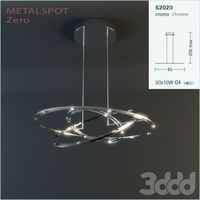
Metalspot / Zero
...metalspot / zero
3ddd
metalspot
metalspot zero
3ddd
$1
Catalano Zero
...catalano zero
3ddd
catalano , унитаз
catalano zero
3ddd
$1

SUB ZERO
... sub zero
the first and only 3d model of sub zero refrigerator.
the model is very accurate.
turbosquid
free

Zero
... available on turbo squid, the world's leading provider of digital 3d models for visualization, films, television, and games.
turbosquid
free

Zero
... available on turbo squid, the world's leading provider of digital 3d models for visualization, films, television, and games.
turbosquid
free

Zero
... available on turbo squid, the world's leading provider of digital 3d models for visualization, films, television, and games.
3ddd
$1

ZERO / Hide
...zero / hide
3ddd
zero
polys: 25486
wire-spline
Upgrade
turbosquid
$15

Upgraded Glock
...e 3d model upgraded glock for download as obj, fbx, and blend on turbosquid: 3d models for games, architecture, videos. (1185950)
3ddd
$1

Calligaris / UPGRADE
...calligaris / upgrade
3ddd
calligaris
c материалом
3d_export
free

cz upgrade
...cz upgrade
3dexport
https://www.buymeacoffee.com/mestrezen3d https://linktr.ee/mestrezen3
turbosquid
$80

Custer Tank upgrade
... available on turbo squid, the world's leading provider of digital 3d models for visualization, films, television, and games.
turbosquid
$39

Domestos 1 upgrade
... available on turbo squid, the world's leading provider of digital 3d models for visualization, films, television, and games.
3d_export
$10

Upgraded tea cup
...upgraded tea cup
3dexport
a cup with an unusual design and a unique shape for a more enjoyable tea experience
3d_export
$8

dixy outlander classic style upgraded poplar wood lounge chair
...utlander classic style upgraded poplar wood lounge chair
3dexport
dixy outlander classic style upgraded poplar wood lounge chair
turbosquid
free

AK-12 + Upgrades low-poly 3D model
...ow-poly 3d model for download as fbx, blend, and unitypackage on turbosquid: 3d models for games, architecture, videos. (1501145)
evermotion
$700

Upgrade from V-ray 1.5 to 3.5 for 3ds max
...here is no need to purchase a new dongle - your current dongles will be reprogrammed to carry v-ray 3. evermotion 3d models shop.
evermotion
$300

Upgrade from V-Ray 2.0 to V-ray 3.5 for 3ds Max
... interface (gui) for editing settings on one machine and one render node for rendering on one machine. evermotion 3d models shop.
Linear
3ddd
$1
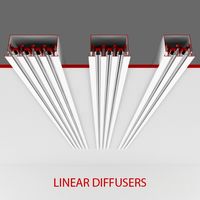
Linear Diffusers
...linear diffusers
3ddd
диффузор
set of linear diffusers for ceiling.
design_connected
$27
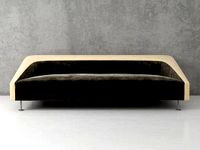
Linear Sofa
...linear sofa
designconnected
scp linear sofa computer generated 3d model.
design_connected
$18

Atlantis linear
...atlantis linear
designconnected
terzani atlantis linear pendant lights computer generated 3d model. designed by barlas baylar.
3d_export
$5
light linear unit
...light linear unit
3dexport
light linear unit
turbosquid
$5

Linear Actuator
...
royalty free 3d model linear actuator for download as blend on turbosquid: 3d models for games, architecture, videos. (1589061)
turbosquid
$29
Linear panel
...oyalty free 3d model linear panel for download as max and obj on turbosquid: 3d models for games, architecture, videos. (1391254)
turbosquid
$12
Linear Chandelier
...y free 3d model linear chandelier for download as max and obj on turbosquid: 3d models for games, architecture, videos. (1574289)
turbosquid
$10

Linear Axis
... available on turbo squid, the world's leading provider of digital 3d models for visualization, films, television, and games.
turbosquid
$10
Grohe Lineare
... available on turbo squid, the world's leading provider of digital 3d models for visualization, films, television, and games.
3d_export
$5

Linear Unit 3D Model
...linear unit 3d model
3dexport
linear unit force torque velocity
linear unit 3d model fau 71218 3dexport
Rail
3d_ocean
$5

rails
...rails
3docean
old rails rails sleepers
old rails
archibase_planet
free
Rail
...chibase planet
rail railing handrail guard-rail
rail forged fence n310814 - 3d model (*.gsm+*.3ds) for exterior 3d visualization.
archibase_planet
free

Rail
...rail
archibase planet
handrail railing guard-rail
rail n220914 - 3d model (*.gsm+*.3ds) for interior 3d visualization.
archibase_planet
free

Rail
...rail
archibase planet
railing hand-rail banisters
rail n130309 - 3d model (*.gsm+*.3ds) for interior 3d visualization.
archibase_planet
free
Rail
...rail
archibase planet
railing hand-rail banisters
rail n270510 - 3d model (*.gsm+*.3ds) for interior 3d visualization.
archibase_planet
free
Railing
...
archibase planet
railing handrail fence guard-rail
railing n140314 - 3d model (*.gsm+*.3ds+*.max) for exterior 3d visualization.
archibase_planet
free

Railing
...railing
archibase planet
railing
railing- 3d model (*.gsm+*.3ds) for interior 3d visualization.
archibase_planet
free
Railing
...railing
archibase planet
railing enclosure barrier
light railing - 3d model for interior 3d visualization.
archibase_planet
free
Rail
...rail
archibase planet
metal railing
rail n280608 - 3d model (*.gsm+*.3ds) for interior 3d visualization.
archibase_planet
free
Railing
...railing
archibase planet
railing kitchen ware
railing 1 - 3d model (*.gsm+*.3ds) for interior 3d visualization.
Axis
3ddd
$1

Мария Axis
...
3ddd
кухня , классическая , axis
модель кухни.
3d_export
$22

Axis robot 6-axis robotic arm
...ing parts drawings, standard parts purchased parts list, can be produced directly according to the drawings, welcome to download!
3ddd
free

Versatile Axis
...ddd
nexus , плитка
http://bvtileandstone.com/ceramic-porcelain/versatile-axis/
3d_export
$19

robot 2 axis
...robot 2 axis
3dexport
robot 2 axis
turbosquid
$40

Axis R5F
... available on turbo squid, the world's leading provider of digital 3d models for visualization, films, television, and games.
turbosquid
$40

Axis S5F
... available on turbo squid, the world's leading provider of digital 3d models for visualization, films, television, and games.
turbosquid
$30

Axis Athlon
... available on turbo squid, the world's leading provider of digital 3d models for visualization, films, television, and games.
turbosquid
$10
Linear Axis
... available on turbo squid, the world's leading provider of digital 3d models for visualization, films, television, and games.
3d_export
$15

drawing axis
...drawing axis
3dexport
simple rendering of the scene file
3ddd
$1

versatile axis ARC
...versatile axis arc
3ddd
versatile , плитка
versatile axis arc red dot design award