Thingiverse
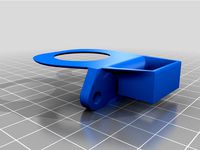
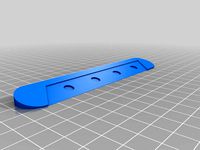
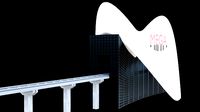
Anycubic i3 Mega partfan monstrosity by BETLOG
by Thingiverse
Last crawled date: 3 years ago
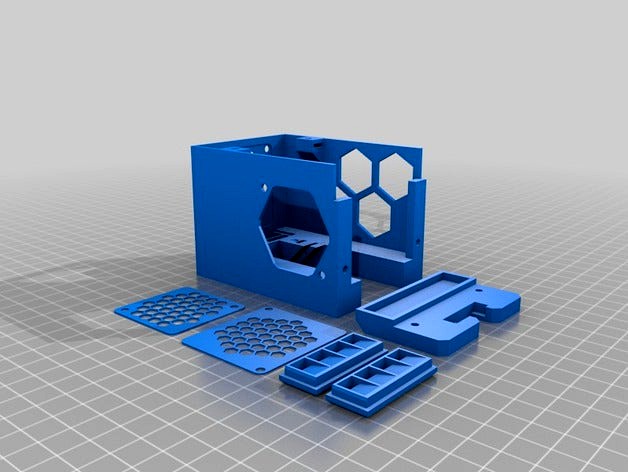
Boxy, but good (enough).
Includes a part that is effectively a remix of: https://www.thingiverse.com/thing:2479809
Borrows dimensions between fixing bolts from: https://www.thingiverse.com/thing:2457516
This is an attempt to get partfan coverage from both/all sides, while retaining the original plate mount to the bearings. After several attempts I gave up in disgust with the quest to design something elegant, and just settled for monstrous and temporary: I am a little bit over trying to modify the mega's existing hotend, so this is simply a temporary means of getting better part cooling while I print components for an entirely different printer.
I may eventually revise this later, but it will likely be in a version that completely replaces the megas hotend compartment right back to the X carriage bearings.
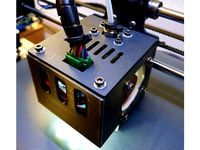
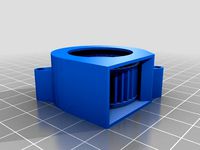
It's not pretty, and despite having a COD LED inside it to illuminate the nozzle it's almost impossible to see underneath the ducts anyway, and the LED reaaaaaly needs a trimpot to turn the light down a little. So consider the COB LED slot completely optional. I also soldered the connections to it so they exit towards the leds light emitting surface, so the slots I allowed for wiring to exit may not be big enough for your standard lazily soldered fat blobs of solder and a wire direction change... maybe, maybe not.
The top bolt on the partfan doesnt fit, due to an oversight, so mine runs with it missing.
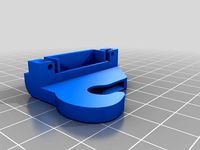
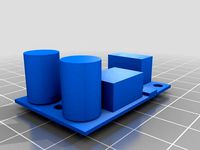
LED COB 26x16mm has a heatsink stuck to it's metal side:
heatsink 14x14x6mm (7x1mmVanes, typically sold in combination with an even smaller one for use on raspberry pi)
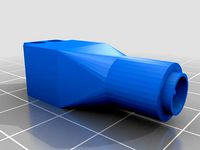
The partfan outlets just click in, helps if you put the short end that's closest to the actual partfan in first, and then force the further edge in last.
No supports, bridging sucks a bit on the partfan outlets, but it doesn't create enough surface roughness to pull the airflow onto the heatsink, so it's ok. You could try separating them from the other parts, flipping them, use supports, and make the airflow surface nice and smooth by printing it as the top face. But I didn't bother.
The partfan is a 5015 blower, some are stronger than others. I picked the strongest I had.
The heatsink fan is still the stock 4010
None of the nuts require a print-pause, but it is designed for square M3 nuts... which you may not have. Gluing in a hex nut would also work. I use glue to lightly tack several of them in just to make assembly easier.
PLA, 0.4mm nozzle, 20% infill ... pretty standard (not really important)
1.2mm walls (IS important; or your bridging will suck and all of the basic design assumptions are for that thickness)
It's annoyingly close to the print, and ugly.. but it is a slight partfan improvement.
dealwithit.jpg
Includes a part that is effectively a remix of: https://www.thingiverse.com/thing:2479809
Borrows dimensions between fixing bolts from: https://www.thingiverse.com/thing:2457516
This is an attempt to get partfan coverage from both/all sides, while retaining the original plate mount to the bearings. After several attempts I gave up in disgust with the quest to design something elegant, and just settled for monstrous and temporary: I am a little bit over trying to modify the mega's existing hotend, so this is simply a temporary means of getting better part cooling while I print components for an entirely different printer.
I may eventually revise this later, but it will likely be in a version that completely replaces the megas hotend compartment right back to the X carriage bearings.
It's not pretty, and despite having a COD LED inside it to illuminate the nozzle it's almost impossible to see underneath the ducts anyway, and the LED reaaaaaly needs a trimpot to turn the light down a little. So consider the COB LED slot completely optional. I also soldered the connections to it so they exit towards the leds light emitting surface, so the slots I allowed for wiring to exit may not be big enough for your standard lazily soldered fat blobs of solder and a wire direction change... maybe, maybe not.
The top bolt on the partfan doesnt fit, due to an oversight, so mine runs with it missing.
LED COB 26x16mm has a heatsink stuck to it's metal side:
heatsink 14x14x6mm (7x1mmVanes, typically sold in combination with an even smaller one for use on raspberry pi)
The partfan outlets just click in, helps if you put the short end that's closest to the actual partfan in first, and then force the further edge in last.
No supports, bridging sucks a bit on the partfan outlets, but it doesn't create enough surface roughness to pull the airflow onto the heatsink, so it's ok. You could try separating them from the other parts, flipping them, use supports, and make the airflow surface nice and smooth by printing it as the top face. But I didn't bother.
The partfan is a 5015 blower, some are stronger than others. I picked the strongest I had.
The heatsink fan is still the stock 4010
None of the nuts require a print-pause, but it is designed for square M3 nuts... which you may not have. Gluing in a hex nut would also work. I use glue to lightly tack several of them in just to make assembly easier.
PLA, 0.4mm nozzle, 20% infill ... pretty standard (not really important)
1.2mm walls (IS important; or your bridging will suck and all of the basic design assumptions are for that thickness)
It's annoyingly close to the print, and ugly.. but it is a slight partfan improvement.
dealwithit.jpg
Similar models
thingiverse
free
CR10S-Fan-Shroud by ESEAone
...ng the airflow. since the top edge was curved around the nozzle with no support i suggest putting temporary support in this area.
thingiverse
free

50 watt COB LED wafer cover
...diation cooling.
the second file has a little more of a pocket for the nuts so that the cover pushes back closer to the heatsink.
thingiverse
free

80mm LED Ring Holder for Anycubic I3 Mega by ThomasMielke
...upport. the 80mm led ring then can be clipped in from above. the screws from the hotend fan can be used to fix at the hotend box.
grabcad
free

Anycubic i3 mega Hotend fan box (also Mega-S, Mega-X, Full Metal, BLTouch & E3DV6 versions)
...ews - no need to buy new parts.
https://www.prusaprinters.org/de/prints/47884-anycubic-i3-mega-hotend-fan-box-also-mega-s-mega-x
thingiverse
free

Hook to hang a 10W LED from a joist by jdh30
...ith 10w leds mounted on them. now our whole garage is lit bright and white. i might use the form 1+ to 3d print some diffusers...
thingiverse
free
Anycubic I3 Mega-S Extruder Filament Input Nozzle by eisenfliege
...wn. best print it with tpu.
it is only for the mega-s extruder - maybe some other anycubic printer models use the same extruder.
thingiverse
free

10w cob mount by johanhoahm
...und led cob with heatsink to my mini talon,
but if just use hot glue, the heat from led will make it loose.
so i make this mount.
3dwarehouse
free

PIN heatsink
...pin heatsink
3dwarehouse
pin heatsink for cob led
thingiverse
free
Anycubic I3 Mega LED Hotend Cover Low Noise by FiddlyFiddler
...losed version without the cutouts included. the freecad files are also available, so you can customize or remix the cover easily.
thingiverse
free

Cr10 Led Light Bar by Phillipnielsen
...ter being on :-)
works in conjunction with other types of hotend fan shrouds, not too good the original. happy printing, cheers !
Partfan
thingiverse
free
GEEETECH A10-M_Luftkanal Partfan by DDDUM
...geeetech a10-m_luftkanal partfan by dddum
thingiverse
partfan kanal mit led
thingiverse
free

Dual 30mm fan mount for Monoprice Select Mini
...i have added two stabilizer beams to support the partfan to minimize vibrations. additionally, the partfan threads have been...
thingiverse
free

Sapphire Pro/Plus DirectDrive by erdna1281
...with an orbiter extruder and a mosquito hotend. as partfan i used original 4010 blowers and the hotendfan is...
thingiverse
free

combo 40mm Fan Shroud by BETLOG
...shroud by betlog thingiverse combo 40mm fan shroud - partfan and heatsink fan i'm using it on this: https://www.thingiverse.com/thing:2864216...
thingiverse
free

Quick Fit Carriage System - BETLOG VERSION by BETLOG
...i recently began using this: https://www.thingiverse.com/thing:3047484 instead of the partfan components included in this (quickfit) thing as they are...
thingiverse
free

CR10S PRO light weight head, no sensor, microswitch by OZ2CPU
...need the cr10-cylinder-sensor-simulator incase you remove the original sensor. cr10-partfan press in 2 x m3 nuts all brackets will...
grabcad
free

Tevo BW Fan Shroud
...cooler 40mm fan. prints best in petg - no partfan pla will be...
3dwarehouse
free

Titan Aero (Clone) for Tronxy X5SA
...only 3 parts to print. i use the original partfan otherwise you found in the skp file a bigger...
Betlog
thingiverse
free
dummy - barrel connector 5.5mm female by BETLOG
...- barrel connector 5.5mm female by betlog
thingiverse
a reference object i needed to make for "does it fit?" purposes.
thingiverse
free
DUMMY DC12V 40mm 4500RPM Brushless Fan Blower by BETLOG
...an blower by betlog
thingiverse
dummy/mockup/reference model of a
dc12v 40mm 4500rpm brushless fan blower
like the images shown.
thingiverse
free
Drill_bits_cylindrical_case-BETLOG-002 by BETLOG
...precise than needing to add 0.45 to 0.48...divided by two (0.225 to 0.24) to everything....0.4 divided by 2 is 0.2... and easier.
thingiverse
free

Z Leadscrew Rod Stabilizer - Flyingbear P902 by BETLOG
...e loud squeaking it makes when moving the z axis large distances.
connects to the 2020 frame by the usual m4 bolts and hammernuts
thingiverse
free
dummy - regulator 9-35V to 5v 5A by BETLOG
...e for "does it fit?" purposes.
2017-07-28 - replaced. previous version holes and width were incorrect enough to matter.
thingiverse
free
tool-capsuleFiller by BETLOG
...is to work reliably.
designed for size #00 caps.
requires 4x 0.8x10x15mm springs https://www.aliexpress.com/item/32963259463.html
thingiverse
free
Raspberry Pi Zero Case - BETLOG version by BETLOG
...precise than needing to add 0.45 to 0.48...divided by two (0.225 to 0.24) to everything....0.4 divided by 2 is 0.2... and easier.
thingiverse
free

calibration - quick - support angle by BETLOG
...el is small to print fast, and simulate almost worst case scenario where heater is always in fairly close proximity to the print.
thingiverse
free
fan guard - 60mm by BETLOG
...lades will almost always be the last time.
as always; assumes a 0.4mm nozzle. layer height is fairly irrelevant, but i used 0.3mm
thingiverse
free
BladeScraper by BETLOG
...t;hold" the blade so once you get it under the print yo can remove the block and just move the blade around under the print.
Monstrosity
thingiverse
free

Stitched Monstrosity
... monstrosity
thingiverse
a stitched monstrosity.
you can support me on https://www.patreon.com/schlossbauer if you like my work.
thingiverse
free

Monstrosity hand by Dantego
...and or like a decorative object.
she can be print in once print. but you can slice it with a software like netfabb / meshimixer.
thingiverse
free

yodapus AKA a monstrosity
...yodapus aka a monstrosity
thingiverse
i have created a monster... just because i was bored...
thingiverse
free

Five Headed Monstrosity by ASLLEXICON
...https://brave.com/tod573
visit my website: https://starlabs3d.com
my youtube: https://www.youtube.com/c/toddolsen
see video below
thingiverse
free

RPI plus 12V Cooling Monstrosity
...mean-looking cooling tower for the raspberry pi 3b+, primed for overclocking, and ready for raw data, or just running octo-print.
thingiverse
free

Gloomhaven Jaws of the Lion: Rat Monstrosity by VirtuallyJason
...ttps://patreon.com/virtuallyjason. if you appreciate my work and have a few dollars to spare each month, please consider joining!
thingiverse
free
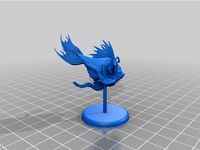
Angler Fish Monstrosity - Tabletop Miniature by M3DM
...ts here! i also offer a learn to 3d model package for aspiring 3d sculptors.
no errors in meshmixer, so it should be good to go!
thingiverse
free

Vase Monstrosity by barty3d
... out the assembly modeling and if i like that i will go ahead and buy. renders are in bryce 3d (green glass) and keyshot (wood).
thingiverse
free

Vase Monstrosity by barty3d
... out the assembly modeling and if i like that i will go ahead and buy. renders are in bryce 3d (green glass) and keyshot (wood).
thingiverse
free

Blood Monstrosity / Gloomhaven / Jaws of the Lion by Sevyd
...bjohnson06https://www.thingiverse.com/thing:3151039
base was made by ezowens found here:https://www.thingiverse.com/thing:2797144
Anycubic
thingiverse
free

anycubic filament holder
...anycubic filament holder
thingiverse
anycubic filament holder
thingiverse
free

Cableholder Anycubic Mega
...cableholder anycubic mega
thingiverse
cableholder anycubic mega
thingiverse
free

AnyCubic Toolholder by WildManPrinting
...anycubic toolholder by wildmanprinting
thingiverse
anycubic i3 mega toolholder that clips on the side of the spool a-frame.
thingiverse
free

AnyCubic Funnel by phana007
...anycubic funnel by phana007
thingiverse
funnel for anycubic resin and also a reducer for a normal soda bottle.
thingiverse
free

Anycubic Kossel PID calibration
...ir mount:
kossel raspberry camera ir mount
extruder pid calibration.
simple extruder temperature calibration of your 3d printer.
thingiverse
free

anycubic mega i3
...anycubic mega i3
thingiverse
anycubic i3 mega/mega s led 30mm 10-14v 6500k
thingiverse
free

Handle for anycubic by cruiser7
...handle for anycubic by cruiser7
thingiverse
its easier to handle the cover of the anycubic mono x and wash&care
thingiverse
free

anycubic predator Printbed by Lihyon
...anycubic predator printbed by lihyon
thingiverse
anycubic predator printbed
thingiverse
free

Anycubic Predator Triggers by marcelcountry
...anycubic predator triggers by marcelcountry
thingiverse
anycubic predator triggers
thingiverse
free

support anycubic cable by sarpdental
...support anycubic cable by sarpdental
thingiverse
support anycubic cable
Mega
3ddd
$1
BoConcept / Mega
...boconcept / mega
3ddd
boconcept
boconcept mega
3ddd
free

Angelo - Mega shoin
... mega shoin , shoin
angelo - mega shoin - 3dmax 2008
3ddd
$1
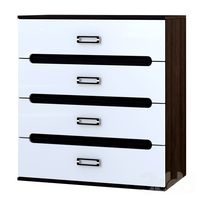
Комод MEGA
...вана по фото с учетом реальных размеров.
стек не сколапсен, есть возможность регулировки уровня сглаживания.
текстуры в архиве.
3ddd
$1
Hulsta / Mega-design
...hulsta / mega-design
3ddd
hulsta
hulsta mega-design
design_connected
$18
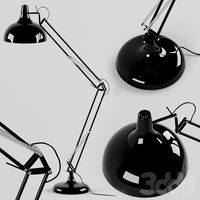
Tolomeo Mega
...
photo-realistic 3d models of the tolomeo mega floor lamps from artemide for 3d architectural and interior design presentations.
turbosquid
$119

Mega Soldier
... free 3d model mega soldier for download as obj, c4d, and fbx on turbosquid: 3d models for games, architecture, videos. (1148568)
turbosquid
$100
Mega Yacht
... free 3d model mega yacht for download as obj, fbx, and blend on turbosquid: 3d models for games, architecture, videos. (1368903)
3ddd
$1
Massproductions Mega
... massproductions , mega
ширина: 180 см
глубина: 90 см
высота: 79 см
3d_export
$4
mega metro station
...mega metro station
3dexport
mega metro station. ready to game. thanks all downloaders!!
3ddd
$1
BAS Mega
...bas mega
3ddd
bas , ванна
ванна
I3
3d_export
$10

suv i3
...suv i3
3dexport
suv i3 2013 series
3d_ocean
$89

BMW i3 2012
...y, in real units of measurement, qualitatively and maximally close to the original. model formats: - *.max (3ds max 2008 scanl...
cg_studio
$99

BMW i3 20143d model
...
cgstudio
.3ds .c4d .fbx .lwo .max .obj - bmw i3 2014 3d model, royalty free license available, instant download after purchase.
cg_studio
$99

BMW i3 20123d model
...tudio
.3ds .c4d .fbx .lwo .max .mb .obj - bmw i3 2012 3d model, royalty free license available, instant download after purchase.
cg_studio
$99

BMW i3 20143d model
...tudio
.3ds .c4d .fbx .lwo .max .mb .obj - bmw i3 2014 3d model, royalty free license available, instant download after purchase.
humster3d
$75

3D model of BMW i3 2014
...
buy a detailed 3d model of bmw i3 2014 in various file formats. all our 3d models were created maximally close to the original.
humster3d
$40

3D model of Kitchen Set I3
...uy a detailed 3d model of kitchen set i3 in various file formats. all our 3d models were created maximally close to the original.
3d_ocean
$30

Kitchen set i3
...ensils oven plates shelves sink table ware
kitchen set i3 include 3d models: cooker, oven, sink, cupboards, table, chair, plates.
3d_ocean
$89

BMW i3 2014
...y, in real units of measurement, qualitatively and maximally close to the original. model formats: - *.max (3ds max 2008 scanl...
cg_studio
$99

BMW i3 Concept 20113d model
...i3
.3ds .c4d .fbx .lwo .max .obj - bmw i3 concept 2011 3d model, royalty free license available, instant download after purchase.