Thingiverse
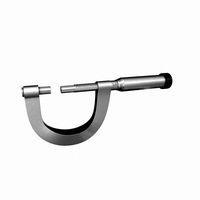
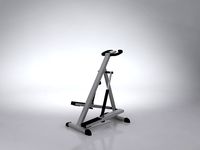
Anycubic 4Max Pro E-steps calibration gauge by Bemko
by Thingiverse
Last crawled date: 2 years, 10 months ago
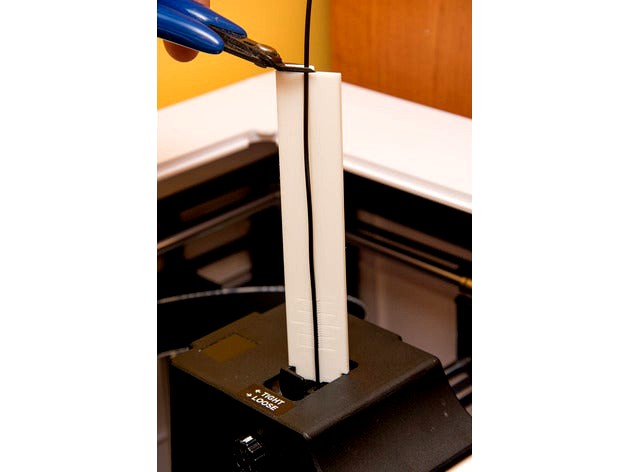
A simple tool for easy and precise E-steps calibration on the Anycubic 4Max Pro.
Calibration procedure:
Heat up the nozzle to the standard temperature for the material used.
Insert filament into the extruder and push some through the nozzle to prime it.
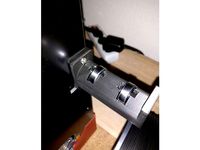
Place the gauge over the extruder hole, stretch the filament and cut it flush with the top surface.
Remove the gauge.
Extrude a 100mm of the filament (use G1 E100 F100 command)
Place the gauge back and check the filament position:
the longest line is exactly at 100mm, the smaller lines are 1mm apart.
Calculate the actual extruded length:
if the end of the filament is for example 3 lines above the center line then the extruded length is 100mm - 3mm = 97mm
if the end of the filament is for example 5 lines below the center then the extruded length is 100mm + 5mm = 105mm
Calculate the new E-steps value and set it in the firmware.
Repeat 1-8 to check if the new value is correct or if it still needs some adjustment.
Calibration procedure:
Heat up the nozzle to the standard temperature for the material used.
Insert filament into the extruder and push some through the nozzle to prime it.
Place the gauge over the extruder hole, stretch the filament and cut it flush with the top surface.
Remove the gauge.
Extrude a 100mm of the filament (use G1 E100 F100 command)
Place the gauge back and check the filament position:
the longest line is exactly at 100mm, the smaller lines are 1mm apart.
Calculate the actual extruded length:
if the end of the filament is for example 3 lines above the center line then the extruded length is 100mm - 3mm = 97mm
if the end of the filament is for example 5 lines below the center then the extruded length is 100mm + 5mm = 105mm
Calculate the new E-steps value and set it in the firmware.
Repeat 1-8 to check if the new value is correct or if it still needs some adjustment.
Similar models
thingiverse
free

Easy Extruder Calibration Tool by KUZTM_3D
...ude distance = x
x / actual extrude distance = new e-steps
printed at .2mm
infill 10%
perimeters 1.2mm
top/bottom thickness 1.2mm
thingiverse
free

estep calibration gauge by pseudo6626
...i snap the gauge on, mark the filament with a permanent marker, and then remove the gauge and then send the calibration commands.
thingiverse
free

Estep multiplier gauge - extruder calibration - 100mm extrude by mcae1
...xtrude 100mm at 200mm/min
repeat to check
m92 exxx.x (with new calculated steps)
m500 - saves to memory
m104 s0 - set hotend to 0
thingiverse
free
Mike's Extruded Filament Calibration by PulseNeko
...heck the exact length. the body of the tester can be marked (or cut notches into it with a razor like i did) to indicate lengths.
thingiverse
free

Extruder calibration tool by wylekyot
...m from end. so i clip it on make a mark and remove it. then run 100mm of filament. it is made for 3mm(2.85mm) filament diameter.
thingiverse
free

Estep multiplier gauge - extruder calibration - 50mm extrude by mcae1
...xtrude 50mm at 200mm/min
repeat to check
m92 exxx.x (with new calculated steps)
m500 - saves to memory
m104 s0 - set hotend to 0
thingiverse
free
4Max Pro Filament Miniature Cleaner
...4max pro filament miniature cleaner
thingiverse
a miniature of the anycubic 4max pro as a filament cleaner
thingiverse
free

Ender 3 E-Steps Calibration Stick by thething78
...giverse
use this to make a 100mm mark and a 120mm mark on your filament when calibrating e-steps on your ender 3 or ender 3 pro.
thingiverse
free
E Step Filament Guide
...ament guide a then extrude 100mm and the mark on the filament should be at the indicator on the guide.
designed in alibre design.
thingiverse
free

E-Step Calibration Tool by srumberg
...machine. just be aware that if you have a small clog and clean it you will suddenly be over extruding.
no special print settings
Bemko
thingiverse
free

TPU fidget cube by Bemko
...bemko
thingiverse
a simple fidget cube that utilizes the properties of tpu to make the hinges work.
https://youtu.be/-yabsmtm16y
thingiverse
free

Drybox bar with mount by Bemko
...ica gel on the bottom of the box to keep the filament dry during printing. it is especially important for tpu, abs/asa and nylon.
thingiverse
free

Poker Dealer Chip by Bemko
...ricky, but the result is outstanding.
check out also the small blind / big blind chips: https://www.thingiverse.com/thing:4878728
thingiverse
free

Anti-slide glasses ear-hooks by Bemko
...a strong grip. they are also very easy and quick to print.
inspired by https://www.thingiverse.com/thing:3537584 by hobbyhoarder.
thingiverse
free

Improved bearing-less Xbox One controller mini wheel by Bemko
...asma (https://www.thingiverse.com/thing:4498704) which is based on the pixel2 design (https://www.thingiverse.com/thing:3049220).
thingiverse
free

Decorative christmas tree bauble hooks by Bemko
...l gap left to prevent the bauble from falling out by accident.
print settings
print with 0.5mm line width to get full perimeters.
thingiverse
free

Honeycomb lamp shade by Bemko
... filaments - should be printed with 0.5mm line width
both should print best at 0.204mm layer height to obtain even spacing in z.
thingiverse
free

Spring honeycomb lamp add-ons by Bemko
...rse.com/thing:3175389
print settings:
print the two parts of the tulip separately in colors you like and them glue them together.
thingiverse
free

Xbox One controller paddles by Bemko
... was designed for the third generation (2016) of xbox one controllers but it will probably fit the earlier xbox one versions too.
thingiverse
free

Nespresso® capsule box holder / dispenser by Bemko
...ings
the models are optimized for printing with 0.5mm line width. layer height should be 0.2mm or less.
no supports are required.
4Max
thingiverse
free
4Max Spoolholder by layos82
...4max spoolholder by layos82
thingiverse
this is a remix of https://www.thingiverse.com/thing:2909802 for the anycubic 4max
thingiverse
free
4MAX - BLTouch Holder
...4max - bltouch holder
thingiverse
-
thingiverse
free

Anycubic 4MAX LCD Cover by HuGhost
...anycubic 4max lcd cover by hughost
thingiverse
anycubic 4max lcd cover
clean and 4max logo better fit
thingiverse
free
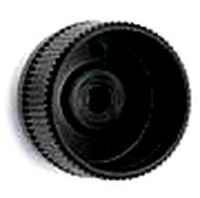
Knob for Anycubic 4MAX by aziodale
...ob for anycubic 4max by aziodale
thingiverse
bigger knob for anycubic 4max, facilitates bed adjustment by requiring less force.
thingiverse
free
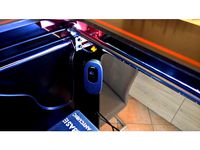
4Max Pro Vibration Damper
...pro vibration damper
thingiverse
a vibration damper made for the anycubic 4max pro. also reduces the jerk noises of the printer.
thingiverse
free
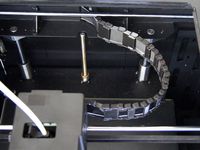
Anycubic 4Max Pro Cable Chain
...anycubic 4max pro cable chain
thingiverse
cable chain for anycubic 4max pro
thingiverse
free
Camera mount C270 on 4Max by Kimmeke
...camera mount c270 on 4max by kimmeke
thingiverse
c270 logitech mount for 4max anycubic
thingiverse
free
4Max Pro Filament Miniature Cleaner
...4max pro filament miniature cleaner
thingiverse
a miniature of the anycubic 4max pro as a filament cleaner
thingiverse
free

4MAX LED Holder by runUNDfun
...d holder by runundfun
thingiverse
4max/fourmax led holder.
inserted two 2mm holes to fixed the led stripe with a small zip tie.
thingiverse
free

Anycubic 4Max update by film4rk
...lm4rk
thingiverse
i made this because some pla spool does not fit in the 4max, there are too big, with this i solve the problem.
Anycubic
thingiverse
free

anycubic filament holder
...anycubic filament holder
thingiverse
anycubic filament holder
thingiverse
free

Cableholder Anycubic Mega
...cableholder anycubic mega
thingiverse
cableholder anycubic mega
thingiverse
free

AnyCubic Toolholder by WildManPrinting
...anycubic toolholder by wildmanprinting
thingiverse
anycubic i3 mega toolholder that clips on the side of the spool a-frame.
thingiverse
free

AnyCubic Funnel by phana007
...anycubic funnel by phana007
thingiverse
funnel for anycubic resin and also a reducer for a normal soda bottle.
thingiverse
free

Anycubic Kossel PID calibration
...ir mount:
kossel raspberry camera ir mount
extruder pid calibration.
simple extruder temperature calibration of your 3d printer.
thingiverse
free

anycubic mega i3
...anycubic mega i3
thingiverse
anycubic i3 mega/mega s led 30mm 10-14v 6500k
thingiverse
free

Handle for anycubic by cruiser7
...handle for anycubic by cruiser7
thingiverse
its easier to handle the cover of the anycubic mono x and wash&care
thingiverse
free

anycubic predator Printbed by Lihyon
...anycubic predator printbed by lihyon
thingiverse
anycubic predator printbed
thingiverse
free

Anycubic Predator Triggers by marcelcountry
...anycubic predator triggers by marcelcountry
thingiverse
anycubic predator triggers
thingiverse
free

support anycubic cable by sarpdental
...support anycubic cable by sarpdental
thingiverse
support anycubic cable
Calibration
turbosquid
$15

DEFIBRILLATOR CALIBRATORS
... available on turbo squid, the world's leading provider of digital 3d models for visualization, films, television, and games.
turbosquid
$3
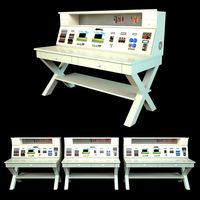
Calibration Test Benches
...libration test benches for download as 3ds, obj, c4d, and fbx on turbosquid: 3d models for games, architecture, videos. (1355804)
turbosquid
$79

Tag Heuer Monaco Calibre 11
...free 3d model tag heuer monaco calibre 11 for download as max on turbosquid: 3d models for games, architecture, videos. (1634427)
turbosquid
$50

Smith & Wesson 50 Calibre Magnum
... available on turbo squid, the world's leading provider of digital 3d models for visualization, films, television, and games.
3d_export
$10
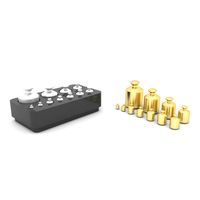
Laboratory Calibration Weight Set 1 3D Model
... 3d model
3dexport
laboratory lab science equipment weight set
laboratory calibration weight set 1 3d model bessoo 88084 3dexport
3d_export
$15
Laboratory Scale and Calibration Weight Set 3D Model
...port
laboratory lab science equipment weight set scale
laboratory scale and calibration weight set 3d model bessoo 88203 3dexport
3d_export
$5
3D printer filament calibration tool 3D Model
...ernier
3d printer filament calibration tool 3d model download .c4d .max .obj .fbx .ma .lwo .3ds .3dm .stl locoman 107942 3dexport
3d_export
$59
tag heuer link calibre 16 watch
...built to real-world scale. units used: centimeters. model is 18 centimeters tall.<br>scene objects are organized by groups.
3d_export
free
laser height reference calibration tool opt lasers
...ind out more about the engraving and cutting laser heads, this item was designed to work with, take a look at the following page:
3d_export
$99
Patek Philippe White Gold Calibre 89
...br>please note: this 3d model like all my other models cannot be used as nft, as is or modified<br>thank you for reading
Gauge
3d_ocean
$10
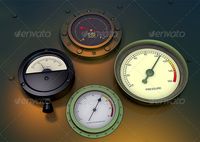
Gauges
...rim to them. each gauge has an xpresso tag to give them an automatic animation without the need for keyframing and can be chan...
3d_export
$5

pressure gauge
...pressure gauge
3dexport
pressure gauge
3d_export
$5
gauge protector
...gauge protector
3dexport
gauge protector
3d_export
$5
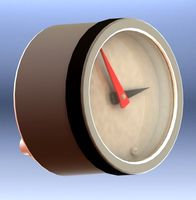
Gauge 3D Model
...gauge 3d model
3dexport
gauge pressure gas air liquid
gauge 3d model fau 71180 3dexport
3d_export
$5

protected pressure gauge
...protected pressure gauge
3dexport
protected pressure gauge
3d_export
$5

hard gauge protector
...hard gauge protector
3dexport
hard gauge protector
turbosquid
$29
Screw Gauge
... available on turbo squid, the world's leading provider of digital 3d models for visualization, films, television, and games.
turbosquid
$29
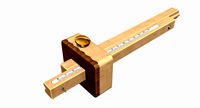
Marking Gauge
... available on turbo squid, the world's leading provider of digital 3d models for visualization, films, television, and games.
turbosquid
$20

Blade Gauge
... available on turbo squid, the world's leading provider of digital 3d models for visualization, films, television, and games.
3d_export
$5
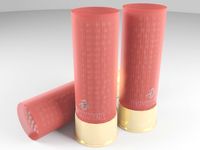
12 Gauge 3D Model
...12 gauge 3d model
3dexport
shotgun shell gauge 12
12 gauge 3d model pirog 54511 3dexport
Steps
3ddd
free
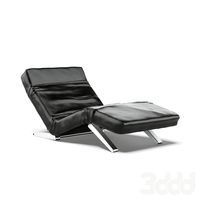
Pro Seda Step by Step
... by step
3ddd
step , proseda , кушетка
pro seda
design_connected
$9

Step
...step
designconnected
porada step coffee tables computer generated 3d model. designed by tarciso colzani.
turbosquid
$49

Steps
... available on turbo squid, the world's leading provider of digital 3d models for visualization, films, television, and games.
turbosquid
$30
step
... available on turbo squid, the world's leading provider of digital 3d models for visualization, films, television, and games.
turbosquid
$11

Step
... available on turbo squid, the world's leading provider of digital 3d models for visualization, films, television, and games.
3d_export
$20
Folding steps step stool 3D Model
...tool stepstool steps ladder tool tools garage workshop shed basement
folding steps step stool 3d model pixelblock 43270 3dexport
3d_export
$5

Glass steps
...glass steps
3dexport
well, just glass steps
3ddd
$1

Lago Steps
...lago steps
3ddd
lago
lago steps chair.
3d_export
$10
steps with cocrete
...steps with cocrete
3dexport
design steps for the architecture engineering purpose
archibase_planet
free
Rack step
...rack step
archibase planet
rack step rack gym
rack step - 3d model (*.gsm+*.3ds) for exterior 3d visualization.
Pro
turbosquid
$29

Pro
...ree 3d model mac pro for download as obj, c4d, fbx, and blend on turbosquid: 3d models for games, architecture, videos. (1505782)
turbosquid
$15

Apple Mac Pro and Pro Display
...ee 3d model apple mac pro and pro display for download as max on turbosquid: 3d models for games, architecture, videos. (1417078)
3d_export
$5

iphone 13 pro max and pro
...3 pro max and 13 pro the model is made in four colors (graphite, gold, silver, and blue), all of which are attached in the files.
3d_export
free

sapphire pro
...sapphire pro
3dexport
sapphire pro 3d printer head mask
3d_export
$4

macbook pro
...macbook pro
3dexport
macbook pro 13" inch 2020 years model
3ddd
free

GentleLase Pro
... syneron , candela
gentlelase pro аппарат для лазерной эпиляции
turbosquid
$25

PRO frame
...rbosquid
royalty free 3d model pro frame for download as max on turbosquid: 3d models for games, architecture, videos. (1148329)
turbosquid
$5

Alien pro
...osquid
royalty free 3d model alien pro for download as blend on turbosquid: 3d models for games, architecture, videos. (1678446)
turbosquid
$5

iphone11 pro
...uid
royalty free 3d model iphone11 pro for download as blend on turbosquid: 3d models for games, architecture, videos. (1562707)
3ddd
$1

Mac Pro (appel)
...mac pro (appel)
3ddd
компьютер , apple
mac pro
E
3ddd
$1
WALL-E
...wall-e
3ddd
wall-e , робот
wall-e
3d_export
$100

e-rickshaw
...e-rickshaw
3dexport
e-rickshaw- it have 3d model of passenger e-rickshaw
3d_ocean
$12
Wall E
...wall e
3docean
character robot wall e
its a 3d model of wall e….
turbosquid
$68
Model-E Droids 2-E Q-E Star Wars
... available on turbo squid, the world's leading provider of digital 3d models for visualization, films, television, and games.
cg_studio
$45

Model-E Droids 2-E Q-E Star Wars3d model
....3ds .c4d .obj .vue - model-e droids 2-e q-e star wars 3d model, royalty free license available, instant download after purchase.
3d_export
$100
e-rickshaw
...e-rickshaw
3dexport
e-rickshaw design for passenger it have all mechanical component
design_connected
$7
Cone E
...cone e
designconnected
bonaldo cone e computer generated 3d model. designed by pasini, ennio.
3ddd
$1

Wall-E NEW
...wall-e new
3ddd
wall-e , робот
wall-e
design_connected
$29

Extrasoft E
...extrasoft e
designconnected
living divani extrasoft e computer generated 3d model. designed by lissoni, piero.
3ddd
$1

E-Turn
... скамейка
современная скамейка фирмы kundalini.
модель e-turn.
дизайнер brodie neil.
размеры: h 42 cm l 185 cm w 54 cm