Thingiverse
Antweight Combat Spinner Bot - Shrapnel Mk1 by Fryddog
by Thingiverse
Last crawled date: 3 years ago
V11 Update:
Found two issues with Shrapnel. First, I would never be able to go to full speed with the weapon and would always vibrate wildly when at greater than half throttle. Second, due to the strength of the weapon motor and because the motor is only mounted to the top half of the chassis, the motor ripped clean out off the chassis on more than one occasion.
This version fixes these issues:
Shortened the chassis by 5mm.
Made the motor mounting area a little larger.
Allowed for an M2 screw and nylock nut to be held in the front bottom section hole. This screw is trimmed to sit inside the center hole of the weapon bar. I also trimmed the shaft of the motor to make room for this screw.
With these changes, Shrapnel can now spin the weapon to full speed and the motor hasn't ripped out yet!
Also uploaded a shorter weapon lock and a stand for Shrapnel.
V10 Update:
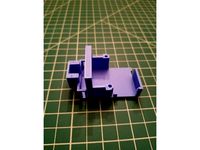
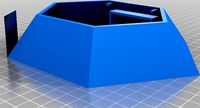
Gave Shrapnel a wedge on the back, increased the underneath clearance by 0.5mm and changed the side columns so that they are hollow. Each of these hollow columns hold two nylon spacers that get secured by two M3 nylon screws each.
These changes were added after a few fights using the V8.0 Shrapnel. The layers split at the columns and he got stuck around the arena sometimes. If you're interested in printing or messing around with V8.0, I've now added it to this thing.
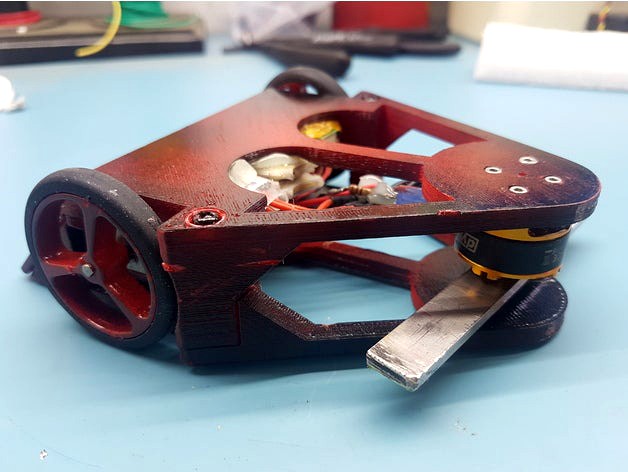
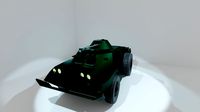
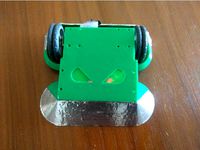
This is my 3D printed design of a bot used in our 150 gram Antweight combat league. I've named him Shrapnel.
He is a horizontal spinning weapon bot and weighs in at 148 grams! (not counting the weapon lock)
This bot leaves a lot for you to customize as far as the internal components go but please use this list of components that I used to make Shrapnel as a guide to get you started:
2x 50:1 microgear motors. http://botbitz.com.au/index.php?route=product/product&path=64&product_id=55
2x Pololu 40x7mm wheels. https://www.robotgear.com.au/Product.aspx/Details/3699-Pololu-Wheel-40-7mm-Pair-Black
2x brushed ESC's. http://www.ebay.com.au/itm/131645159656?_trksid=p2057872.m2749.l2649&ssPageName=STRK%3AMEBIDX%3AIT
Orange micro aircraft receiver. I use a Spectrum DX6 aircraft transmitter to control Shrapnel. I used this receiver because it was compatible with Spectrum and gained me a lot of spare weight and free space for this bot. http://www.hobbyking.com/hobbyking/store/__47012__OrangeRx_R415X_DSMX_DSM2_Compatible_4Ch_Micro_2_4Ghz_Receiver.html
260mAh battery (this higher capacity is required to maintain a high discharge current but 180mAh could be used too). http://www.hobbyking.com/hobbyking/store/uh_viewItem.asp?idProduct=37342
Turnigy brushless ESC. http://www.hobbyking.com/hobbyking/store/uh_viewItem.asp?idProduct=30734
2300kV brushless motor. http://www.ebay.com.au/itm/Genuine-DYS-BE1806-2300KV-Brushless-Motor-2-3S-for-Mini-Multicopter-QAV250-/251939269040?hash=item3aa8c029b0&_uhb=1
Power Switch and power on led (robot fighting safety requirements).
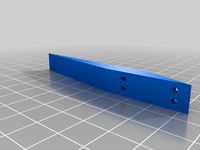
Weapon bar to mount on top of the brushless motor. I went with a stainless steel piece that measured 10mm x 90mm x 3mm. This bar weighed in at approx 23 grams. I made this component last so I could make the largest bar I could with all the weight I had left.
5x M3 screws, socket or phillips head. These will hold the lid onto the bot. Usually the mounting holes don't print through perfectly, so I run a 3mm drill bit through the column section and the rear mounting holes and a 2.5mm drill bit through the bottom section rear mounting hole. Nylon screws like these would be suitable http://www.jaycar.com.au/25mm-x-3mm-nylon-screws-pk-10/p/HP0142
4x M3 nylon spacers. These slot into the columns to provide added strength to the columns and should prevent the layers from splitting. Spacers like these will be suitable.http://www.jaycar.com.au/9mm-x-3mm-tapped-nylon-spacers-pk-25/p/HP0922 http://www.jaycar.com.au/12mm-x-3mm-tapped-nylon-spacers-pk-25/p/HP0924
6x M2x6mm screws, socket head. These will hold the brushless motor to the chassis and the weapon bar to the motor. The chassis holes will need to be drilled out with a 2mm drill bit to clean them up a bit. http://www.ebay.com.au/itm/371010680689?_trksid=p2057872.m2749.l2649&ssPageName=STRK%3AMEBIDX%3AIT
2x M2x10mm screws. Drill the holes out to 1.5mm this time because these screws will thread into the chassis to secure the microgear motor brackets. Alternatively you can use the small self threading screws that usually come with R/C servos which I almost never use and so have heaps spare!
Assembly:
Print out The Version 10 top and bottom sections and two motor mounts. Drill out the holes described above.
Mount the brushless motor up front and the two drive motors on the sides, using the motor clamps to secure the motors.
Solder up your power circuit. Connect the battery positive to one side of the power switch. Connect other side of the power switch to all of the ESC positives and to the anode of the led. Connect the battery negative to all of the ESC negatives and to a 220ohm resistor. The resistor then connects to the cathode of the led.
The ESC's may come with switches of their own. Cut these off and short together these wires on only ONE of the ESC's.
Shorten your ESC leads that go to the receiver and either solder them directly to the receiver or splice in connectors that can plug right in. You can lose a save of weight doing this and it is far easier when fitting everything inside. The plugs you use will depend on the receiver you select. The micro receiver listed above uses Micro Molex 3 Pin connectors. (I prefer using the plugs, I like to make sure everything can be unplugged and swapped out easily).
Plug the ESC leads into your receiver. I connected the brushless ESC to the throttle channel on the receiver. This is important because this bot will vibrate a LOT and likely damage itself if your weapon bar is not balanced well enough. By using the throttle control, I can increase the throttle gradually and find the sweet spot before the bot starts vibrating and still be effective in the fighting ring. You can avoid this issue all together by using a lighter aluminium bar or blade (approx 10 grams). It won't be as effective when fighting but the bot will barely vibrate at all.
Secure the ESC, battery, power switch and any loose wires with some super glue or hot glue.
Manufacture your weapon bar with the material of your choice. Follow the diagram on the brushless motor's eBay page for screw hole placement.
Mount the weapon bar to the brushless motor with the M2 screws.
Attach the top section to the bottom with the M3 screws; two on each side and one on the rear of the bot.
Before you power your bot on, always power the transmitter on first and always have the weapon lock fitted. The weapon lock should be printed or spray painted afterwards in a highly visible color for safety.
Here's a video of a time lapse build of Shrapnel:https://youtu.be/MSqu1FzZkb8
And here's a video of him in action:https://www.youtube.com/watch?v=51fVMvtIf0c
Found two issues with Shrapnel. First, I would never be able to go to full speed with the weapon and would always vibrate wildly when at greater than half throttle. Second, due to the strength of the weapon motor and because the motor is only mounted to the top half of the chassis, the motor ripped clean out off the chassis on more than one occasion.
This version fixes these issues:
Shortened the chassis by 5mm.
Made the motor mounting area a little larger.
Allowed for an M2 screw and nylock nut to be held in the front bottom section hole. This screw is trimmed to sit inside the center hole of the weapon bar. I also trimmed the shaft of the motor to make room for this screw.
With these changes, Shrapnel can now spin the weapon to full speed and the motor hasn't ripped out yet!
Also uploaded a shorter weapon lock and a stand for Shrapnel.
V10 Update:
Gave Shrapnel a wedge on the back, increased the underneath clearance by 0.5mm and changed the side columns so that they are hollow. Each of these hollow columns hold two nylon spacers that get secured by two M3 nylon screws each.
These changes were added after a few fights using the V8.0 Shrapnel. The layers split at the columns and he got stuck around the arena sometimes. If you're interested in printing or messing around with V8.0, I've now added it to this thing.
This is my 3D printed design of a bot used in our 150 gram Antweight combat league. I've named him Shrapnel.
He is a horizontal spinning weapon bot and weighs in at 148 grams! (not counting the weapon lock)
This bot leaves a lot for you to customize as far as the internal components go but please use this list of components that I used to make Shrapnel as a guide to get you started:
2x 50:1 microgear motors. http://botbitz.com.au/index.php?route=product/product&path=64&product_id=55
2x Pololu 40x7mm wheels. https://www.robotgear.com.au/Product.aspx/Details/3699-Pololu-Wheel-40-7mm-Pair-Black
2x brushed ESC's. http://www.ebay.com.au/itm/131645159656?_trksid=p2057872.m2749.l2649&ssPageName=STRK%3AMEBIDX%3AIT
Orange micro aircraft receiver. I use a Spectrum DX6 aircraft transmitter to control Shrapnel. I used this receiver because it was compatible with Spectrum and gained me a lot of spare weight and free space for this bot. http://www.hobbyking.com/hobbyking/store/__47012__OrangeRx_R415X_DSMX_DSM2_Compatible_4Ch_Micro_2_4Ghz_Receiver.html
260mAh battery (this higher capacity is required to maintain a high discharge current but 180mAh could be used too). http://www.hobbyking.com/hobbyking/store/uh_viewItem.asp?idProduct=37342
Turnigy brushless ESC. http://www.hobbyking.com/hobbyking/store/uh_viewItem.asp?idProduct=30734
2300kV brushless motor. http://www.ebay.com.au/itm/Genuine-DYS-BE1806-2300KV-Brushless-Motor-2-3S-for-Mini-Multicopter-QAV250-/251939269040?hash=item3aa8c029b0&_uhb=1
Power Switch and power on led (robot fighting safety requirements).
Weapon bar to mount on top of the brushless motor. I went with a stainless steel piece that measured 10mm x 90mm x 3mm. This bar weighed in at approx 23 grams. I made this component last so I could make the largest bar I could with all the weight I had left.
5x M3 screws, socket or phillips head. These will hold the lid onto the bot. Usually the mounting holes don't print through perfectly, so I run a 3mm drill bit through the column section and the rear mounting holes and a 2.5mm drill bit through the bottom section rear mounting hole. Nylon screws like these would be suitable http://www.jaycar.com.au/25mm-x-3mm-nylon-screws-pk-10/p/HP0142
4x M3 nylon spacers. These slot into the columns to provide added strength to the columns and should prevent the layers from splitting. Spacers like these will be suitable.http://www.jaycar.com.au/9mm-x-3mm-tapped-nylon-spacers-pk-25/p/HP0922 http://www.jaycar.com.au/12mm-x-3mm-tapped-nylon-spacers-pk-25/p/HP0924
6x M2x6mm screws, socket head. These will hold the brushless motor to the chassis and the weapon bar to the motor. The chassis holes will need to be drilled out with a 2mm drill bit to clean them up a bit. http://www.ebay.com.au/itm/371010680689?_trksid=p2057872.m2749.l2649&ssPageName=STRK%3AMEBIDX%3AIT
2x M2x10mm screws. Drill the holes out to 1.5mm this time because these screws will thread into the chassis to secure the microgear motor brackets. Alternatively you can use the small self threading screws that usually come with R/C servos which I almost never use and so have heaps spare!
Assembly:
Print out The Version 10 top and bottom sections and two motor mounts. Drill out the holes described above.
Mount the brushless motor up front and the two drive motors on the sides, using the motor clamps to secure the motors.
Solder up your power circuit. Connect the battery positive to one side of the power switch. Connect other side of the power switch to all of the ESC positives and to the anode of the led. Connect the battery negative to all of the ESC negatives and to a 220ohm resistor. The resistor then connects to the cathode of the led.
The ESC's may come with switches of their own. Cut these off and short together these wires on only ONE of the ESC's.
Shorten your ESC leads that go to the receiver and either solder them directly to the receiver or splice in connectors that can plug right in. You can lose a save of weight doing this and it is far easier when fitting everything inside. The plugs you use will depend on the receiver you select. The micro receiver listed above uses Micro Molex 3 Pin connectors. (I prefer using the plugs, I like to make sure everything can be unplugged and swapped out easily).
Plug the ESC leads into your receiver. I connected the brushless ESC to the throttle channel on the receiver. This is important because this bot will vibrate a LOT and likely damage itself if your weapon bar is not balanced well enough. By using the throttle control, I can increase the throttle gradually and find the sweet spot before the bot starts vibrating and still be effective in the fighting ring. You can avoid this issue all together by using a lighter aluminium bar or blade (approx 10 grams). It won't be as effective when fighting but the bot will barely vibrate at all.
Secure the ESC, battery, power switch and any loose wires with some super glue or hot glue.
Manufacture your weapon bar with the material of your choice. Follow the diagram on the brushless motor's eBay page for screw hole placement.
Mount the weapon bar to the brushless motor with the M2 screws.
Attach the top section to the bottom with the M3 screws; two on each side and one on the rear of the bot.
Before you power your bot on, always power the transmitter on first and always have the weapon lock fitted. The weapon lock should be printed or spray painted afterwards in a highly visible color for safety.
Here's a video of a time lapse build of Shrapnel:https://youtu.be/MSqu1FzZkb8
And here's a video of him in action:https://www.youtube.com/watch?v=51fVMvtIf0c
Similar models
thingiverse
free

D5SGA 'Floating' ESC Mount & Template for Mid Motor by ALPHAQGTI
...ws
use the m3x8 screws to attach the platform to the fan bracket.
use the m3x10 screws to attach the fan bracket to the bulkhead.
thingiverse
free

Brushless Whoop Quadcopter by RalphHilton
...fc and 4 in 1 esc.
i used 4 8mm nylon spacers between the top and bottom sections.
tx01 camera mount. battery housing.
5cm props.
thingiverse
free

BLX185 ESC Mount for Arrma 3s Typhon by resu13
...wer switch can simply be mounted on its default position on top of the receiver box
required parts
4x m3x8 screws
2x m3x10 screws
thingiverse
free

Antweight Combat Spinner Bot - Shrapnel Mk3 by Fryddog
...-pigtail-12cm-length-10pcs-bag.html
.
.
.
.
feel free to ask questions on anything i might have missed in the comments!good luck!
thingiverse
free

Mini-z buggy mb-010 Brushless and electronics conversion by synco
... the chassis for the receiver and drill 2 holes for the battery cables.
this is still in progress, i am open to any suggestions.
thingiverse
free

Brushless motor and ESC mount by Alexk1af
...s motor and esc mount by alexk1af
thingiverse
this is for brushless motors and their esc's. this was designed to make a fan.
thingiverse
free

E-Flight Mini Motor Mount by Shovelhead84
... plate should be large enough to accommodate most 12-20amp escs.
firewall, 3mm
mounting plate, 2mm
sidewalls taper from 2mm - 1mm
thingiverse
free
Mamba-X ESC Holder for Traxxas Slash 4X4 by quadcells
...accommodations for the castle creation mamba-x's power switch. you will need two m3 x 22mm button or cap screws for mounting.
thingiverse
free

Redcat Gen7 Electronics Tray-selfdrill by dhamby
... the way.
mounts using 2x 3mmx10 screws and nuts using factory frame holes just in front/below the rear shock mounting locations.
thingiverse
free

Antweight Combat Wedge - Rollcage by Fryddog
...and insert into chassis.
attach the wheels and you're done!
here's a build video of rollcage:https://youtu.be/yqmmvljw1rw
Fryddog
thingiverse
free

Enterprise D Stand by Fryddog
...giverse
this is a stand i knocked up for the enterprise d print by solid_alexei.
my dad, being the big trekkie his is, loved it!
thingiverse
free
Antweight Combat Wedge - Rollcage by Fryddog
...and insert into chassis.
attach the wheels and you're done!
here's a build video of rollcage:https://youtu.be/yqmmvljw1rw
thingiverse
free
Antweight Combat Spinner Bot - Shrapnel Mk3 by Fryddog
...-pigtail-12cm-length-10pcs-bag.html
.
.
.
.
feel free to ask questions on anything i might have missed in the comments!good luck!
thingiverse
free

Plover (150g combat robot) by aldwin
...local fights. i've modified the n20/micro-metal gearmotor clamps from fryddog#39;s bot rollcage and similar components can be used for...
Shrapnel
turbosquid
$24
Frag gold grenade
...frag gold grenade turbosquid royalty free 3d model shrapnel gold grenade for download as obj, stl, and ige...
3d_export
$12
relay assembly machine
...or above to open it!<br>this equipment is an automatic shrapnel assembly machine in the relay industry, the equipment uses...
3d_export
free
Brdm-2
...its armor protects only from small arms bullets and shrapnel the main feature of the car is a very...
3d_ocean
$15
British Pound Sterling Coins
...heads metal payment pence penny pound queen shield shopping shrapnel silver spending sterling tails uk this file contains uk...
3d_export
$9
helmet zsh-1-2
...to protect the human head from firearms bullets and shrapnel it was adopted by the ru mvd in 2007.<br>the...
thingiverse
free

Insecticon shrapnel by Lam3gamer
...insecticon shrapnel by lam3gamer
thingiverse
thingiverse
free

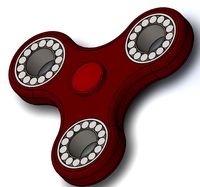
Fidget Spinner - Shrapnel by BlackHawkAC
...dget spinner with a shard of shrapnel in mind. center hole is a standard 22 mm bearing, outer holes are sized to hold 4 quarters.
thingiverse
free

Redragon Shrapnel RGB Keycap replacement by xenomorphdelombre
...y xenomorphdelombre
thingiverse
replica of a redragon rgb cherry mx keycap (low profile) that i did to print on my resin printer
thingiverse
free
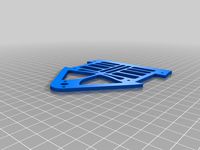
Shrapnel Mk3 Top and Bottom Plate Stl and Svg
...3 top and bottom plate stl and svg
thingiverse
the top and bottom plate in stl format and svg for 3d printing and laser cutting.
Antweight
thingiverse
free

Dropsaw antweight bot body
...dropsaw antweight bot body
thingiverse
chassis for dropsaw antweight battlebot
thingiverse
free
Dropsaw antweight bot tynes
...dropsaw antweight bot tynes
thingiverse
tynes for front of drawsaw antweight battlebot
thingiverse
free

Antweight Robot - 4W Drive by ACE_ROBOTICS
...antweight robot - 4w drive by ace_robotics
thingiverse
150g antweight robot
thingiverse
free

Antweight Robot - MINI Emoji by ACE_ROBOTICS
...antweight robot - mini emoji by ace_robotics
thingiverse
150g antweight robot
thingiverse
free

Antweight Robot - ACE by ACE_ROBOTICS
...antweight robot - ace by ace_robotics
thingiverse
150g antweight robot, based on our hw robot "ace"
thingiverse
free

Kidney Stone antweight by deadpoool
...antweight by deadpoool
thingiverse
this is an antweight battle bot i made for the hell of it. feel free to mod/remix this design
thingiverse
free

Robotwars Antweight inspired by Carbide by alexmordue
...robotwars antweight inspired by carbide by alexmordue
thingiverse
robotwars antweight robot inspired by carbide
thingiverse
free

G1 antweight pusher robot hull
...g1 antweight pusher robot hull
thingiverse
simple antweight combat robot design. created to be driven by two sg90 servo motors.
thingiverse
free
Hex Bug (antweight class battle bot) by TNPI2
...ter of an rc car. the drive motors are small yellow gearboxes which run at 3.3 volts and the battery is a 4.5 volt 650ma battery.
thingiverse
free
Antweight wedge combat robot by Team_Panic
...wedge, or cover it in aluminium tape
use "slightlycrudetopeyes" file to add a section of translucent plastic to the lid
Mk1
turbosquid
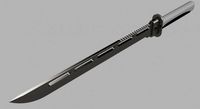
$25
Cutlass MK1
...urbosquid
royalty free 3d model cutlass mk1 for download as on turbosquid: 3d models for games, architecture, videos. (1387253)
turbosquid
free
Lewis mk1
...s mk1
turbosquid
free 3d model lewis mk1 for download as fbx on turbosquid: 3d models for games, architecture, videos. (1614469)
3d_export
$5

Escort MK1
...escort mk1
3dexport
turbosquid
$14
Table Mk1
... available on turbo squid, the world's leading provider of digital 3d models for visualization, films, television, and games.
turbosquid
$10
Stove Mk1
... available on turbo squid, the world's leading provider of digital 3d models for visualization, films, television, and games.
3d_export
$99

Maserati 3500GT mk1
...maserati 3500gt mk1
3dexport
turbosquid
free

VW Golf MK1
...osquid
free 3d model vw golf mk1 for download as c4d and obj on turbosquid: 3d models for games, architecture, videos. (1707225)
turbosquid
$100

Hawker Fury MK1
... available on turbo squid, the world's leading provider of digital 3d models for visualization, films, television, and games.
turbosquid
$100
Hawker Fury MK1
... available on turbo squid, the world's leading provider of digital 3d models for visualization, films, television, and games.
turbosquid
$100

Hawker Fury MK1
... available on turbo squid, the world's leading provider of digital 3d models for visualization, films, television, and games.
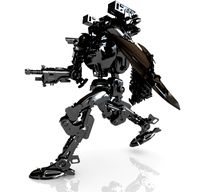
Bot
turbosquid
$19

Bot
... available on turbo squid, the world's leading provider of digital 3d models for visualization, films, television, and games.
turbosquid
free

Bot
... available on turbo squid, the world's leading provider of digital 3d models for visualization, films, television, and games.
3d_export
$10

scanner bot
...scanner bot
3dexport
cool scanner bot who scans for fixing things...
3d_ocean
$9

Apc Bot
...n bot games toys
an all-purpose-constructo-bot. for cartoon purposes. the model is not rigged. please use vray adv for rendering.
3d_export
$75
Bot 3D Model
...bot 3d model
3dexport
robot bot man kiborg character
bot 3d model evgen 19504 3dexport
turbosquid
free

Eye Bot
...eye bot
turbosquid
free 3d model eye bot for download as fbx on turbosquid: 3d models for games, architecture, videos. (1514059)
turbosquid
$29

Gorill-bot
...bosquid
royalty free 3d model gorill-bot for download as fbx on turbosquid: 3d models for games, architecture, videos. (1239456)
turbosquid
$25

Lamp Bot
...bosquid
royalty free 3d model lamp bot for download as blend on turbosquid: 3d models for games, architecture, videos. (1230121)
turbosquid
$10
Spectre Bot
...osquid
royalty free 3d model spectre bot for download as fbx on turbosquid: 3d models for games, architecture, videos. (1616378)
turbosquid
$8

Ultra Bot
...urbosquid
royalty free 3d model ultra bot for download as ma on turbosquid: 3d models for games, architecture, videos. (1330752)
Spinner
turbosquid
$5

Spinner
...turbosquid
royalty free 3d model spinner for download as max on turbosquid: 3d models for games, architecture, videos. (1190412)
turbosquid
$1

Spinner
...turbosquid
royalty free 3d model spinner for download as dwg on turbosquid: 3d models for games, architecture, videos. (1173525)
3d_export
$5
spinner toy
...spinner toy
3dexport
cool spinner toy.
turbosquid
$12

Spinner
...id
royalty free 3d model spinner for download as max and obj on turbosquid: 3d models for games, architecture, videos. (1242592)
turbosquid
$20

Spinner
...lty free 3d model spinner for download as obj, fbx, and blend on turbosquid: 3d models for games, architecture, videos. (1191800)
turbosquid
$15

spinner
...yalty free 3d model spinner for download as max, obj, and fbx on turbosquid: 3d models for games, architecture, videos. (1165932)
turbosquid
$2

Spinner
...oyalty free 3d model spinner for download as ma, obj, and fbx on turbosquid: 3d models for games, architecture, videos. (1187750)
turbosquid
free

Spinner
...lty free 3d model spinner for download as obj, fbx, and blend on turbosquid: 3d models for games, architecture, videos. (1230908)
turbosquid
$29

spinner
... free 3d model spinner for download as 3ds, obj, c4d, and fbx on turbosquid: 3d models for games, architecture, videos. (1471160)
turbosquid
$4
Spinner
...y free 3d model spinner for download as ma, max, obj, and fbx on turbosquid: 3d models for games, architecture, videos. (1201076)
Combat
3d_export
$20
combat robot
...combat robot
3dexport
combat robot
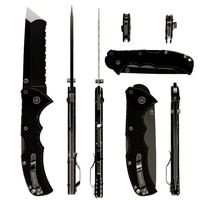
3d_export
$5

Combat knife
...combat knife
3dexport
combat knife
3d_export
$5
combat knife
...combat knife
3dexport
combat knife
3d_export
$7

combat robot
...combat robot
3dexport
combat robot modeling in blender
3d_export
$5
combat knife
...combat knife
3dexport
free fantasy on the theme of a long combat knife. it is technologically thought out.
3d_export
$10

combat knife
...combat knife
3dexport
hyper realistic textured model of a combat knife. made using blender. rendered by cycles.
3d_export
$17
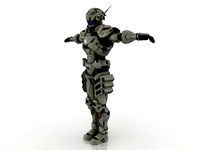
combat spacesuit
...combat spacesuit
3dexport
3d_export
$15

combat helmet
...combat helmet
3dexport
turbosquid
$15
Combat Knife
...rbosquid
royalty free 3d model combat knife for download as on turbosquid: 3d models for games, architecture, videos. (1425813)
turbosquid
$50
Combat Aircraft
...id
royalty free 3d model combat aircraft for download as max on turbosquid: 3d models for games, architecture, videos. (1419710)