Thingiverse
Another Lock Pick Handle by DougInAZ
by Thingiverse
Last crawled date: 3 years ago
Disclaimer: This model may not be the best choice for a beginner.
Update 12/22/17 I added a version with rounded corners. I haven't printed it, so let me know if it works and I'll do the other one. There are a couple layers that bridge the pick opening, but with care you should be able to insert the pick into the cavity.
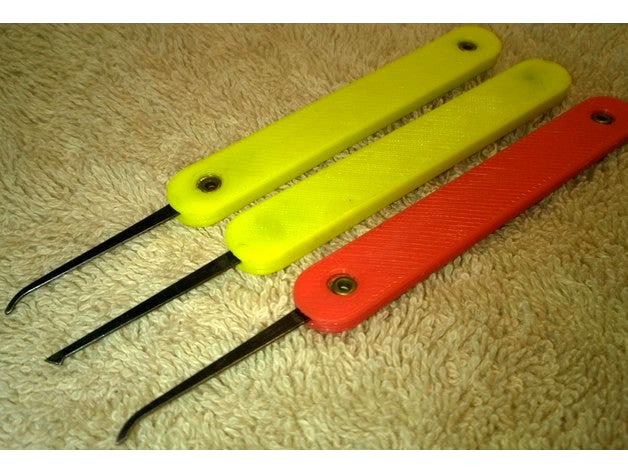
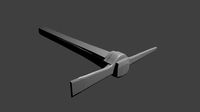
This handle is designed to encapsulate lock picks that have handles and are 8 x 1.8 x 80 mm. These handles are generally furnished with the lock pick kits with the clear plastic practice lock found on Banggood, Aliexpress, and other sites.
The way I use this model is that you stop the print at the layer just before the lock pick cavity top surface is printed and insert the lock pick with handle. When you restart the printer, the top layers are printed and the pick is embedded in the handle. Make sure the side with the holes is against the print bed. Also, it is a good idea to check the interior of the cavity with a file before inserting the handle so you can remove any bits of filament that might prevent the handle from laying flat in the cavity.
There are two designs: one for a pick that exits the center of the handle and one that accommodates a pick up to handle width, so picks that exit either the left or right side of the handle can be used.
You could print the handle in two pieces and then glue them together. Also, you could remove the two handle pieces and use one of the other pick handle designs on Thingiverse and insert only the pick layer into the handle.
IMPORTANT: When inserting the assembled pick into the print, make sure that the side of the handle with the head of the rivets is placed against the print bed so that the rivet heads fit into the holes in the bottom. If the flattened side of the rivets protrude too high, either press them down or file some of it off so it is only a few thousandths high, otherwise the print head may hit it. A slight bump by the print head is generally OK.
I'll list the techniques I use to pause the printer; your printer may or may not work with these.
If your printer firmware supports the the M600 command, you can patch that into the G-Code at the beginning of the layer that prints over the open cavity. This command moves the print head to a park position and waits for you to push a button on the printer to resume.
You can patch the G-Code to manually move the print head and pause the printer. Insert the following as above:
G1 X150 - this moves the print head to X=150 mm
@pause - this command is for Repetier Host and probably only Repetier Host
Update 12/22/17 I added a version with rounded corners. I haven't printed it, so let me know if it works and I'll do the other one. There are a couple layers that bridge the pick opening, but with care you should be able to insert the pick into the cavity.
This handle is designed to encapsulate lock picks that have handles and are 8 x 1.8 x 80 mm. These handles are generally furnished with the lock pick kits with the clear plastic practice lock found on Banggood, Aliexpress, and other sites.
The way I use this model is that you stop the print at the layer just before the lock pick cavity top surface is printed and insert the lock pick with handle. When you restart the printer, the top layers are printed and the pick is embedded in the handle. Make sure the side with the holes is against the print bed. Also, it is a good idea to check the interior of the cavity with a file before inserting the handle so you can remove any bits of filament that might prevent the handle from laying flat in the cavity.
There are two designs: one for a pick that exits the center of the handle and one that accommodates a pick up to handle width, so picks that exit either the left or right side of the handle can be used.
You could print the handle in two pieces and then glue them together. Also, you could remove the two handle pieces and use one of the other pick handle designs on Thingiverse and insert only the pick layer into the handle.
IMPORTANT: When inserting the assembled pick into the print, make sure that the side of the handle with the head of the rivets is placed against the print bed so that the rivet heads fit into the holes in the bottom. If the flattened side of the rivets protrude too high, either press them down or file some of it off so it is only a few thousandths high, otherwise the print head may hit it. A slight bump by the print head is generally OK.
I'll list the techniques I use to pause the printer; your printer may or may not work with these.
If your printer firmware supports the the M600 command, you can patch that into the G-Code at the beginning of the layer that prints over the open cavity. This command moves the print head to a park position and waits for you to push a button on the printer to resume.
You can patch the G-Code to manually move the print head and pause the printer. Insert the following as above:
G1 X150 - this moves the print head to X=150 mm
@pause - this command is for Repetier Host and probably only Repetier Host
Similar models
thingiverse
free

xacto #11 blade sheath and hilt by foofoodog
...to hot plastic in a hot machine. so be careful.
repetier at least does the pause simply with a @pause command on a certain layer.
thingiverse
free

Lock Pick Handle
...l be required. had some minor issues getting the filament to stick to the pick. you may want to coat it with a little glue stick.
thingiverse
free

Hobby / Needle File / Hex Bit Caddy by DougInAZ
...axes and do a trial run; there are plenty of things that can go wrong . let me know in the comments if critical info is missing.
thingiverse
free

Slip on lock pick handle by D_Taylor
...rts. i did have warping issues since the part touching the bed is so skinny. a brim solved that for me, but may not be necessary.
thingiverse
free

Magnetic Tetra-Bricks! by QuantumZ
...es c. printing with pla should not be an issue but you may want to limit the bet temperature to 75 c or less for other materials.
thingiverse
free

"The Sponge" Nozzle Box by luckyx182
...he print when it gets to that layer, switch filament hit resume on printer. for editing i used repetier-host.
happy printing! :)
thingiverse
free

Household iCamera-1000 or similar 1/4-20 POE webcam wall/ceiling by DeltaStar
...amp is designed to not really need hand tools. in fact you only need the same tension if you used a 1/4-20 wingnut and your hand.
thingiverse
free

Ø50mm bushing for 6301z bearing by improprietary
...lidworks part file, in here it is also
possible to change the tolerances of the bearing, diameter of the rod and the
resting lip.
thingiverse
free

Snowblower Adjustment Knob with Metal Nut Inserted During Print by Elproducts
...nd then paused the printer when it got to that point and inserted the nut. then hit resume and the printed sealed the nut inside.
thingiverse
free

Triggered Millennials patch
...the filament color. the model was designed so that each color has 3 layers, so i added the pauses before starting layers 4 and 7.
Douginaz
thingiverse
free
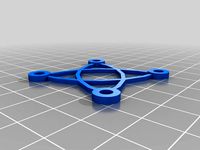
Simple Fan Guard by DougInAZ
...original, but other than that should do about the same job as the original. if you want it thicker, scale it in the z direction.
thingiverse
free

Super Glue Holder by DougInAZ
...se for super glue before i had a 3d printer. now, i find it an essential item to assmeble and patch pla and some other plastics.
thingiverse
free

Soap Tray for Kitchen or bathroom by DougInAZ
...version without drain holes, let me know and i'll add one.
note: the models are sized @ 10x. scale to 0.1 for original size.
thingiverse
free

Nose Clip for anti COVID mask by DougInAZ
...nother version(s) right away.
update 4/17/21 i added a version that fits tighter on my face and is twice as thick in the arms.
thingiverse
free
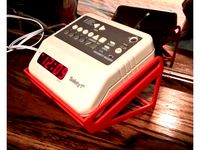
Holder for X10 Clock by DougInAZ
...the rear feet of the stand. it was really not needed for my use, and probably doesn't need to be used for most applications.
thingiverse
free
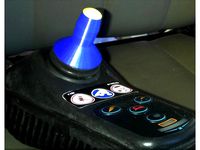
Joy Stick Handle for Power Chair by DougInAZ
...meter, with a 11.5 mm circular stop below.
the part has a thin internal brim built into it that has to be removed prior to use.
thingiverse
free
Base for Enermax EAS02S Bluetooth Speaker by DougInAZ
...ne perimeter for the base, and the infill moved the printed thread where they were adjacent. however, it was surprisingly rigid.
thingiverse
free

Tray for Pills, etc. by DougInAZ
...two colors using a y-switching extruder and patched g-code. there is also a small foot. print four and glue them on the bottom.
thingiverse
free

Tether for Drill Chuck Key by DougInAZ
...asy to heat them with a hair dryer and slip them around the 90 deg bend when they were hot. upon cooling, they are a shrink fit.
thingiverse
free

Steering Wheel Spinner Knob for 29x36 mm Wheel by DougInAZ
...ings like this, the question of legality and the risk imposed by having this attached to the steering wheel is borne by the user.
Pick
turbosquid
$5

Pick
...squid
royalty free 3d model pick for download as max and fbx on turbosquid: 3d models for games, architecture, videos. (1358186)
turbosquid
$8

Pick
... available on turbo squid, the world's leading provider of digital 3d models for visualization, films, television, and games.
turbosquid
$5

Pick
... available on turbo squid, the world's leading provider of digital 3d models for visualization, films, television, and games.
turbosquid
$2
pick
... available on turbo squid, the world's leading provider of digital 3d models for visualization, films, television, and games.
turbosquid
free
Pick
... available on turbo squid, the world's leading provider of digital 3d models for visualization, films, television, and games.
3d_export
free
pick 1
...pick 1
3dexport
3d_export
$5
Pick 3D Model
...pick 3d model
3dexport
pick кирка picker hack pike moil pecker
pick 3d model dambeldortv 96894 3dexport
3d_ocean
$5
Pick-Up
...pick-up
3docean
box human pick-up stay
easy to modify. 2 formats included. (.bip), (.max) frames: 165 – 30 fps
turbosquid
$4

Miner pick
...ty free 3d model miner pick for download as max, obj, and fbx on turbosquid: 3d models for games, architecture, videos. (1218856)
3d_export
$5

pick up car
...pick up car
3dexport
is a pick up car with an artistic cartoon style
Lock
turbosquid
$1

Lock
...ck
turbosquid
royalty free 3d model lock for download as fbx on turbosquid: 3d models for games, architecture, videos. (1286851)
3d_export
$5

lock handle
...lock handle
3dexport
lock handle
3d_export
$5
hinged lock
...hinged lock
3dexport
hinged lock
turbosquid
$1
Lock Box with combination lock
...ee 3d model lock box for download as 3ds, obj, fbx, and blend on turbosquid: 3d models for games, architecture, videos. (1215494)
turbosquid
$2
Lock
...
royalty free 3d model lock for download as max, obj, and fbx on turbosquid: 3d models for games, architecture, videos. (1452660)
turbosquid
$35

Lock
... available on turbo squid, the world's leading provider of digital 3d models for visualization, films, television, and games.
turbosquid
$24

lock
... available on turbo squid, the world's leading provider of digital 3d models for visualization, films, television, and games.
turbosquid
$10

Lock
... available on turbo squid, the world's leading provider of digital 3d models for visualization, films, television, and games.
turbosquid
$6

Lock
... available on turbo squid, the world's leading provider of digital 3d models for visualization, films, television, and games.
turbosquid
$4
Lock
... available on turbo squid, the world's leading provider of digital 3d models for visualization, films, television, and games.
Another
turbosquid
$15
ANOTHER BATHROOM
...quid
royalty free 3d model another bathroom for download as on turbosquid: 3d models for games, architecture, videos. (1171460)
turbosquid
$24

Another World
... available on turbo squid, the world's leading provider of digital 3d models for visualization, films, television, and games.
turbosquid
$39
Another Red Curb
...ee 3d model another red curb for download as ma, obj, and fbx on turbosquid: 3d models for games, architecture, videos. (1182913)
turbosquid
$9
Another Deberenn Sofa
...model another deberenn sofa for download as max, obj, and fbx on turbosquid: 3d models for games, architecture, videos. (1497850)
turbosquid
$2
Another picnic table
... model another picnic table for download as max, obj, and fbx on turbosquid: 3d models for games, architecture, videos. (1426381)
turbosquid
$15

door to another world
...oor to another world for download as 3ds, obj, fbx, and blend on turbosquid: 3d models for games, architecture, videos. (1334842)
3d_export
free

another hacksaw
...another hacksaw
3dexport
. . . 3d model of a hacksaw. 3d model files: - 3ds max 2017 (scanline) - obj (low poly) . . .
turbosquid
$12
Another Country Side Table
... another country side table for download as max, obj, and fbx on turbosquid: 3d models for games, architecture, videos. (1496053)
turbosquid
$29
Furniture - "Another country" modern sofa
...another country" modern sofa for download as obj and c4d on turbosquid: 3d models for games, architecture, videos. (1186189)
3d_ocean
$29

Another Tron Light Cycle with the Rider and Trail
...ther tron light cycle with the rider and the light trail. high quality 3d model,all the materials and lights are included. the...
Handle
archibase_planet
free
Handle
...handle
archibase planet
handle furniture handle
handle 1 - 3d model (*.gsm+*.3ds) for interior 3d visualization.
archibase_planet
free
Handle
...handle
archibase planet
handle furniture handle
handle 5 - 3d model (*.gsm+*.3ds) for interior 3d visualization.
archibase_planet
free
Handle
...handle
archibase planet
handle furniture handle
handle 3 - 3d model (*.gsm+*.3ds) for interior 3d visualization.
archibase_planet
free
Handle
...handle
archibase planet
handle furniture handle
handle 6 - 3d model (*.gsm+*.3ds) for interior 3d visualization.
archibase_planet
free
Handle
...handle
archibase planet
handle furniture handle
handle 4 - 3d model (*.gsm+*.3ds) for interior 3d visualization.
archibase_planet
free
Handle
...handle
archibase planet
handle furniture handle
handle 2 - 3d model (*.gsm+*.3ds) for interior 3d visualization.
archibase_planet
free
Handle
...handle
archibase planet
handle furniture handle knob
handle 2 n140814 - 3d model (*.gsm+*.3ds) for interior 3d visualization.
archibase_planet
free
Handle
...handle
archibase planet
handle door knob door-handle
handle n110413 - 3d model (*.gsm+*.3ds) for interior 3d visualization.
archibase_planet
free
Handle
...handle
archibase planet
door-handle handle door-knob
handle n070209 - 3d model (*.gsm+*.3ds) for interior 3d visualization.
archibase_planet
free
Handle
...handle
archibase planet
door-handle handle door-knob
handle n270309 - 3d model (*.gsm+*.3ds) for interior 3d visualization.