Thingiverse
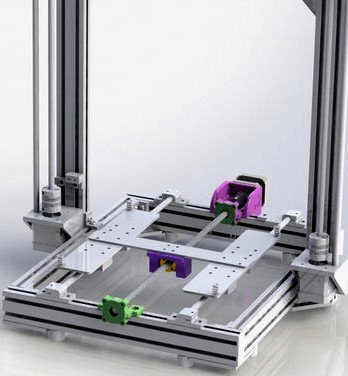
Anet AM8 Y Axis Lead Screw Drive System
by Thingiverse
Last crawled date: 5 years, 3 months ago
This is the Y axis part to go with my X Axis Lead Screw
This is complete and ready to install for the brave!
See it in action!
To make this fit the cross bar under the bed must be mounted on top of the side bars the bearings are mounted on. The nut can float in the mount up down and side to side but there should be no lash in the Y axis.
I recommend my AM8 Full Travel Y Rod Holders for use with this mod. These restore full travel to the Y axis on standard AM8 frames.
This is a tight fit! However the bed can go fully in both directions. You will need your wires on the side not out the back. I have a Narrow Y Axis Chain that helps.
BOM:
400mm Lead Screw with Anti-Backlash Nut
Couplers
608RS Bearings X2
Locking Collars
Installation notes!
Mount the Y axis crossbar on top of the side plates the bearings mount to for a little extra clearance and make sure your wires come out the side not the back. My Y axis narrow chain for AM8 is highly recommended. The stop collar and bushing goes on the front side to the inside of the machine, on the back side you don't need a stopper if you use the linked motor coupler from amazon. If you use a spring coupler use a stop collar on this end too.
I use TMC2208 UART steppers. The Y axis is set to 1/4 steps with 1400MA drive current. The acceleration is set to 10 and the max speed is set to 60. Of course I run Marlin on SKR 1.3 32 bit driver boards.
This is going to take some work to make it go on your machine, but if you don't mind the extra noise you will get a super smooth and accurate machine you wont believe was once an Anet A8!
Thank you!
Update 12/6/19 All files reloaded and ready to go! Released to the wild.