Thingiverse
Anet A8 single motor Z axis drive by osadchy
by Thingiverse
Last crawled date: 3 years ago
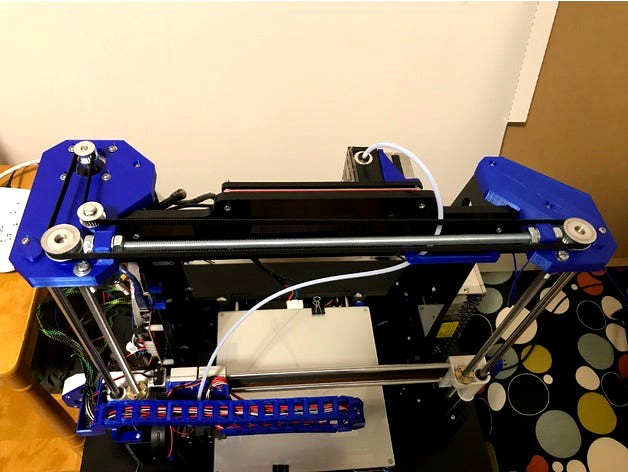
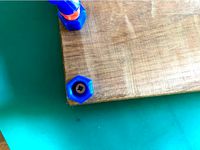
This is a way to sync the Z-axis drive using a single motor.
Printed parts:
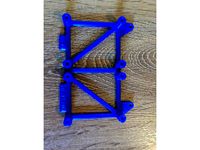
plateL.stl - top left plate, the motor and idler are mounted here
plateR.stl - top right plate, essentially a mirror image of the left plate, but without the motor and pulley.
rod_plug.stl (print 2) - replaces the original guiding rod plugs on top plates
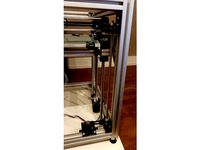
rod_holder.stl (print 2) - holds the guiding rods from below, since the motors aren't there anymore
tube_guard.stl (optional) - keeps my bowden tube from interfering with the timing belt
If you prefer the motor on the right, you can print mirror images of the plateL.stl and plateR.stl.
Hardware needed:
use the original 4 M3 screws and nuts to mount the top plates
976mm 488 teeth GT2 (6mm) closed belt (https://www.aliexpress.com/item/Hot-sales-GT2-timing-belt-976-2GT-6-length-976mm-width-6mm-teeth-488-for-3D/32299312364.html)
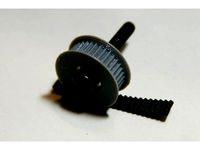
GT2 18 teeth pulley 5mm bore - mounted on the motor (https://www.aliexpress.com/item/3d-printer-2GT-GT2-Timing-Pulley-18-teeth-Alumium-Bore-5mm-for-GT2-Belt-Width-6mm/32835852375.html)
2x flange bearings 8mm bore (https://www.aliexpress.com/item/8mm-Bearing-Zinc-Alloy-Miniature-Bearing-Pedestal-KFL08-Flange-Pillow-Block-Bearing-diy-cnc-parts/32773248332.html)
2x GT2 36teeth timing pulleys with 8mm bore (https://www.aliexpress.com/item/3d-printer-pulley-aluminum-timing-pulley-2GT-36teeth-bore-5mm-6mm-6-35mm-8mm-10mm-pulley/32658350983.html)
1x idler pulley for GT2, 5mm bore - (https://www.aliexpress.com/item/Timing-Gear-Pulley-Without-tooth-Idle-Pulley-synchronous-Round-5mm-For-GT2-Belt-Width-6MM-Power/32761426168.html)
M8 rod, length 349mm - needed to stiffen the frame, because the frame is too flimsy to withstand the timing belt tension
4x M8 nuts and washers to fix the M8 rod
4x M5 25mm screws and nuts and washers - to fix the flange bearings
1x M5 40mm screw and 2x M5 nuts and a washer - to mount the pulley idler
2x M3 20mm screws and nuts for the top rod plugs
4x M3 15mm screws and nuts to mount the bottom rod holders
4x M3 12mm screws and washers for motor mounting
The mounting holes for the flange bearings are a bit oversized so you can keep the leadscrews and the guiding rods parallel. The way I did it:
Mount the flange bearing without tightening the mounting screws
fix the leadscrews in the bearings
bring the X-axis assembly (the one that rides on the leadscrews and rods) all the way up (maximal expected Z height)
ensure that the leadscrews are parallel to the guiding rods (I eyeballed it, by keeping the bottom of the leadscrews above the Z motor axes, which were yet unmounted at this stage).
tighten the flange bearing mounting screws
Don't forget to change the steps/mm parameter for the z axis (from the original 400 to 800)
Hope I included everything here. If you find anything missing, please comment and I'll answer/update.
Printed parts:
plateL.stl - top left plate, the motor and idler are mounted here
plateR.stl - top right plate, essentially a mirror image of the left plate, but without the motor and pulley.
rod_plug.stl (print 2) - replaces the original guiding rod plugs on top plates
rod_holder.stl (print 2) - holds the guiding rods from below, since the motors aren't there anymore
tube_guard.stl (optional) - keeps my bowden tube from interfering with the timing belt
If you prefer the motor on the right, you can print mirror images of the plateL.stl and plateR.stl.
Hardware needed:
use the original 4 M3 screws and nuts to mount the top plates
976mm 488 teeth GT2 (6mm) closed belt (https://www.aliexpress.com/item/Hot-sales-GT2-timing-belt-976-2GT-6-length-976mm-width-6mm-teeth-488-for-3D/32299312364.html)
GT2 18 teeth pulley 5mm bore - mounted on the motor (https://www.aliexpress.com/item/3d-printer-2GT-GT2-Timing-Pulley-18-teeth-Alumium-Bore-5mm-for-GT2-Belt-Width-6mm/32835852375.html)
2x flange bearings 8mm bore (https://www.aliexpress.com/item/8mm-Bearing-Zinc-Alloy-Miniature-Bearing-Pedestal-KFL08-Flange-Pillow-Block-Bearing-diy-cnc-parts/32773248332.html)
2x GT2 36teeth timing pulleys with 8mm bore (https://www.aliexpress.com/item/3d-printer-pulley-aluminum-timing-pulley-2GT-36teeth-bore-5mm-6mm-6-35mm-8mm-10mm-pulley/32658350983.html)
1x idler pulley for GT2, 5mm bore - (https://www.aliexpress.com/item/Timing-Gear-Pulley-Without-tooth-Idle-Pulley-synchronous-Round-5mm-For-GT2-Belt-Width-6MM-Power/32761426168.html)
M8 rod, length 349mm - needed to stiffen the frame, because the frame is too flimsy to withstand the timing belt tension
4x M8 nuts and washers to fix the M8 rod
4x M5 25mm screws and nuts and washers - to fix the flange bearings
1x M5 40mm screw and 2x M5 nuts and a washer - to mount the pulley idler
2x M3 20mm screws and nuts for the top rod plugs
4x M3 15mm screws and nuts to mount the bottom rod holders
4x M3 12mm screws and washers for motor mounting
The mounting holes for the flange bearings are a bit oversized so you can keep the leadscrews and the guiding rods parallel. The way I did it:
Mount the flange bearing without tightening the mounting screws
fix the leadscrews in the bearings
bring the X-axis assembly (the one that rides on the leadscrews and rods) all the way up (maximal expected Z height)
ensure that the leadscrews are parallel to the guiding rods (I eyeballed it, by keeping the bottom of the leadscrews above the Z motor axes, which were yet unmounted at this stage).
tighten the flange bearing mounting screws
Don't forget to change the steps/mm parameter for the z axis (from the original 400 to 800)
Hope I included everything here. If you find anything missing, please comment and I'll answer/update.
Similar models
thingiverse
free

Tevo Tarantula Single Motor Dual Z Axis by olala2
...ng 8mm - not sure about translation to english and haven´t got link because i am using my 2nd 20teeth gt2 timing pulley bore 8mm)
thingiverse
free
K40 (with wheels) Adjustable Bed by psaik
...ps://www.aliexpress.com/item/free-shipping-1pcs-lot-gt2-1140-closed-loop-rubber-2gt-timing-belt-1140-gt2-6-teeth/32791435275.html
thingiverse
free

Openbeam Printer by xsmarty
...e
also i am using a 300mmx300mm silicon adhesive heatpad
i hope you enjoy my designhttps://www.youtube.com/watch?v=auoyjmhpzpw
grabcad
free

2GT-20T BF Pulleys
...elt widths; 5mm, 6mm, and 8mm bore sizes. m4 set screws in the model. the render is of a pulley for a 10mm belt with an 8mm bore.
thingiverse
free

Camera Pan/Tilt Head by suromark
...gs
30mm x 5mm ø steel shaft
55mm x 8mm ø steel shaft
keystone network wiring module
m8 screw 60-100mm
m4 screws
m3 screws
washers
thingiverse
free
Hypercube Evolution - XY Bottom Mount by VirDim
...4x gt2 20t 8*2mm bore timing belt idler pulley
4x 608zz bearings
2x z-motor mount from: https://www.thingiverse.com/thing:2254103
grabcad
free

2GT-40T Pulleys
...lt widths; 6mm, 8mm, and 10mm bore sizes. m4 set screws in the model. the render is of a pulley for a 10mm belt with an 8mm bore.
grabcad
free

2GT-60T Pulleys
...ths; 6mm, 8mm, 10mm, and 12mm bore sizes. m4 set screws in the model. the render is of a pulley for a 10mm belt with an 8mm bore.
grabcad
free

2GT-40T BF Pulleys
...lt widths; 6mm, 8mm, and 10mm bore sizes. m4 set screws in the model. the render is of a pulley for a 10mm belt with an 8mm bore.
thingiverse
free
GT2 32T pulley 625 Bearing by junkhack
...gt2 32t pulley 625 bearing by junkhack
thingiverse
gt2 32 teeth bore 16mm (625zz bearing bore 5mm)
6mm belt
Osadchy
thingiverse
free
Helping hands mount by osadchy
...ping hands mount by osadchy
thingiverse
this is a helping hand mount. attached with a single screw (in my case to a wooden base)
thingiverse
free
Lower dual mosfet mount for Anet A8 by osadchy
...lower dual mosfet mount for anet a8 by osadchy
thingiverse
another dual mosfet mount - below the main board.
thingiverse
free

QX70 prop cutting jig by osadchy
...s for eachine qx70
if the prop doesn't fit into the center hole, the hole should be widened with a 3.5mm drill bit (by hand).
thingiverse
free

Parametric spool holder with hyperbolic cutouts by osadchy
...wkwardly implemented in openscad).
number of cutouts, and few other parameters are customizable (as described in the scad file).
thingiverse
free

TBS Unify Pro 5G8 V2VTX and Antenna mount for Alien 5" frame by osadchy
...the tbs unify pro 5g8 v2 video transmitter and antenna.
total weight 2.4g
not sure yet how the pla mount will handle the vtx heat
thingiverse
free

Anet A8 120mm fan holder for power supply by osadchy
...mm vertical hole spacing, with each row of holes shifted half horizontal spacing (i think this is standard anet a8 power supply)
thingiverse
free

Self locking Y belt holder for Anet A8 by osadchy
...have a different spring). the file includes an over-complicated exact gt2 belt model, as an scad programming exercise for myself.
A8
turbosquid
$47

Car A8
...
turbosquid
royalty free 3d model car a8 for download as max on turbosquid: 3d models for games, architecture, videos. (1196060)
turbosquid
$50

Audi A8
...yalty free 3d model audi a8 for download as 3dm, obj, and fbx on turbosquid: 3d models for games, architecture, videos. (1580187)
turbosquid
$15

Audi A8
...lty free 3d model audi a8 for download as obj, fbx, and blend on turbosquid: 3d models for games, architecture, videos. (1387519)
turbosquid
$500

Audi A8
... available on turbo squid, the world's leading provider of digital 3d models for visualization, films, television, and games.
3d_export
$5

Audi A8 3D Model
...audi a8 3d model
3dexport
audi a8 cars car
audi a8 3d model ma 20351 3dexport
3d_export
$5

Audi A8 3D Model
...audi a8 3d model
3dexport
3d model of audi a8
audi a8 3d model badyaka 12136 3dexport
3d_ocean
$89

Audi A8 2010
...usiness car car class class f f german german luxury luxury s s s8 s8 sedan sedan vehicle vehicle
new audi a8 2010 detaled model.
turbosquid
$39

A8 2018
...a8 2018 for download as 3ds, obj, wrl, c4d, fbx, dae, and stl on turbosquid: 3d models for games, architecture, videos. (1345349)
turbosquid
free

audi a8 l
...rbosquid
royalty free 3d model audi a8 l for download as obj on turbosquid: 3d models for games, architecture, videos. (1663016)
3d_ocean
$45

Audi A8 restyled
...our door vehicle was created in blender3d 2.62.realistic renderings were created with yafaray 0.1.2 realistic plugin.rendering...
Anet
thingiverse
free

Anet by derbodesign
...anet by derbodesign
thingiverse
logo anet
thingiverse
free

Anet e10 , Anet v1.0 by jonathan_943D
...anet e10 , anet v1.0 by jonathan_943d
thingiverse
soporte de ventilador de 80mm, para controladora anet v1.0
thingiverse
free

Anet A8 Anet AM8 Y belt holder
...anet a8 anet am8 y belt holder
thingiverse
anet a8 anet am8 y belt holder
thingiverse
free

Anet A8 Probe Bracket for anet sensor by chelrix
...anet a8 probe bracket for anet sensor by chelrix
thingiverse
anet a8 probe bracket for anet official sensor and marlin firmware
thingiverse
free

Anet logo by JUST3D_PRNTNG
...anet logo by just3d_prntng
thingiverse
anet logo
thingiverse
free

Fan nozzle for Anet A8 with original Anet levelsensor by peteruhlmann
...et levelsensor by peteruhlmann
thingiverse
here is an improved fan nozzle for the anet a8 with original level sensor from anet.
thingiverse
free

Anet Et4 Box
...anet et4 box
thingiverse
tool box for anet et4
thingiverse
free

Anet Logo by Superflex_Plastic_Fantastic
...anet logo by superflex_plastic_fantastic
thingiverse
anet logo to incorporate into designs.
thingiverse
free

Box for Anet ET4
...box for anet et4
thingiverse
this is a simple box for tool of anet et4
thingiverse
free

Anet V1.0 Board Kühlung (80mm Lüfter) / Anet A8 by MadCre8
...anet v1.0 board kühlung (80mm lüfter) / anet a8 by madcre8
thingiverse
anet v1.0 board kühlung (80mm lüfter) / anet a8
Drive
turbosquid
$90

Drive
...turbosquid
royalty free 3d model drive for download as blend on turbosquid: 3d models for games, architecture, videos. (1654393)
3d_export
$10

cycloidal drive
...cycloidal drive
3dexport
cycloidal drive
3d_ocean
$5

Flash Drive
...h drive included : – materials – scene ( lighs / room ) – .c4d + .obj for any questions please feel free to contact me thank you.
3d_ocean
$5

Usb drive
...s shaders and a lighting setup. it also has a small animation of it going in and out. i saved it out as both a .blend file and...
3d_ocean
$5

Pen Drive
...est computer drive game model good low poly new pen pen drive textured unwrapped uv very low poly
a very beautiful low poly model
3d_ocean
$10

External hard drive
... is a detailed model of a trekstor external hard drive. you can easily modify the label on the top. simply edit the text objects.
turbosquid
$60

Star Drive
...squid
royalty free 3d model star drive for download as blend on turbosquid: 3d models for games, architecture, videos. (1254314)
turbosquid
$50

Star Drive
...squid
royalty free 3d model star drive for download as blend on turbosquid: 3d models for games, architecture, videos. (1263524)
turbosquid
$45

Star Drive
...squid
royalty free 3d model star drive for download as blend on turbosquid: 3d models for games, architecture, videos. (1287060)
turbosquid
$40
Star Drive
...squid
royalty free 3d model star drive for download as blend on turbosquid: 3d models for games, architecture, videos. (1261902)
Axis
3ddd
$1

Мария Axis
...
3ddd
кухня , классическая , axis
модель кухни.
3d_export
$22

Axis robot 6-axis robotic arm
...ing parts drawings, standard parts purchased parts list, can be produced directly according to the drawings, welcome to download!
3ddd
free

Versatile Axis
...ddd
nexus , плитка
http://bvtileandstone.com/ceramic-porcelain/versatile-axis/
3d_export
$19

robot 2 axis
...robot 2 axis
3dexport
robot 2 axis
turbosquid
$40

Axis R5F
... available on turbo squid, the world's leading provider of digital 3d models for visualization, films, television, and games.
turbosquid
$40

Axis S5F
... available on turbo squid, the world's leading provider of digital 3d models for visualization, films, television, and games.
turbosquid
$30

Axis Athlon
... available on turbo squid, the world's leading provider of digital 3d models for visualization, films, television, and games.
turbosquid
$10

Linear Axis
... available on turbo squid, the world's leading provider of digital 3d models for visualization, films, television, and games.
3d_export
$15

drawing axis
...drawing axis
3dexport
simple rendering of the scene file
3ddd
$1

versatile axis ARC
...versatile axis arc
3ddd
versatile , плитка
versatile axis arc red dot design award
Z
3d_export
$5

nissan z
...nissan z
3dexport
nissan z
3ddd
$1

Vase Z
...vase z
3ddd
vase z
3ddd
$1

полотенцесушить Z
...полотенцесушить z
3ddd
полотенцесушитель
полотенцесушить z
design_connected
free

Z-Chair
...z-chair
designconnected
free 3d model of z-chair designed by karman, aleksei.
design_connected
$11

Z Lamp
...z lamp
designconnected
phillips z lamp computer generated 3d model. designed by kalff, louis.
3d_export
$5

Dragon balls z
...dragon balls z
3dexport
dragon ball z
turbosquid
$20

Fighter Z
...
turbosquid
royalty free 3d model fighter z for download as on turbosquid: 3d models for games, architecture, videos. (1292563)
turbosquid
$9

Pen Z
...pen z
turbosquid
free 3d model pen z for download as obj on turbosquid: 3d models for games, architecture, videos. (1686775)
turbosquid
free

z chair
...z chair
turbosquid
free 3d model z chair for download as max on turbosquid: 3d models for games, architecture, videos. (1410230)
turbosquid
$5

Letter Z
...urbosquid
royalty free 3d model letter z for download as max on turbosquid: 3d models for games, architecture, videos. (1408540)
Motor
archibase_planet
free

Motor
...base planet
motor motor engine engine electric motor
motor wagner n250213 - 3d model (*.gsm+*.3ds) for interior 3d visualization.
archibase_planet
free

Motor
...motor
archibase planet
motor motor engine engine
motor n151112 - 3d model (*.gsm+*.3ds) for interior 3d visualization.
archibase_planet
free

Motor
...motor
archibase planet
motor motor engine engine
motor n150615 - 3d model (*.gsm+*.3ds+*.max) for interior 3d visualization.
turbosquid
$15

Motor
...otor
turbosquid
royalty free 3d model motor for download as on turbosquid: 3d models for games, architecture, videos. (1639404)
3d_ocean
$5

Electric motor
...electric motor
3docean
car electric engine industry motor phase train vehicle
an electric motor enjoy!
3d_ocean
$18

Electric Motor
...electric motor
3docean
electric motor engine machine mover parts
3d model electric motor for hoist crane
turbosquid
$29

Motor
... available on turbo squid, the world's leading provider of digital 3d models for visualization, films, television, and games.
turbosquid
$5

Motor
... available on turbo squid, the world's leading provider of digital 3d models for visualization, films, television, and games.
3d_export
$5

electric motor
...electric motor
3dexport
electric motor use for industrial purposes
3d_export
$5

servo motor
...tor
3dexport
it's a simple part of servo motor 0.75kw for used in machines assembly to show specified motor in own project.
Single
3d_export
$5

single sofa single chair
...single sofa single chair
3dexport
single sofa single chair 3d model
3d_export
$5

single sofa single chair
...single sofa single chair
3dexport
single sofa single chair 3d model
3d_export
$5

single fastener
...single fastener
3dexport
single fastener
3ddd
$1
Single FLOU
... sofa , трансформер
диван-трансформер single от итальянского производителя flou
3ddd
$1

bed single
...bed single
3ddd
постельное белье
bed single 190cm*90cm
3ddd
$1

Single Flou
...single flou
3ddd
качественная моделька дивана-трансформера single flou.
3d_ocean
$9
Single sofa
...le sofa
3docean
modern sofa single sofa sofa white sofa.comfortable sofa
single sofa,sofa,modern sofa,white sofa.comfortable sofa
3d_export
free

Single Knife
...single knife
3dexport
a single knife, presumably it was used as one of the throwing knives.
3d_export
free

couch - single
...couch - single
3dexport
low poly single couch with .psd file for personal customization
3d_ocean
$5
Single Sofa
...single sofa
3docean
single sofa made by fabric , wood frame & ss leg