Thingiverse
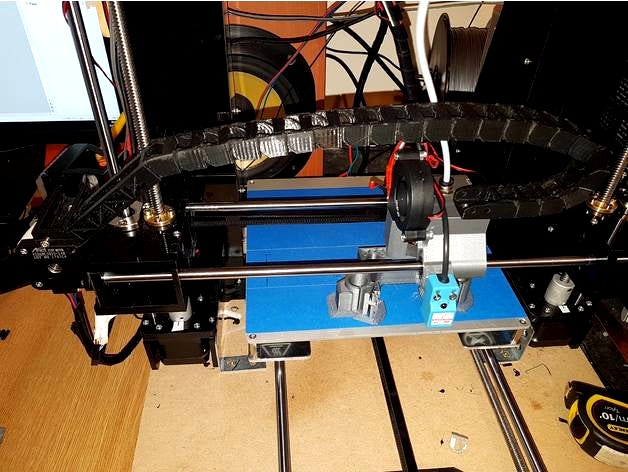
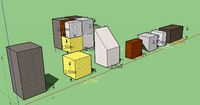
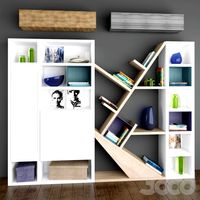
Anet A6 x carriage upgrade - e3d, cube type sensor mount, cable chain + mounts, plus configuration file for skynet by gadget_man
by Thingiverse
Last crawled date: 3 years ago
see the auto-levelling in action, short video of my printer with all my various mods (so far!) - https://youtu.be/Wc_7ZG5BG_k
THIS IS AN ONGOING THING AND I AM STILL TWEAKING IT, just incase thingverse hasn't already shown that its a work in progress.
New to this and this is my 1st attempt at modifying http://www.thingiverse.com/thing:2171816 anet a6 x carriage. I have the cube shape type inductive sensor for auto levelling and need a way of mounting it without gluing something on as an after-thought.
I have added a mount block so the sensor can screw to the front of the carriage as you look at the printer.
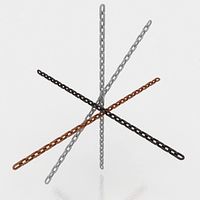
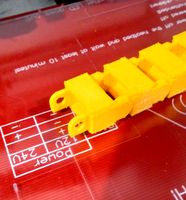
I have also created a flat area with a pair of screw holes on the top front of the carriage so that a cable chain can be anchored. Idea being that the cable chain comes off from the carriage to the right and sweeps up and back along to the left z axis block/assembly.
Tried printing this out last night only to get up this morning to a failed print euth an error message about thermal runaway. Upon closer inspection ive found that the connector on the heated bed has basically fried itself! Hace seen others warn about this but until now i hadnt got around to soldering the wires directly to the bed! ANET A6 USERD BE WARNED....THIS COULD HAVE RESULTED IN A FIRE. SOLDER THE BED WIRES DIRECTLY TO THE BED AND AVOID THE RISK!
Attempting the print again this evening, will update tomorrow.
I shall also try and include a configuration file once I have edited it and calibrated it to suit.
6th may -
I have now printed the carriage successfully and have gone through the procedure of striping down my A6 and modifying it to this e3d carriage etc. I finally have it up and running, but the sensor is a little too close to the bed - with it all the way up on the slots the sensor is sat barely 1mm above the bed, so although it does clear, I'd rather it had a touch more clearance, so will edit the design when I get a chance.
The 2mm screw holes also need to be enlarged to 2.5mm so that 3mm screws can screw straight in, as they are at the moment I have had to use a thread tap to thread the holes for the 3mm screws
as for functionality, yes it works, but I need to edit the screw hole placement for the sensor mount. this I will try and do tonight, along with releasing the updated config file......although I need to get the fine tuning sorted so that I'm happy with it, as at the moment the 1st layer looks like crap and isn't quite right - more config tweaking needed!
I have also realised that I forgot to include the extended fan duct that is needed for this carriage.......the standard length duct is too high and blows onto the side of the heater block.
7th may, 1am - have just finished creating a cable chain mount bracket for the x axis, it mounts onto the x axis stepper motor, going to set it printing now and see how it turns out before I put up the stl file, have uploaded a couple of screen grabs of it for now to give you an idea of how its intended to go together.
7th may:
I have now finished designing the cable chain motor bracket after several variations and edits.
For the x motor cable chain mount you will need to replace the existing m3 x 12mm screws that secure the motor with m3 x 16mm screws.
The bracket mounts so that it is sandwiched between the motor and the acrylic frame, this means that you will also need to move the belt pulley further out on the motor shaft by approximately 3mm so that it lines up with the x axis belt.
For mounting the ladder part to the bracket you will need:
m3 x 6mm (for the interlocking arm on the front of the bracket)
m3 x 8mm (for the upper of the 2 flange holes, this leaves just enough to get a nut on the inside)
m3 x 10mm or 12mm (for the lower flange hole, this screw just tightly threads into the bracket)
All the above screws should be a tight fit in the parts, so you could assemble them without putting nuts on the screws as they should get enough bite on the plastic, but I have put nuts on just to be sure they don't come loose.
I have also edited the carriage so that the cable chain anchor point is now flush with the top of the carriage (it was siting slightly low before) and I have also edited the screw holes for the sensor and moved them up a couple of mm, as well as created some slots for nuts to be inserted, as after a couple of days use, the prototype carriage I printed is now a bit loose on the sensor screws and the print has started to crack between layers very slightly. I have also added a piece on the bottom for a bit of led strip to illuminate the nozzle. have uploaded the latest version of the carriage, cable chain bracket and ladder piece, but my print of the latest carriage version is still ongoing, will update when its done and been fitted.
I have also uploaded my configuration.h file for any that want it, but just remember to calibrate the z offset for your sensor, due to manufacturing, nozzle/hotend, or assembly differences/variations, or just the height you attach the sensor to the carriage it is unlikely that the calibration for the z offset on my printer will also work for yours. if you dont know how to adjust the offset you can either follow: https://www.youtube.com/watch?v=EcGFLwj0pnA
or you can adjust the offset on the printer itself - control>motion>z offset
9TH MAY:
Realised that when i created the cavities/slots for nuts i forgot to enlarge the screw holes to 3mm, which has now been done, and the file updated. Haven't yet had a chance to test the latest version of the carriage as the print went proper tits up the other night....it warped badly, lifting off the bed by quite a bit, but when i noticed it was starting to lift I tried in vain to dab superglue around the print where it met the bed in order to try and stop it lifting further.....which worked. But then i left it overnight to continue printing and when i came back to it in the morning it had delaminated between layers in at least 5 places! Guess I'll scrap that 1 again then! attempting to print again tonight with different roll of abs and at a higher temp, and as an extra measure Ive even given the bed a coat of abs juice as well! fingers crossed!
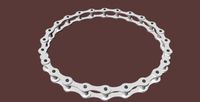
I have also included the cable chain files i used to print the chain as i realised i had forgotten all about including them, but can not remember where i got them in order to reference them
THIS IS AN ONGOING THING AND I AM STILL TWEAKING IT, just incase thingverse hasn't already shown that its a work in progress.
New to this and this is my 1st attempt at modifying http://www.thingiverse.com/thing:2171816 anet a6 x carriage. I have the cube shape type inductive sensor for auto levelling and need a way of mounting it without gluing something on as an after-thought.
I have added a mount block so the sensor can screw to the front of the carriage as you look at the printer.
I have also created a flat area with a pair of screw holes on the top front of the carriage so that a cable chain can be anchored. Idea being that the cable chain comes off from the carriage to the right and sweeps up and back along to the left z axis block/assembly.
Tried printing this out last night only to get up this morning to a failed print euth an error message about thermal runaway. Upon closer inspection ive found that the connector on the heated bed has basically fried itself! Hace seen others warn about this but until now i hadnt got around to soldering the wires directly to the bed! ANET A6 USERD BE WARNED....THIS COULD HAVE RESULTED IN A FIRE. SOLDER THE BED WIRES DIRECTLY TO THE BED AND AVOID THE RISK!
Attempting the print again this evening, will update tomorrow.
I shall also try and include a configuration file once I have edited it and calibrated it to suit.
6th may -
I have now printed the carriage successfully and have gone through the procedure of striping down my A6 and modifying it to this e3d carriage etc. I finally have it up and running, but the sensor is a little too close to the bed - with it all the way up on the slots the sensor is sat barely 1mm above the bed, so although it does clear, I'd rather it had a touch more clearance, so will edit the design when I get a chance.
The 2mm screw holes also need to be enlarged to 2.5mm so that 3mm screws can screw straight in, as they are at the moment I have had to use a thread tap to thread the holes for the 3mm screws
as for functionality, yes it works, but I need to edit the screw hole placement for the sensor mount. this I will try and do tonight, along with releasing the updated config file......although I need to get the fine tuning sorted so that I'm happy with it, as at the moment the 1st layer looks like crap and isn't quite right - more config tweaking needed!
I have also realised that I forgot to include the extended fan duct that is needed for this carriage.......the standard length duct is too high and blows onto the side of the heater block.
7th may, 1am - have just finished creating a cable chain mount bracket for the x axis, it mounts onto the x axis stepper motor, going to set it printing now and see how it turns out before I put up the stl file, have uploaded a couple of screen grabs of it for now to give you an idea of how its intended to go together.
7th may:
I have now finished designing the cable chain motor bracket after several variations and edits.
For the x motor cable chain mount you will need to replace the existing m3 x 12mm screws that secure the motor with m3 x 16mm screws.
The bracket mounts so that it is sandwiched between the motor and the acrylic frame, this means that you will also need to move the belt pulley further out on the motor shaft by approximately 3mm so that it lines up with the x axis belt.
For mounting the ladder part to the bracket you will need:
m3 x 6mm (for the interlocking arm on the front of the bracket)
m3 x 8mm (for the upper of the 2 flange holes, this leaves just enough to get a nut on the inside)
m3 x 10mm or 12mm (for the lower flange hole, this screw just tightly threads into the bracket)
All the above screws should be a tight fit in the parts, so you could assemble them without putting nuts on the screws as they should get enough bite on the plastic, but I have put nuts on just to be sure they don't come loose.
I have also edited the carriage so that the cable chain anchor point is now flush with the top of the carriage (it was siting slightly low before) and I have also edited the screw holes for the sensor and moved them up a couple of mm, as well as created some slots for nuts to be inserted, as after a couple of days use, the prototype carriage I printed is now a bit loose on the sensor screws and the print has started to crack between layers very slightly. I have also added a piece on the bottom for a bit of led strip to illuminate the nozzle. have uploaded the latest version of the carriage, cable chain bracket and ladder piece, but my print of the latest carriage version is still ongoing, will update when its done and been fitted.
I have also uploaded my configuration.h file for any that want it, but just remember to calibrate the z offset for your sensor, due to manufacturing, nozzle/hotend, or assembly differences/variations, or just the height you attach the sensor to the carriage it is unlikely that the calibration for the z offset on my printer will also work for yours. if you dont know how to adjust the offset you can either follow: https://www.youtube.com/watch?v=EcGFLwj0pnA
or you can adjust the offset on the printer itself - control>motion>z offset
9TH MAY:
Realised that when i created the cavities/slots for nuts i forgot to enlarge the screw holes to 3mm, which has now been done, and the file updated. Haven't yet had a chance to test the latest version of the carriage as the print went proper tits up the other night....it warped badly, lifting off the bed by quite a bit, but when i noticed it was starting to lift I tried in vain to dab superglue around the print where it met the bed in order to try and stop it lifting further.....which worked. But then i left it overnight to continue printing and when i came back to it in the morning it had delaminated between layers in at least 5 places! Guess I'll scrap that 1 again then! attempting to print again tonight with different roll of abs and at a higher temp, and as an extra measure Ive even given the bed a coat of abs juice as well! fingers crossed!
I have also included the cable chain files i used to print the chain as i realised i had forgotten all about including them, but can not remember where i got them in order to reference them
Similar models
thingiverse
free

3D Touch Mounting Bracket by GopherRancher
...efine y_probe_offset_from_extruder 0 // y offset: -front +behind [the nozzle]
adjust your z-offset according to your first layer.
thingiverse
free

E3D v6 Bowden Short Bracket
...ws holes is 30mm. also wedge is implementet on upper bracket for future implementation of removable cooling fan for pla printing.
thingiverse
free

Cable Chain Mount for Modular X-Carriage by haynizzle
...want to do away with any washer(s) you may have been using for the carriage, otherwise thread engagement will be less than ideal.
thingiverse
free

Holder for Filament Runout Sensor by AKampmeier
...o nuts! the hole in the middle is for a better cable-management.
you need a t-nut and a matching screw to attach it on the frame.
thingiverse
free

X-Carriage (with sensormount & cablechain) for Wilson 2 by darealmoo
...; (http://www.thingiverse.com/thing:34661)
@x-motor: connecting-piece for the other cable-chain-end (between motor and z-carriage
thingiverse
free

Re-X Carriage Adjustable Mount for Mini Differential IR Height Sensor by rkrammes
...ll fit. the bolt should move freely in the hole at the top of the bracket but should be tight where it screws into the carriage.
thingiverse
free

Anet A6 - Level Sensor / Fan / Limit Switch Bracket by lunix80
...h the other components.
i have rotated the stepper motor 90° left to insert all cables trough the hole at the top of the bracket.
thingiverse
free

Tevo Tarantula Pro BLTouch/3D touch mount with strain relief by thiagogoularte
...gh (the spacer part for the bltouch)
offset
nozzle_to_probe_offset { 0, 20, -1.45 }
[1] https://www.thingiverse.com/thing:3742648
thingiverse
free

K40 Drag Chain by xile6
...rear mount i believe i used 6 or 8mm
for the carriage i used one m3 8mm
for the chain to carriage roller one m3 20mm and 1 m3 nut
thingiverse
free

Cable Chain Mount Bracket for TEVO Tarantula Taralu Y Carriage by ThorUs
...an m4 screw and nut. the second one uses an m3 screw and nut. the latter one has more play so i would recommend using the m4 one.
Skynet
3d_export
$20
Terminator
...terminator 3dexport a robot created by skynet to defeat the resistance. better watch the movie if...
cg_studio
$60

MiniHunter3d model
...minihunter3d model cgstudio space mini terminatorterminator">hunterterminatorterminator skynetquot;>3skynet .mb - minihunter 3d model, royalty free license available,...
3d_export
$150
Terminatrix-T3 3D Model
...terminatrix t3 terminator girl genesis machine marvel model arnold skynet robot woman iron steel terminatrix-t3 3d model download .c4d...
3d_export
$20
terminator t-800 arm
...turbosmooth iterations: 0 1 2 + for any questions...skype: skynet2029 ...
cg_studio
$35

Arnold Schwarzenegger body3d model
...people t800 boy hero machine robot robotic android cyborg skynet male man bodybuilder body celebrities celebrity .max - arnold...
3d_export
$15

Hunter Killer Terminator
...factories. they comprise the majority of the soldiers in skynet#39;s army. many are similar in overall form to the...
3d_export
$20
Terminator T-800 Skull
...turbosmooth iterations: 0 1 2 + for any questions...skype: skynet2029 ...
3d_export
$50

Terminator T-800 Torso Bust
...turbosmooth iterations: 0 1 2 + for any questions...skype: skynet2029 ...
3d_export
$250

Terminator t-800 endoskeleton rekvizit
...turbosmooth iterations: 0 1 2 + for any questions...skype: skynet2029 ...
3d_ocean
$49

3d model Arnold Schwarzenegger body
...hero machine male man muscular people robot robotic schwarzenegger skynet t800 terminator polys 22354 verts 22679 the 3d model...
Gadget
archibase_planet
free
Gadget
...gadget
archibase planet
gadget
gadget - 3d model for interior 3d visualization.
archive3d
free

Gadget 3D Model
...gadget 3d model
archive3d
gadget
gadget - 3d model for interior 3d visualization.
3d_ocean
$10
Flying Helmet Gadget
... on over the forums. my inspiration was inspector gadget. this 3d model has 354,637 polygons and 20.34 kb. format: this file i...
turbosquid
$5

Brass gadgets
...quid
royalty free 3d model brass gadgets for download as prj on turbosquid: 3d models for games, architecture, videos. (1364874)
3d_ocean
$5

Office Desk Gadgets
...model brush desk erazer gadgets office paper pencil ruler sharpener
this is a set of office desk gadgets transformed to cartoons.
3d_ocean
$8
Levitating Skateboard Gadget
...oing on over the forums and is called gadget competition. my inspiration for this gadget was the movie called back to the futu...
evermotion
$8
kitchen gadget 100 AM18
...100 am18
evermotion
kitchen gadget 100 am18 evermotion key kitchen gadgets gadget 100 am18 3d models
. evermotion 3d models shop.
evermotion
$10
home gadget 80 AM19
... 80 am19
evermotion
home gadget 80 am19 evermotion key kitchen home gadgets 80 gadget am19 3d models
. evermotion 3d models shop.
evermotion
$12
kitchen gadget 104 AM18
...hen gadget with all textures, shaders and materials. it is ready to use, just put it into your scene.. evermotion 3d models shop.
evermotion
$12
kitchen gadget 80 AM18
...hen gadget with all textures, shaders and materials. it is ready to use, just put it into your scene.. evermotion 3d models shop.
A6
3ddd
free

audi a6
...audi a6
3ddd
audi a6
audi a6
3ddd
$1
AUDI A6
...audi a6
3ddd
audi
audi a6, — семейство легковых автомобилей бизнес-класса, выпускающихся под маркой audi
3ddd
$1
Slipper Bath A6
...slipper bath a6
3ddd
toto
slipper bath a6
3ddd
$1

Slipper Bath A6
...slipper bath a6
3ddd
toto , ванна
slipper bath a6
3d_export
$40

Audi A6 3D Model
...audi a6 3d model
3dexport
audi a6
audi a6 3d model kaxa3d 8037 3dexport
3d_export
$79

Audi A6 3D Model
...audi a6 3d model
3dexport
audi auto a6
audi a6 3d model growl 3313 3dexport
3d_export
$40

Audi a6 3D Model
...audi a6 3d model
3dexport
car audi a6
audi a6 3d model bararhakopre20 91055 3dexport
turbosquid
$99
Audi A6
... available on turbo squid, the world's leading provider of digital 3d models for visualization, films, television, and games.
turbosquid
$99

Audi A6
... available on turbo squid, the world's leading provider of digital 3d models for visualization, films, television, and games.
turbosquid
$90

Audi A6
... available on turbo squid, the world's leading provider of digital 3d models for visualization, films, television, and games.
E3D
turbosquid
$23

E3D - Google Home
... 3d model e3d - google home for download as max, obj, and c4d on turbosquid: 3d models for games, architecture, videos. (1192509)
cg_studio
free

e3d model
...e3d model
cgstudio
- e 3d model, royalty free license available, instant download after purchase.
turbosquid
$2

Syringe C4D (E3D Ready)
...lty free 3d model syringe c4d (e3d ready) for download as c4d on turbosquid: 3d models for games, architecture, videos. (1336720)
turbosquid
$12

Microphone USB E3D and C4D
...ree 3d model microphone usb e3d & c4d for download as c4d on turbosquid: 3d models for games, architecture, videos. (1568216)
turbosquid
$29

E3D - OnePlus 6 Black
...model e3d - oneplus 6 black for download as max, obj, and c4d on turbosquid: 3d models for games, architecture, videos. (1358534)
turbosquid
$29

E3D - Motorola One 2018
...del e3d - motorola one 2018 for download as max, obj, and c4d on turbosquid: 3d models for games, architecture, videos. (1358533)
turbosquid
$29

E3D - Disney MagicBands 2
...l e3d - disney magicbands 2 for download as max, obj, and c4d on turbosquid: 3d models for games, architecture, videos. (1355515)
turbosquid
$29

E3D - Samsung Z4 Smartphone
...e3d - samsung z4 smartphone for download as max, obj, and c4d on turbosquid: 3d models for games, architecture, videos. (1182179)
turbosquid
$23

E3D - Razer Phone model
...del e3d - razer phone model for download as max, obj, and c4d on turbosquid: 3d models for games, architecture, videos. (1231207)
turbosquid
$23

E3D - Alcatel Idol 5
... model e3d - alcatel idol 5 for download as max, obj, and c4d on turbosquid: 3d models for games, architecture, videos. (1212799)
Anet
thingiverse
free

Anet by derbodesign
...anet by derbodesign
thingiverse
logo anet
thingiverse
free

Anet e10 , Anet v1.0 by jonathan_943D
...anet e10 , anet v1.0 by jonathan_943d
thingiverse
soporte de ventilador de 80mm, para controladora anet v1.0
thingiverse
free

Anet A8 Anet AM8 Y belt holder
...anet a8 anet am8 y belt holder
thingiverse
anet a8 anet am8 y belt holder
thingiverse
free

Anet A8 Probe Bracket for anet sensor by chelrix
...anet a8 probe bracket for anet sensor by chelrix
thingiverse
anet a8 probe bracket for anet official sensor and marlin firmware
thingiverse
free

Anet logo by JUST3D_PRNTNG
...anet logo by just3d_prntng
thingiverse
anet logo
thingiverse
free

Fan nozzle for Anet A8 with original Anet levelsensor by peteruhlmann
...et levelsensor by peteruhlmann
thingiverse
here is an improved fan nozzle for the anet a8 with original level sensor from anet.
thingiverse
free

Anet Et4 Box
...anet et4 box
thingiverse
tool box for anet et4
thingiverse
free

Anet Logo by Superflex_Plastic_Fantastic
...anet logo by superflex_plastic_fantastic
thingiverse
anet logo to incorporate into designs.
thingiverse
free

Box for Anet ET4
...box for anet et4
thingiverse
this is a simple box for tool of anet et4
thingiverse
free

Anet V1.0 Board Kühlung (80mm Lüfter) / Anet A8 by MadCre8
...anet v1.0 board kühlung (80mm lüfter) / anet a8 by madcre8
thingiverse
anet v1.0 board kühlung (80mm lüfter) / anet a8
Carriage
archibase_planet
free

Carriage
...arriage
archibase planet
perambulator baby carriage pram
carriage n250908 - 3d model (*.gsm+*.3ds) for interior 3d visualization.
3d_export
free

carriage
...carriage
3dexport
old fashion carriage model, more files here:
turbosquid
$140

Carriage
...urbosquid
royalty free 3d model carriage for download as max on turbosquid: 3d models for games, architecture, videos. (1482052)
turbosquid
$25

Carriage
...urbosquid
royalty free 3d model carriage for download as max on turbosquid: 3d models for games, architecture, videos. (1285944)
3d_export
free

carriage
...carriage
3dexport
game cart
3d_ocean
$15

Barrel Carriage
...ieval oak old transport wheels wine wood
this model contains a barrel and a carriage. it is a medieval type of wood oak carriage.
turbosquid
$40

Carriage
...ty free 3d model carriage for download as obj, fbx, and blend on turbosquid: 3d models for games, architecture, videos. (1290094)
turbosquid
free

Carriage
...yalty free 3d model carriage for download as ma, obj, and fbx on turbosquid: 3d models for games, architecture, videos. (1239157)
3d_export
$5

Medieval carriage
...medieval carriage
3dexport
medieval carriage in fairy style
turbosquid
$58

Carriage
...d model carriage with scene for download as max, obj, and fbx on turbosquid: 3d models for games, architecture, videos. (1276262)
Upgrade
turbosquid
$15

Upgraded Glock
...e 3d model upgraded glock for download as obj, fbx, and blend on turbosquid: 3d models for games, architecture, videos. (1185950)
3ddd
$1

Calligaris / UPGRADE
...calligaris / upgrade
3ddd
calligaris
c материалом
3d_export
free

cz upgrade
...cz upgrade
3dexport
https://www.buymeacoffee.com/mestrezen3d https://linktr.ee/mestrezen3
turbosquid
$80

Custer Tank upgrade
... available on turbo squid, the world's leading provider of digital 3d models for visualization, films, television, and games.
turbosquid
$39

Domestos 1 upgrade
... available on turbo squid, the world's leading provider of digital 3d models for visualization, films, television, and games.
3d_export
$10

Upgraded tea cup
...upgraded tea cup
3dexport
a cup with an unusual design and a unique shape for a more enjoyable tea experience
3d_export
$8

dixy outlander classic style upgraded poplar wood lounge chair
...utlander classic style upgraded poplar wood lounge chair
3dexport
dixy outlander classic style upgraded poplar wood lounge chair
turbosquid
free

AK-12 + Upgrades low-poly 3D model
...ow-poly 3d model for download as fbx, blend, and unitypackage on turbosquid: 3d models for games, architecture, videos. (1501145)
evermotion
$700

Upgrade from V-ray 1.5 to 3.5 for 3ds max
...here is no need to purchase a new dongle - your current dongles will be reprogrammed to carry v-ray 3. evermotion 3d models shop.
evermotion
$300

Upgrade from V-Ray 2.0 to V-ray 3.5 for 3ds Max
... interface (gui) for editing settings on one machine and one render node for rendering on one machine. evermotion 3d models shop.
Sensor
3d_export
free

parking sensor
...parking sensor
3dexport
car parking sensor
turbosquid
$1

Sensor
... available on turbo squid, the world's leading provider of digital 3d models for visualization, films, television, and games.
3d_export
$5

Smoke sensor
...port
smoke sensor, can be an impressive element for your projects. easy to use, realistic image, low polygon, quality materials.
3d_export
$5

Air Quality Sensor v1
...air quality sensor v1
3dexport
air quality sensor v1
3d_export
$15

float sensor
...e up render. - all parts and materials are logically named. other formats ================= - collada (.dae) - autodesk fbx - obj
turbosquid
$26

Wind sensor C
...free 3d model wind sensor c for download as 3ds, obj, and fbx on turbosquid: 3d models for games, architecture, videos. (1328943)
turbosquid
$26

Wind sensor B
...free 3d model wind sensor b for download as 3ds, obj, and fbx on turbosquid: 3d models for games, architecture, videos. (1328168)
3d_export
$5

ultrasound sensor
...ivers convert ultrasound into electrical signals, and transceivers can both transmit and receive ultrasound. export in: -obj -fbx
3ddd
free

Вытяжка Shindo pallada sensor
... вытяжка
вытяжка shindo pallada sensor. в двух размерах - 600 и 900. текстуры в комплекте.
turbosquid
$52

Wind sensor A B C
...
royalty free 3d model wind sensor a b c for download as fbx on turbosquid: 3d models for games, architecture, videos. (1408406)
Cube
3d_ocean
$5
Cubes
...cubes
3docean
children cube cubes model paint toy toys wooden
old wooden children’s cubes.
3d_export
$5
cube
...cube
3dexport
cube
3d_export
$5

cube
...cube
3dexport
cube
3d_export
free

Chemistry cube - cube chimique
...chemistry cube - cube chimique
3dexport
chemistry cube - cube chimique
3d_export
$10

Cube
...cube
3dexport
cube deco
3d_export
free

cube
...cube
3dexport
invented the cube
archibase_planet
free

Cube
...cube
archibase planet
cube
g4 cube - 3d model for interior 3d visualization.
3d_export
$6
cube
...cube
3dexport
cube gamel location
archibase_planet
free
Cube
...cube
archibase planet
home furniture cube
cube - 3d model (*.gsm+*.3ds) for interior 3d visualization.
archibase_planet
free
Cube
...cube
archibase planet
cube block die
cube eazelcom n050113 - 3d model (*.gsm+*.3ds) for interior 3d visualization.
Plus
turbosquid
$2
plus-plus puzzle and lego
...d model plus-plus puzzle and lego for download as stl and obj on turbosquid: 3d models for games, architecture, videos. (1662633)
3ddd
$1
Стенка Plus
...стенка plus
3ddd
plus , модная мебель
фабрика "модная мебель", модель plus
3ddd
$1
Спальня METIS plus
... hulsta , metis , спальня
спальня metis plus
design_connected
$11
be plus B+
...be plus b+
designconnected
blå station be plus b+ chairs computer generated 3d model. designed by börge lindau.
design_connected
$11
Bank Plus
...bank plus
designconnected
röthlisberger kollektion bank plus coffee tables computer generated 3d model. designed by atelier oi.
3ddd
$1
elos Plus
... candela
elos plus — мультифункциональный аппарат для проведения лазерного и ipl лечений
3ddd
$1
Calligaris Even Plus
...calligaris even plus
3ddd
calligaris
calligaris_chair_even plus
design_connected
$29
Basket Plus
...nconnected
photo-realistic 3d models of the basket plus bed from bonaldo for 3d architectural and interior design presentations.
3ddd
free
Artpole Faktum Plus
... артполе , панель
artpole faktum plus
размеры:
высота 625мм
ширина 800мм
глубина 17мм
3ddd
$1

Мария / Jazz Plus
...мария / jazz plus
3ddd
мария
кухня фабрики мария модель__jazz plus
Configuration
3d_export
free

snowman with configurator
...snowman with configurator
3dexport
create your own original snowman by using configurator:
design_connected
$27

Alison configuration 01
...ison configuration 01
designconnected
minotti alison configuration 01 computer generated 3d model. designed by dordoni, rodolfo.
design_connected
$27

Alison configuration 02
...ison configuration 02
designconnected
minotti alison configuration 02 computer generated 3d model. designed by dordoni, rodolfo.
design_connected
$27
Alison configuration 03
...ison configuration 03
designconnected
minotti alison configuration 03 computer generated 3d model. designed by dordoni, rodolfo.
design_connected
$27

Alison configuration 04
...ison configuration 04
designconnected
minotti alison configuration 04 computer generated 3d model. designed by dordoni, rodolfo.
turbosquid
$4
Multiple Configurations Chair
...e configurations chair for download as max, fbx, 3ds, and obj on turbosquid: 3d models for games, architecture, videos. (1595432)
turbosquid
$571
Battleship Missouri 1990s Configuration
...issouri 1990s configuration for download as max, obj, and fbx on turbosquid: 3d models for games, architecture, videos. (1364490)
3d_export
$35

Small configurable table 3D Model
...
3dexport
furniture wooden table textures riged ready to animate organised
small configurable table 3d model lukeb 26655 3dexport
3ddd
$1
GAUTIER FRANCE, Preface Configuration 7
... 305.5см x высота: 231см x глубина: 35.3/42смhttp://www.gautier.co.uk/our-products/living-room/bookcase/configuration-7
turbosquid
$1000

3D Suit Configurator - FULL 3D model
...onfigurator - full 3d model for download as max, obj, and fbx on turbosquid: 3d models for games, architecture, videos. (1492616)
Chain
archibase_planet
free
Chain
...chain
archibase planet
chain chain link chain loop
chain n020708 - 3d model (*.gsm+*.3ds) for interior 3d visualization.
3d_export
$5
chain
...chain
3dexport
3d model chain
3d_export
$5
chain
...chain
3dexport
chain. obj,fbx,blend
archibase_planet
free

Chain
...se planet
chain circuit catena
chain - archicad parametrical gdl 3d model (*.gsm). regulation of the length, curvature and angle.
archibase_planet
free
Chain
...n
archibase planet
chain circuit catena
chain - archicad parametrical gdl 3d model(*.gsm). regulation of the length and angle xyz
3d_ocean
$5
Chain
...chain
3docean
3d models chain design elements
3d models, design elements
3d_ocean
$5

Chain
...chain
3docean
3d models chain design elements
3d models, design elements
turbosquid
$10
Chain
...hain
turbosquid
royalty free 3d model chain for download as on turbosquid: 3d models for games, architecture, videos. (1329200)
turbosquid
$9
chain
...hain
turbosquid
royalty free 3d model chain for download as on turbosquid: 3d models for games, architecture, videos. (1549461)
turbosquid
$2
Chain
...hain
turbosquid
royalty free 3d model chain for download as on turbosquid: 3d models for games, architecture, videos. (1148668)
Cable
3d_export
free

Cables
...cables
3dexport
cables for your purposes
3d_export
free
cable belt for cable organization
...ze your cables in 3d printers. it will bend only to one direction. the area to put the cables per piece is aprox. 1,6cmx2,6cmx1cm
3d_ocean
$16

Ethernet Cable
...ethernet cable
3docean
cable computer electronics ethernet internet network connected
ethernet cable 3d model
3d_export
$65

cable
...cable
3dexport
simple rendering of the scene file
turbosquid
$14

Cable
...l cable for download as ma, max, fbx, 3ds, gltf, obj, and stl on turbosquid: 3d models for games, architecture, videos. (1631358)
3ddd
$1
Cable Cover
...cable cover
3ddd
кабель
vertebra passacavo - cable cover
max + vray 2.20.03
3d_export
$15
Cable reel
...without cable. textures 4k 4096x4096 targa, png, jpeg.<br>number of polygons without cable: 2896<br>with cable: 35328
3d_export
$7

short cable
...short cable
3dexport
rubber cord. very detailed. cable thickness: 2.55 mm total length: 55mm
3d_export
$5

USB CABLE
...usb cable
3dexport
turbosquid
$30
Cable Reels
...osquid
royalty free 3d model cable reels for download as fbx on turbosquid: 3d models for games, architecture, videos. (1439507)
Man
3d_export
$5

Man
...man
3dexport
man
3d_export
$5
man
...man
3dexport
man obj
3d_export
$10

man
...man
3dexport
this is an man for 3d games.
archibase_planet
free

Man
...man
archibase planet
people man
man - 3d model (*.gsm+*.3ds) for interior 3d visualization.
archibase_planet
free

Man
...man
archibase planet
people man
man - 3d model (*.gsm+*.3ds) for interior 3d visualization.
3d_export
$15

Man
...man
3dexport
download man model enjoy....
3d_ocean
$10
Man
...man
3docean
detailed highly layout man uv with
detailed polygon model of a man, with complete uv layout
archibase_planet
free
Man
...man
archibase planet
man people
man sitting n070814 - 3d model (*.gsm+*.3ds) for 3d visualization.
archibase_planet
free
Man
...man
archibase planet
man people
man keyboard n080814 - 3d model (*.gsm+*.3ds) for 3d visualization.
archibase_planet
free
Man
...man
archibase planet
man people
man n060215 - 3d model (*.gsm+*.3ds+*.max) for 3d visualization.
Type
3d_export
$5
s type
...s type
3dexport
s type formats max 3ds obj stl
3d_export
$5

l-type conveyor
...l-type conveyor
3dexport
l-type conveyor
3d_export
$5

volkswagen type 2
...volkswagen type 2
3dexport
volkswagen type 2
turbosquid
$150
RBC types
...osquid
royalty free 3d model rbc types for download as blend on turbosquid: 3d models for games, architecture, videos. (1343563)
turbosquid
$1
B-Type
...urbosquid
royalty free 3d model b-type for download as blend on turbosquid: 3d models for games, architecture, videos. (1609608)
3ddd
$1
shoes type A
...shoes type a
3ddd
туфли
shoes
turbosquid
$39

R-type
...oyalty free 3d model r-type for download as max, obj, and fbx on turbosquid: 3d models for games, architecture, videos. (1303675)
turbosquid
$5
melon type
...ee 3d model melon galia type for download as ma, fbx, and obj on turbosquid: 3d models for games, architecture, videos. (1557188)
3d_export
free
three different type
...three different type
3dexport
three different type: mace, axe, sword
turbosquid
$49

Types of Placentation
... available on turbo squid, the world's leading provider of digital 3d models for visualization, films, television, and games.
Mounts
3d_export
free

mounting bracket
...the part of a hinge, handle or latch that mounts the hardware to a cabinet. mounting plates make it...
turbosquid
$2

MOUNTING
... available on turbo squid, the world's leading provider of digital 3d models for visualization, films, television, and games.
turbosquid
free

Mounts
... available on turbo squid, the world's leading provider of digital 3d models for visualization, films, television, and games.
turbosquid
free

Mount Fuji
...fuji
turbosquid
free 3d model mount fuji for download as obj on turbosquid: 3d models for games, architecture, videos. (1579977)
3d_export
$5

Headphone mount LR
...headphone mount lr
3dexport
headphone mount l+r
turbosquid
$39

Mount rainier
...quid
royalty free 3d model mount rainier for download as fbx on turbosquid: 3d models for games, architecture, videos. (1492586)
turbosquid
$5

pipe mounting
...quid
royalty free 3d model pipe mounting for download as obj on turbosquid: 3d models for games, architecture, videos. (1293744)
turbosquid
$3

Mounting Tires
...uid
royalty free 3d model mounting tires for download as fbx on turbosquid: 3d models for games, architecture, videos. (1708511)
3d_export
$5

Magnetic GoPro Mount
...pro mount
3dexport
cool magnetic mount for gopro. allows you to mount the camera on flat metal surfaces and get exclusive shots.
turbosquid
$5

Stone Mount
...ty free 3d model stone mount for download as ma, obj, and fbx on turbosquid: 3d models for games, architecture, videos. (1370306)
Mount
3d_export
free
mounting bracket
...mounting plate is the portion of a hinge that attaches to the wood. mounting plates can be used indoors, cabinetry and furniture.
turbosquid
$2
MOUNTING
... available on turbo squid, the world's leading provider of digital 3d models for visualization, films, television, and games.
turbosquid
free
Mounts
... available on turbo squid, the world's leading provider of digital 3d models for visualization, films, television, and games.
turbosquid
free
Mount Fuji
...fuji
turbosquid
free 3d model mount fuji for download as obj on turbosquid: 3d models for games, architecture, videos. (1579977)
3d_export
$5
Headphone mount LR
...headphone mount lr
3dexport
headphone mount l+r
turbosquid
$39
Mount rainier
...quid
royalty free 3d model mount rainier for download as fbx on turbosquid: 3d models for games, architecture, videos. (1492586)
turbosquid
$5
pipe mounting
...quid
royalty free 3d model pipe mounting for download as obj on turbosquid: 3d models for games, architecture, videos. (1293744)
turbosquid
$3
Mounting Tires
...uid
royalty free 3d model mounting tires for download as fbx on turbosquid: 3d models for games, architecture, videos. (1708511)
3d_export
$5
Magnetic GoPro Mount
...pro mount
3dexport
cool magnetic mount for gopro. allows you to mount the camera on flat metal surfaces and get exclusive shots.
turbosquid
$5
Stone Mount
...ty free 3d model stone mount for download as ma, obj, and fbx on turbosquid: 3d models for games, architecture, videos. (1370306)
File
archibase_planet
free

File
...file
archibase planet
locker box archive
fp suspension file wh - 3d model (*.gsm+*.3ds) for interior 3d visualization.
turbosquid
free

File
... available on turbo squid, the world's leading provider of digital 3d models for visualization, films, television, and games.
3d_ocean
$5
Filing cabinet
...filing cabinet 3docean cabinet chair desk file filing locker office paper storage store work a simple...
turbosquid
$8

Filing cabinets
...id
royalty free 3d model filing cabinets for download as fbx on turbosquid: 3d models for games, architecture, videos. (1371140)
turbosquid
$8

File Cabinet
...squid
royalty free 3d model file cabinet for download as fbx on turbosquid: 3d models for games, architecture, videos. (1572208)
turbosquid
$16

Filing Cabinet
...ree 3d model filing cabinet for download as max, obj, and fbx on turbosquid: 3d models for games, architecture, videos. (1310873)
turbosquid
$2
File Cabinet
... free 3d model file cabinet for download as obj, c4d, and fbx on turbosquid: 3d models for games, architecture, videos. (1357577)
turbosquid
$12
Nail File
...e 3d model nail file for download as blend, obj, fbx, and dae on turbosquid: 3d models for games, architecture, videos. (1588508)
turbosquid
$5

File Organiser
...model file organiser for download as blend, obj, fbx, and dae on turbosquid: 3d models for games, architecture, videos. (1636447)
turbosquid
$1
Flat file
...e 3d model flat file for download as 3ds, obj, md3, and blend on turbosquid: 3d models for games, architecture, videos. (1209808)