Thingiverse
Android Auto Head Unit for Vehicle
by Thingiverse
Last crawled date: 4 years, 1 month ago
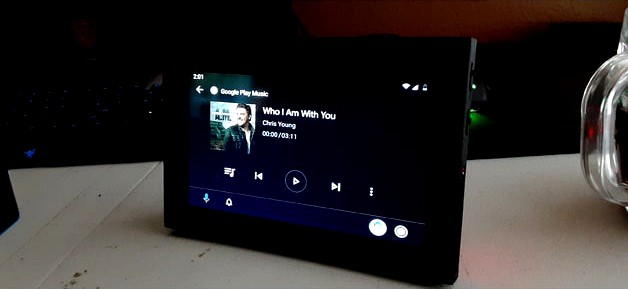
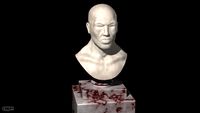
Hello everyone! Its been awhile since I've uploaded a project.. but dont worry! I have been hard at work with this one here. Love the Raspberry Pi? Great, because here is everything you need to get Android Auto running on a Rasberry Pi 3, 3B+, 4. PLEASE NOTE this is not a "How TO" or instructable. This is a project in prototype stages and is very buggy and needs alot of tweaks. Build at your own risk.
This runs off of Crankshaft Open Auto. All software credits go to the developer of Crankshaft. I am only using his software for educational purposes.
This assemble can be tweaked. Below is a list of items I have used to build the shell around.
UCTRONICS 7" IPS 1024x600 Touch Screen for Raspberry Pi
Miisso 10,000 mah portable battery (5v)
Raspberry Pi 3
USB 2.0 break out connectors (x2)
Micro USB type B breakout connectors (x2)
x2 Cylewet 12mm Switches
Male To Female USB chord (To plug into the battery and to have a female USB for external power)
High Speed Micro SD card at least 16GB
Below I will give you basic instructions on how to set this all up. If you really want a detailed video on how to do this, ETAPrime has a very excellent video showing how to get everything set up with Android Auto.
Step 1. Download Balena Etcher and Crankshaft Open Auto
Step 2. Install Balena Etcher
Step 3. Run Etcher, and select your Micro SD card you want to flash Crankshaft. Then, select Crankshaft as the image to flash.
Step 4. Flash
Step 5. You will need to change the config.ini to your display resolution
Step 6. Insert SD into Pie
Step 7. Profit
Have fun building!
Similar models
thingiverse
free

Simple "micro" sd card holder by wezze
...simple "micro" sd card holder by wezze
thingiverse
sd card holder for my raspberry pi projects.
.
thingiverse
free

SD Card & micro SD Card Box with USB Stick Holder by Findusdwarf
...l part "sd cardbox top2stronger_slottest" is a section of "sd cardbox top2stronger" to test if the cards fit.
thingiverse
free

Card Organizer for SD Card/Micro SD/Compact Flash/USB by Cadmium48
...n mind, this desktop card organizer will hold 12 sd cards, 6 micro sd cards, 6 compact flash cards, and 12 usb sticks or devices.
thingiverse
free

USB Holder
...usb holder
thingiverse
it holds 15 usb flash drives, 8 sd cards and 8 micro sd cards
thingiverse
free

Memory card holder by jdesgarennes
...memory card holder by jdesgarennes
thingiverse
this is a usb compact flash sd card and micro sd card holder.
thingiverse
free

Organizer for SD cards, mini SD cards, micro SD cards and USB - A by BlueSkyHD
... 30 15 centimeters. hope you like it. xd
(the dimensions of the usb - a slot are false. i'll fix this next week. sorry. xd)
thingiverse
free

Transportation Case for Raspberry Pi 3 with Touchscreen by corentiny
...vacations use. this raspberry is used to copy the sd card to a ssd. i'm using usb sd card reader and usb case for sata drive.
thingiverse
free

Raspberry Pi Tablet by makedave
...ntroller-guide/calibrating-the-ar1100) i can work on instructions and a more complete list of parts and how to put them together.
thingiverse
free

SD Card & USB Holder by CBull283
...lder by cbull283
thingiverse
this is a small, simple, customizable hub designed to hold usb flash drives, sd and micro sd cards.
thingiverse
free

SD Card Box by C4Pt41ND34DP00L
...ard box by c4pt41nd34dp00l
thingiverse
this is box i made to hold micro sd cards for my raspberry pi projects. new to 3d design.
Android
turbosquid
$12

ANDROID
...turbosquid
royalty free 3d model android for download as c4d on turbosquid: 3d models for games, architecture, videos. (1704089)
turbosquid
$5

Android
...turbosquid
royalty free 3d model android for download as fbx on turbosquid: 3d models for games, architecture, videos. (1231021)
3d_ocean
$4

Android logo
...android logo
3docean
android character logo
logo android, vray 1.50 sp5.
3d_ocean
$4
Superman Android
... file “mf_android_superman.zip” - “mf_android_superman.zip” file includes; 3dstudio 2012×64 .max file that name is “android_su...
3d_export
$5

android
...android
3dexport
3ddd
free
Boots Android
...boots android
3ddd
обувь
boots android
turbosquid
$3

android!
...ee 3d model android! for download as 3ds, obj, fbx, and blend on turbosquid: 3d models for games, architecture, videos. (1215998)
turbosquid
$60

Android
... available on turbo squid, the world's leading provider of digital 3d models for visualization, films, television, and games.
turbosquid
$35

Android
... available on turbo squid, the world's leading provider of digital 3d models for visualization, films, television, and games.
turbosquid
$25

Android
... available on turbo squid, the world's leading provider of digital 3d models for visualization, films, television, and games.
Auto
3d_export
$5

auto
...auto
3dexport
auto
3ddd
$1
auto
...auto
3ddd
max7
turbosquid
$69
AUTO
...to
turbosquid
royalty free 3d model auto for download as obj on turbosquid: 3d models for games, architecture, videos. (1453538)
3d_export
$10

Auto
...auto
3dexport
3d_export
free

auto
...auto
3dexport
3ddd
$1

Auto posters
...auto posters
3ddd
машина
auto posters
turbosquid
$50
auto
... available on turbo squid, the world's leading provider of digital 3d models for visualization, films, television, and games.
turbosquid
$28
Auto
... available on turbo squid, the world's leading provider of digital 3d models for visualization, films, television, and games.
turbosquid
$20
auto
... available on turbo squid, the world's leading provider of digital 3d models for visualization, films, television, and games.
turbosquid
$5
auto
... available on turbo squid, the world's leading provider of digital 3d models for visualization, films, television, and games.
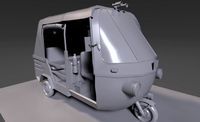
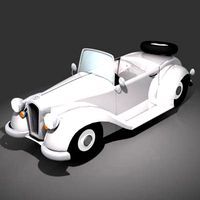
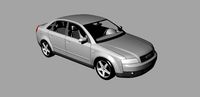
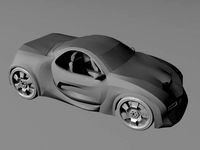
Vehicle
3d_export
$30
Vehicle display
...vehicle display
3dexport
vehicle display consists of podium and vehicle cover no vehicle there is a veiled vehicle silhouette
turbosquid
$41

vehicle
... available on turbo squid, the world's leading provider of digital 3d models for visualization, films, television, and games.
turbosquid
$10

vehicle
... available on turbo squid, the world's leading provider of digital 3d models for visualization, films, television, and games.
3d_ocean
$40
Heavy vehicles
...el this model is created with 3ds max 2009 and content .max (3ds max), size: 7,65 mb this model can be used in any scene. enjoy !
3d_export
$6

Trailer Transporter Consignment Vehicle Turnover Vehicle
...trailer transporter consignment vehicle turnover vehicle
3dexport
trailer transporter consignment vehicle turnover vehicle
archive3d
free

Vehicle 3D Model
... sports and recreational vehicle n250714 - 3d model (*.gsm+*.3ds) for interior 3d visualization.
3d_export
$50
Vehicle 3D Model
...vehicle 3d model
3dexport
vehicle
vehicle 3d model fred-13 21262 3dexport
3d_export
$15
special vehicles
...special vehicles
3dexport
3d_export
$10
utility vehicle
...utility vehicle
3dexport
turbosquid
$9
Vehicles pack
...bosquid
royalty free 3d model vehicles pack for download as on turbosquid: 3d models for games, architecture, videos. (1635451)
Head
3d_export
$5

head
...head
3dexport
simulated female head.
3d_ocean
$5
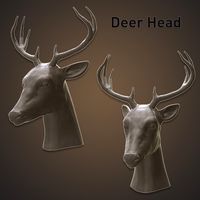
Deer Head
...deer head
3docean
deer head
simple model of deer head with neck.
cg_studio
$25
Marble Head - Head A3d model
... - head a3d model
cgstudio
.ma - marble head - head a 3d model, royalty free license available, instant download after purchase.
turbosquid
$5
Head
...ad
turbosquid
royalty free 3d model head for download as max on turbosquid: 3d models for games, architecture, videos. (1230068)
turbosquid
free

Head
...
turbosquid
royalty free 3d model head for download as blend on turbosquid: 3d models for games, architecture, videos. (1276899)
turbosquid
free

The Head
...urbosquid
royalty free 3d model the head for download as max on turbosquid: 3d models for games, architecture, videos. (1386205)
3d_export
$10

bull head
...bull head
3dexport
bull head
3d_export
$5
girl head
...girl head
3dexport
head girl
3d_export
$5
Tigger-head
...tigger-head
3dexport
tigger-head
3d_export
$5

head on a spear
...head on a spear
3dexport
head on a spear
Unit
turbosquid
$4

UNIT
...unit
turbosquid
royalty free 3d model unit for download as on turbosquid: 3d models for games, architecture, videos. (1196686)
archibase_planet
free
Unit
...unit
archibase planet
desk board
entertainment unit 02 - 3d model (*.gsm+*.3ds) for interior 3d visualization.
3d_export
$15
control unit
...control unit
3dexport
control unit
3ddd
$1
bathroom unit
...bathroom unit
3ddd
bathroom unit
3ddd
$1

Crockery unit
...crockery unit
3ddd
сервант
crockery unit
3ddd
$1

Process unit
...process unit
3ddd
статуэтка
process unit
3d_export
$5

united nations
...united nations
3dexport
united nations-logo -cnc plant
turbosquid
$3

TV unit-1 / 2 unit
...-1 / 2 unit for download as 3ds, max, obj, fbx, dwg, and dae on turbosquid: 3d models for games, architecture, videos. (1207609)
3d_export
$5
tv unit
...tv unit
3dexport
the tv unit design simple design with texture for interior
3d_ocean
$5

Tv Unit
...gh quality apple tv unit. the model is made using 3ds max. hope you enjoy it and if you have any queries feel free to contact me.