Thingiverse
Amiga Clock by ioio72
by Thingiverse
Last crawled date: 2 years, 11 months ago
Amiga Clock (3 June 2021)
by IOIO72 aka Tamio Patrick Honma (https://honma.de)
This work is licensed under the Creative Commons Attribution-NonCommercial-ShareAlike 4.0 International License. To view a copy of this license, visit http://creativecommons.org/licenses/by-nc-sa/4.0/ or send a letter to Creative Commons, PO Box 1866, Mountain View, CA 94042, USA.
Description
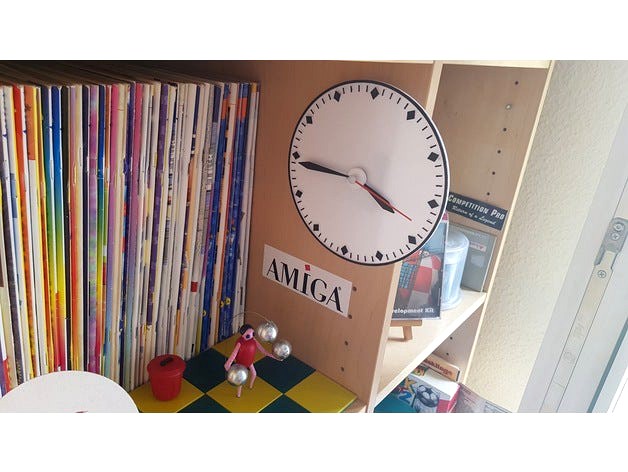
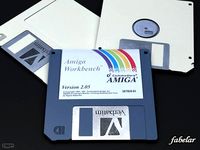
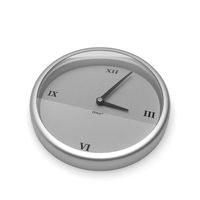
Amiga Clock is an adaptation of Clock V2.15 from Amiga Workbench 1.2.
You can attach this 3D print to a clock movement to experience the physical version of an iconic program from the digital past.
The model is customizable and can be adapted to any clockwork and size - down to wristwatches. It's even possible to print static versions of different time settings, i.e. to create opening times signs.
For those, who don't want to create a customized version, here's the clockwork, I used for this project:https://www.amazon.de/gp/product/B08RNJ5SYK/
Where's the second hand?
Since the second hand has a small pin for mounting, it is not easy to print one that is accurate enough. The purchasable clockwork packages usually include a variety of hands from which you can choose. There should definitely be a second hand that is just a dash, like the one on the Amiga Clock. Use this second hand and paint it orange.
Use OpenSCAD
As the Thingiverse customizer has some issues, it's better to use OpenSCAD instead.
Download and install: OpenSCAD version 2021.01 or newer
Download: The *.scad file of this model.
Start OpenSCAD and open the *.scad file in it.
Open the customizer via the menu "Window/Customizer"
Now you can configure the model.
Export your STL file
If you're done with your model settings, you can export the STL file:
Render the mesh by pressing the F6 key.
Wait until the rendering is finished. This might take some minutes.
Export the STL file by pressing the F7 key.
Optionally save your configuration
If you like to use your configuration as a template for further models, it's a good idea, to save your configuration:
Click the + symbol in the customizer, which you find beside the configuration selector drop-down in the second line of the customizer.
Give your configuration a name.
Use the drop-down menu to access your saved configurations.
Trivia
The preset time refers to the time displayed on the Amiga clock icon.
The story behind this time is interesting:http://theamigamuseum.com/amiga-kickstart-workbench-os/workbench/workbench-1-2/
Smartwatch
If you want to wear an Amiga wristwatch as a Wear OS, Tizen or Apple Watch watchface, take a look at my WatchMaker creation:https://getwatchmaker.com/watchface/amiga-wb-1-2
Customizer
First of all: The customizer provides a test print model. This helps you to test your entered measurements without the need to print the whole model.
Create a running Clock
If you like to create a running clock, you need to get a clockwork first.
By default the value fastening_elements in the Modify Parts section is turned on. If it's not, you should turn it on, as this switches on the part modifications to attach all clock part to the clockwork.
To adapt the Amiga Clock to your clockwork, you should use a caliper to measure it and enter the following values into the customizer:
Clockwork Hub
The following parameters are the most important ones:
In the lower part of the hub there is usually a thread where you screw the nut to fix the dial to the movement. Measure the diameter of the thread and enter the value to hub_diameter
Directly above the thread should be the wheel for the hour hand. Enter the diameter of this wheel in hub_hours_diamater.
And above the hour hand wheel should be the wheel for the minute hand. Enter this diameter in hub_minutes_diamater
On the back of the dial, you can adjust the diameter of an embossed alignment aid. My movement package included a rubber ring that fits in this embossment as a spacer to the movement case. Enter this value in hub_embossment.
Alignment helpers
To align the clockwork enclosure to the clock face, the enclosure offers four small pins - at least the one I've used. If your one doesn't provide these pins, you can set the value pin_diameter to zero.
If you like to use the pins, you should measure the diameter of one pin and enter the value in pin_diameter.
As the pin sticks into the backside of the clock face, you should enter the depth of the pin in pin_depth.
The positions of the pins should be measured from the center of the hub to each horizontal and vertical positions in the following order in the main brackets of pin_positions:
the values of the left top pin are entered in the the values of the left top pin are entered in the first bracket..
the values of the right top pin are entered in the second bracket.
the values of the right bottom pin are entered in the third bracket.
the values of the left bottom pin are entered in the fourth bracket.
Test your entered measurements
The accuracy of the entered values not only depend on the measurement itself, but also on the used filament, your slicer settings and the printer setup. Therefore, Amiga Clock provides test parts, which you can print without the need to print the large clock face.
To do this, go to the section Select Parts and unselect all parts. Then go to the section Test Parts and enable measurements_test_parts.
Design your Clock
The main setting to design your clock, is the diameter of the clock face. Enter the value in face_diamater.
Additionally you can change the depth of the clock face in face_base_depth.
If you like to print the clock face base apart from the clock face content, which are the minutes lines and hours rhombuses, you can set an emboss depth value in emboss_depth. This embosses the content in the clock face base, which helps you to glue the elements accurate onto the clock face base.
Change the appearance of the Clock Face Content
You can tweak the depth, border size, content margin, minutes line size and hours rhombus size of the clock face in the section Clock Face Content. You can do this to personalize the content design. You need to do this, if you use a very small or large clock face diameter.
Configure Clock Hands
You can change the Clock Hands in depth in hands_depth . Note, that the minute hand uses half of the depth for the mount ring.
You can set the margin from hours rhombus' to the tip of the minute hand in hands_margin.
You can adjust the heights of the hands to affect how thin or wide they appear in hour_hand_height and minute_hand_height.
If you've activated the fastening_elements, both clock hands will provide an attachment ring, which refer to the diameters of the hub settings. To defined the size if this ring, you can change it in hands_mount_ring_border_size.
If you like to print a static version of the Amiga Clock, you can change the displayed time in clock_time_hour and clock_time_minute.
Export Parts
Depending on your plan, how to attach the parts of the clock together, you can select and combine the parts as you like. Here are the usual combinations:
If you like to export parts for a real clockwork, you have to enable fastening_elements and select and export the parts in the following combinations:
Select minute hand only, press F6, wait until render finishes and press F7 to export the STL.
Select hour hand only, press F6, wait until render finishes and press F7 to export the STL.
Select the clock face base and clock face content together, press F6, wait until render finishes and press F7 to export the STL.
If you like to use white filament for the clock face base and black filament for the clock face content on a single extruder printer, you can export them separately and glue them together.
If you like to export a static version of the clock, disable fastening_elements, set your desired time in clock_time_hour and clock_time_minute and export all parts together.
by IOIO72 aka Tamio Patrick Honma (https://honma.de)
This work is licensed under the Creative Commons Attribution-NonCommercial-ShareAlike 4.0 International License. To view a copy of this license, visit http://creativecommons.org/licenses/by-nc-sa/4.0/ or send a letter to Creative Commons, PO Box 1866, Mountain View, CA 94042, USA.
Description
Amiga Clock is an adaptation of Clock V2.15 from Amiga Workbench 1.2.
You can attach this 3D print to a clock movement to experience the physical version of an iconic program from the digital past.
The model is customizable and can be adapted to any clockwork and size - down to wristwatches. It's even possible to print static versions of different time settings, i.e. to create opening times signs.
For those, who don't want to create a customized version, here's the clockwork, I used for this project:https://www.amazon.de/gp/product/B08RNJ5SYK/
Where's the second hand?
Since the second hand has a small pin for mounting, it is not easy to print one that is accurate enough. The purchasable clockwork packages usually include a variety of hands from which you can choose. There should definitely be a second hand that is just a dash, like the one on the Amiga Clock. Use this second hand and paint it orange.
Use OpenSCAD
As the Thingiverse customizer has some issues, it's better to use OpenSCAD instead.
Download and install: OpenSCAD version 2021.01 or newer
Download: The *.scad file of this model.
Start OpenSCAD and open the *.scad file in it.
Open the customizer via the menu "Window/Customizer"
Now you can configure the model.
Export your STL file
If you're done with your model settings, you can export the STL file:
Render the mesh by pressing the F6 key.
Wait until the rendering is finished. This might take some minutes.
Export the STL file by pressing the F7 key.
Optionally save your configuration
If you like to use your configuration as a template for further models, it's a good idea, to save your configuration:
Click the + symbol in the customizer, which you find beside the configuration selector drop-down in the second line of the customizer.
Give your configuration a name.
Use the drop-down menu to access your saved configurations.
Trivia
The preset time refers to the time displayed on the Amiga clock icon.
The story behind this time is interesting:http://theamigamuseum.com/amiga-kickstart-workbench-os/workbench/workbench-1-2/
Smartwatch
If you want to wear an Amiga wristwatch as a Wear OS, Tizen or Apple Watch watchface, take a look at my WatchMaker creation:https://getwatchmaker.com/watchface/amiga-wb-1-2
Customizer
First of all: The customizer provides a test print model. This helps you to test your entered measurements without the need to print the whole model.
Create a running Clock
If you like to create a running clock, you need to get a clockwork first.
By default the value fastening_elements in the Modify Parts section is turned on. If it's not, you should turn it on, as this switches on the part modifications to attach all clock part to the clockwork.
To adapt the Amiga Clock to your clockwork, you should use a caliper to measure it and enter the following values into the customizer:
Clockwork Hub
The following parameters are the most important ones:
In the lower part of the hub there is usually a thread where you screw the nut to fix the dial to the movement. Measure the diameter of the thread and enter the value to hub_diameter
Directly above the thread should be the wheel for the hour hand. Enter the diameter of this wheel in hub_hours_diamater.
And above the hour hand wheel should be the wheel for the minute hand. Enter this diameter in hub_minutes_diamater
On the back of the dial, you can adjust the diameter of an embossed alignment aid. My movement package included a rubber ring that fits in this embossment as a spacer to the movement case. Enter this value in hub_embossment.
Alignment helpers
To align the clockwork enclosure to the clock face, the enclosure offers four small pins - at least the one I've used. If your one doesn't provide these pins, you can set the value pin_diameter to zero.
If you like to use the pins, you should measure the diameter of one pin and enter the value in pin_diameter.
As the pin sticks into the backside of the clock face, you should enter the depth of the pin in pin_depth.
The positions of the pins should be measured from the center of the hub to each horizontal and vertical positions in the following order in the main brackets of pin_positions:
the values of the left top pin are entered in the the values of the left top pin are entered in the first bracket..
the values of the right top pin are entered in the second bracket.
the values of the right bottom pin are entered in the third bracket.
the values of the left bottom pin are entered in the fourth bracket.
Test your entered measurements
The accuracy of the entered values not only depend on the measurement itself, but also on the used filament, your slicer settings and the printer setup. Therefore, Amiga Clock provides test parts, which you can print without the need to print the large clock face.
To do this, go to the section Select Parts and unselect all parts. Then go to the section Test Parts and enable measurements_test_parts.
Design your Clock
The main setting to design your clock, is the diameter of the clock face. Enter the value in face_diamater.
Additionally you can change the depth of the clock face in face_base_depth.
If you like to print the clock face base apart from the clock face content, which are the minutes lines and hours rhombuses, you can set an emboss depth value in emboss_depth. This embosses the content in the clock face base, which helps you to glue the elements accurate onto the clock face base.
Change the appearance of the Clock Face Content
You can tweak the depth, border size, content margin, minutes line size and hours rhombus size of the clock face in the section Clock Face Content. You can do this to personalize the content design. You need to do this, if you use a very small or large clock face diameter.
Configure Clock Hands
You can change the Clock Hands in depth in hands_depth . Note, that the minute hand uses half of the depth for the mount ring.
You can set the margin from hours rhombus' to the tip of the minute hand in hands_margin.
You can adjust the heights of the hands to affect how thin or wide they appear in hour_hand_height and minute_hand_height.
If you've activated the fastening_elements, both clock hands will provide an attachment ring, which refer to the diameters of the hub settings. To defined the size if this ring, you can change it in hands_mount_ring_border_size.
If you like to print a static version of the Amiga Clock, you can change the displayed time in clock_time_hour and clock_time_minute.
Export Parts
Depending on your plan, how to attach the parts of the clock together, you can select and combine the parts as you like. Here are the usual combinations:
If you like to export parts for a real clockwork, you have to enable fastening_elements and select and export the parts in the following combinations:
Select minute hand only, press F6, wait until render finishes and press F7 to export the STL.
Select hour hand only, press F6, wait until render finishes and press F7 to export the STL.
Select the clock face base and clock face content together, press F6, wait until render finishes and press F7 to export the STL.
If you like to use white filament for the clock face base and black filament for the clock face content on a single extruder printer, you can export them separately and glue them together.
If you like to export a static version of the clock, disable fastening_elements, set your desired time in clock_time_hour and clock_time_minute and export all parts together.
Similar models
thingiverse
free

Aluminium Foil Gas Stove Cutter by ioio72
...in the second line of the customizer.
give your configuration a name.
use the drop-down menu to access your saved configurations.
thingiverse
free
Atomic Clock by Floowey
... another clock with this one. if the customizer works you can change the diameter of the bolt, else i will provide the scad file.
thingiverse
free

Spiral Clock
...058279.html?spm=a2g0s.9042311.0.0.71434c4dsphxfq
(to be honest, this clockwork is extremely loud. i am searching for another one)
thingiverse
free

Lens Cover Holder Family
...ith big $fn values. note that $fn > 100 is not recommended in openscad manual, still it is working but you have to be patient.
thingiverse
free
Lemmings by ioio72
...in the second line of the customizer.
give your configuration a name.
use the drop-down menu to access your saved configurations.
thingiverse
free

Press-on clock hands by liebherk
...press-on clock hands by liebherk
thingiverse
hour, minute and second hand for a standard press-on clock movement.
thingiverse
free

The Rainbow Customizer by ioio72
...in the second line of the customizer.
give your configuration a name.
use the drop-down menu to access your saved configurations.
thingiverse
free

Butter dish factory (lower part) / Butterdosenfabrik (Unterteil) by Johann_LA
...
open the scad file of this thing
adjust the parameters as you like
render the design by pressing f6
export to stl by pressing f7
thingiverse
free

Week-day clock clockwork gear 5.55mm shaft by CorrieD
...hour hand shaft was larger than the person who created this model, so i resized it for clockworks with 5.55mm minute hand shafts.
thingiverse
free

Ohio State's Tom W. Davis Clock Tower by NegativeB
...n.
if you have a small printer like i do, there are also files for the tower split in half vertically, and a pin to connect them.
Ioio72
thingiverse
free

Filament Ring by ioio72
...filament ring by ioio72
thingiverse
this is a simple filament guide in shape of a ring.
thingiverse
free

Trashcan of Amiga Workbench v1.3 by ioio72
...an of amiga workbench v1.3 by ioio72
thingiverse
this retro fan art is the materialisation of the amiga workbench v1.3 trashcan.
thingiverse
free

Paint cup cap for Aerograph Sprite Airbrush by ioio72
...s is a cap for the color cup of the aerograph sprite airbrush. it fits into the 19.5mm cup and sits on the 20.5mm outer diameter.
thingiverse
free
Lemmings by ioio72
...in the second line of the customizer.
give your configuration a name.
use the drop-down menu to access your saved configurations.
thingiverse
free

Filament Ball by ioio72
...as the slot in the ball doesn't work as suggested, i've uploaded a closed ball version, which i recommend to use instead.
thingiverse
free

CD based shelf by ioio72
...e length by one more tube.
add as many layers as you like and it is physically possible.
finish the top layer with the end piece.
thingiverse
free

Cup Stack Helper (can be used for many other tube-like objects) by ioio72
...72
thingiverse
the cup organizer helps you to stack cups securely.
you can use the customizer to set the diameters of your cups.
thingiverse
free
The Rainbow Customizer by ioio72
...in the second line of the customizer.
give your configuration a name.
use the drop-down menu to access your saved configurations.
thingiverse
free
Spool Painting Turntable by ioio72
...about 52mm and the outer diameter is about 149mm. the height of the inner circle border is 5mm to hook up the table to the spool.
thingiverse
free

Amiga Juggler by ioio72
...bution - non-commercial - no derivatives (cc-by-nc-nd).
it takes a lot of passion for the post-processing, but it's worth it!
Amiga
turbosquid
free

Amiga 1000
...bosquid
free 3d model amiga 1000 for download as max and dds on turbosquid: 3d models for games, architecture, videos. (1178668)
3d_export
$30

commodore amiga 600
...cinema 4d r20, rendered using corona.<br>the package contains files: * .c4d, * .3ds, * .fbx, * .obj, * .stl and 13 renders.
3d_export
$12

Floppy disk 3D Model
...3dexport diskette floppy disk disc storage label computer verbatim amiga workbench media data inch software peripheral office home vintage...
3d_ocean
$5

Retro Joystick
...retro joystick 3docean amiga caricature cartoon computer console controller game gaming joystick old...
3d_export
$299

Gaming devices coll 1 3D Model
...entertainment system pistol gun controller pack collection atari spectrum amiga sega people gaming devices coll 1 3d model fabelar...
cg_studio
$15
Floppy disk3d model
...electronics diskette floppy disk disc storage label computer verbatim amiga workbench media data inch software peripheral office home vintage...
3d_export
$5

woman pot 3 - stl for 3d printing
...etc., es un gran regalo para las madres, sus amiga, tu esposa, tu hermana o tu hija. orificio de...
thingiverse
free

Amiga Logo by syntonia
...amiga logo by syntonia
thingiverse
logo commodore amiga
thingiverse
free

Amiga 500 by Nowhereman999
...n the top of the 3d model to make it more like the original amiga 500.
thanks falken76 for the original model.
cheers,
nowhereman
thingiverse
free
Amiga Pi by stw78
...amiga pi by stw78
thingiverse
a case to you raspberry pi 2 or 3 for you amiga fans!
Clock
3d_ocean
$4
Clock
...clock
3docean
clock hand kitchen clock time watch
a clock
archibase_planet
free

Clock
...clock
archibase planet
clock table clock alarm-clock
clock orange - 3d model (*.gsm+*.3ds) for interior 3d visualization.
archibase_planet
free

Clock
...clock
archibase planet
clock table clock alarm-clock
clock yellow - 3d model (*.gsm+*.3ds) for interior 3d visualization.
archibase_planet
free
Clock
...clock
archibase planet
clock alarm-clock
clock n100707 - 3d model for interior 3d visualization.
archibase_planet
free
Clock
...clock
archibase planet
clock table clock
clock - 3d model (*.gsm+*.3ds) for interior 3d visualization.
archibase_planet
free
Clock
...clock
archibase planet
clock striking clock
clock - 3d model (*.gsm+*.3ds) for interior 3d visualization.
archibase_planet
free

Clock
...clock
archibase planet
clock wall clock
clock 1 - 3d model (*.gsm+*.3ds) for interior 3d visualization.
archibase_planet
free
Clock
...clock
archibase planet
clock wall clock
clock 2 - 3d model (*.gsm+*.3ds) for interior 3d visualization.
archibase_planet
free

Clock
...clock
archibase planet
clock wall clock
clock 3 - 3d model (*.gsm+*.3ds) for interior 3d visualization.
archibase_planet
free
Clock
...clock
archibase planet
alarm clock alarm-clock
clock - 3d model (*.gsm+*.3ds) for interior 3d visualization.