Thingiverse
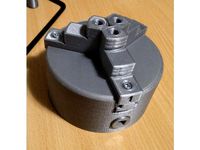
Allison 1000 transmission by marcinszydlowski
by Thingiverse
Last crawled date: 4 years, 3 months ago
Hello everyone,
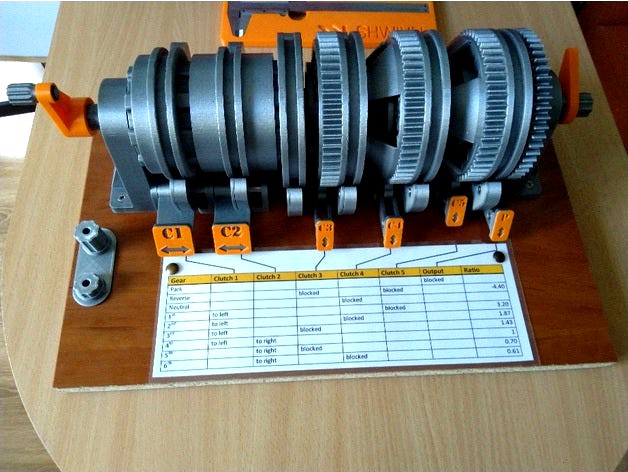
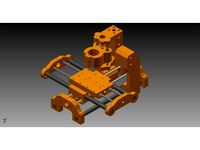
model presented here is a variation of Allison 1000 transmission derived from InterlinkKnight's 6 Speed Allison Automatic Transmission
It's operated manually by pushing/pulling breakes and shifting clutches. Model was designed for be assembled with bearings, Seeger rings, rods, shims and forming screws.
Gears and other parts have been prepared in Fusion 360 using paid add-in for generating planetary sets (available for Win and Mac).
In addition to the STL models there are also following documents:
assembly guide,
template for drilling holes in the support board (must be printed in 1:1 scale or scaled for the same factor as models if you'll do),
power flow, kinematic models and calculations of ratios,
sheet for calculating ratios for single stages.
Full video which shows it in action is on YouTube:
Main requirements
Type
Time/cost/dimensions
Notes
Printing time
77h
Assuming continuous operation (no breaks between parts) by one printer; in practice 1 week
Postprocessing time
4h
Removing supports, deburring, grinding
Cost of filament
$20
1 spool of 850g refill Fiberlogy Easy PLA if no other color used and success at first time
Cost of metal parts
$20
Cheapest parts found on the market
Assembling time
6h
Drilling holes in support plate, cutting grooves for Seeger rings on 8mm rod, cutting 8mm and 3mm rod
Dimensions (WxLxH)
28x44x16 cm
Printed parts
Name
Qty
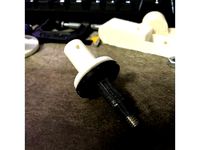
01_Crank_placeholder.stl
1
02_Handle.stl
1
03_Knob.stl
1
04_Pointer.stl
1
05_C1_text.stl
1
06_C2_text.stl
1
07_C3_text.stl
1
08_C4_text.stl
1
09_C5_text.stl
1
10_P_text.stl
1
11_Input_shaft.stl
1
12_Bearing_support.stl
2
13_Clutch_rail_start_guide.stl
2
14_Clutch_rail_middle_guide.stl
1
15_P_support_back_bearing_lid.stl
4
16_P_support_front_bearing_lid.stl
4
17_Clutch_guide_front_bearing_lid.stl
2
18_Clutch_guide_back_bearing_lid.stl
2
19_P_support.stl
4
20_Clutch_support.stl
2
21_Break_teeth.stl
4
22_Break_support.stl
4
23_Break_handle_left_side.stl
4
23_Break_handle_right_side.stl
4
24_P5_planet.stl
4
25_P4_planet.stl
4
26_P3_planet.stl
4
27_P5_Synchronizer.stl
1
28_P4-P5_Synchronizer.stl
1
29_Clutch_1.stl
1
30_Clutch_2.stl
1
31_P3_sun.stl
1
32_P3_ring.stl
1
33_P4_ring.stl
1
34_P5_ring.stl
1
35_P4_P5_sun.stl
1
36_Output_carrier.stl
1
Metal parts
Name
Qty
Rod 8/297mm
1
Rod 8/95mm
2
Rod 3/20mm
4
Rod 3/14mm
4
Rod 3/41mm
12
Set screw 6/6mm
1
Set screw 8/8mm
1
Forming screw 3/12mm
40
Forming screw 4/20mm
4
Seeger external ring 8mm
4
Seeger external ring 20mm
4
Seeger internal ring 15mm
2
Seeger internal ring 48mm
2
Ball bearing 8x22x7mm
14
Ball bearing 20x47x14mm
2
Needle bearing 8x12x12mm
3
Needle bearing 20x26x20mm
1
Shim 3mm
24
Others
Name
Qty
Board or plate for support no smaller than 44x28x1cm
1
Tools
Name
Used for
Upholstery knife
removing supports, finishing surfaces
Pliers
removing supports
File
finishing surfaces
Drill (for steel) 8mm
deburring 8mm holes
Drill (for steel or wood) 2mm
drilling holes for forming screws in support board
Allen screwdriver 3mm
set screw in synchronizer C1
Allen screwdriver 4mm
set screw in sun P4-P5
Phillips screwdriver 3mm
forming screws 3x12mm
Phillips screwdriver 4mm
forming screws 4x20mm
External and internal Seeger calipers
mounting Seeger rings
Silicon or machine oil
lubricating parts
Grease
lubricating internal shaft's bearings
Tweezers
easier putting shims on planets' shafts
Recommendations
3D-printing settings
All models available here are oriented in a way which guarantee quite good quality in FDM technology. However, it's not enought to be sure that parts will be matched together when slicer use automatic settings. I strongly suggest to use advanced slicers like Cura, Prusa Slicer or any other which lets you to set:
elephant foot compensation (in Prusa Slicer)
Linear Advance (for my case K=0.04 or K=40 was ok),
horizontal expansion (hole, initial layer, general - in Cura),
support types and orientation
Metal parts
Bearings, screws, shims and Seeger rings can be cheapest but in case of rods you need to be sure that theirs diameters are exact. In other case, you can waste a few hours for grinding 8mm rod for be able to put 8mm needle and ball bearings on them or making 3mm holes in plastic parts slightly bigger.
Known problems
Assembly
breaks aren't designed well for beeing both assembled or disassembled - try to follow the assembly guide for putting these parts together,
mounting planets into carriers - unfortunately it's the worst thing here (I realized too late) and it's a one-way operation; it cannot be reversed and for removing shaft, carrier needs to be damaged; you need a thin tweezers, knife, screwdriver or similar kind of tool and be very patient for putting shaft throught the carrier, shim, planet and the last shim
mounting bearings is (and generally, should be) tight but try to pushing them rather than hitting by hammer; you need to be careful for not breaking parts,
internal Seeger rings (15 and 48mm) requires strong calipers - cheapest sets of calipers may be unable and dangerous to bend rings of those sizes (wear safety gogles for mounting snap rings)
Operating
shifting clutches may be difficult especially for overdrives or for some othe configuration of switches. If so, try to do this by pushing clutches instead of C1/C2 shifts;
4th and 5th gear (overdrives) requires more forces and for synchronizers designed for this model' design it tends to shifting clutch C2 back - it need to be hold during spinning the input shaft.
model presented here is a variation of Allison 1000 transmission derived from InterlinkKnight's 6 Speed Allison Automatic Transmission
It's operated manually by pushing/pulling breakes and shifting clutches. Model was designed for be assembled with bearings, Seeger rings, rods, shims and forming screws.
Gears and other parts have been prepared in Fusion 360 using paid add-in for generating planetary sets (available for Win and Mac).
In addition to the STL models there are also following documents:
assembly guide,
template for drilling holes in the support board (must be printed in 1:1 scale or scaled for the same factor as models if you'll do),
power flow, kinematic models and calculations of ratios,
sheet for calculating ratios for single stages.
Full video which shows it in action is on YouTube:
Main requirements
Type
Time/cost/dimensions
Notes
Printing time
77h
Assuming continuous operation (no breaks between parts) by one printer; in practice 1 week
Postprocessing time
4h
Removing supports, deburring, grinding
Cost of filament
$20
1 spool of 850g refill Fiberlogy Easy PLA if no other color used and success at first time
Cost of metal parts
$20
Cheapest parts found on the market
Assembling time
6h
Drilling holes in support plate, cutting grooves for Seeger rings on 8mm rod, cutting 8mm and 3mm rod
Dimensions (WxLxH)
28x44x16 cm
Printed parts
Name
Qty
01_Crank_placeholder.stl
1
02_Handle.stl
1
03_Knob.stl
1
04_Pointer.stl
1
05_C1_text.stl
1
06_C2_text.stl
1
07_C3_text.stl
1
08_C4_text.stl
1
09_C5_text.stl
1
10_P_text.stl
1
11_Input_shaft.stl
1
12_Bearing_support.stl
2
13_Clutch_rail_start_guide.stl
2
14_Clutch_rail_middle_guide.stl
1
15_P_support_back_bearing_lid.stl
4
16_P_support_front_bearing_lid.stl
4
17_Clutch_guide_front_bearing_lid.stl
2
18_Clutch_guide_back_bearing_lid.stl
2
19_P_support.stl
4
20_Clutch_support.stl
2
21_Break_teeth.stl
4
22_Break_support.stl
4
23_Break_handle_left_side.stl
4
23_Break_handle_right_side.stl
4
24_P5_planet.stl
4
25_P4_planet.stl
4
26_P3_planet.stl
4
27_P5_Synchronizer.stl
1
28_P4-P5_Synchronizer.stl
1
29_Clutch_1.stl
1
30_Clutch_2.stl
1
31_P3_sun.stl
1
32_P3_ring.stl
1
33_P4_ring.stl
1
34_P5_ring.stl
1
35_P4_P5_sun.stl
1
36_Output_carrier.stl
1
Metal parts
Name
Qty
Rod 8/297mm
1
Rod 8/95mm
2
Rod 3/20mm
4
Rod 3/14mm
4
Rod 3/41mm
12
Set screw 6/6mm
1
Set screw 8/8mm
1
Forming screw 3/12mm
40
Forming screw 4/20mm
4
Seeger external ring 8mm
4
Seeger external ring 20mm
4
Seeger internal ring 15mm
2
Seeger internal ring 48mm
2
Ball bearing 8x22x7mm
14
Ball bearing 20x47x14mm
2
Needle bearing 8x12x12mm
3
Needle bearing 20x26x20mm
1
Shim 3mm
24
Others
Name
Qty
Board or plate for support no smaller than 44x28x1cm
1
Tools
Name
Used for
Upholstery knife
removing supports, finishing surfaces
Pliers
removing supports
File
finishing surfaces
Drill (for steel) 8mm
deburring 8mm holes
Drill (for steel or wood) 2mm
drilling holes for forming screws in support board
Allen screwdriver 3mm
set screw in synchronizer C1
Allen screwdriver 4mm
set screw in sun P4-P5
Phillips screwdriver 3mm
forming screws 3x12mm
Phillips screwdriver 4mm
forming screws 4x20mm
External and internal Seeger calipers
mounting Seeger rings
Silicon or machine oil
lubricating parts
Grease
lubricating internal shaft's bearings
Tweezers
easier putting shims on planets' shafts
Recommendations
3D-printing settings
All models available here are oriented in a way which guarantee quite good quality in FDM technology. However, it's not enought to be sure that parts will be matched together when slicer use automatic settings. I strongly suggest to use advanced slicers like Cura, Prusa Slicer or any other which lets you to set:
elephant foot compensation (in Prusa Slicer)
Linear Advance (for my case K=0.04 or K=40 was ok),
horizontal expansion (hole, initial layer, general - in Cura),
support types and orientation
Metal parts
Bearings, screws, shims and Seeger rings can be cheapest but in case of rods you need to be sure that theirs diameters are exact. In other case, you can waste a few hours for grinding 8mm rod for be able to put 8mm needle and ball bearings on them or making 3mm holes in plastic parts slightly bigger.
Known problems
Assembly
breaks aren't designed well for beeing both assembled or disassembled - try to follow the assembly guide for putting these parts together,
mounting planets into carriers - unfortunately it's the worst thing here (I realized too late) and it's a one-way operation; it cannot be reversed and for removing shaft, carrier needs to be damaged; you need a thin tweezers, knife, screwdriver or similar kind of tool and be very patient for putting shaft throught the carrier, shim, planet and the last shim
mounting bearings is (and generally, should be) tight but try to pushing them rather than hitting by hammer; you need to be careful for not breaking parts,
internal Seeger rings (15 and 48mm) requires strong calipers - cheapest sets of calipers may be unable and dangerous to bend rings of those sizes (wear safety gogles for mounting snap rings)
Operating
shifting clutches may be difficult especially for overdrives or for some othe configuration of switches. If so, try to do this by pushing clutches instead of C1/C2 shifts;
4th and 5th gear (overdrives) requires more forces and for synchronizers designed for this model' design it tends to shifting clutch C2 back - it need to be hold during spinning the input shaft.
Similar models
3dwarehouse
free

Solarbotics 1-1/4' Wheel, Internal Set-screw
...ics 1-1/4' wheel, internal set-screw
3dwarehouse
aluminum hub with 3mm shaft and setscrew covered by the grippy rubber tire.
thingiverse
free
8mm bearing mount for 12mm Linear Rail support + 8mm Lead Screw by elufo
... x m3 nuts
bearings: 8mm inner, 16mm outer, 5mm thickness.
12mm linear shaft.
8mm lead screw.
nema 23 support + 10mm height base.
thingiverse
free
Spur Gears: 1 to 2 Ratio for 1/4" or 8mm shaft by Cotton80
...an easy fit.
the large gear has 28t and the small gear has 14t.
added on 02/05/2017: gears together for 1/4" & 8mm shaft
thingiverse
free

Spoolholder recycling by djdj111
...cut into two pieces each) or ball bearings. plug the parts together and enjoy this simple spoolholder. use big or small shims ;-)
thingiverse
free
PCB Drill Press by Mape
...that works great. i recommend using this one (or similar instead of the small drill. this drill has a...
thingiverse
free
Magnetic Slip Clutch for movie reels (6mm D-shaft to 8mm square shaft) by Agumander
...r 1/4"-20 threads will be handy, and your choice of adhesive. i used a hot glue gun but super glue would probably be easier.
thingiverse
free

U-STAR Mini Bench Saw UA-90400 Bearing Block by Van_Houten
... countersunk for the bearing block screws.
1.5mm hex screwdriver for the brass motor coupler and a screwdriver for the 3mm screws
thingiverse
free
cncDIY by tonyhoang
...arduino cnc shield
3 a4988
1 relay (on/off spindle)
and something you need to assembly.
firmware: grbl v0.9j
control: grblcontrol
thingiverse
free

"Doubowden" Double Hobbed Bolt Bowden Extruder Assembly by MatGyver85
...pression springs for idlers. not sure what size exactly.
2 - 8mm x 15mm drill rod (5/16" may work)
1 - nema 17 stepper motor
thingiverse
free

Shaft Hub by LabRecon
...an element, such as a disk, to a shaft. it was designed for a 1/4" shaft and includes a hole to accommodate a #2 set screw.
Marcinszydlowski
thingiverse
free
CNC lathe kinematic model by marcinszydlowski
...:
name
qty
notes
body
1
support z
1
with supports
support x
1
with supports
chuck
1
turret
1
with supports
3x12mm forming screw
2
thingiverse
free
Spool for refill filament coils by marcinszydlowski
...d for printing (100% speed, 0.2mm layer height):
left side: 13.5 hours,
right side: 12 hours
there's no post-printing needed.
thingiverse
free
Self-centering 3-jaws lathe chuck by marcinszydlowski
...trength
4x30mm allen bolt
6
for jaws and blocking pinion keys
4x12mm allen bolt
3
for jaws
4x12/15mm allen csk
3
for internal lid
Allison
3d_export
$17

porada allison
...render, it is recommended to install a version of at least 1.5, since the glossiness of materials is configured with pbr in mind.
archive3d
free

Sconce 3D Model
...sconce 3d model archive3d sconce lamp-bracket lantern sconce allison n210511 - 3d model (*.3ds) for interior 3d...
3d_export
$155

Lockheed P38 Lightning My little Pig 3D Model
...1943, which had a more powerful version of the allison v-1710 engine.the p-38j, introduced in august 1943, was considerably...
thingiverse
free
Allison Kelly- Remix by akelly141
...allison kelly- remix by akelly141
thingiverse
allison kelly- remix
thingiverse
free

Allison's House by alr112
...allison's house by alr112
thingiverse
this is a model of my house.
thingiverse
free

ceramic robot allison veldheer by massink
...ceramic robot allison veldheer by massink
thingiverse
scanned with the makerbot digitizer desktop 3d scanner
thingiverse
free

Allison Leonard by Friends
...s, artists, diyers, makers, musicians, hackers and anybody else we think is notable.
made with a polhemus 3d scanner at makerbot.
blendswap
free

Allison House Style Illustration Fog
...utput you're looking for.i hope this isn't copyright infringing - for what it's worth, she knows about / endorsed it.
3dbaza
$3

Allison Industrial Loft Vintage Brass Pendant (137152)
... 888<br>xform: no<br>box trick: no<br>model parts: 2<br>render: v-ray<br>formats: 3ds max 2014, obj
thingiverse
free

Allison Kelly-Elegant Geometry by akelly141
...of it. each of the horizontal cylinders have rings coming off them. the idea here was to make them look as if they were balanced.
Transmission
archibase_planet
free
Transmission tower
...lectricity pylon lattice tower framework tower
transmission tower n121015 - 3d model (*.gsm+*.3ds) for exterior 3d visualization.
design_connected
$13

Transmission Sculpture Chandelier
...ture chandelier
designconnected
lasvit transmission sculpture chandelier computer generated 3d model. designed by studio deform.
archive3d
free

Transmission tower 3D Model
...mework tower
transmission tower n121015 - 3d model (*.gsm+*.3ds) for exterior 3d visualization.
3ddd
$1

Lasvit Transmission Торшер
...ry angle. glass parts are joined by heat, creating individual elements that become one material and one body.
приятных рендеров)
3ddd
$1

Lasvit Transmission люстры
...ry angle. glass parts are joined by heat, creating individual elements that become one material and one body.
приятных рендеров)
3d_export
$70

Fiat Van for radio transmission 3D Model
...ansmission 3d model
3dexport
fiat van truck radio transmission
fiat van for radio transmission 3d model neutrino76 54272 3dexport
3d_export
$1000

Automobile Manual Transmission mechanism Gearbox 3D Model
...ox 3d model
3dexport
transmission gearbox
automobile manual transmission mechanism gearbox 3d model daveterminator 24996 3dexport
3d_export
$299
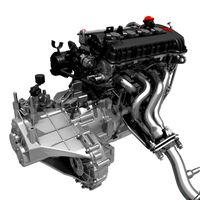
Engine with Transmission 3D Model
... truck turbo 6v transverse four cylinder auto mobile car clutch crank 16v
engine with transmission 3d model fly123 89978 3dexport
cg_studio
$45
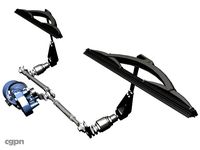
Wiper with transmission and drive unit3d model
...c4d .lwo .obj - wiper with transmission and drive unit 3d model, royalty free license available, instant download after purchase.
3d_export
$319
Engine with Transmission Exhaust 3D Model
...sverse four cylinder pipe exhaust car clutch crank 16v mitsubishi
engine with transmission exhaust 3d model fly123 89987 3dexport
1000
3d_export
free

stone 1000
...stone 1000
3dexport
3ddd
$1
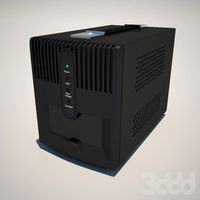
Ippon AVR-1000
...ippon avr-1000
3ddd
стабилизатор , ippon
стабилизатор напряжения ippon avr-1000
3ddd
$1
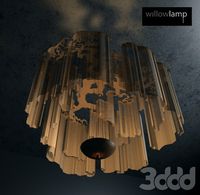
Faraway Tree - 1000
...ddd
faraway tree , willowlamp
люстра от компании willowlamp. модель faraway tree - 1000.
3ddd
free
table 1000
... stool , table , greek
www.tsinos.gr
3d_export
$5

superbike s 1000 rr
...superbike s 1000 rr
3dexport
superbike s 1000 rr, motorcycle with perfect model.
3d_export
$89

Wolseley 1000 3D Model
...ini wolseley 1000 mk1 classic british austin morris 1962 1965 cooper old antique
wolseley 1000 3d model desmonster 98084 3dexport
3ddd
$1
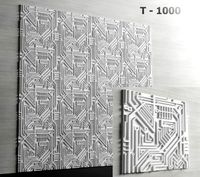
3д Панель - T-1000
...3д панель - t-1000
3ddd
панель
стеновая, гипсовая 3д панель t-1000.
500 x 500 мм.
design_connected
$16

1000 Karat Blau Pendant
...00 karat blau pendant
designconnected
ingo maurer 1000 karat blau pendant computer generated 3d model. designed by schmid, axel.
3ddd
$1

NorSap 1000 Series
...norsap 1000 series
3ddd
pilot chair , norsap
texture included
3d_export
$35

Swimex 1000S 3D Model
...swimex 1000s 3d model
3dexport
swimex swimming pool therapy water swim spa
swimex 1000s 3d model artet 33413 3dexport