Thingiverse
All-In-One Case Cover
by Thingiverse
Last crawled date: 4 years, 3 months ago
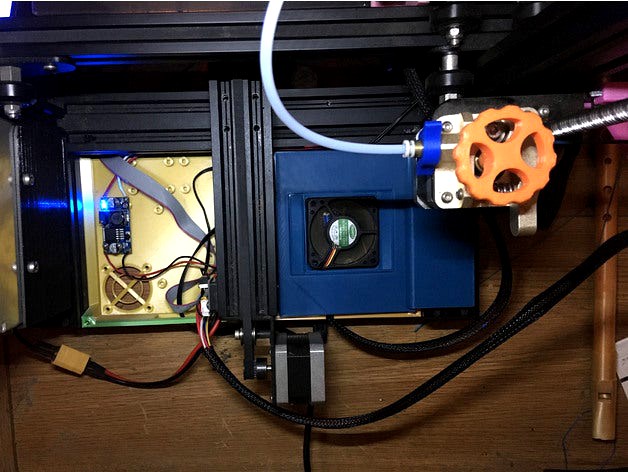
Ender 3 Electronics Case Cover
An alternative cover for the Ender 3 all in one, universal rear electronics case design by teaching tech.
Github
Designed to fit my Ender 3 Pro. On the regular Ender 3 there would be a small gap between the cover and the Y axis rail.
Teaching tech's design is really nice. I just wasn't super happy with the cover. This alternative cover features a separable hinge. When raised the cover can be completely removed for easier access to the electronics. I can remove it in seconds without moving/turning my printer. (There is an optional remix of TT's melzi case which moves the borad to the left a bit and removes the TL smoother mounts.)
The hinge piece slides onto the end of 40x40 extrusion. Before sliding the hinge on, you will need to remove the endcap from the extrusion and you will also need to slide the electronics case partially out because the stop that the cover rest on hangs lower than the back wall of the case.
To install the cover, pull the buildplate carriage forward for clearance then insert the 'J' shaped side of the cover into the hinge slot with the cover at about a 60 degree angle. The cover is not meant to be a tight fit on the case. It hovers a couple of MM above it. If you have any wires that run over the 40x40 extrusion under the bed, slide the cover back enough that you don't pinch them when lowering it into place.
The slotted version of the cover accepts trays and spacers and can be used with a 40 mm or 50 mm fan. The trays come in 10 mm and 5 mm deep versions. If you have clerance over heatsinks you can use a 10 mm one so that the top of the fan is flush with the top of the cover.
All models are oriented the way I print them. I use supports on the trays. I printed hinge.stl standing on end with a brim, but it would probably print ok without the brim if you have good build plate adhesion. You may need to trim, scrape, or sand the underside of the 'J' as there may be a slight ridge there after printing (I scraped mine using a razor blade).
Files
Descrition
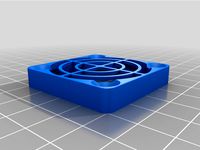
40mm_cover.stl
Full cover for 40mm fan.
40mm_mount.stl
Mount for 40mm fan.
40x10_tray.stl
10 mm deep tray for 40 mm fan (for use with the slotted cover).
40x5_tray.stl
5 mm deep tray for 40 mm fan (for use with the slotted cover).
50mm_cover.stl
Full cover for 40mm fan.
50mm_mount.stl
Mount for 50mm fan.
50x10_tray.stl
10 mm deep tray for 50 mm fan (for use with the slotted cover).
50x5_tray.stl
5 mm deep tray for 50 mm fan (for use with the slotted cover).
hinge.stl
Cover hinge mounts to the 40x40 extrustion (all covers and mounts use this).
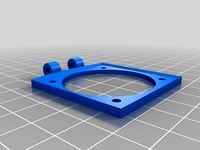
slotted_cover.stl
An adjustable cover. Tray fit into the slot. Use spacers to position the fan.
solid_cover.stl
A cover with no fan mount.
10mm_spacer.stl
Spacer for use with the slotted cover and tray. Use 2 with the 50 mm tray or 3 with the 40 mm tray.
melzi_case.stl
Remix of TT's case, moving the board to the left for better access.
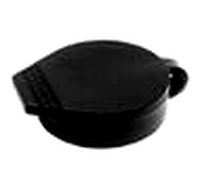
rear_cap.stl
Fits the top of the rear wall of the case. Holds the wire bundle in and gives a landing for the cover.
An alternative cover for the Ender 3 all in one, universal rear electronics case design by teaching tech.
Github
Designed to fit my Ender 3 Pro. On the regular Ender 3 there would be a small gap between the cover and the Y axis rail.
Teaching tech's design is really nice. I just wasn't super happy with the cover. This alternative cover features a separable hinge. When raised the cover can be completely removed for easier access to the electronics. I can remove it in seconds without moving/turning my printer. (There is an optional remix of TT's melzi case which moves the borad to the left a bit and removes the TL smoother mounts.)
The hinge piece slides onto the end of 40x40 extrusion. Before sliding the hinge on, you will need to remove the endcap from the extrusion and you will also need to slide the electronics case partially out because the stop that the cover rest on hangs lower than the back wall of the case.
To install the cover, pull the buildplate carriage forward for clearance then insert the 'J' shaped side of the cover into the hinge slot with the cover at about a 60 degree angle. The cover is not meant to be a tight fit on the case. It hovers a couple of MM above it. If you have any wires that run over the 40x40 extrusion under the bed, slide the cover back enough that you don't pinch them when lowering it into place.
The slotted version of the cover accepts trays and spacers and can be used with a 40 mm or 50 mm fan. The trays come in 10 mm and 5 mm deep versions. If you have clerance over heatsinks you can use a 10 mm one so that the top of the fan is flush with the top of the cover.
All models are oriented the way I print them. I use supports on the trays. I printed hinge.stl standing on end with a brim, but it would probably print ok without the brim if you have good build plate adhesion. You may need to trim, scrape, or sand the underside of the 'J' as there may be a slight ridge there after printing (I scraped mine using a razor blade).
Files
Descrition
40mm_cover.stl
Full cover for 40mm fan.
40mm_mount.stl
Mount for 40mm fan.
40x10_tray.stl
10 mm deep tray for 40 mm fan (for use with the slotted cover).
40x5_tray.stl
5 mm deep tray for 40 mm fan (for use with the slotted cover).
50mm_cover.stl
Full cover for 40mm fan.
50mm_mount.stl
Mount for 50mm fan.
50x10_tray.stl
10 mm deep tray for 50 mm fan (for use with the slotted cover).
50x5_tray.stl
5 mm deep tray for 50 mm fan (for use with the slotted cover).
hinge.stl
Cover hinge mounts to the 40x40 extrustion (all covers and mounts use this).
slotted_cover.stl
An adjustable cover. Tray fit into the slot. Use spacers to position the fan.
solid_cover.stl
A cover with no fan mount.
10mm_spacer.stl
Spacer for use with the slotted cover and tray. Use 2 with the 50 mm tray or 3 with the 40 mm tray.
melzi_case.stl
Remix of TT's case, moving the board to the left for better access.
rear_cap.stl
Fits the top of the rear wall of the case. Holds the wire bundle in and gives a landing for the cover.
Similar models
thingiverse
free

reducer - 50 to 40 mm fan for Electronics Cover by split007
...t007
thingiverse
reducer from 50mm to 40mm fan for electronics cover by mrzii
*11/9/2017 added a cover for the power supply hole
thingiverse
free
fan_cover for 40x40 fans by MrNiceDM
...
the fans are not protected, so i have created a cover.
for mounting i used m4 hexagon socket countersunk screw with 30 mm length
thingiverse
free

CR-10 / Ender Hotend Cover For Stock Fans/ Adapter 40x40 by casa007
...ender hotend cover for stock fans/ adapter 40x40 by casa007
thingiverse
cr-10 / ender hotend cover for stock fans/ adapter 40x40
thingiverse
free
RADDS case for D-BOT by printerboon
... hold two 40mm fans.
update: added a cover for a single 60mm fan. my (cheap) 40mm fans died, now i'm using a 60mm sunon fan.
thingiverse
free
40mm Mendel90 electronics-fan mount by Dekker3D
... a 40 mm fan mount for the electronics on a mendel90. but it should be usable wherever you need to screw a rotatable fan to wood.
thingiverse
free

Ender 3 V2 - Raspberry Pi 3B case (with 30mm fan mount and v-slot rail) by dsgipks
...int the original lamax, attached
i also removed the cavities at the bottom of the case.
soon i will do the same for the 40mm fan.
thingiverse
free

velleman k8200 board cover with holes for mounting 40mm fan inside by arnevdm
...ing 40mm fan inside by arnevdm
thingiverse
i added holes to the original board cover for mounting a 40 mm fan inside the cover.
thingiverse
free

Solidoodle Printrboard Dual Fan Cover Plate by Claghorn
...o the clips is likely to break one or the other. sliding them in until they seat in the 40mm square depression works much better.
thingiverse
free

X5S motherboard cover w/fan and spacers by Dnewgent92
...o be mounted.
spacers are included to keep the fan a distance from the motherboard.
i had to use 50mm m3 screws to mount this.
thingiverse
free

40mm fan cover by k_madsen
... by k_madsen
thingiverse
hi it's a cover for 40 mm fan. i made for my raspberry pi 4. but it can be used as a general cover.
Cover
archibase_planet
free

Cover
...cover
archibase planet
cover place setting
cover n170807 - 3d model for interior 3d visualization.
3ddd
$1
cover
...cover
3ddd
ковер , круглый
cover decor
archibase_planet
free

Cover
...cover
archibase planet
cover place setting setting
servis-cafe1930 - 3d model for interior 3d visualization.
turbosquid
free
Coverings
...rings
turbosquid
free 3d model coverings for download as dwg on turbosquid: 3d models for games, architecture, videos. (1279391)
3d_export
$5
plug cover
...plug cover
3dexport
plug cover
turbosquid
$25
Covers
... available on turbo squid, the world's leading provider of digital 3d models for visualization, films, television, and games.
3d_export
$10
manhole cover
...manhole cover
3dexport
manhole cover gost, stl, step
turbosquid
$5

Street Gas Cover Manhole Cover
... available on turbo squid, the world's leading provider of digital 3d models for visualization, films, television, and games.
3ddd
free
Bed cover
...bed cover
3ddd
постельное белье
very useful bed cover
3d_export
$5
cpu cover
...cpu cover
3dexport
cpu cover, cpu box, sheet metal container
Case
3d_export
$1

case
...case
3dexport
case
archibase_planet
free

Case
...case
archibase planet
showcase show-case glass case
glass-case + cakes - 3d model for interior 3d visualization.
archibase_planet
free

Case
...case
archibase planet
showcase show-case glass case
glass-case for chips - 3d model for interior 3d visualization.
archibase_planet
free

Case
...case
archibase planet
case shelving drawer
case - 3d model for interior 3d visualization.
archibase_planet
free

Case
...case
archibase planet
case rack locker
case - 3d model for interior 3d visualization.
archibase_planet
free

Case
...case
archibase planet
case drawer kitchen furniture
case - 3d model for interior 3d visualization.
archibase_planet
free

Case
...case
archibase planet
case cupboard shelving
glass case - 3d model for interior 3d visualization.
archibase_planet
free

Case
...case
archibase planet
case handbag suitcase
case - 3d model (*.gsm+*.3ds) for interior 3d visualization.
archibase_planet
free

Case
...case
archibase planet
case suitcase
case 5 - 3d model (*.gsm+*.3ds) for interior 3d visualization.
archibase_planet
free

Case
...case
archibase planet
locker case dresser
case - 3d model (*.gsm+*.3ds) for interior 3d visualization.
One
turbosquid
$2
one plus one
... available on turbo squid, the world's leading provider of digital 3d models for visualization, films, television, and games.
3ddd
$1
One
...one
3ddd
стул
офисный стул one
3ddd
free

one
...
palazetti one ,http://palazzetti.ca/index.php/component/virtuemart/seating/armchairs-lounges/one-chair-detail?itemid=0
turbosquid
$35

One A
... available on turbo squid, the world's leading provider of digital 3d models for visualization, films, television, and games.
turbosquid
free

One
... available on turbo squid, the world's leading provider of digital 3d models for visualization, films, television, and games.
3ddd
$1
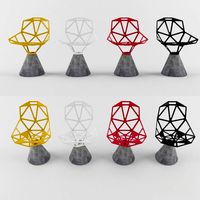
Стул One
...стул one
3ddd
one , magis
кресло magis s.p.a , one
3ddd
$1
Стул One
...стул one
3ddd
one , magis
кресло one chair (4star), magis s.p.a.
3d_export
$20

xbox one
...xbox one
3dexport
xbox one
3ddd
$1
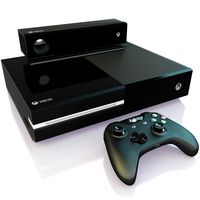
xbox one
... консоль , джойстик
xbox one + kinect + gamepad
3ddd
free
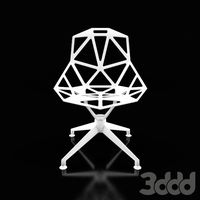
One
...nstantin grcic
артикул ct-284 (cosmorelax.ru)
размер l36xw41xh82.5, sh 77cm
цвет черный, красный
материал алюминий
вес 2,5 кг
All
turbosquid
$20

all
... available on turbo squid, the world's leading provider of digital 3d models for visualization, films, television, and games.
turbosquid
$5
all
... available on turbo squid, the world's leading provider of digital 3d models for visualization, films, television, and games.
design_connected
$29

All-Two
...all-two
designconnected
bonaldo all-two computer generated 3d model. designed by bicego, sergio.
design_connected
$29

All-One
...all-one
designconnected
bonaldo all-one computer generated 3d model. designed by bicego, sergio.
design_connected
$16

Holly All
...holly all
designconnected
serralunga holly all computer generated 3d model. designed by starck, philippe.
3d_export
$15

all terrain
...all terrain
3dexport
turbosquid
$29

Holly All
... available on turbo squid, the world's leading provider of digital 3d models for visualization, films, television, and games.
turbosquid
$19

Fireplace (All)
... available on turbo squid, the world's leading provider of digital 3d models for visualization, films, television, and games.
turbosquid
$19

Fireplace (All)
... available on turbo squid, the world's leading provider of digital 3d models for visualization, films, television, and games.
turbosquid
$19

Fireplace (All)
... available on turbo squid, the world's leading provider of digital 3d models for visualization, films, television, and games.