Thingiverse

AeVOC Housing for C´T 2021/3 Project by D_o_S
by Thingiverse
Last crawled date: 4 years, 1 month ago
Air Quality Sensor AeVOC
Alternate Housing
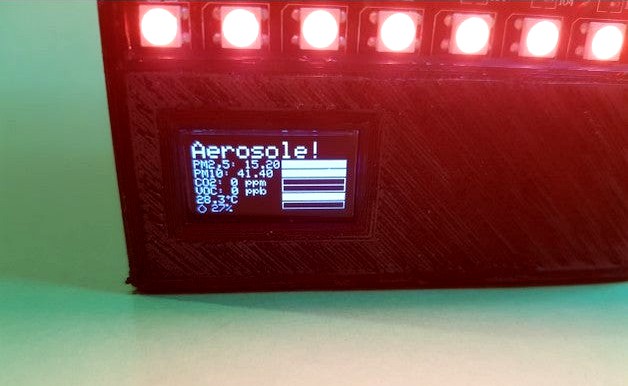
This is a alternate Housing for a air-quality-sensor, published on C´T (Computer and Technology) 2021/3 Page 118
This device analyses ambient air about fine dust, aerosols, carbon dioxide and hydrocarbons. The device is displaying measurements on a OLED display and a array of
WS2812. The uses CPU-Module is a ESP32 (NodeMCU). All measurement datas are alternatively streamed into the WLAN or can integrated in houseautomation.Link
Sourcecode, Schematic and all other stuff is placed here:Link
Motivation of this thing:
This project looks very fine but in original, a housing of wood was given wich was very big and aditional, a fan was planned for ventilation air to CS811 and DHT22-Sensor.
*what?
First, why wasting place with such housing an why a second fan. SDS11-Sensor has a build in radial fan wich is very silent and is doing it´s job.
So i started to make a alternate housing with special features.Enjoy! The SDS11 Fan is sucking air for analysis aim on the top of the housing. After passing SDS11 fine-dust/aerosol analysis air will be blowed on CS811 and DHT22 for further analysis.
Exausts is designed on the upper side wall, so any warming oft the air will build thermic-effect and helps venting sensors.
This housing is printfriendly means it is easy to print and needs no support
For the powersupply i used this components:
Bush 5.5mm x 2.1mm: [Link]https://www.amazon.de/gp/product/B019IFAQ5G/ref=ppx_yo_dt_b_asin_title_o01_s01?ie=UTF8&psc=1
Supply:
[Link]https://www.amazon.de/RS-Power-Steckernetzteil-RS-E04J00-S02-Hohlstecker-Schwarz/dp/B07F849K8P/ref=sr_1_5?__mk_de_DE=ÅMÅŽÕÑ&dchild=1&keywords=5V+4A&qid=1616253686&s=computers&sr=1-5Dim down LEDs. This saves your life, your eyes and reduces sefheating of AeVOC!!!
Additional you need a short (5mm..10mm) Tube (about 5.5mm..5.7mm in diameter, 6.5mm out diameter (or a shrink tube, i used) and 2 3mm screws length about 3..6 mm
All wires i used had a length of 80mm. You don´t need longer cables.
Housing is mounted in this order:
Place Front part, face down.
Put LED-Array into Front part and put OLED-Display into forseen moulding area
Insert "Andruckplatte". This part holds LED-Array and OLED in position
SDI-Part has to be prepared with hot air like shown on photo. The function is to build springs wich are pressing the "Andruckplatte" about 2mm.
Insert SDI-part. Put CS811 and DHT22 Sensor in forseen place (you can glue it if you want, or use tape)
Put SDS11-Sensor on forseen 3 pins. Fan should now be placed exactly to the sensors
Mount a small Tube (Shrinktube is also possible) on intake of SDS11 so Air will be sucked outside the housing.
Plug the ESP32-Module on the forseen terminals and fix it with a hot nail by melting ends of terminals
Put the CPU-part with mounted ESP32 on the stack.
Mount the Power-bush on Back-part
Close housing with the Back-part by pushing it together and use 2 3mm screws to fix everything.
Glue the exaust-cover "Lueftung" on the housing.
The exaust hole is 20mm x 20mm. You can personalise your AeVOC-device by making your own grid/cover (Smiley, Sun, Cloud, ...)
This Files are Version 26.
The hole project in german: [link]https://www.mostfun.de/index.php/sonstiges/416-luftguetewaechter-2
