Thingiverse
Adjustable Mounting System for 5MP WebCam eg as TableTop GameCam or wall mounted by JPG_master
by Thingiverse
Last crawled date: 3 years ago
This is about replacing the original Camera Mounting System and replace by a rebuilt and flexible one.
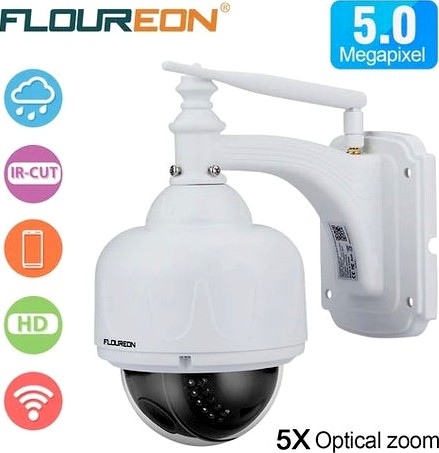
Last summer we bought a 5 Mpixel Zoomable WebCam from Floureon to enable friends and familie to play table games with us remotely via web - all caused by Corona / Covid restrictions.
But this is also suitable for those who live some distance away or a spontanous session where drive or drink&drive needs to be organized.
The Camera ( https://www.floureon.com/collections/ip-wi-fi-camera/products/1080p-ptz-wifi-ip-camera-outdoor-hd-h-264-wireless-waterproof-cctv-security-dome-camera ) does support ONVIF and so can be managed by a Surveillance-SW. ( we use Synology ).
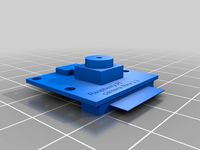
The camera has a "simple rod-type top" that allowed to replace the holder by my own design - see mock in "grey" left to the two pieces in blue: Top "cylinder" and "spoon" for antenna.
I think that can be adopted / designed for any Camera with Top-Mount mechanism, that can be disassembled - at least separated from the mount.
All rods and mount use a M16 Nut and Bolt linking. One Rod Piece ist adjustable by an inner / out Rod concept ( slipping into each other ) and fixed by a 5 mm printed pin with a securing nut.
The camera as well can be mounted with or without Rods ( extensions ) at the redesigne wall-mount.
I did design for the over-table-Position a holder that fixes at a 12 Halogen Rail from german SLV Company. BUT one can build ANY final fixation by simple adding a M16 thread ( Nut ) to that with a 10.5 mm thread.
One challenge was to avoid SUPPORT around the thread, as this might make them going heavy => see extra print support stands ( 12 gramm extra filament or so ) - but one rod needed to be printed "thread down" and with support.
Second challenge was to open the orig wall mount to get the wiring out of it - see last pictures.
Third challenge is thread print quality. I used Prus Slic3rs variable layer height to print threads at smalles layer heights => the fit PERFECT and i could have omited the 6face-bolt type extension at the rod ends.
Finally: i did not prepare a mount for the tiny speaker, I just left it away ... no use for AND the cam works fine without.
happy to explain more and if required in German.
Last summer we bought a 5 Mpixel Zoomable WebCam from Floureon to enable friends and familie to play table games with us remotely via web - all caused by Corona / Covid restrictions.
But this is also suitable for those who live some distance away or a spontanous session where drive or drink&drive needs to be organized.
The Camera ( https://www.floureon.com/collections/ip-wi-fi-camera/products/1080p-ptz-wifi-ip-camera-outdoor-hd-h-264-wireless-waterproof-cctv-security-dome-camera ) does support ONVIF and so can be managed by a Surveillance-SW. ( we use Synology ).
The camera has a "simple rod-type top" that allowed to replace the holder by my own design - see mock in "grey" left to the two pieces in blue: Top "cylinder" and "spoon" for antenna.
I think that can be adopted / designed for any Camera with Top-Mount mechanism, that can be disassembled - at least separated from the mount.
All rods and mount use a M16 Nut and Bolt linking. One Rod Piece ist adjustable by an inner / out Rod concept ( slipping into each other ) and fixed by a 5 mm printed pin with a securing nut.
The camera as well can be mounted with or without Rods ( extensions ) at the redesigne wall-mount.
I did design for the over-table-Position a holder that fixes at a 12 Halogen Rail from german SLV Company. BUT one can build ANY final fixation by simple adding a M16 thread ( Nut ) to that with a 10.5 mm thread.
One challenge was to avoid SUPPORT around the thread, as this might make them going heavy => see extra print support stands ( 12 gramm extra filament or so ) - but one rod needed to be printed "thread down" and with support.
Second challenge was to open the orig wall mount to get the wiring out of it - see last pictures.
Third challenge is thread print quality. I used Prus Slic3rs variable layer height to print threads at smalles layer heights => the fit PERFECT and i could have omited the 6face-bolt type extension at the rod ends.
Finally: i did not prepare a mount for the tiny speaker, I just left it away ... no use for AND the cam works fine without.
happy to explain more and if required in German.
Similar models
thingiverse
free

38mm Webcam Tripod Mount by zx82net
...-20 thread adapter, which is a good way to get a high quality printed thread into this:
https://www.thingiverse.com/thing:3081943
thingiverse
free

Generic mount for Webcam or other accessories by gameoffuture
...sembled on thingiverse).
the design-spark file is also attached so you can customize anything as you see fit for your purpose.
thingiverse
free

Filament Spool Holder Mod for Malyan M150 and I3 Clones by paradug
...paradug thingiverse this modification of the malyan m150's (or similar i3 clones) stock filament holder improves the filament feed...
thingiverse
free

Webcam Tripod Mount
...era with the capture nut slot toward the back. the camera platform sits slightly forward to allow the camera freedom of movement.
thingiverse
free

PlayStation VR Camera Mounting Pole
...the rod and secure using a m4 bolt. the tv mount needs double sized tape on one side to 'pad' out the gap for the tv top.
thingiverse
free

Prusa i3 MK3 z-axis-top webcam mount for top view by pavankp
... change" gcode m600 at of 60mm to get the two-tone print, starting with black petg and then switching to prusa orange petg.
thingiverse
free

Vesa mount for 12mm threaded rod by michalmietlinski
... clamp to mount it to desk. use double nuts to secure it more! let me know how it goes:
https://www.thingiverse.com/thing:4593927
thingiverse
free

Bowden extruder mount on Z-Axis support threaded rod by Tech2C
... and nuts to mount the bowden extruder to these blocks.
check my "makes" in my profile for the bowden extruder model.
thingiverse
free

upside down wall mount for Xiaomi ip 360 camera
... placed it in the printer.
i sanded the print and used the same paint i used for the walls of my house so it looks the same color
thingiverse
free

Wall Mount for Logitech C920 Webcam on Corner (support at 45º) by protoidea
...r only one webcam, but have modified one of the supports for a different angle, so i have two predefined positions for my webcam.
5Mp
3d_export
$8

Web camera logitech 5mp 3D Model
...web camera logitech 5mp 3d model
3dexport
web camera
web camera logitech 5mp 3d model dema98 60050 3dexport
thingiverse
free
RPi Camera 5MP v1.3
...rpi camera 5mp v1.3
thingiverse
rpi camera 5mp v1.3
thingiverse
free

Support Camera Kuman 5MP Raspberry by pieruf
...erry by pieruf
thingiverse
support for camera kuman 5mp raspberry.
nb: is not perfect but could be a good basis for the project.
thingiverse
free

Raspberry PI Cam Clip for 5MP Camera - for Flashforge Dreamer by Nordwork
...hingiverse
holder to mount the 5mp raspberry pi camera into a flashforge dreamer.
without screws
without sticking
easy to mount
thingiverse
free

Camera case for HD Flügel Kamera 1280x720p 30fps 5MP CMOS by nablabla
...p-cmos.html
sorry for german title, the items name is
hd wing camera 1280x720p 30fps 5mp cmos
unfortunately it is out of stock :(
thingiverse
free

Arducam 5MP OV5647 Camera Mount by GiulianoM
...e should come with the camera kit.
if not, you'll need 4 x m2 15mm screws and 4 x m2 nuts.
m2 - 2mm screws, not m2.5 - 2.5mm.
thingiverse
free

Anycubic i3 Mega Raspberry Pi 4B holder with Raspberry Pi 5MP Night Vision Camera by Andibacke
... waveshare raspberry pi ir-cut 5mp camera and added a spare cone because my gets broken very fast with 20% infill (bad filament).
thingiverse
free

Reolink RLC-520-5MP Distance Mount by MuffelGuffel
...dont have to drill new holes in your wall.
the smaller holes are for 3mm screws with a max length of 30mm.
feel free to remix it.
thingiverse
free

Case for IR-CUT Focusable Camera Module 5MP Webcam Video 1080p For Raspberry Pi by dretful
... bracket thingy in the other orientation so i uploaded that one too. (back horiz' is the other way from the group and photos)
thingiverse
free

Raspberry Pi-Cam 5MP Weitwinkel (RB-CAMERA-WW) by Keine1dee
...eitwinkelkamera (rb-camera-ww) des raspberry pi. das ganze kann man am drucker über kleine magnete (5mm x 5mm x 5mm) befestigen.
Webcam
3d_export
$10

webcam
...webcam
3dexport
this is a webcam
archibase_planet
free
Webcam
...planet
webcam web camera camera
webcam camera a4tech pks-730g web n200613 - 3d model (*.gsm+*.3ds) for interior 3d visualization.
3d_ocean
$6
Webcam
...orted to 3ds, dae, obj and fbx there is the c4d file include with materials file this is a webcam microsoft lifecam vx-3000 model
turbosquid
$35

Webcam
... available on turbo squid, the world's leading provider of digital 3d models for visualization, films, television, and games.
turbosquid
$35

webcam
... available on turbo squid, the world's leading provider of digital 3d models for visualization, films, television, and games.
turbosquid
$20

webcam
... available on turbo squid, the world's leading provider of digital 3d models for visualization, films, television, and games.
turbosquid
$5

Webcam
... available on turbo squid, the world's leading provider of digital 3d models for visualization, films, television, and games.
turbosquid
$2

Webcam
... available on turbo squid, the world's leading provider of digital 3d models for visualization, films, television, and games.
turbosquid
free

Webcam
... available on turbo squid, the world's leading provider of digital 3d models for visualization, films, television, and games.
turbosquid
free

Webcam
... available on turbo squid, the world's leading provider of digital 3d models for visualization, films, television, and games.
Eg
3ddd
free

Egs
...egs
3ddd
ваза , яйцо , композиции
коллекция яиц
turbosquid
$10

EG Robot
... available on turbo squid, the world's leading provider of digital 3d models for visualization, films, television, and games.
3d_export
$38

pendant lamp eg design
...pendant lamp eg design
3dexport
pendant lamp eg type
3ddd
$1

EG Monogram Ventilation
...оответствует реальным размерам
в архиве также есть файл макс 2012.http://appliances.monogram.com/applproducts/zv755spss
turbosquid
$25

Honda Civic eg
... available on turbo squid, the world's leading provider of digital 3d models for visualization, films, television, and games.
3ddd
$1

EGLO EG-94082 Pasiano
...eglo eg-94082 pasiano
3ddd
eglo
настольная лампа eglo eg-94082 pasiano
стиль модерн
страна производитель: австрия
3ddd
free

Egged shaped table
...egged shaped table
3ddd
круглый , обеденный
стол со стойкой в форме яйца
turbosquid
$4

Ege Office Furniture 3D Model
... model ege office furniture for download as max, 3ds, and fbx on turbosquid: 3d models for games, architecture, videos. (1579934)
3ddd
$1

Creval 714 A EG
..., подвес,
бильярдный светильник creval d122 h73, цвет amber(янтарь), цвет арматуры brass (бронза), длина: 1220 mm, высота: 730 mm
turbosquid
$20

Airplane Triplane WW1 (eg. Sopwith Triplane)
... available on turbo squid, the world's leading provider of digital 3d models for visualization, films, television, and games.
Tabletop
archibase_planet
free

Tabletop
...tabletop
archibase planet
rostrum platform stage
tabletop lecturn- 3d model for interior 3d visualization.
3ddd
$1
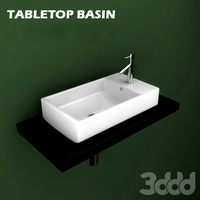
Tabletop Washbasin
...tabletop washbasin
3ddd
tabletop
modern design of tabletop washbasin
3d_export
$5

TABLETOP GREENHOUSE
...tabletop greenhouse
3dexport
tabletop greenhouse with accessories
turbosquid
free

Tabletop Decor
...urbosquid
free 3d model tabletop decor for download as blend on turbosquid: 3d models for games, architecture, videos. (1634208)
3ddd
$1
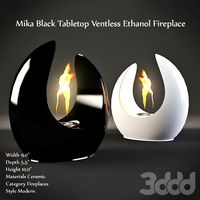
Mika White Tabletop
...mika white tabletop
3ddd
mika white tabletop ventless ethanol fireplace
turbosquid
$20

tabletop radio
...d model tabletop radio for download as 3ds, max, obj, and fbx on turbosquid: 3d models for games, architecture, videos. (1167277)
turbosquid
free

Tabletop Sign
... available on turbo squid, the world's leading provider of digital 3d models for visualization, films, television, and games.
archive3d
free

Tabletop 3D Model
...odel
archive3d
rostrum platform stage
tabletop lecturn- 3d model for interior 3d visualization.
3ddd
free
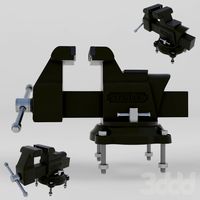
Bench Vise Clamp Tabletop
...bench vise clamp tabletop
3ddd
тиски
bench vise clamp tabletop
turbosquid
$10

Ivanhoe Tabletop Lamp
... ivanhoe tabletop lamp for download as max, obj, fbx, and stl on turbosquid: 3d models for games, architecture, videos. (1411186)
Master
3ddd
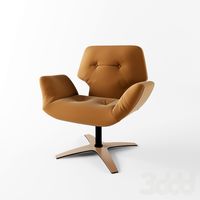
$1
Master
...master
3ddd
besana , master
фабрика: besana
master
размер: 80х60х80
design_connected
$20

Masters
...photo-realistic 3d models of the kartell masters chair by philippe starck for 3d architectural and interior design presentations.
3ddd
$1
Masters
...ка на производительяhttp://www.designboom.com/design/philippe-starck-masters-chair-for-kartell-at-milan-design-week-09/
3d_export
$5

master roshi
...master roshi
3dexport
master roshi 3d model good quality for animation
design_connected
$18
Masters Stool
...masters stool
designconnected
kartell masters stool computer generated 3d model. designed by starck, philippe.
3ddd
free
Key Master
...key master
3ddd
игровой автомат , key master
д 950 / ш 950 / в 1850
3ddd
$1
Стул: Masters Chair
... kartell
стул: masters chair
коллекция: masters
бренд: kartell
страна: италия
размеры, см: 83x54x54; высота сиденья – 47.
3d_export
$5

master bedroom
...master bedroom
3dexport
zhu design<br>a modern tropical inspired master bedroom for your model
3ddd
$1
kartel masters
...el masters
3ddd
kartel , masters
в архиве присутствует fbx и модель в 2011 версии макса.
turbosquid
$150

Master Bedroom
...osquid
royalty free 3d model master bedroom for download as on turbosquid: 3d models for games, architecture, videos. (1329485)
Jpg
turbosquid
$200
10.jpg
... available on turbo squid, the world's leading provider of digital 3d models for visualization, films, television, and games.
turbosquid
$200
room05.JPG
... available on turbo squid, the world's leading provider of digital 3d models for visualization, films, television, and games.
turbosquid
$100

spotter1.jpg
... available on turbo squid, the world's leading provider of digital 3d models for visualization, films, television, and games.
turbosquid
$100

diablow01.jpg
... available on turbo squid, the world's leading provider of digital 3d models for visualization, films, television, and games.
turbosquid
$100

md03.jpg
... available on turbo squid, the world's leading provider of digital 3d models for visualization, films, television, and games.
turbosquid
$100

mk2.jpg
... available on turbo squid, the world's leading provider of digital 3d models for visualization, films, television, and games.
turbosquid
$95

bridge2.jpg
... available on turbo squid, the world's leading provider of digital 3d models for visualization, films, television, and games.
turbosquid
$70

A1.jpg
... available on turbo squid, the world's leading provider of digital 3d models for visualization, films, television, and games.
turbosquid
$62

dojo2.jpg
... available on turbo squid, the world's leading provider of digital 3d models for visualization, films, television, and games.
turbosquid
$57

5.jpg
... available on turbo squid, the world's leading provider of digital 3d models for visualization, films, television, and games.
Adjustable
3d_ocean
$7
Adjustable Wrench
...adjustable wrench
3docean
adjustable wrench highly detailed wrench
highly detailed adjustable wrench.
3ddd
$1
Adjustable Stool
...adjustable stool
3ddd
табурет
wooden adjustable stool.
3d_ocean
$20

Adjustable Gym Bench
...st adjustable bench black equipement gym gymnastic indoor silver sport workout
3d model of black and silver adjustable gym bench.
3d_ocean
$20
Adjustable Gym Bench
...st adjustable bench black equipement gym gymnastic indoor silver sport workout
3d model of black and silver adjustable gym bench.
3d_ocean
$16

Adjustable Weight Bench
...arbell bench black equipement gym gymnastic indoor sport weight workout
3d model of black adjustable weight bench with a barbell.
turbosquid
$5

Adjustable wrench
...
royalty free 3d model adjustable wrench for download as fbx on turbosquid: 3d models for games, architecture, videos. (1313414)
3d_export
$5

adjustable tension lock
...adjustable tension lock
3dexport
adjustable tension lock
turbosquid
$1

Adjustable Wrench
...free 3d model adjustable wrench for download as obj and blend on turbosquid: 3d models for games, architecture, videos. (1446736)
turbosquid
$1

Adjustable Wrench
...y free 3d model adjustable wrench for download as c4d and fbx on turbosquid: 3d models for games, architecture, videos. (1379022)
3d_export
$5

Adjustable key
...adjustable key
3dexport
System
archibase_planet
free

System
...m
archibase planet
fire alarm system fire alarm box
security light system - 3d model (*.gsm+*.3ds) for interior 3d visualization.
archibase_planet
free

Spider system
...stem spider glass system
spider system to fix glass stefano galli n050912 - 3d model (*.gsm+*.3ds) for interior 3d visualization.
3ddd
$1

Euforia System
...euforia system
3ddd
euforia
euforia system
3d_export
$50

Roof system Truss system 3D Model
...oof system truss system 3d model
3dexport
roof system truss truss stage
roof system truss system 3d model aleksbel 38970 3dexport
3ddd
$1

DVD System
...dvd system
3ddd
dvd , schneider
dvd system
design_connected
free

Seating system
...seating system
designconnected
free 3d model of seating system
3d_export
$5

solar system
...solar system
3dexport
solar system in c4d, with 8k nasa textures
3ddd
$1

Quanta System
...quanta system
3ddd
медицина
quanta system.
лазерное оборудование для медицинских центров
3d_export
$15

solar system
...nd the other the sun, the earth and the moon, the latter has an animation with camera movement included, the files are in spanish
3d_export
$14

missile system
...missile system
3dexport
Wall
turbosquid
$5
Wall and UDK Wall
... available on turbo squid, the world's leading provider of digital 3d models for visualization, films, television, and games.
archibase_planet
free
Wall
...wall
archibase planet
batten wall plywood partition
batten wall - 3d model for interior 3d visualization.
3d_ocean
$5
Wall
...wall
3docean
low polgon wall low stone old wall stone wall
2048*2048 tex obj,fbx,blend format. low polygon. game ready.
3ddd
$1
wall
...wall
3ddd
камень , кладка
damaged stone wall
3d_export
$5

wall
...wall
3dexport
room with a wall with doors made of wood and leather
3ddd
$1
WALL FREAMS
...wall freams
3ddd
wall freams
wall freams
3ddd
$1
WALL-E
...wall-e
3ddd
wall-e , робот
wall-e
3ddd
$1
WALL PANNEL
...wall pannel
3ddd
панель
wall pannel for enterance wall.
3d_export
$18
great wall-city wall-dianjiangtai
...great wall-city wall-dianjiangtai
3dexport
great wall-city wall-dianjiangtai<br>3ds max 2015
turbosquid
$5

Wall
...wall
turbosquid
royalty free 3d model wall for download as on turbosquid: 3d models for games, architecture, videos. (1522889)
Mounted
3d_export
free

mounting bracket
...mounting plate is the portion of a hinge that attaches to the wood. mounting plates can be used indoors, cabinetry and furniture.
turbosquid
$2

MOUNTING
... available on turbo squid, the world's leading provider of digital 3d models for visualization, films, television, and games.
turbosquid
free

Mounts
... available on turbo squid, the world's leading provider of digital 3d models for visualization, films, television, and games.
turbosquid
free

Mount Fuji
...fuji
turbosquid
free 3d model mount fuji for download as obj on turbosquid: 3d models for games, architecture, videos. (1579977)
3d_export
$5

Headphone mount LR
...headphone mount lr
3dexport
headphone mount l+r
turbosquid
$39

Mount rainier
...quid
royalty free 3d model mount rainier for download as fbx on turbosquid: 3d models for games, architecture, videos. (1492586)
turbosquid
$5

pipe mounting
...quid
royalty free 3d model pipe mounting for download as obj on turbosquid: 3d models for games, architecture, videos. (1293744)
turbosquid
$3

Mounting Tires
...uid
royalty free 3d model mounting tires for download as fbx on turbosquid: 3d models for games, architecture, videos. (1708511)
3d_export
$5

Magnetic GoPro Mount
...pro mount
3dexport
cool magnetic mount for gopro. allows you to mount the camera on flat metal surfaces and get exclusive shots.
turbosquid
$5

Stone Mount
...ty free 3d model stone mount for download as ma, obj, and fbx on turbosquid: 3d models for games, architecture, videos. (1370306)
Mounting
3d_export
free
mounting bracket
...mounting plate is the portion of a hinge that attaches to the wood. mounting plates can be used indoors, cabinetry and furniture.
turbosquid
$2
MOUNTING
... available on turbo squid, the world's leading provider of digital 3d models for visualization, films, television, and games.
turbosquid
free
Mounts
... available on turbo squid, the world's leading provider of digital 3d models for visualization, films, television, and games.
turbosquid
free
Mount Fuji
...fuji
turbosquid
free 3d model mount fuji for download as obj on turbosquid: 3d models for games, architecture, videos. (1579977)
3d_export
$5
Headphone mount LR
...headphone mount lr
3dexport
headphone mount l+r
turbosquid
$39
Mount rainier
...quid
royalty free 3d model mount rainier for download as fbx on turbosquid: 3d models for games, architecture, videos. (1492586)
turbosquid
$5
pipe mounting
...quid
royalty free 3d model pipe mounting for download as obj on turbosquid: 3d models for games, architecture, videos. (1293744)
turbosquid
$3
Mounting Tires
...uid
royalty free 3d model mounting tires for download as fbx on turbosquid: 3d models for games, architecture, videos. (1708511)
3d_export
$5
Magnetic GoPro Mount
...pro mount
3dexport
cool magnetic mount for gopro. allows you to mount the camera on flat metal surfaces and get exclusive shots.
turbosquid
$5
Stone Mount
...ty free 3d model stone mount for download as ma, obj, and fbx on turbosquid: 3d models for games, architecture, videos. (1370306)