Thingiverse
A1Up RetroPie front control panel
by Thingiverse
Last crawled date: 4 years, 1 month ago
[Working on it]
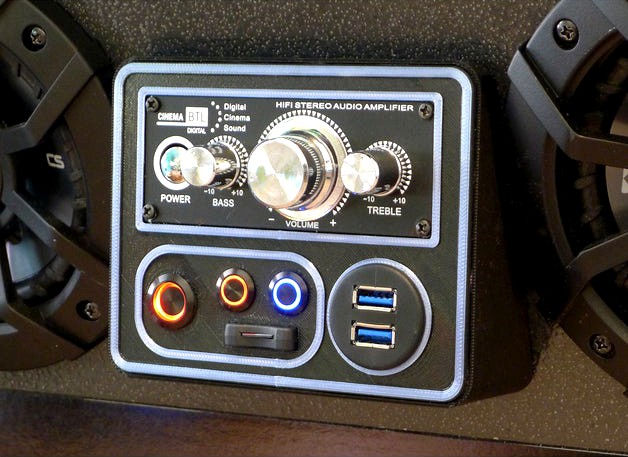
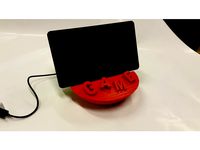
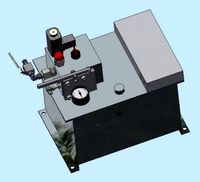
This is a custom cabinet and Raspberry Pie control panel for the Arcade1UP first and second-gen cabinets. It is intended to mount on the J-panel (the angled panel on the front, dircetly below the control panel.
I use an ATX power supply for all internal power - it is switched on and off from this front panel exactly like a computer's on/off switch. A Raspberry Pi is used to run all the games - one of the buttons on the front panel is a safe-shutdown button for the Pi. All of the buttons on the front panel are illuminated when on. The arcade buttons are also illuminated and controlled by a wireless LED controller. (They can flash in patterns in attract mode, but I find a dim illumination better for game play.) There's also a microSD card slot - an extension cable plugged into my Raspi's uSD slot.
I've shoe-horned in a common small, inexpensive amplifier and used its face plate on the panel.
Originally, I had the this panel flush to the surface of the J-panel, but the back of the amp intruded into the arcade button area so I added a housing to let me mount it level. This, along with the car speakers mounted on either side, had the added benefit of making it look a bit like an add-on auto tape deck. Just a small touch of retro.
This is a very preliminary post, but I'm publishing to give a place to point to for those who have asked me about this build. The parts posted are the parts I used and will work for you, too, if you're going to be building a hardware-similar front panel, but a step-by-step for the complete build is a work-in-progress.
I intend to fully flesh out the hardware I used and the wiring and installation of all the things I used to build this A1Up Retro Arcade. I'm also building another one, so I can photograph more of the intermediate steps where necessary.
Similar models
cults
free
Arcade Bonnet Controller for RetroPie
... also dedicated pins for wiring up an analog joystick and an 8-way switch joystick.
https://www.youtube.com/watch?v=ndnbltzojcg
thingiverse
free

Front plate for MIDI controller by sefiwhfiuewhb
...hb
thingiverse
front panel for a midi controller project that i'm working on. i'll be using sixteen 24mm arcade buttons.
thingiverse
free

Retro Game Controller by JoeBowler
...e speaker's mounts was purposely split across the two main bodies to help keep the two halves of the controller box together.
thingiverse
free

Arcade Bonnet Controller for RetroPie by adafruit
...t wires, so no soldering required. there's also dedicated pins for wiring up an analog joystick and an 8-way switch joystick.
thingiverse
free

Tevo Nereus Raspberry Pi 3 mount
...you do not need any additional hardware to put the raspberry pi inside the nereus. i intend on using it with the raspberry pi 3 b
thingiverse
free

Arcade1Up - RetroPie PCB mounts
...d it to be a bit tight.
you may notice the "museum putty" i'm using to trial-mount everything. highly recommended.
cults
free
Ultimate Retropie Joystick Controller -- Remix
... a remix to be able to use the snap-on buttons from this set: quimat arcade kit
also moved the side button to the front.
works!
thingiverse
free

Raspberry Pi CanaKit Mounting Bracket
...mounting bracket i made for my raspberry pi 4 canakit case and setup.
i use this to mount it to my christmas light control panel.
thingiverse
free

Raspberry Pi Controller Case by micahstevens
... the lid was designed for 2 arcade style buttons and a keypad.
i made a few of these for a project last summer, worked out well.
thingiverse
free

Switch Panel - Power, LEDs, Raspberry Pi by whatmojm
... update when complete). i wanted to print this with the boarder and icons facing up so that i could make them a different color.
A1Up
thingiverse
free

A1UP Pinball DMD Frame by mrhector
...the side bars too thin to cover the notches on the right side. the uploaded model has thicker side boarders to cover the notches.
thingiverse
free
Arcade1Up - RetroPie PCB mounts
...took my least-favorite and most control-board rich of my a1up cabs (the street fighter cab) and decided to convert...
thingiverse
free

Wire/Cable hanger with zip tie path
...to hang and guide wires and cables in my a1up retropi arcade cabinet. i use a piece of double-sided...
thingiverse
free

Arcade1Up 4-way Joystick Restrictor
...i think they would work with any other standard a1up cabinet, but no guarantees. also included is a holder...
thingiverse
free

Raspi FLIRC case hanger
...(which i used for attaching the hanger to my a1up cab.) the back plate is not very thick (2.5mm)...
Retropie
thingiverse
free

RetroPi Logo by AwesomeA
...retropi logo by awesomea
thingiverse
retropi logo
thingiverse
free

My RetroPie
...my retropie
thingiverse
this is a test.
thingiverse
free

RetroPie Box by StreetMaker
... cabinet? its got to be portable! and better cost less than $50.
well here is my version of an all inclusive box for the retropie
thingiverse
free
RetroPie Handheld by Cees_Meijer
... 3 a+ running retropie.
check the details and build instruction on hackaday:
https://hackaday.io/project/176661-retropie-handheld
thingiverse
free
Retropie Game Station 2 by paulvanviegen
...rse
with this design you can make a retropie game station. you need a raspberry pi with retropie installed and an 7 inch screen.
thingiverse
free

Retropie Game Station by paulvanviegen
...led and an 7 inch screen. the controllers can be stored on the front of the station. a speaker could be placed inside the sftion.
thingiverse
free

RetroPi TV front panel by BC_Jeffro
... bc_jeffro
thingiverse
front cover for retropi tv
by joo, that was published feb 4, 2015https://www.thingiverse.com/thing:666802
thingiverse
free

Retropie Gaming Station by Snille
...l to come together... this is just the 3d-printable box. :)
you can make the box your own, download and edit the sketchup file.
thingiverse
free

Retropie Arcade Stick by gerk20
... printer!
buttons and joystick - https://www.amazon.com/gp/product/b01m2x88qp/ref=ppx_yo_dt_b_search_asin_title?ie=utf8&psc=1
thingiverse
free

Retropie drinkcoaster
... (100 by 100 by 5 mm), to fit in my coasterholder:
https://www.thingiverse.com/thing:3130397
made with love by:
raimon of idealab
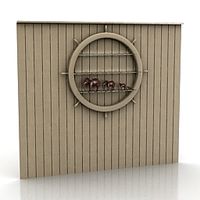
Panel
3d_export
$15

panel
...panel
3dexport
panel
archibase_planet
free
Panel
...panel
archibase planet
panel
panel - 3d model for interior 3d visualization.
3d_export
$5

panel
...panel
3dexport
panel with cones
3ddd
$1
Panels
...panels
3ddd
панель
panels
3d_export
$5

panel
...panel
3dexport
panels grapes with birds
archibase_planet
free
Panel
...panel
archibase planet
panel wainscot dado
play panel n050707 - 3d model for interior 3d visualization.
archibase_planet
free
Panel
...panel
archibase planet
lining panel facing material
panel 2 - 3d model (*.3ds) for interior 3d visualization.
archibase_planet
free

Panel
...panel
archibase planet
lining panel facing material
panel 1 - 3d model (*.gsm+*.3ds) for interior 3d visualization.
archibase_planet
free
Panel
...panel
archibase planet
keyboard patchboard finger-board
security panel - 3d model for interior 3d visualization.
turbosquid
$10

Panel
...l
turbosquid
royalty free 3d model panel for download as stl on turbosquid: 3d models for games, architecture, videos. (1387163)
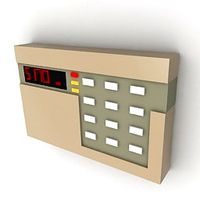
Control
3d_ocean
$4
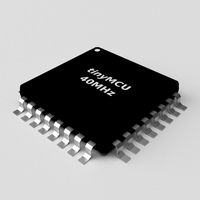
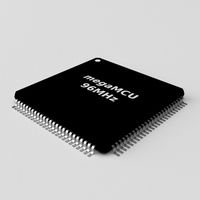
Controller TQFP32
...qfp32
3docean
chip controller cpu electronic gpu mcu micro controller silicon smd tqfp wafer
a micro controller in tqfp32 package
3d_ocean
$4
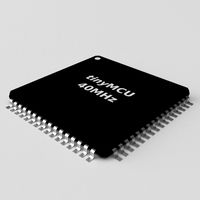
Controller TQFP44
...44
3docean
chip controller cpu electronic gpu mcu micro controller package smd tqfp tqfp44
a micro controller in a tqfp44 package
3d_export
$15
control unit
...control unit
3dexport
control unit
3ddd
$1
Yacht control
...yacht control
3ddd
yacht control
3d_export
$5
controle pgdm
...controle pgdm
3dexport
carcaca controle pgdm
turbosquid
free
controler
... available on turbo squid, the world's leading provider of digital 3d models for visualization, films, television, and games.
3ddd
$1
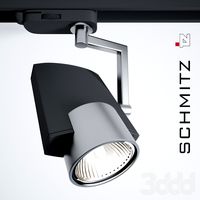
Control
...
http://www.schmitz-leuchten.de/html-ru/einzelleuchten-lampentyp-details.php?lamptype_no=700&group;=917&id;=731
3d_ocean
$4
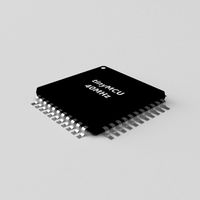
Controller TQFP100
...100
3docean
chip computer cpu electronic gpu mcu micro controller pin platine silicon wafer
a micro controller in tqfp100 package
3d_ocean
$4
Controller TQFP64
...qfp64
3docean
chip computer cpu gpu mcu micro controller package silicon tqfp tqfp64 wafer
a micro controller in a tqfp64 package
3d_ocean
$7

Remote controller
... control switcher tv remote
remote controller for tv, sound systems etc easy to edit textures photo real rendered with mental ray
Front
archibase_planet
free

Front
...front
archibase planet
facade front bluff
front 3d01a - 3d model (*.gsm+*.3ds) for interior 3d visualization.
3d_export
$5
front fork
...front fork
3dexport
front fork
3d_export
$5

Front Desk
...front desk
3dexport
modern and minimal reception front desk
3d_ocean
$4
Medical Front
...medical front
3docean
horror low medical
medical front
3d_ocean
$5
Front Desk
...front desk
3docean
desk front office reception
office reception counter or front desk. cad file and obj file included.
3ddd
free
Axor WaterDream by Front
...r , waterdream , front
axor waterdream by front
3d_export
$5

front nut eye
...front nut eye
3dexport
front nut eye
3d_export
$5
front screw eye
...front screw eye
3dexport
front screw eye
3d_export
$5
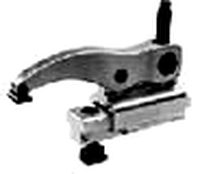
front clamping device
...front clamping device
3dexport
front clamping device
archive3d
free
Front 3D Model
...rchive3d
facade front bluff
front 3d01a - 3d model (*.gsm+*.3ds) for interior 3d visualization.