Thingiverse
SmartBoard: LED Timer Cutting Board by Teece
by Thingiverse
Last crawled date: 2 years, 11 months ago
UPDATED!!!
Two new features added to the SmartBoard, surface temperature reading and night light!
New Video: https://www.youtube.com/watch?v=myKygOVnIUU&feature=youtu.be
The temperature is read by a TMP35 and the neopixel ring shows a different color every 10 degrees. There is a color key supplied in the images. Night light mode shows a white light slowly fading in and out. Currently I am using WS2812 LEDs and one Arduino UNO and two ATTINY85's. The UNO runs the software for the temperature reading and the ATTiny85's run the timer and night light. I am using a 4 position switch to switch between modes, link below is the switch.
http://www.amazon.com/gp/product/B007Q856NK/ref=oh_aui_detailpage_o04_s00?ie=UTF8&psc=1
Thin cutting boards, easily cut to size:http://www.amazon.com/Farberware-Flexible-Cutting-Board-Types/dp/B004OBEX3G
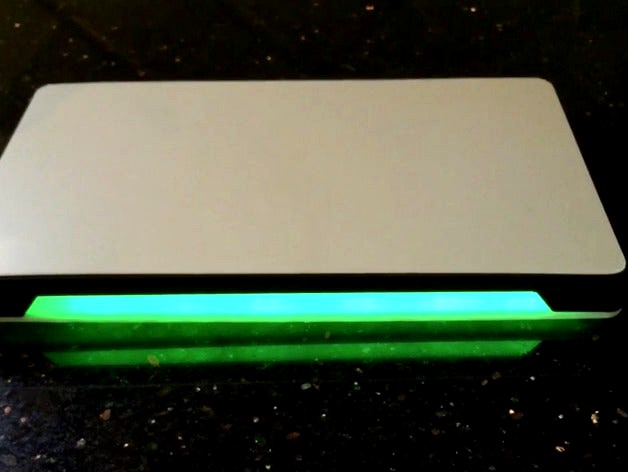
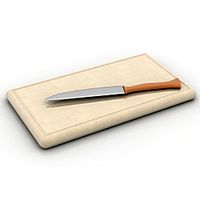
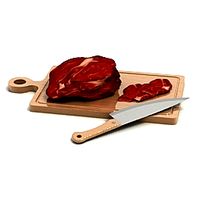
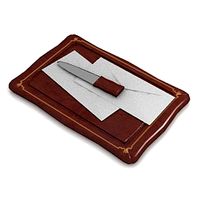
Just in time for grilling season, the SmartBoard is here. The SmartBoard is a cutting board and LED timer all in one. Every seasoned griller knows that you must allow your grilled meat to rest for at least 5 minutes to prevent your masterpiece from being dry and dull The SmartBoard, once activated, lights up red for 5 minutes then blinks green, orange for 5 minutes and then blinks green and finally blue for 5 minutes ending again with green. This allows you to choose just how long you would like your grilled good to rest. Once the resting is complete, you can use the board to carve and serve. There are two versions, one with a cut out top, so a 1/4"x5"x9" food ready cutting board can be added and a solid top. You can add a thin 1/16" cutting board to the top to make it food safe.
I had many more ideas for this board, but unfortunately ran out of time. Weight sensing with LED read coming through the board, Temp sensor with color readout, LED clock lit behind cutting board, night light, etc. Since this is powered with Arduino, hopefully others will add to this project as time passes!
The timing of the lights in the video was changed for the sake of the video. The red, Orange and blue was set to 3 seconds, when actually being used each color is set to 5 minutes.
Video:https://www.youtube.com/watch?v=i4YHNdT0UXI
https://www.youtube.com/watch?v=dpE5a5AqICU
Powered with an Arduino Uno, power adapter and LED lights.
Parts, Printing and Assembly:
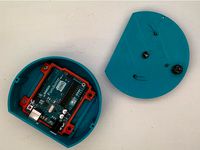
Arduino Uno, LED light strip(I used TM1803, but the code can accommodate a number of LED strips), on off switch, push button for reset, power adapter, cutting board (1/4" or thin 1/6" depending on the version printed), printed parts.
No support necessary for the top and bottom of the body however support is necessary for the stand. I printed at Makerbot's lowest resolution at 10% infill and the print came out great.
Drop in the UNO, hold with a dab of hot glue. Solder up your reset and power button (power button: power wire from LEDs and ground from UNO). Insert reset button, there is a little channel for the nut, reset button screws into that. Insert power button and wire reset and power to UNO. Reset goes to RESET and Ground on the UNO. Power goes to VIN and Ground on UNO. LED connects to A1 and Ground on UNO and VIN via power button. LEDs are held in place with a little hot glue. Insert 4 screws on the bottom to mate all parts.
INO file uploaded. Please add features to it!
CountertopChallenge
Two new features added to the SmartBoard, surface temperature reading and night light!
New Video: https://www.youtube.com/watch?v=myKygOVnIUU&feature=youtu.be
The temperature is read by a TMP35 and the neopixel ring shows a different color every 10 degrees. There is a color key supplied in the images. Night light mode shows a white light slowly fading in and out. Currently I am using WS2812 LEDs and one Arduino UNO and two ATTINY85's. The UNO runs the software for the temperature reading and the ATTiny85's run the timer and night light. I am using a 4 position switch to switch between modes, link below is the switch.
http://www.amazon.com/gp/product/B007Q856NK/ref=oh_aui_detailpage_o04_s00?ie=UTF8&psc=1
Thin cutting boards, easily cut to size:http://www.amazon.com/Farberware-Flexible-Cutting-Board-Types/dp/B004OBEX3G
Just in time for grilling season, the SmartBoard is here. The SmartBoard is a cutting board and LED timer all in one. Every seasoned griller knows that you must allow your grilled meat to rest for at least 5 minutes to prevent your masterpiece from being dry and dull The SmartBoard, once activated, lights up red for 5 minutes then blinks green, orange for 5 minutes and then blinks green and finally blue for 5 minutes ending again with green. This allows you to choose just how long you would like your grilled good to rest. Once the resting is complete, you can use the board to carve and serve. There are two versions, one with a cut out top, so a 1/4"x5"x9" food ready cutting board can be added and a solid top. You can add a thin 1/16" cutting board to the top to make it food safe.
I had many more ideas for this board, but unfortunately ran out of time. Weight sensing with LED read coming through the board, Temp sensor with color readout, LED clock lit behind cutting board, night light, etc. Since this is powered with Arduino, hopefully others will add to this project as time passes!
The timing of the lights in the video was changed for the sake of the video. The red, Orange and blue was set to 3 seconds, when actually being used each color is set to 5 minutes.
Video:https://www.youtube.com/watch?v=i4YHNdT0UXI
https://www.youtube.com/watch?v=dpE5a5AqICU
Powered with an Arduino Uno, power adapter and LED lights.
Parts, Printing and Assembly:
Arduino Uno, LED light strip(I used TM1803, but the code can accommodate a number of LED strips), on off switch, push button for reset, power adapter, cutting board (1/4" or thin 1/6" depending on the version printed), printed parts.
No support necessary for the top and bottom of the body however support is necessary for the stand. I printed at Makerbot's lowest resolution at 10% infill and the print came out great.
Drop in the UNO, hold with a dab of hot glue. Solder up your reset and power button (power button: power wire from LEDs and ground from UNO). Insert reset button, there is a little channel for the nut, reset button screws into that. Insert power button and wire reset and power to UNO. Reset goes to RESET and Ground on the UNO. Power goes to VIN and Ground on UNO. LED connects to A1 and Ground on UNO and VIN via power button. LEDs are held in place with a little hot glue. Insert 4 screws on the bottom to mate all parts.
INO file uploaded. Please add features to it!
CountertopChallenge
Similar models
thingiverse
free
Corona Timer by Piepenbrink
... for reset an a piezo buzzer.
one case is for arduino nano and the other for arduino uno.
ein projekt aus dem technik-unterricht.
grabcad
free

Button switch PWR-LED
...button switch pwr-led
grabcad
19mm metal push button switch. power led light. momentary reset.
grabcad
free

Arduino Uno Screw Shield
...arduino uno screw shield
grabcad
screw shield for arduino with reset button and led
thingiverse
free

arduino UNO case (boitier Arduino uno)
...arduino uno case (boitier arduino uno)
thingiverse
arduino uno case with reset button.
grabcad
free

Arduino Uno
...a button, or a twitter message - and turn it into an output - activating a motor, turning on an led, publishing something online.
thingiverse
free

Arduino with Adafru.it lcd 1.8" shield casing by Lyadis
...e for an arduino uno with an adafru.it lcd 1.8" shield. let the i/o pins, reset button, usb port, and power plug accessible.
thingiverse
free

Arduino PH Meter by kevinlo
...roject information :http://www.mini-kossel.com/arduino-ph-meter-project
hardware :
arduino uno
lcd keypad shield
ph meter board
thingiverse
free

Arduino uno slim case top with reset button access by rubisco2000
...has enough clearance so that normal handling will not cause an unwanted reset.
i also removed a small section for the power jack.
thingiverse
free

Digital Clock
...inutes.
the software for the uno is "corrie_clock.tex". open with notepad, copy and past in arduino programmer.
enjoy.
thingiverse
free

Arduino Uno Snug Case by Esquilo
...ino mega snug case.
for the raspberry pi, see my raspberry pi snug case.
update 11/20/15: added hole on top for the reset button.
Teece
thingiverse
free

Teeces Bezles by Oburi
...eley's dome. (btw, check out his profile, he does some awesome work... and michael, feel free to add them to your one drive.)
thingiverse
free

Teece's Apple Watch Stand Remix by Nylanan
... route the cable for a clean look and also added a hole so that you can remove the charger a bit easier.
love the design teece!
thingiverse
free

iPhone X Case by Teece
...s an exact fit for my printer, but tolerances may vary by printer. settings are up to you, i printed this at .2 with 100% infill.
thingiverse
free

Solar Wind Turbine by Teece
...solar wind turbine. 25mm dc motor and radio shack solar panel was used. the only parts that needs supports are the motor housing.
thingiverse
free

Sugar Bowl with spoon by Teece
...plan on staining and sealing with polyurethane. spoon and bowl won't need supports or rafts, the top will need supports only.
thingiverse
free

myLamp by Teece
...ng but one will take a little less time to print. total print time for me was around 12 hours, most of that was the shade. enjoy!
thingiverse
free

Ghostly Accessory Chest by Teece
...ays losing my 45 adapters, now it has a home. the box is great for accessories or whatever you chose to put in it.
ghostlyvinyl
thingiverse
free

Scepter Of Light by Teece
...ed tea light that i purchased in bulk from amazon. assembly is pretty straightforward, but ask if you have any questions. enjoy!
thingiverse
free

Wire Pass Through wall mount by Teece
...gh after running hdmi and speaker wire through my ceiling and walls. printed at 20% infill. but 10% would probably be sufficient.
thingiverse
free

Prusa i3 Name Plate by Teece
...rew holes for mounting were designed for m4 bolts.
note: also added a version with no holes for people using double sided tape.
Smartboard
thingiverse
free
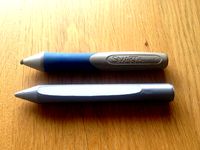
Smartboard pen by Scottylad7
...smartboard pen by scottylad7
thingiverse
a spare smartboard pen
thingiverse
free
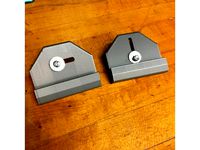
Smartboard Mounting Brackets by dbeck
... adjustable horizontally while the other is adjustable vertically to allow fine tuned positioning and leveling of the smartboard.
thingiverse
free
Smartboard pen by pmac123
...these. i made them for a tech camp i work for at the request of the instructor so he would not have to take apart dry erase pens.
thingiverse
free

SmartBoard Clip/Rail mount by tom10122
...sed to mount a smartboard on a rail system. the part was put to use before i could take some pics. hopefully someone can use this
thingiverse
free

Sign - Not A Whiteboard by KKHausman
...this is a sign for use on an institutional smartboard to notify faculty and students that the white ceramic-on-steel...
thingiverse
free

Sony E-mount Microscope Adapter by thadwald
...an old microscope. i connect the camera to my smartboard and this lets the entire class see what is...
thingiverse
free

Antagonist muscles ; model elbow ; biceps triceps by cmug
...images in a book or webpage or animation on smartboard. ...
thingiverse
free

Blackboard Physics (Mechanics) by IronOxide
...with weights - suction cups on a whiteboard or smartboard would hold up better). i will build off of...
thingiverse
free

tableta gráfica para dibujar con pantalla XP-PEN by chusheng
...los docentes que quieran convertir cualquier televisor en un smartboard y poder hacer sus clases virtuales. utilizo esta tableta...
Timer
turbosquid
$5

timer
... available on turbo squid, the world's leading provider of digital 3d models for visualization, films, television, and games.
turbosquid
free

Timer
... available on turbo squid, the world's leading provider of digital 3d models for visualization, films, television, and games.
design_connected
$9

Two Timer
...two timer
designconnected
established & sons two timer computer generated 3d model. designed by industrial facility.
3d_export
free
sand timer
...sand timer
3dexport
turbosquid
$49

Hourglass Sand Timer
...alty free 3d model hourglass timer for download as ma and obj on turbosquid: 3d models for games, architecture, videos. (1431455)
turbosquid
$3

Electronic timer panel
...alty free 3d model electronic timer panel for download as max on turbosquid: 3d models for games, architecture, videos. (1363343)
3d_ocean
$18

Red Kitchen Timer
...er with aluminium elements. available formats: • max scanline • max vray • max mentalray • cinema 4d • cinema 4d vray • fbx • obj
turbosquid
$7

Darkroom Interval Timer
... available on turbo squid, the world's leading provider of digital 3d models for visualization, films, television, and games.
3d_export
$7

bombe c4 timer variable
...bombe c4 timer variable
3dexport
bombe c4 + timer variable + texture<br>obj . c4d . fbx . stl
3d_export
$13

Kitchen Timer 3D Model
...terior home house 3ds max cinema c4d mental ray fbx obj detailed cgaxis vray kitchen
kitchen timer 3d model cgaxis 52497 3dexport
Board
archibase_planet
free
Board
...e planet
board information board bulletin board
board information n310813 - 3d model (*.gsm+*.3ds) for interior 3d visualization.
archibase_planet
free
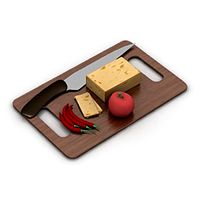
Board
...board
archibase planet
board cutting board kitchen ware
board n051011 - 3d model (*.gsm+*.3ds) for interior 3d visualization.
archibase_planet
free

Board
...board
archibase planet
board blackboard school board
board school n290114 - 3d model (*.gsm+*.3ds) for interior 3d visualization.
archibase_planet
free
Board
...board
archibase planet
slate board
board - 3d model (*.gsm+*.3ds) for interior 3d visualization.
archibase_planet
free
Board
...board
archibase planet
blackboard board school furniture
board - 3d model for interior 3d visualization.
archibase_planet
free
Board
...board
archibase planet
board shelf stand
board - 3d model (*.gsm+*.3ds) for interior 3d visualization.
archibase_planet
free
Board
...board
archibase planet
kitchen ware board
board - 3d model (*.gsm+*.3ds) for interior 3d visualization.
archibase_planet
free
Board
...board
archibase planet
kitchen ware board
board n150410 - 3d model (*.gsm+*.3ds) for interior 3d visualization.
archibase_planet
free
Board
...board
archibase planet
board office supplies stationery
board - 3d model (*.gsm+*.3ds) for interior 3d visualization.
archibase_planet
free

Board
...board
archibase planet
board gym
board evminov n240613 - 3d model (*.gsm+*.3ds) for interior 3d visualization.
Led
3d_export
$5

led
...led
3dexport
the led is cut with all the parts.
3ddd
$1

Monacor / PARL56DMX / LED-320RGBW / LED-345RGBW / LED-300RGB
... прожектор
http://www.monacor.dk/
parl56dmx
led-320rgbw
led-345rgbw
led-300rgb
turbosquid
$10

LED
...led
turbosquid
free 3d model led for download as blend on turbosquid: 3d models for games, architecture, videos. (1691856)
3d_export
$5

led lamp
...led lamp
3dexport
led lamp, brightness animation
3ddd
free

leds-c4
...leds-c4
3ddd
leds-c4
современный торшер
3ddd
free

leds-c4
...leds-c4
3ddd
leds-c4
настольный лампа
turbosquid
$12

Led
... available on turbo squid, the world's leading provider of digital 3d models for visualization, films, television, and games.
turbosquid
free

LED
... available on turbo squid, the world's leading provider of digital 3d models for visualization, films, television, and games.
3ddd
$1
leds-c4
...leds-c4
3ddd
blomma , leds-c4
нависная люстра
3ddd
free

LED Светильник
...led светильник
3ddd
led-3004 светодиодная линейная лампа уличного освещения
Cutting
design_connected
$11
e15 Cut Cutting Boards
...e15 cut cutting boards
designconnected
e15 cut cutting boards computer generated 3d model.
design_connected
$16
Cut
...cut
designconnected
lapalma cut computer generated 3d model. designed by rota, francesco.
3d_export
$5
cutting machine
...cutting machine
3dexport
crop cutting machine
3d_export
$5

cutting board
...cutting board
3dexport
12 models for cutting boards
3d_export
$20
wire laser cutting peeling cutting machine ffc cutting machine
...and receiving machine, with the structure of this drawing, you don't need to draw by yourself, welcome to collect, thank you.
3ddd
$1
Lapalma CUT
... cut
фабрика: lapalma
коллекция: cut
размер:↑ 74 cm, ↔ 55 см.
описание: стул, ткань, кожа, дерево.
сайт: www.lapalma.it
3ddd
$1
стул lapalma cut
...стул lapalma cut
3ddd
lapalma , cut
стул lapalma cut
3ddd
$1

Lapalma CUT
...
коллекция: cut
размер:↑ 74 cm, ↔ 55 см.
описание: стул, порошковое покрытие, черный, белый, ткань, пластик.
сайт: www.lapalma.it
design_connected
$16
Hi Cut
...hi cut
designconnected
kartell hi cut computer generated 3d model. designed by starck, philippe.
3ddd
$1
Vorwerk Cut
...vorwerk cut
3ddd
ковер
vorwerk cut
прямоугольный:
размеры : 2400mm x 3200mm
круглый:
размеры : 2400mm