Cults

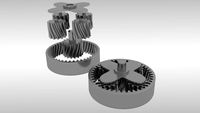
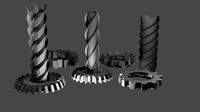
Pointlessly complex gear device
by Cults
Last crawled date: 6 years, 1 month ago
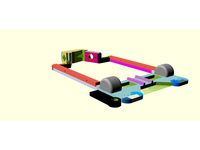
I was looking for something to impress my brother-in-law for Christmas. He always seemed inordinately pleased with the gear systems I had given him before, so I was looking for something more elaborate. I liked the asymmetric planetary gears by faggahz, and the eccentrically cycloidal drive model by otvinta3d, but neither seemed to quite do it. So of course the logical thing to do is to connect them together. I made extensive use if the customizable involute spur gear by artanian and would like to say I made it through logical design processes and that it worked perfectly the first time, but that would not be correct. So exactly how much of this did I do? I designed the transmission and the support structure, both of which I thought came out pretty well.
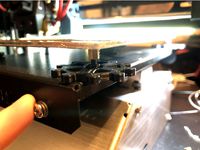
I of course designed this to print on my machine, which does outside measurements pretty well, but tends to make inside measurements a little small. Since the tolerances on everything are a little tight, you may want so subtly adjust the size of a few components if it doesn’t work for you. Ring 2a, Hold 5, and all the axles are good candidates for this. It uses 6 #4 x 0.5 inch flat head bolts with nuts to hold the supports to the base. You could glue them in place, but then you wouldn’t be able to take it apart if it needed repair.
Assembly tips:
Adjust the contact layer to spread as little as possible while maintaining a good bond (this is a nuisance to clean off gears).
Print one of most things but two of “Support5,” “Clip4,” and “2_peg” (so a total of four pegs).
Make the planetary gears first; these fit most closely and it will tell you if you have to adjust sizes. They should all snap in at once. They should also be capable of rotating without the square support (Hold5). There are several ways they can be inserted, but only one were the support lines up with all the holes (the side of the support against the build surface goes away from the gears). The pegs join all the gears to the support except “Planet 7” (the small one).
To make the transmission, insert “Small_axle_ext” through the 10 tooth gear (pliers may be necessary). Insert the washer one end and the same end through "Hold5" into "Planet7." Insert the plain end of “Bottom axle 1” into the 27 tooth gear (I glued it, but it may not be necessary). Engage the 27 and 10 tooth gear the drop “Brace 2a” over both axles (snap it onto the smaller one). Place “Spacer1” on the larger axle.
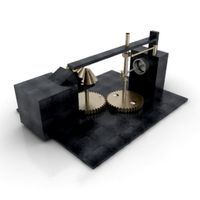
Place “Wheel2” between the two “Support5’s” (the washer-like bearings go on the inside). Place this assembly over “Bottom_axle1” and secure with “Clip4.” The full assembly can then be attached to the base with the 6 nuts and bolts. Insert the plain end of “Top axle 1” into “Spinner 3,” glue if desired. Engage “Pinion2” to “Wheel2” and pass the axle through it. Secure the axle with the other clip. Place “Bridge3” over the protruding struts of the supports and ring gear (should be a good friction fit). And you should be done.
http://youtu.be/3UGVun5kG5w
I of course designed this to print on my machine, which does outside measurements pretty well, but tends to make inside measurements a little small. Since the tolerances on everything are a little tight, you may want so subtly adjust the size of a few components if it doesn’t work for you. Ring 2a, Hold 5, and all the axles are good candidates for this. It uses 6 #4 x 0.5 inch flat head bolts with nuts to hold the supports to the base. You could glue them in place, but then you wouldn’t be able to take it apart if it needed repair.
Assembly tips:
Adjust the contact layer to spread as little as possible while maintaining a good bond (this is a nuisance to clean off gears).
Print one of most things but two of “Support5,” “Clip4,” and “2_peg” (so a total of four pegs).
Make the planetary gears first; these fit most closely and it will tell you if you have to adjust sizes. They should all snap in at once. They should also be capable of rotating without the square support (Hold5). There are several ways they can be inserted, but only one were the support lines up with all the holes (the side of the support against the build surface goes away from the gears). The pegs join all the gears to the support except “Planet 7” (the small one).
To make the transmission, insert “Small_axle_ext” through the 10 tooth gear (pliers may be necessary). Insert the washer one end and the same end through "Hold5" into "Planet7." Insert the plain end of “Bottom axle 1” into the 27 tooth gear (I glued it, but it may not be necessary). Engage the 27 and 10 tooth gear the drop “Brace 2a” over both axles (snap it onto the smaller one). Place “Spacer1” on the larger axle.
Place “Wheel2” between the two “Support5’s” (the washer-like bearings go on the inside). Place this assembly over “Bottom_axle1” and secure with “Clip4.” The full assembly can then be attached to the base with the 6 nuts and bolts. Insert the plain end of “Top axle 1” into “Spinner 3,” glue if desired. Engage “Pinion2” to “Wheel2” and pass the axle through it. Secure the axle with the other clip. Place “Bridge3” over the protruding struts of the supports and ring gear (should be a good friction fit). And you should be done.
http://youtu.be/3UGVun5kG5w
Similar models
thingiverse
free

Pointlessly complex gear device by Harfigger
...ruding struts of the supports and ring gear (should be a good friction fit). and you should be done.
http://youtu.be/3ugvun5kg5w
thingiverse
free

Shower Knob with 3:1 Gear Ratio by redcurse
...te a tighter fit. if i feel it's necessary in the future i'll fix the offset and model a part to hold the gears in place.
grabcad
free

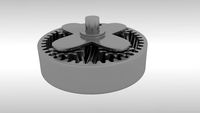
Planetary Gear Set
...planetary gear set
grabcad
planetary gear set assembly for an automatic transmission.
thingiverse
free

Filament Roller Stand by X50arm
...g it around and breaking the axle shafts. today i replaced them with 8mmx200mm threaded rod. hopefully, i won’t break them now.
thingiverse
free
Anglewinder Slotcar Chassis by SlotcarBrad
...he points cut off can hold the lexan body on, but make sure you tape over them so they won't fall out and end up in the slot.
thingiverse
free

LowRider Fixed Y Belt Block by TheExpertNoob
...re of how this is done once i get one printed.
(if you wish to add supports inside the slot, you can, but its likely not needed.)
grabcad
free

Animations. Planetary Transmission (Helical Gear 1)
...of the other gear. the working principle is the same as https://grabcad.com/library/animated-planetary-transmission-spur-gear-1-1
grabcad
free

Animated Planetary Transmission (Helical Gear 1)
...of the other gear. the working principle is the same as https://grabcad.com/library/animated-planetary-transmission-spur-gear-1-1
grabcad
free

Animation. Planetary Transmission (Helical Gear 1)
...of the other gear. the working principle is the same as https://grabcad.com/library/animated-planetary-transmission-spur-gear-1-1
thingiverse
free

Adjustable Z-endstop support by tuono1k
...possible so just put the "hook" in place then force a little bit toward the rear part of the printer it should jump in.
Pointlessly
thingiverse
free
Pointlessly complex gear device by Harfigger
...ruding struts of the supports and ring gear (should be a good friction fit). and you should be done.
http://youtu.be/3ugvun5kg5w
thingiverse
free

Upgraded Crystal Generator by Teevax
...have limited sides to 10 because the shape is pointlessly round above this value enjoy. thanks and greats to...
thingiverse
free
MPSM v3/Pro Manual Bed Leveling Hack + Test files by monsieurglad
...heating plate, as final design is 2-3mm higher. i pointlessly tried to keep them on, with 5mm spacer and...
3dwarehouse
free

Avenue turn
...avenue turn 3dwarehouse btm, stop rating my roads pointlessly bad!!! how can a road even be more detailed??...
3dwarehouse
free

road w/ no lines
...w/ no lines 3dwarehouse btm, stop rating my roads pointlessly bad!!! how can a road even be more detailed??...
3dwarehouse
free

NEW MacBook Pro (13 inch Magic Keyboard)
...new macbook pro (13 inch magic keyboard) 3dwarehouse the pointlessly complicated and stupidly annoying keyboard of the old 13'...
Cycloidal
3d_export
$10

cycloidal drive
...cycloidal drive
3dexport
cycloidal drive
thingiverse
free
Cycloid art by papp328
...cloid art by papp328
thingiverse
an artistic physic experiment. the curve is a cycloid which has famous features. look after it.
thingiverse
free

Half Cycloid Spiral Spacecurve by espen
...half cycloid spiral spacecurve by espen
thingiverse
half cycloid spiral spacecurve.
thingiverse
free
cycloid gear script by ekaggrat
...based on a alternating epicycloid and hypocycloid tooth profile,... http://demonstrations.wolfram.com/cycloidalears/ ...
thingiverse
free

Cycloidal Knot by mm1440
...cycloidal knot by mm1440
thingiverse
square tube rotating around space curve.
thingiverse
free

Cycloid Period Experiment Cit with Arduino by CNSHmath
...cycloid period experiment cit with arduino by cnshmath
thingiverse
cycloid model to sound its period using arduino
thingiverse
free

Cycloidic Vase (t-glase) by scottvader
...hingiverse
a simple vase created using solidworks lofts to connect two cycloidic gear like ends. looks great in taulman t-glase.
thingiverse
free

Cycloid Penny Slide by guido666
...e curve problem, which is the curve of fastest descent due to gravity. you can store some pennies in the slots in the base, too.
thingiverse
free

Cycloidal Drive by Meia
...m5 bolt, 1 m3 bolt and a small 5mm washer.
if you put it together carefully and maybe sand it a little it will run very smoothly.
thingiverse
free
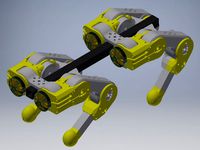
Quadruped with 3D cycloidal Gearboxes
...th modified shaft)
absolute magnetic encoder as5147 (custom board)
https://hackaday.io/project/167855-simple-cycloidal-robot-knee
Planetary
3d_export
$7

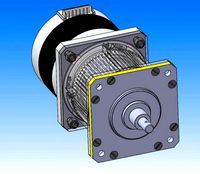
planetary gearbox
...planetary gearbox
3dexport
planetary gearbox
3d_export
$12

planetary rover
...planetary rover
3dexport
low poly, game ready, planetary rover.<br>the model is rigged but not animated.
3d_export
$5
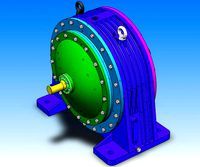
nw planetary reducer
...nw planetary reducer
3dexport
nw planetary reducer
turbosquid
$4

planetary gearbox
...royalty free 3d model planetary gearbox for download as blend on turbosquid: 3d models for games, architecture, videos. (1423384)
3d_ocean
$3

Planetary gears
...al applied and is ready to import and render in both all(blend/fbx/obj). there are two models, one of which is the exploded mo...
3d_export
$5
three stage planetary gearbox
...three stage planetary gearbox
3dexport
three stage planetary gearbox
3d_export
$15
Planetary gears 3D Model
...box automatic manual car engine power drive differential sprocket mechanical
planetary gears 3d model dragosburian 81058 3dexport
3d_export
free

tinket planetary transmission
...tinket planetary transmission
3dexport
3d_export
$30

Planetary system 3D Model
...planetary system 3d model
3dexport
planets sol system
planetary system 3d model psicore 64545 3dexport
3d_export
$25
Animated planetary gears 3D Model
...atic manual car engine power drive differential sprocket mechanical
animated planetary gears 3d model dragosburian 80993 3dexport
Complex
3d_ocean
$2

Complex Maze
...complex maze
3docean
building complex curve hilbert maze modern technology
a maze like structure in true 3d space.
turbosquid
$15

BATH COMPLEX
...squid
royalty free 3d model bath complex for download as rvt on turbosquid: 3d models for games, architecture, videos. (1676691)
turbosquid
$115

Residential Complex
...free 3d model residential complex for download as skp and dwg on turbosquid: 3d models for games, architecture, videos. (1552269)
turbosquid
$40

Sport Complex
...3d model sport complex for download as 3ds, max, obj, and fbx on turbosquid: 3d models for games, architecture, videos. (1401140)
turbosquid
$120

sport complex
... available on turbo squid, the world's leading provider of digital 3d models for visualization, films, television, and games.
turbosquid
$99

Complex building
... available on turbo squid, the world's leading provider of digital 3d models for visualization, films, television, and games.
turbosquid
$50

Residential complex
... available on turbo squid, the world's leading provider of digital 3d models for visualization, films, television, and games.
turbosquid
$40

Apartment complex
... available on turbo squid, the world's leading provider of digital 3d models for visualization, films, television, and games.
turbosquid
$30

Building Complex
... available on turbo squid, the world's leading provider of digital 3d models for visualization, films, television, and games.
turbosquid
$30

game complex
... available on turbo squid, the world's leading provider of digital 3d models for visualization, films, television, and games.
Device
3ddd
$1
device
...device
3ddd
device
3ddd
$1

device
...device
3ddd
device
archive3d
free

Device 3D Model
...device 3d model
archive3d
equipment device
device- 3d model for interior 3d visualization.
archive3d
free
Device 3D Model
... model
archive3d
device
device n050608 - 3d model (*.gsm+*.3ds) for interior 3d visualization.
archive3d
free
Device 3D Model
...e 3d model
archive3d
device gear
device - 3d model (*.gsm+*.3ds) for interior 3d visualization.
3d_export
$5
rope tighten device
...rope tighten device
3dexport
rope tighten device
3d_export
$5
front clamping device
...front clamping device
3dexport
front clamping device
archive3d
free

Device 3D Model
...e3d
device kitchen ware
device n130208 - 3d model (*.gsm+*.3ds) for interior 3d visualization.
3d_ocean
$5

Google Chromecast device
...romecast device. if you want to know more about this device, please check url : http://www.google.com/chrome/devices/chromecast/
turbosquid
$7

Hearing Device
...alty free 3d model hearing device for download as obj and c4d on turbosquid: 3d models for games, architecture, videos. (1374371)
Drive
3d_export
$10
cycloidal drive
...cycloidal drive
3dexport
cycloidal drive
3d_ocean
$5

Flash Drive
...h drive included : – materials – scene ( lighs / room ) – .c4d + .obj for any questions please feel free to contact me thank you.
3d_ocean
$5

Usb drive
...s shaders and a lighting setup. it also has a small animation of it going in and out. i saved it out as both a .blend file and...
3d_ocean
$5

Pen Drive
...est computer drive game model good low poly new pen pen drive textured unwrapped uv very low poly
a very beautiful low poly model
3d_ocean
$10

External hard drive
... is a detailed model of a trekstor external hard drive. you can easily modify the label on the top. simply edit the text objects.
turbosquid
$1

Flash Drive
...quid
royalty free 3d model flash drive for download as blend on turbosquid: 3d models for games, architecture, videos. (1231573)
turbosquid
$10

Flash Drive
...id
royalty free 3d model usb flash drive for download as obj on turbosquid: 3d models for games, architecture, videos. (1325282)
turbosquid
$1

USB Drive
...
royalty free 3d model usb drive for download as obj and fbx on turbosquid: 3d models for games, architecture, videos. (1701787)
3d_ocean
$4

USB Flash Drive
...usb flash drive
3docean
computer disk drive electronic flash mac memory pc pen usb
usb flash drive. the cartridge form
turbosquid
$10

Flash Drive
...y free 3d model flash drive for download as lxo, lxo, and obj on turbosquid: 3d models for games, architecture, videos. (1551742)
Gears
3d_ocean
$4
Gears
...gears
3docean
gear gears iron
4 different size of gears
3d_export
$5
gear
...gear
3dexport
gear
3d_export
free
Gears
...gears
3dexport
gears
3d_export
$5
gear
...gear
3dexport
a simple model of gear
3d_export
$5

gear
...gear
3dexport
gear for transmission , case machine
3d_ocean
$3
Gears
...nical parts process steampunk vehicle wheel work
10 different gear models volume 01-10 files: .3ds .c4d .obj note: you need vray
3d_ocean
$1

Spur Gear
...spur gear
3docean
decoration gear
a typical spur gear
3d_ocean
$4
Gear wheels
...gear wheels 3docean engine engineering gear gears industry machinery mechanical toothwheel wheel pair of gear wheels...
turbosquid
$9

Gear
...gear
turbosquid
royalty free 3d model gear for download as on turbosquid: 3d models for games, architecture, videos. (1712328)
turbosquid
$2

Gears
...rs
turbosquid
royalty free 3d model gears for download as ma on turbosquid: 3d models for games, architecture, videos. (1166710)
Gear
3d_ocean
$4
Gears
...gears
3docean
gear gears iron
4 different size of gears
3d_export
$5
gear
...gear
3dexport
gear
3d_export
free
Gears
...gears
3dexport
gears
3d_export
$5
gear
...gear
3dexport
a simple model of gear
3d_export
$5
gear
...gear
3dexport
gear for transmission , case machine
3d_ocean
$3
Gears
...nical parts process steampunk vehicle wheel work
10 different gear models volume 01-10 files: .3ds .c4d .obj note: you need vray
3d_ocean
$1
Spur Gear
...spur gear
3docean
decoration gear
a typical spur gear
3d_ocean
$4
Gear wheels
...gear wheels
3docean
engine engineering gear gears industry machinery mechanical toothwheel wheel
pair of gear wheels : animated.
turbosquid
$9
Gear
...gear
turbosquid
royalty free 3d model gear for download as on turbosquid: 3d models for games, architecture, videos. (1712328)
turbosquid
$2
Gears
...rs
turbosquid
royalty free 3d model gears for download as ma on turbosquid: 3d models for games, architecture, videos. (1166710)