Thingiverse

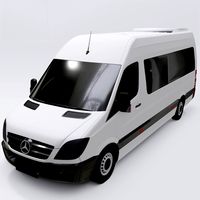
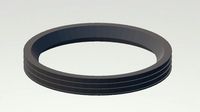
Mercedes Benz Roof Rack Rubber Strip Trim Molding Insert by crazycollie
by Thingiverse
Last crawled date: 3 years ago
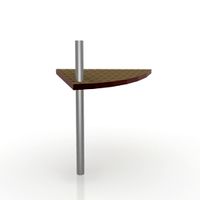
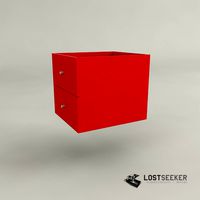
For the life of me, I could not find nor order a replacement rubber molding for this darn Mercedes Benz-branded roof rack for my father's ML350. The original piece was gone with the wind on a spirited drive in the suburbs of Atlanta. So, I decided to design and print it in a flexible filament. What a nightmare.
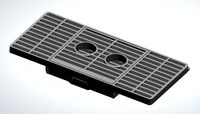
The design was easy. I took one of the original trim pieces off the rack. I measured it and made a rough approximation of the insert, which works fine. This is my second ever design, but I knew I'd have to print it without support and have to print it flat. No problem. The original rubber trim piece is longer than my print volume. I knew that this would require me to glue two or three together to make it work.
Printing with TPU is a pain in my toe on my left foot.
I was using the stock Creality CR-10S with SainSmart's Black TPU. Every thing I read online said it's the easiest flexible to print with... my ash.. The filament would not push through the bowden tube to the hotend. I tried many settings. It was a Charlie Foxtrot.
So, I upgraded the extruder and hotend. I purchased and installed the E3D Aero Titan with the V6 nozzle. This puts the extruder right on top of the hotend.
Whiskey Tango Foxtrot. It still didn't work.
Here is what I did to get it to work.
1.) I moved the bed down a bit. Three paper thicknesses opposed to one.
2.) I increased the flow rate to 140%.
3.) Hotend set to 220C.
4.) Bed temp to 70C.
5.) Used a 7.6cm or 3in of bowden tube on top of the extruder.
6.) I ran the TPU above and straight down into the bowden tube.
After I got three printed, I installed them onto the rack. Works like a champ.
Similar models
thingiverse
free

Bowden Hotend Clamp for Vulcanus V1 by ohfudge
...caman for his vulcanus v1 printer.
i designed this to fit the e3d v6 hotend, i can't guarantee it will fit any of its clones.
thingiverse
free

Anet Extruder Flexible Filament Add-on by tamccain
...the angle of the adapter. this will keep a nice tight tolerance for your filament and keep it from tangling up in your extruder.
grabcad
free

Mercedes Benz W202 Roof Trim Clip
...202 roof trim clip
grabcad
slightly modified mercedes benz w202 roof trim clip. the original is often perishable at dismantling.
thingiverse
free

Bowden Clamp for Rostock Hotend by jamesarm97
...rks with a 4mm tube. the insert / collet could be a little tighter but i just used a piece of tape around the bottom of the tube.
thingiverse
free

Anycubic Mega Zero - Bowden tube clips by Calvin_MegaZero
...olution looked cheap so i designed a clip for it.
i also scaled the clip to make it suitable for the bowden tube on the extruder.
thingiverse
free

Insert clip bowden tube Ender 3 Max extruder by Collie90
...t be perfect but it fixed my problem.
the print takes about 10 minutes with a layer height of 0.1mm and costs 0.08m of filament.
thingiverse
free

Funbot i1 - bowden hotend holder by Georg_cz
...er i have modify a little hotend holder. i would like to use bowden hotend because of weight of extruder instead original holder.
thingiverse
free

E3D V6 Clone Direct Drive Adapter Insert by bratan
...imple one. it screws in using large flat head screwdriver into top of hotend and then you just insert correctly cut ptfe tube...
thingiverse
free

CR-10S_PRO Extruder MOD for Bowden push through. TPU by EUCGUY
...ow shape, but filament still got loose.
what works the best is to push the bowden tube into the feeder as it is. with a flat end.
thingiverse
free

QU-BD Oneup/Twoup Bowden Mount by jaygreco
...works really well and allowed me to increase my print speeds pretty dramatically in comparison to the stock hotend configuration.
Crazycollie
thingiverse
free

Playing Card Holder by crazycollie
... i've printed 20 of these for my life-experienced friends (elderly). also, notice that these can be stacked for easy storage.
thingiverse
free

Minimalist Card Holder (Vase Mode) by Mr_JoerT
...tough. this was inspired by playing card holder by crazycollie which on my printer with my profile took 10...
Benz
3ddd
$1
ROLF BENZ
...rolf benz
3ddd
rolf benz
rolf benz
3ddd
$1
Rolf Benz
...rolf benz
3ddd
rolf benz
пуф фирмы rolf benz
3ddd
$1
Rolf Benz
... журнальный , круглый
стол журнальный фирмы rolf benz
3d_export
$10
Mercedes benz
...mercedes benz
3dexport
mercedes benz
3d_export
$10

Mercedes benz
...mercedes benz
3dexport
mercedes benz
3d_export
$8

Mercedes benz
...mercedes benz
3dexport
mercedes benz
3ddd
$1
ROLF BENZ
... rolf benz , германия
rolf benz 7800www.rolf-benz.deстулразмеры (мм): 470x640x980
3d_export
$5

mercedes-benz
...mercedes-benz
3dexport
mercedes-benz g
3ddd
free
Rolf Benz
...rolf benz
3ddd
rolf benz
модель 2004 года
turbosquid
$18

benz
... available on turbo squid, the world's leading provider of digital 3d models for visualization, films, television, and games.
Mercedes
3d_export
$12
mercedes
...mercedes
3dexport
this is mercedes
3d_ocean
$1

Mercedes/Mercedes-Benz Badge
...rcedes mercedes-benz
this is a model of the mercedes and mercedes-benz badge that is found on the front of the bonnet of the car.
3ddd
$1
mercedes 560sec
...mercedes 560sec
3ddd
mercedes
mercedes 560sec w126
3d_export
$20

mercedes gt63s
...mercedes gt63s
3dexport
mercedes gt63s
3d_export
$10
Mercedes benz
...mercedes benz
3dexport
mercedes benz
3d_export
$10
Mercedes benz
...mercedes benz
3dexport
mercedes benz
3d_export
$9
mercedes sprinter
...mercedes sprinter
3dexport
mercedes sprinter
3d_export
$8
Mercedes benz
...mercedes benz
3dexport
mercedes benz
3d_export
$6

mercedes amg
...mercedes amg
3dexport
mercedes amg
3d_export
$5
mercedes-benz
...mercedes-benz
3dexport
mercedes-benz g
Trim
3d_ocean
$2
Metal Trims
...metal bindings. you can assign the texture to fixtures and metal trims in your scene or use it to create your own textures. ho...
turbosquid
$5
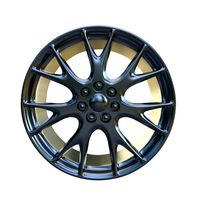
Wheel Trim
... available on turbo squid, the world's leading provider of digital 3d models for visualization, films, television, and games.
3ddd
$1
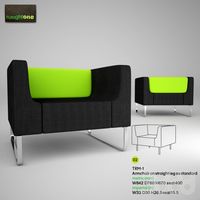
Naughtone Trim Armchair
... detailed modern armchair modeled in 3ds max with vray materials, uvw unwrapping so you can change the textures to anything else.
3ddd
$1

Naughtone Trim Sofa
...detailed modern sofa modeled in 3ds max 2014 with vray materials, uvw unwrapping so you can change the texture for anything else.
turbosquid
$15

Classic carved trim
...royalty free 3d model classic carved trim for download as 3ds on turbosquid: 3d models for games, architecture, videos. (1555950)
turbosquid
$50

Door with nob and trim
... available on turbo squid, the world's leading provider of digital 3d models for visualization, films, television, and games.
turbosquid
$3

Trim Package 9
... available on turbo squid, the world's leading provider of digital 3d models for visualization, films, television, and games.
turbosquid
$1

Gangster Hat With Trim
... available on turbo squid, the world's leading provider of digital 3d models for visualization, films, television, and games.
3ddd
free
офисные кресла VITRA ID TRIM
...itterio , кресло
офисные кресла от vitra дизайнера antonio citterio
(база кресел не моя)
3d_export
$5

Trim Ornament 07
... blender, c4d, ...). in this product you will get: -.max files (saved in 3ds max 2015) -.obj file -.fbx file. thanks for support.
Rubber
3d_export
$5

rubber ball
...rubber ball
3dexport
old soviet rubber ball.
3d_export
free
Rubber sealer
...rubber sealer
3dexport
rubber sealer for pvc-pipe with a diameter of 50 mm
3d_ocean
$2
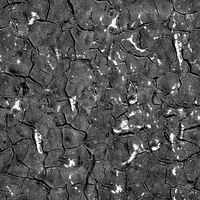
Cracked Rubber
...cked cracky old resin roofing paper rubber ruberoid split worn material
cracked rubber texture. files included tga and jpg files.
turbosquid
$30

Rubber Boat
...osquid
royalty free 3d model rubber boat for download as max on turbosquid: 3d models for games, architecture, videos. (1318471)
turbosquid
$5

Rubber Mallet
...id
royalty free 3d model rubber mallet for download as blend on turbosquid: 3d models for games, architecture, videos. (1579692)
turbosquid
$10

Rubber duck
...
royalty free 3d model rubber duck for download as ma and ma on turbosquid: 3d models for games, architecture, videos. (1582267)
turbosquid
$2

rubber stamp
...alty free 3d model rubber stamp for download as blend and fbx on turbosquid: 3d models for games, architecture, videos. (1653332)
turbosquid
$2

rubber stamp
...alty free 3d model rubber stamp for download as blend and fbx on turbosquid: 3d models for games, architecture, videos. (1653226)
turbosquid
$2

Rubber Spatula
... 3d model rubber spatula for download as fbx and unitypackage on turbosquid: 3d models for games, architecture, videos. (1289703)
turbosquid
$13

Rubber Stamp
... free 3d model rubber stamp for download as jpg, psd, and max on turbosquid: 3d models for games, architecture, videos. (1401488)
Strip
design_connected
$16
Strip
...strip
designconnected
poliform strip chairs computer generated 3d model. designed by carlo colombo.
3ddd
free
Strip Tease
...strip tease
3ddd
strip , tease
кресло strip tease
3d_export
$5
stripping machine
...stripping machine
3dexport
stripping machine
3ddd
$1
Casamania Strip
...strip
стул casamania strip.
дизайнер: fabio novembre.
материал: полиэтилен.
размеры: ширина 59 см, глубина 62 см, высота 93,5 см.
design_connected
$16

Strip leather
...strip leather
designconnected
poliform strip leather chairs computer generated 3d model. designed by carlo colombo.
design_connected
$4
Strip Chair
...strip chair
designconnected
castelijn strip chair chairs computer generated 3d model. designed by gijs bakker.
design_connected
$16
Strip Chair
...
designconnected
photo-realistic 3d models of the strip chair from henge for 3d architectural and interior design presentations.
3d_export
$5

led strip
...led strip
3dexport
led strip modelled in inventor.<br>it includes .obj and .fbx model in real-world scale.
3ddd
$1
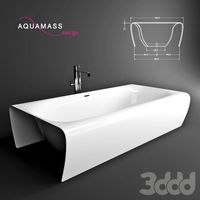
Ванна aquamass strip
... ванна
http://www.aquamass.com/en/so-creative-so-design/strip/strip
в архиве есть файл 2011 версии
3ddd
free
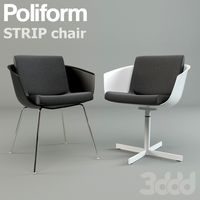
Strip Chair
...actured by poliform (www.poliform.it).
dimension in cm: 60w_57d_72h
uvw mapped, free texture folder.
file formats: fbx and obj.
Molding
3ddd
$1
molding
...molding
3ddd
молдинг
molding
3ddd
$1

molding
...molding
3ddd
молдинг , резьба
molding
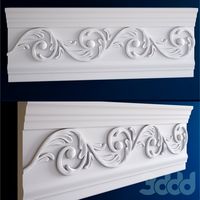
3d_export
$10

molding
...molding
3dexport
molding, casting, baguette, decoration
3d_export
$10

molding
...molding
3dexport
molding, casting, baguette, decoration
3d_export
$10

molding
...molding
3dexport
molding, casting, baguette, decoration
3d_export
$10

molding
...molding
3dexport
molding, casting, baguette, decoration
3d_export
$10

molding
...molding
3dexport
molding, casting, baguette, decoration
3d_export
$10

molding
...molding
3dexport
molding, casting, baguette, decoration
3d_export
$10

molding
...molding
3dexport
molding, casting, baguette, decoration
design_connected
$16
Mold
...mold
designconnected
eternit mold computer generated 3d model. designed by charlot, michel.
Roof
3ddd
$1

Roof
...roof
3ddd
kare , roof
kare кресло roof.
archibase_planet
free
Roof
...roof
archibase planet
roof iron roof
fence roof - 2 - 3d model (*.gsm+*.3ds) for interior 3d visualization.
archibase_planet
free
Roof
...roof
archibase planet
roof iron roof
fence roof-3 - 3d model (*.gsm+*.3ds) for interior 3d visualization.
archibase_planet
free
Roof
...roof
archibase planet
roof iron roof
fence roof-5 - 3d model (*.gsm+*.3ds) for interior 3d visualization.
archibase_planet
free
Roof
...roof
archibase planet
roof iron roof
fence roof-6 - 3d model (*.gsm+*.3ds) for interior 3d visualization.
archibase_planet
free

Roof
...roof
archibase planet
roof iron roof
fence roof-1- 3d model (*.gsm+*.3ds) for interior 3d visualization.
3d_export
free

roof
...roof
3dexport
roof construct
archibase_planet
free
Roof
...roof
archibase planet
roof skylight
fence roof-7 - 3d model (*.gsm+*.3ds) for interior 3d visualization.
archibase_planet
free

Roof
...roof
archibase planet
roof skylight
fence roof-8 - 3d model (*.gsm+*.3ds) for interior 3d visualization.
archibase_planet
free

Roof
...roof
archibase planet
roof house-top
roof n070211 - 3d model (*.gsm+*.3ds) for exterior 3d visualization.
Rack
archibase_planet
free
Rack
...ack
archibase planet
rack paper rack rack for paper
rack 6 office n060914 - 3d model (*.gsm+*.3ds) for interior 3d visualization.
archibase_planet
free
Rack
...ack
archibase planet
rack paper rack rack for paper
rack 3 office n060914 - 3d model (*.gsm+*.3ds) for interior 3d visualization.
archibase_planet
free
Rack
...ack
archibase planet
rack paper rack rack for paper
rack 5 office n060914 - 3d model (*.gsm+*.3ds) for interior 3d visualization.
archibase_planet
free
Rack
...ack
archibase planet
rack paper rack rack for paper
rack 7 office n060914 - 3d model (*.gsm+*.3ds) for interior 3d visualization.
archibase_planet
free
Rack
...for magazines rack for notebooks notebooks notebook
rack notebook n120614 - 3d model (*.gsm+*.3ds) for interior 3d visualization.
archibase_planet
free

Rack
...rack
archibase planet
rack umbrella umbrella rack
rack n180811 - 3d model (*.3ds) for interior 3d visualization.
archibase_planet
free
Rack
...rack
archibase planet
rack book rack stand
rack - 3d model (*.gsm+*.3ds) for interior 3d visualization.
archibase_planet
free

Rack
...rack
archibase planet
rack rack for glasses
rack 1 - 3d model (*.gsm+*.3ds) for interior 3d visualization.
archibase_planet
free
Rack
...rack
archibase planet
rack rack for glasses
rack 2 - 3d model (*.gsm+*.3ds) for interior 3d visualization.
3d_export
free
rack
...rack
3dexport
rack
Insert
turbosquid
$10
insert a bracelet
... 3d model the link element insert for download as max and max on turbosquid: 3d models for games, architecture, videos. (1609593)
turbosquid
$56

Threaded Inserts
... available on turbo squid, the world's leading provider of digital 3d models for visualization, films, television, and games.
turbosquid
$10

Insert for eggs
... available on turbo squid, the world's leading provider of digital 3d models for visualization, films, television, and games.
3d_export
$14
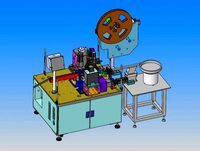
drawing of needle inserting machine
...lectronic manufacturers use pin machines to help customers to insert needles, so as to obtain processing costs and obtain wealth.
turbosquid
$5
IKEA Insert drawers
... available on turbo squid, the world's leading provider of digital 3d models for visualization, films, television, and games.
turbosquid
$5

IKEA insert with door
... available on turbo squid, the world's leading provider of digital 3d models for visualization, films, television, and games.
3d_export
$5
Siemsn EQ 6 Inlet insert
...placed there without any problems. the insert is then straight for normal cups and a square insert can be removed for large cups.
turbosquid
$5
metal insert for earring rings
...for earring rings for download as 3dm, 3dm, obj, pdf, and stl on turbosquid: 3d models for games, architecture, videos. (1569103)
turbosquid
$1

Base insert - Stone&Wood 50mm
...e 3d model base insert - stone&wood 50mm for download as on turbosquid: 3d models for games, architecture, videos. (1325614)
turbosquid
$1

Base insert - Stone&Rails 30mm
...odel base insert - stone&rails 30mm for download as blend on turbosquid: 3d models for games, architecture, videos. (1325627)