Thingiverse
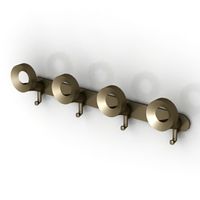
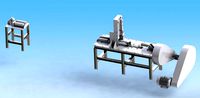
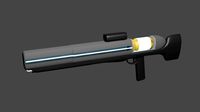
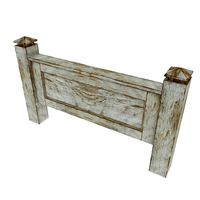
50-60W CO2 laser tube hanger for SH-G350 laser cutter by bratan
by Thingiverse
Last crawled date: 3 years ago
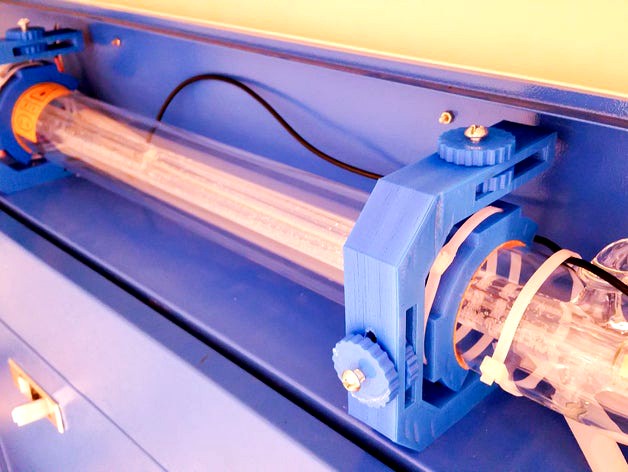
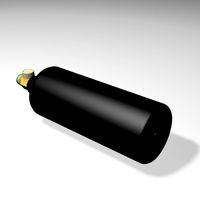
This is a remix of Xnaron's Laser Tube hangers. I had to make some changes in order to fit my larger 60W tube (upgraded on SH-G350D laser cutter, also known as 50W Chinese Blue Ebay laser cutter)
Here's what's new:
Will fit CO2 tube up to 55mm diameter (i.e. SP 60W)
A little more travel space in adjustment slots (needed for larger tube).
Elongate one of the bottom mounting holes (as it didn't fit on my machine).
Added tons of comments in SCAD file so one can easily make changes
Inner support doesn't have space for nuts, instead 10-24 machine screws are screwed directly in the plastic.
Basically I wasn't able to use original deigns on my fatter tube mostly because when I used nuts to attach inner ring it would be very loose and wobbly and I had no space to add nuts on the other end of the ring. So I just made holes smaller and was able to screw 10-24 screws right into plastic. It seems to hold pretty well too. But please BE CAREFUL, if you screw it too far, you can crack your tube!
It's a tricky process mounting tube, but I'll try to explain it as best as I can remember.
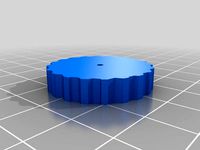
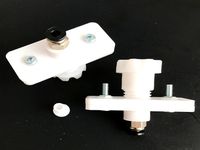
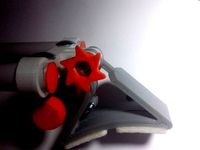
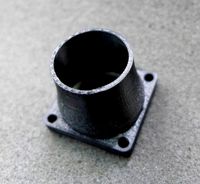
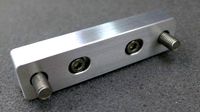
Basically there are 3 main parts. Two Outer Supports, 2 Inner supports and 8 knobs.
Non-3D printed parts:
Four 10-24 machine screws (2" or 1.5" long) (10-32 or M5 should also work)
Eight 10-24 nuts (10-32 or M5 should also work)
Four 13" zip ties
1/16" self adhesive cork. (use thicker if your tube diameter is smaller).
Four 10-24 machine screws (about 1"). Optional, you can reuse screws from old mounting brackets.
Take inner support part and carefully thread in 10-24 screws. When you feel it's not going in any more, stop and mark this length. This way you'll know how far they can go without breaking thru plastic and possibly damaging your CO2 tube.
Remove screws
Insert 8 nuts into 8 knobs
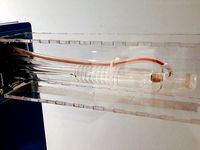
Remove old CO2 tube support.
Attach Outer Support brackets to the machine, open end facing front of the cutter. Either use old screws or use 4 shorter 10-24 screws.
Measure, cut and stick cork pieces to the inside of the inner brackets.
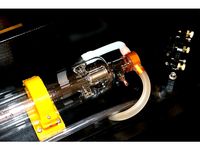
Place inner brackets (one by one) around your CO2 tube and fasten with long zip ties. Don't over-tighten. You should still be able to slide brackets along your tube.
Thread knob with attached nut onto each of the longer screws.
Put remaining two knobs in the slots of the outer support bracket, and thread screws from previous step into them slightly.
Position CO2 tube where you want it and slide Inner Support brackets until they inside outer support brackets.
Carefully thread screws thru all knobs and into inner support bracket, making sure you don't go too past mark you made in step 1. There's nothing stopping screw from going thru cork and into glass tube!!!
Finally you can use adjustment mechanism to position your tube. Once it's been positioned correct you can fix it with outside knobs.
Other suggestions.
Do a dry fit to make sure nothing is sticking out and you can close your machine's cover.
This construction not super rigid, so you might want to check your tube alignment from time to time. Don't push tube down with your hands, as you can strip screws out of inner support bracket.
Print with ABS or PLA plastic, and you can use pretty low infill and resolution. I think I used 30% infill and 0.4mm layer height.
You can generate models for each part separately by editing SCAD file. Just comment out hanger(); or ex_bracket(); at the end of the file!
You can find complete how to upgrade article on my site: https://www.lensdigital.com/home/?p=1498
Credits for knob:
Parametric knob generator
by Gian Pablo Villamil
May 2011
Here's what's new:
Will fit CO2 tube up to 55mm diameter (i.e. SP 60W)
A little more travel space in adjustment slots (needed for larger tube).
Elongate one of the bottom mounting holes (as it didn't fit on my machine).
Added tons of comments in SCAD file so one can easily make changes
Inner support doesn't have space for nuts, instead 10-24 machine screws are screwed directly in the plastic.
Basically I wasn't able to use original deigns on my fatter tube mostly because when I used nuts to attach inner ring it would be very loose and wobbly and I had no space to add nuts on the other end of the ring. So I just made holes smaller and was able to screw 10-24 screws right into plastic. It seems to hold pretty well too. But please BE CAREFUL, if you screw it too far, you can crack your tube!
It's a tricky process mounting tube, but I'll try to explain it as best as I can remember.
Basically there are 3 main parts. Two Outer Supports, 2 Inner supports and 8 knobs.
Non-3D printed parts:
Four 10-24 machine screws (2" or 1.5" long) (10-32 or M5 should also work)
Eight 10-24 nuts (10-32 or M5 should also work)
Four 13" zip ties
1/16" self adhesive cork. (use thicker if your tube diameter is smaller).
Four 10-24 machine screws (about 1"). Optional, you can reuse screws from old mounting brackets.
Take inner support part and carefully thread in 10-24 screws. When you feel it's not going in any more, stop and mark this length. This way you'll know how far they can go without breaking thru plastic and possibly damaging your CO2 tube.
Remove screws
Insert 8 nuts into 8 knobs
Remove old CO2 tube support.
Attach Outer Support brackets to the machine, open end facing front of the cutter. Either use old screws or use 4 shorter 10-24 screws.
Measure, cut and stick cork pieces to the inside of the inner brackets.
Place inner brackets (one by one) around your CO2 tube and fasten with long zip ties. Don't over-tighten. You should still be able to slide brackets along your tube.
Thread knob with attached nut onto each of the longer screws.
Put remaining two knobs in the slots of the outer support bracket, and thread screws from previous step into them slightly.
Position CO2 tube where you want it and slide Inner Support brackets until they inside outer support brackets.
Carefully thread screws thru all knobs and into inner support bracket, making sure you don't go too past mark you made in step 1. There's nothing stopping screw from going thru cork and into glass tube!!!
Finally you can use adjustment mechanism to position your tube. Once it's been positioned correct you can fix it with outside knobs.
Other suggestions.
Do a dry fit to make sure nothing is sticking out and you can close your machine's cover.
This construction not super rigid, so you might want to check your tube alignment from time to time. Don't push tube down with your hands, as you can strip screws out of inner support bracket.
Print with ABS or PLA plastic, and you can use pretty low infill and resolution. I think I used 30% infill and 0.4mm layer height.
You can generate models for each part separately by editing SCAD file. Just comment out hanger(); or ex_bracket(); at the end of the file!
You can find complete how to upgrade article on my site: https://www.lensdigital.com/home/?p=1498
Credits for knob:
Parametric knob generator
by Gian Pablo Villamil
May 2011
Similar models
thingiverse
free

60W CO2 Laser cutter tube extension 5mm acrylic by manos1984
... from lowes as original is designed for use with .25" material. used to cover upgraded 1250mm tube in my chinese 50w laser.
thingiverse
free

50 to 60W CO2 Laser Tube Hanger Remix by bumyong
...at. you will need to move the holes if you want your lid to shut all the way but you will restrict movement for the tube itself.
thingiverse
free
60W CO2 Laser cutter tube extension for SH-G350 machine by bratan
...scent bulb inside machine generated more uv actually :)
as you can see in this video: https://www.youtube.com/watch?v=gxj3ikypjum
thingiverse
free
k40 co2 laser tube mounting knobs with 1mm hole by Ryxxi
... 1mm hole by ryxxi
thingiverse
the knobs have a 1mm hole. you can just use a drill with a m3 tapping bit and use your m3 screws!
thingiverse
free
Drybox Filament Pass-Through
...
any comments and suggestions for improvements appreciated ;-)
feel free to remix, fusion 360 files are included in the download.
thingiverse
free

stereoplug holder screw, nut - 1000% by marc_is_curious
...t: bayonet outer thread
c - screw: bayonet outer thread, inner m8x1 thread & negative of m8x1 nut - nut: bayonet outer thread
thingiverse
free

stereoplug holder screw, nut - 100% by marc_is_curious
...t: bayonet outer thread
c - screw: bayonet outer thread, inner m8x1 thread & negative of m8x1 nut - nut: bayonet outer thread
thingiverse
free

CO2 40W laser tube clamp by b_r_a_v_e
...co2 40w laser tube clamp by b_r_a_v_e
thingiverse
co2 40w laser tube clamp for chinese 40w co2 laser engraver/cutter
thingiverse
free
3D Printed DSLR Shoulder Rig new parts by GalloEnricoDesign
...x20mm screw with their nuts and two metal ring.
remember that for this project you need 10 m6screw, 8m5 and patience!
regards
thingiverse
free
Customizable Laser Tube Bracket by jimmit
...if the bracket in your machine does not look similar to this one, the hole pattern may not match...
G350
thingiverse
free
60W CO2 Laser cutter tube extension for SH-G350 machine by bratan
...scent bulb inside machine generated more uv actually :)
as you can see in this video: https://www.youtube.com/watch?v=gxj3ikypjum
thingiverse
free
60W CO2 Laser cutter tube extension 5mm acrylic by manos1984
...remix of 60w co2 laser cutter tube extension for sh-g350 machine by bratan for use with 5mm acrylic that...
thingiverse
free

Adjustable Laser Tube Holder by Dynasus
...i made for my 50 w chinese laser (shenhui sh-g350. the inner diameter of the clamp is 60 mm....
thingiverse
free

Laser Cutter Mirrors Calibration Jig V2 by bratan
...tape mess. these were designed to fit shenhui laser sh-g350 (a.k.a. blue/white 50w ebay laser) mirror mounts. yours may...
thingiverse
free
Leveling Honeycomb Table for Laser Cutter by taylorfinley
...setup for my laser. the z-level on my shenhui g350 is adjustable, but the bed itself is often out-of-level....
grabcad
free

G350
...g350
grabcad
a gaming mouse with lightweight design
cg_trader
$40

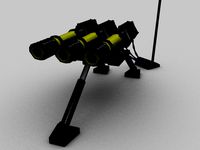
Gulfstream G350 Aircraft
... aircraft
cg trader
gulfstream g350 aircraft 3d model , formats max, obj, 3ds, dxf, stl, wrl, wrz, ready for 3d animation and ot
grabcad
free

Centro de usinagem 5 eixos GROB G350 (Simplificado)
...os grob g350 (simplificado)
grabcad
modelo simplificado centro de usinagem 5 eixos grob g350 sketchup para utilização em layouts
Bratan
thingiverse
free
Mount for laser beam combiner by bratan
... light object's 25mm beam combiner mount to the sh-g350d laser cutter.
detailed guide can be found here: http://goo.gl/tfdjrx
thingiverse
free
Autel EVO 2 Galaxy Tab 10 Holder by bratan
...2 galaxy tab 10 holder by bratan
thingiverse
redesigned this to work with galaxy tab a 10" tablet with slim protective case
thingiverse
free
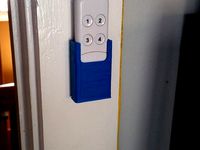
Aeon Labs Minimote wall mount by bratan
... (z-wave remote). can be mounted with 2 screws or double-sided tape.
i only tested it with v1 remote, not sure if it will fit v2.
thingiverse
free
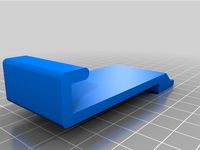
Prusa i3 Spool Mount for 3mm Frame by bratan
...inner (3mm) steel frame (like one sold by replikeo) and also made mount longer with holes at the bottom to secure it with screws.
thingiverse
free
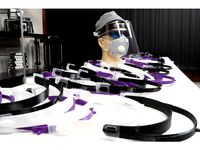
COVID-19 Face Shield by bratan
...n! no chin reinforcement. no logo.
demo: https://youtu.be/xrxesdebrmq
assembly video: https://www.youtube.com/watch?v=d00mecaeyru
thingiverse
free

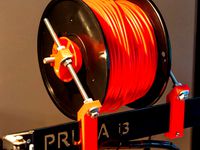
Filament Spool Enlarger by bratan
...ds both sides together (you can also use threaded rod).
if you don't have access to laser cutter, you can print rims as well.
thingiverse
free
LED Panel Mount by bratan
...hat has standard 1/4" thread. i've mounted lights on mini ball-heads that's capable of holding the weight (barely).
thingiverse
free

Dewalt DW715 Miter Saw vacuum exhaust adapter by bratan
...n the vacuum end. you might want to make it longer too if your printer doesn't have layer separation issue on large objects.
thingiverse
free

E3D V6 Clone Direct Drive Adapter Insert by bratan
...imple one. it screws in using large flat head screwdriver into top of hotend and then you just insert correctly cut ptfe tube...
thingiverse
free

Micromake Delta Printer lasercut Spool Mount by bratan
...ws. speaking of screws, i used three 4-40 1/2" machine screws with nylock nuts, but feel free to use 3m screws/nuts as well.
60W
3d_export
$5
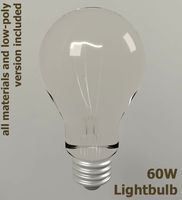
60W Bulb 3D Model
...60w bulb 3d model
3dexport
60w 60 watt bulb light classic lighing
60w bulb 3d model pirog 54301 3dexport
3ddd
free
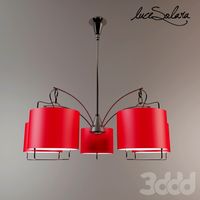
LuceSolara 3001/5 E27*60W
...lucesolara 3001/5 e27*60w
3ddd
lucesolara
lucesolara 3001/5 e27*60w,
габариты:Ø940*в900мм
3ddd
$1

Бра ARTE LAMP A9075AP-2GA DORATURA 2xE14 60W
...atura 2xe14 60w
3ddd
arte lamp , doratura
высота (см) - 38, длина (см) - 36, ширина (см)
3ddd
$1

Настольная лампа ARTE LAMP A9075LT-1GA DORATURA 1xE14 60W
...5lt-1ga doratura 1xe14 60w
3ddd
arte lamp , doratura
высота (см) - 40, диаметр (см) - 30
3ddd
$1

Люстра подвесная ARTE LAMP A9075LM-8GA DORATURA 8xE14 60W
...atura 8xe14 60w
3ddd
arte lamp , doratura
высота (см) - 54, длина (см) - 74, ширина (см)
3ddd
$1
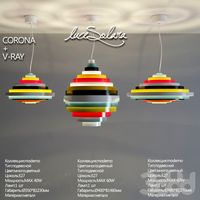
LuceSolara
...габариты:ø350*в1230мм материал:металл 8002/1sg e27*60w коллекция:moderno тип:подвесной цвет:многоцветный цоколь:e27 мощность:max 60w ламп:1 шт габариты:ø480*в1270мм материал:металл 8003/1sg e27*60w коллекция:moderno цвет:многоцветный тип:подвесной...
3ddd
$1
Уличные садово-парковые светильники Delux Pole
...pole , фонарь , delux , pole размеры: g01 60w e27 - 116х116х378(h) g02 60w e27 - 163х330(h) g450...
3ddd
$1

светильники Campiluz
...светильники campiluz 3ddd в файле : -люстра 3xe14 60w h48.0/d64.0, арматура латунь, с плаф. из стекла белого цв.,...
3ddd
$1

Светильники Savoy House Europe Pauline
...e14 - 100w, бра se-9-1027-1-sn / 1x e14 - 60w ...
3ddd
$1
Philips
...philips 3ddd philips philips pendant lights 60w ecomoods fpg700 steel...
Co2
turbosquid
$5

CO2 Assembly
...royalty free 3d model co2 assembly for download as ma and obj on turbosquid: 3d models for games, architecture, videos. (1471659)
turbosquid
$25

Balloon CO2
... available on turbo squid, the world's leading provider of digital 3d models for visualization, films, television, and games.
turbosquid
$2

co2 tank
... available on turbo squid, the world's leading provider of digital 3d models for visualization, films, television, and games.
turbosquid
free
CO2 Rifle
... available on turbo squid, the world's leading provider of digital 3d models for visualization, films, television, and games.
turbosquid
$10
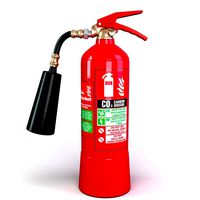
CO2 fire extinguisher
...yalty free 3d model co2 fire extinguisher for download as max on turbosquid: 3d models for games, architecture, videos. (1700115)
turbosquid
$3

CO2 Fire Extinguisher
...ee 3d model co2 fire extinguisher for download as max and fbx on turbosquid: 3d models for games, architecture, videos. (1292094)
turbosquid
$6
Paintball Co2 Tank
... available on turbo squid, the world's leading provider of digital 3d models for visualization, films, television, and games.
turbosquid
free

Fire Extinguisher CO2
... available on turbo squid, the world's leading provider of digital 3d models for visualization, films, television, and games.
3d_export
$10

co2 fire extinguisher
...096<br>refract - 4096х4096<br>the archive contains files of universal formats for import:<br>.fbx<br>.obj
3d_export
$99

Citroen C zerro 2011 3D Model
...detailed 3d model europe auto vehicle car france zero co2 emissions electric urban creativity qualify emotion citroen c zerro...
Sh
3ddd
free

SH-wire
... крулый стул , sh-wire
два стула из металлического каркаса с сидением из дерева
turbosquid
$30

Space SH
... available on turbo squid, the world's leading provider of digital 3d models for visualization, films, television, and games.
3ddd
free

Розетка sh. 1010-2
...розетка sh. 1010-2
3ddd
розетка
розетка sh. 1010-2
3ddd
free

Розетка sh. 1010-1
...розетка sh. 1010-1
3ddd
розетка
розетка sh. 1010-1
3ddd
free
Массажный стол SH-3729
...массажный стол sh-3729
3ddd
массаж
массажный стол/кушетка sh-3729.
cg_studio
$169

sh-33d model
...opter army military chopper
.3ds .c4d .lwo .max - sh-3 3d model, royalty free license available, instant download after purchase.
turbosquid
$15

Metal Profile SHS
... available on turbo squid, the world's leading provider of digital 3d models for visualization, films, television, and games.
turbosquid
$10

SH Movie Church
... available on turbo squid, the world's leading provider of digital 3d models for visualization, films, television, and games.
3ddd
free
Синтезатор Roland SH-201
... синтезатор
синтезатор roland sh-201, текстура присутствует, полигоны: 32106, вершины: 35904.
cg_studio
$169
Sh-60 Seahawk3d model
...3d model
cgstudio
.c4d .lwo .max .obj - sh-60 seahawk 3d model, royalty free license available, instant download after purchase.
Hanger
3d_export
$5

hanger
...hanger
3dexport
hanger
archibase_planet
free
Hanger
...hanger
archibase planet
hanger coat hanger holder
hanger n260612 - 3d model (*.gsm+*.3ds) for interior 3d visualization.
archibase_planet
free
Hanger
...hanger
archibase planet
hanger rack
hanger - 3d model (*.gsm+*.3ds) for interior 3d visualization.
3d_export
$5

Hanger
...hanger
3dexport
old-fashioned hanger of georgia
3ddd
$1
Hanger
...hanger
3ddd
вешалка
classic black hanger
archibase_planet
free
Hanger
...hanger
archibase planet
hanger hall-stand rack
hanger - 3d model (*.gsm+*.3ds) for interior 3d visualization.
archibase_planet
free

Hanger
...hanger
archibase planet
hanger rack peg
hanger n210712 - 3d model (*.gsm+*.3ds) for interior 3d visualization.
archibase_planet
free
Hanger
...hanger
archibase planet
hanger rack sanitary ware
hanger - 3d model (*.gsm+*.3ds) for interior 3d visualization.
archibase_planet
free
Hanger
...hanger
archibase planet
hall-stand rack hanger
hanger n250711 - 3d model (*.3ds) for interior 3d visualization.
archibase_planet
free
Hanger
...hanger
archibase planet
hanger hall-stand rack
hanger - 3d model (*.gsm+*.3ds) for interior 3d visualization.
Cutter
archibase_planet
free
Cutter
...cutter
archibase planet
cutter mill milling cutter
cutter 2 n050712 - 3d model (*.gsm+*.3ds) for interior 3d visualization.
3d_export
$10
pipe cutter
...pipe cutter
3dexport
pipe cutter
3d_export
$8

Grass Cutter
...grass cutter
3dexport
grass cutter
turbosquid
$5

Cutter
...alty free 3d model cutter for download as ige, stl, and sldpr on turbosquid: 3d models for games, architecture, videos. (1505202)
turbosquid
$29
Cutter
... available on turbo squid, the world's leading provider of digital 3d models for visualization, films, television, and games.
turbosquid
$9

Cutter
... available on turbo squid, the world's leading provider of digital 3d models for visualization, films, television, and games.
turbosquid
$3
cutter
... available on turbo squid, the world's leading provider of digital 3d models for visualization, films, television, and games.
turbosquid
$1

cutter
... available on turbo squid, the world's leading provider of digital 3d models for visualization, films, television, and games.
turbosquid
free

Cutter
... available on turbo squid, the world's leading provider of digital 3d models for visualization, films, television, and games.
3d_export
free
unicorn cookie cutter
...unicorn cookie cutter
3dexport
unicorn cookie cutter, more cookie cutters here:
Laser
3d_export
$5
laser
...laser
3dexport
a 3d laser
3d_export
free
cnc 3dp laser nozzle for 2w laser opt lasers
...logy that gave birth to cutting and engraving laser heads this laser nozzle was designed for, read the article in the link below:
3d_export
free
cnc laser mount opt lasers
...eive the engraving and cutting laser heads this cnc machine laser mount was designed for, read the article on the following page:
turbosquid
$20
Laser
... available on turbo squid, the world's leading provider of digital 3d models for visualization, films, television, and games.
turbosquid
$15
Laser
... available on turbo squid, the world's leading provider of digital 3d models for visualization, films, television, and games.
turbosquid
$3
Laser
... available on turbo squid, the world's leading provider of digital 3d models for visualization, films, television, and games.
3d_export
$5

laser sword
...laser sword
3dexport
it is a blue laser sword with a metal frame
3d_ocean
$19
Laser Turret
...be used in any sf type of game, especially in tower defense games. - laser turret: 3025 polygons - props: 270 polygons - textu...
3d_export
free
workbee cnc laser mount for opt lasers
...the specifications of engraving and cutting laser heads this mount was designed for, please take a look at the following website:
3d_export
free

shapeoko cnc laser mount for opt lasers
...ind out the opportunities that adding a cutting and engraving laser head to your cnc can bring, take a look at the website below:
Tube
archibase_planet
free

Tube
...tube
archibase planet
paint tube stationery
tube - 3d model (*.gsm+*.3ds) for interior 3d visualization.
turbosquid
free
tube
...tube
turbosquid
free 3d model tube for download as c4d on turbosquid: 3d models for games, architecture, videos. (1378271)
archibase_planet
free
Tube
...tube
archibase planet
mascara cosmetics make-up
tube 1 - 3d model (*.gsm+*.3ds) for interior 3d visualization.
3d_export
$5
Tube pants
...tube pants
3dexport
tube pants
3d_export
free
Tube
...tube
3dexport
turbosquid
free
TUBE
...
free 3d model tube for download as blend, dae, fbx, and obj on turbosquid: 3d models for games, architecture, videos. (1672199)
turbosquid
$29

tube
...lty free 3d model tube for download as 3ds, obj, c4d, and fbx on turbosquid: 3d models for games, architecture, videos. (1442047)
3ddd
$1

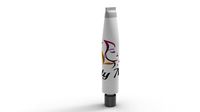
perfume tube
...perfume tube
3ddd
тюбик
perfume tube, тюбик
3ddd
$1
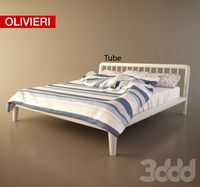
Olivieri Tube
...olivieri tube
3ddd
olivieri
кровать olivieri tube
turbosquid
$22

Tube
... available on turbo squid, the world's leading provider of digital 3d models for visualization, films, television, and games.
50
3d_export
$500
50
...50
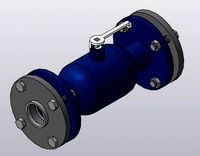
3dexport
flanged ball valve dn 50 detailed made in compass 17
3ddd
free
Life 50-50-170
...life 50-50-170
3ddd
life
автор модели: aroslon
3ddd
$1

Pillows 50
...pillows 50
3ddd
подушка
pillows 50
turbosquid
$27
50
... available on turbo squid, the world's leading provider of digital 3d models for visualization, films, television, and games.
3d_export
$18

plants 50
...plants 50
3dexport
plants 50 is a monstera plants or swiss cheese plant,, best suit in both indoor and outdoor.
3d_export
$17

Sukhoi T-50
...sukhoi t-50
3dexport
sukhoi t-50
3ddd
$1
Aqwella Espresso 50
...aqwella espresso 50
3ddd
aqwella espresso 50
3ddd
$1
ELEYUS LINE 50
...тяжка , eleyus
вытяжка eleyus, модель eleyus line 50 ( белый, коричневый) ширина - 50 см
turbosquid
$99
AMX-50
...
turbosquid
royalty free 3d model amx-50 for download as fbx on turbosquid: 3d models for games, architecture, videos. (1521461)
turbosquid
$6
Bedcloth 50
...osquid
royalty free 3d model bedcloth 50 for download as max on turbosquid: 3d models for games, architecture, videos. (1522738)